Where can this type of fishing be used?
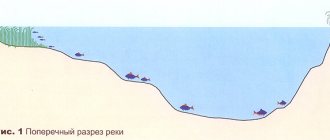
Roaches require a fairly large amount of oxygen in the water. Therefore, it cannot be found in bays with rotting vegetation in winter. And vice versa - she also avoids too fast a flow, but likes to stand next to the stream, in calm water. Particularly attractive are its return sections and exits from pits. On large rivers, attractive places for its winter moorings will be long areas with a depth of no more than 5-6 meters with numerous bottom irregularities, snags, sandy slopes with zebra mussel colonies and steps.
This fishing method works especially well at the end of winter and during the last ice on reservoirs at the mouths of rivers and streams, where schools gather before spawning and actively feed. The strength of the current in such places may not allow the use of standard equipment for fishing in calm waters. A detailed description of the characteristics of the winter behavior of roach, its migrations during the winter, as well as the influence of weather on the bite of this fish, is presented on our website in a separate article:
Fishing Features
Fishing on the current in winter involves the use of heavy weights in the equipment to hold the bait in place, as well as special methods of feeding fish. Here you can’t just pour the bait into the hole - it will be carried away from the fishing spot. For such fishing, you need to use either special feeders, which are lowered into the second hole strictly above the main one, or use feeders in the equipment of the fishing rod itself.
Bait for the current
The bait itself is no different from the usual one. For more information about winter bait for roaches, see here:
Feed supply should be carried out taking into account drift. For successful fishing, you need the hook with the nozzle to be in the baited area. If you simply throw bait for roach into the hole, the current will carry it all away from the fishing area, and feeding will be useless.
Special winter feeders
For use on traction, there are special feeders that are filled with bait and lowered into a separate hole drilled upstream from the main one. Such feeders can be bought in fishing stores, or you can also make them yourself. The food will gradually be washed out of it, creating a trail of particles at the bottom in the fishing area that is attractive to fish.
Tactics and methods of winter feeding
Feeding tactics and methods of delivering bait to the desired point primarily depend on two factors:
- depths at the fishing site;
- presence and strength of current.
Taking them into account, you can ensure frequent and productive bites, and therefore a good catch.
On the current
When using bloodworms or maggots as the main component in groundbait, you need to mix them with the soil. The larvae will become heavier, and the current will not wash them away from the selected point. But if the current is strong, you should think about drilling a separate bait hole a little higher upstream.
If the goal is to catch white fish, then the bait mixture prepared in advance should not just be poured into the feeder, but must first be rolled into dense balls. But in this case, you need to take into account that in the cold the bait absorbs water much more slowly. This means that the lump will disintegrate faster than required. High-quality bait should be placed in the feeder and released at the very bottom.
You can also use a stationary feeder. It is located directly at the bottom, and gradually the current washes the bait out of it. Such a feeder is lowered a little further upstream into a specially drilled hole for this purpose.
On still water
Where there is no current, the feeder is not always used. If the depth at the fishing spot does not exceed 3 meters, the bait balls can simply be lowered into the hole by hand. If the object of fishing is, for example, roach, bluegill, rudd, which can stand both in half-water and near the ice, you need to feed differently. Balls that immediately sink to the bottom are ineffective in this case. You need to create a bait post. To do this, the mixture is simply poured into the hole in small portions, which attracts a school of fish with the smell and the created turbidity. But you need to take into account that fish can move not only across the water area of the reservoir, but also in depth.
At a depth
At a depth of more than 3 meters, the dump truck again comes out on top. In this case, the bait should not be heavily weighted. It should not just lie in a lump at the bottom, but gradually disintegrate, spreading the aroma and releasing components that are appetizing to the fish. A couple of feeders should be filled not with balls, but simply with loose bait mixture and open them 1-2 meters above the bottom. This will form a bait cloud over the fishing spot.
Float tackle for roach in winter on the current
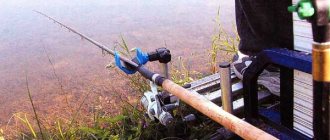
At shallow depths and not very strong currents, you can use a regular winter float fishing rod. After some modernization, it copes with its tasks perfectly. A heavier sliding weight is placed on such a fishing rod. Here you need to choose the right float - it should be larger than in calm water. You can use special composite floats. The current should not pull it under the ice when the fishing rod is positioned when the line between the tip of the fishing rod and the float is free. It is important to pay attention to this point.
Some fishermen tighten the line so that the gear does not blow away, but this way you can simply not notice the neat bite of the roach. The float itself must hold the tackle in the hole. A bite on such tackle will be expressed in intermittent or uniform immersion of the float. But do not confuse the bite and the possible effects of the current on the fishing line.
This gear is suitable for fishing in fairly calm water. In strong currents and great fishing depths, it is better to use other equipment.
Winter fishing rods for roach with a nod
The most convenient and working winter tackle for roach for fishing in the current is a fishing rod with a nod and a heavy sinker. For large fish, the fishing rod can be equipped with a heavy jig. But this option is not suitable for roach, so a sliding olive or a blind weight at the bottom with a retractable leash is used. The weight of the sinker is selected based on the strength of the current, most often from 5 to 30 grams. This fishing rod can also be used as equipment for fishing without a current, for example, in reservoirs at depths of 5-6 meters. Simply lowering a light fishing rod to the bottom in such conditions takes too long.
With sliding sinker
The simplest equipment for catching roach in the winter on the current is a sliding sinker, a stopper, a leash and a hook. Important points of such a fishing rod:
- A fairly large and heavy fishing rod (a small and light one will be pulled away from the installation site).
- Strong fishing line about 14-0.18 (when fishing for roach in the current and good depth, bream, large silver bream, and chub can bite).
- A fairly elastic metal nod that can withstand the pressure of the flow.
When biting, the line is pulled through the sinker, a nod shows this well.
With retractable leash
A rig with a retractable lead is more versatile than a rig with a sliding sinker. In winter, roaches can stand either at the bottom or in the middle of the water. If you make a diverter leash on a loop with two stoppers, you can set the depth by raising the working part higher or lowering it lower along the main line, thus fishing the entire thickness of the water. A blind weight is installed at the end of the fishing line, holding all the gear at the bottom.
Feeder rigs - a life hack for ice fishing for roach
Tackle for catching roach in winter on the current can be equipped according to the principle of feeder rigs, only in miniature. A paternoster, asymmetrical loop or inline in a smaller version can be easily knitted with your own hands. Instead of a sinker, you can attach a small feeder. Experience confirms that such experiments on roach work well.
Heavy Tooling
Sometimes you have to catch roach in conditions of great depth and a very strong current, when light tackle simply cannot stay on the bottom. For example, on fast northern and Siberian rivers, you can successfully use helicopter gear to catch sorog (chebak) in the current in winter. A heavy sinker is installed at the end of the fishing line; a piece of monofilament with several leads is attached as a lead, the end of which is attached to a specially shaped blade using a swivel.
Thanks to this blade, the working part stretches with the flow and maneuvers with a certain amplitude to the left and right. At the top, the fishing line is attached to a nod or a homemade signaling device. The helicopter can be made sliding, which will allow you to change the fishing horizon.
Ride
In Siberia, rolling is used to catch chebak in the current in winter. The installation of this fishing rod is a round sliding sinker and a leash with a hook. The point of fishing is that the tackle is released far enough under the ice, the sinker with the hook rolls along the bottom. Naturally, such fishing is only possible in areas with a clean bottom. The tackle is equipped with a powerful fishing rod with a reel and a nod that can withstand strong currents. The hole needs to be drilled slightly at an angle, with the flow, this will make the process of managing the gear easier.
For all roach fishing gear in winter, it is advisable to use relatively small, sharp hooks and thin, strong fishing lines. If for the northern regions and Siberia, where there is a lot of fish, this is not very relevant, then in the urbanized European part of the country, roaches in winter simply will not be taken with a rough fishing rod.
Types of feeding
There are three ways to feed fish in winter:
- pour it into the hole with your hand;
- deliver to the bottom with a dump-type feeder;
- install a stationary feeder for fishing in the current;
- use a feeder in the fishing gear itself (the so-called winter feeder).
If for the first case of feeding a feeder is not required at all, then in other cases its use is advisable and necessary.
Dump truck
A factory or homemade dump-type feeder for winter fishing is used in still water at depths at the fishing point of more than one or one and a half meters. This feeder includes:
- fishing rod with reel;
- cord;
- bait container;
- folding bottom;
- locking mechanism.
If your nearest fishing store does not have a feeder of this type or you are interested in making your own tackle, we offer brief instructions.
- You can use a piece of pipe or stick as a fishing rod.
- You need to attach a large inertial coil to it using insulating tape.
- At the end of the handle, it is advisable to strengthen the ring for passing the cord, otherwise it will fly into the water in rings, causing the tackle to overlap.
- We wind a cord around the reel and attach a carabiner to the end of it. This system will allow you to use it for uncoupling.
- The bait container is made of plastic or metal in the shape of a cone. The top part of your favorite “one and a half” shirt is perfect for this.
- Holes are made in the cone to allow water to pass inside it.
- A metal loop is rigidly attached to the upper cone of the part.
- Then you need to cut out the bottom from a piece of plastic or metal and load it for easy opening. On one side of the circle you need to make holes for attaching to the cone through the winding ring. On the opposite side there should be a tongue with a hole for fixing the locking mechanism.
- We attach the bottom to the cone.
- We make a locking mechanism. We tie a piece of fishing line to the large winding ring.
- We pass the fishing line through the loop at the top of the cone.
- At the end of the fishing line we knit a piece of wire, tied in the form of antennae, like in a Christmas tree toy.
- We squeeze the antennae together and insert them into the hole of the tongue in the bottom.
Now let's talk about the operating procedure of such a winter feeder.
- We attach the ring of the locking mechanism to the cord carabiner.
- We take out the antennae from the bottom.
- Fill the feeder 2/3 full with bait.
- We insert the antennae into the tongue.
- We lower the feeder into the hole, holding it at the initial stage of immersion to fill with water.
- At the calculated point of release, we sharply pull the handle up, while the wire tendrils slip out of the bottom and the bait spills out.
DIY winter feeder
For the convenience of making a winter feeder with your own hands from thin cardboard, we will cut out a template, for now in the form of a closed circle. By cutting off part of the circle towards the center, we obtain a cardboard imitation of the blank for the side wall of a winter feeder.
The width of the conical base of the bait device is up to your taste, but I can give you a hint. If we take half a circle as a sector, then the diameter of the conical base of the finished winter feeder will be equal to its height. The device turns out to be somewhat wide.
Once, for winter fishing on the last ice on the lakes, I needed to make three similar feeders with my own hands - for myself and a couple of friends, one of whom turned a wooden cone on a machine to bend the side wall of the fishing device. Therefore, I boldly cut the round sheet of tin into three equal parts, shown in the drawing on the right.
Read DIY marker float
Before starting to make a tin feeder, you can cut the cardboard sector wider, and then, if necessary, trim it. After this, roll the cardboard into a cone and secure the joint in 3-4 places with glue.
If you are satisfied with the dimensions of the cone, then we will begin making a feeder from sheet metal with our own hands, but, having cut out a sector of the required width, first drill (punch through a nail) small round holes in the metal, as in my drawing.
Although I foresee some difficulties for some fishermen with the bending of the tin side wall of the winter feeder into a cone. They can glue the layout in the form of a tetrahedral pyramid. But then, to make the side walls of a homemade winter feeder, you will need to cut out a sector about half the size of a circle.
Making your own side wall of the feeder
To make your own ice fishing feeder for one person, all you need is the tin of the side wall of an instant coffee can. If some difficulties arise with bending the metal, they can be significantly reduced if you anneal the tin.
Then we bend the thin-rolled metal according to the recommendations suggested above, not forgetting to first cut out the top of the sector, shown in the drawing with a black line. Again, we solder the joint of the side wall of the winter homemade feeder with our own hands and place the base of the device on a flat surface.
Surely, you will notice a gap under the cone of the feeder, which can be removed with sandpaper laid on a flat plane.
Next, we solder a loop of millimeter wire into the hole at the top of the cone. At this point, the manufacture of the side wall of the feeder for winter fishing can be considered complete.
Winter feeder cover
Along the perimeter of the base (round or square) from tin, cut out the lid of the feeder for winter fishing, taking into account the sides three to four millimeters wide and the protrusion of the bracket for tying an elastic band. Level the plane of the lid with a mallet.
You can make a hinge (only a narrow one) according to the recommendations disclosed in the article: Homemade piano hinge for a butterfly. Then solder the hinge to the lid and side wall of the feeder. Don’t forget to solder a loop into the top of the cone to tie the feeder to the fishing line for winter fishing.
Feeder lid swivel joint
By the way, a very simple, self-made hinged connection between the lid and the side wall of the feeder will look like this.
Along the edge of the lid opposite the place where the elastic is attached, two holes are drilled (punched) almost next to each other.
The same two holes at the same distance from each other are drilled at the bottom of the base. Then the top of the feeder and its lid are connected through these holes by winding or homemade copper soldered rings.
Even such a structurally simple hinge joint will be quite reliable in connecting the lid and one of the side walls of a winter fishing feeder.
Why are there holes in the feeder?
Regarding the side holes in the feeder. They must be drilled without fail. Otherwise, with a tightly fitted lid in real winter fishing conditions, the feeder simply cannot be drowned.
Our fishing feeder can sink only after it is filled with water to a certain volume, of course, if it is not filled with fragments of sand-lime brick as food.
In addition, when lifting the fishing feeder shown in the picture, streams of water from the surrounding water space will rush into the holes. They will create additional pressure on the lid of the feeder with the existing one. After which it has no choice but to open slightly and relieve the water pressure in the cavity of the cone, throwing off part of the bait along with the water.
By controlling the speed at which the winter feeder rises, we can sprinkle the feed not all at once, but in parts, in doses. This is the main function of the rubber shock absorber on this feeder.
Stationary for flow
A winter feeder for the current is installed in a feeding hole, which is drilled a little upstream from the working hole. The distance between them is determined experimentally depending on the strength of the water flow.
This winter feeder can be made of metal or synthetic knitted mesh. Both can be done with your own hands.
Let's start with a knitted feeder. To do this, you need to purchase a mesh with small cells and cut out a rectangle of the required size from it, select it so that the feeder is smaller than the diameter of your drill.
The mesh is then sewn into a sleeve, the lower part is tied, and a lead or steel weight is attached to it. A cord is inserted into the upper part of the mesh to tighten the feeder and hang it on the fishing rod (by the way, its design is described in the previous chapter).
A metal winter feeder for currents is made in a similar way. The steel mesh is rolled into a cylinder and soldered. A weighted bottom is attached to the bottom, and a lid is provided on top.
Both feeders work the same. They are placed in the feeding hole and shaken from time to time to release the bait. In this case, the feed trail reaches the working hole, where the hooks with bait are located.
How to make feeders for winter fishing with your own hands: photos, drawings, video instructions
Fishing stores offer a large selection of feeders, but many anglers prefer to make them themselves. At the same time, there are 2 main approaches to making homemade feeders: you can make disposable and reusable options.
Disposable winter feeders that can be made directly while fishing:
- Paper cone. To make it, you need to roll a sheet of paper into a ball. Place a sinker on the bottom, fill with bait, and secure with fishing line. The positive aspects of such a feeder are that it is inexpensive, affordable materials, it holds its shape well and silently sinks to the bottom.
Paper cone feeder - Cormak from a plastic bag. To make a feeder, you will need a narrow bag, at the bottom of which a sinker is placed. It should be secured with thread or fishing line. Pour food on top and carefully wrap the bag. When the improvised feed is at the desired depth, you just need to pull the line so that the contents turn out.
Feeder from a bag
How to make a reusable feeder for winter fishing:
- From sheet metal. Cut a blank from a sheet of metal and roll it into a cone. Drill holes in the walls. The lid is also cut out of a sheet of metal. To connect the body to the lid, drill holes and thread the wire. Attach a sinker to the sharp end or pour molten lead or other metal onto the bottom.
- Homemade syringe feeder. Cut the syringe to the desired length. Pass the line through the center. Place a weight at the bottom. Make holes in the walls. It is convenient to place bait in such a feeder in layers and compact it using a piston.
Do-it-yourself feeder-dump truck for fishing:
Homemade feeder - dump truck for winter fishing:
DIY sports feeder for winter fishing - expert video:
Do-it-yourself winter mini-cormac at home:
Do-it-yourself winter feeder for the current:
Feeder
Feeder feeders for ice fishing differ from their summer counterparts in being smaller in size and weight. Depending on the strength of the current, they can weigh from ten to forty grams; more is usually not required.
There are several manufacturing methods, but the simplest of them are two:
- made of metal mesh;
- from a plastic tube or curler.
Made from metal mesh
To make this feeder we will need:
- metal grid;
- wire;
- lead;
- plaster or other form.
Here is a description of the manufacturing process:
- Cut out the required piece from the mesh.
- We fold it in the form of a square or triangle in cross-section, and tie the free edges with thin wire.
- We tie a loop for fastening to the equipment.
- We make a hole in the mold for filling. In addition to gypsum, ordinary clay is also suitable, because the pouring will be done from above.
- We wait for the wife to leave the house and put a container of lead on the stove.
- We pour the molten lead into the mold and immediately insert the mesh there, with its edges connected into the metal.
From a plastic tube
This method of making a feeder with your own hands is safer; you can also work with your household.
- From a plastic tube, or HDPE, of small diameter, 15-20 millimeters, cut off a piece of 3-4 centimeters.
- We take a lead plate (it can be obtained from radio markets) and cut off a strip slightly longer than the tube.
- In the upper and lower edges of the tube on one side we cut out grooves as wide as a lead plate.
- We press the plate against the tube and bend its ends inward through the grooves.
- Using an awl, we make a hole in the lead plate and tube.
- We attach a wire loop for fishing line to the hole.
Stages of work on the manufacture of a stationary winter feeder:
Using side cutters (you can use metal scissors), I cut out a square with sides 30 cm from a piece of metal mesh.
I sew the edges together with wire to make a cylinder.
I cut the lead into small pieces. I place the pieces of lead in an empty tin can or other metal container, the diameter of which is larger than the diameter of the cylinder.
I heat the jar on gas until the lead melts to a liquid state (if you have a stove, you can use it, it will be faster). Be sure to turn on the hood.
I place a mesh cylinder in a jar of hot lead.
I let the lead cool.
I cut the tin can with side cutters and remove the cylinder with the lead bottom.
I cut off the uneven edges of the bottom protruding beyond the cylinder.
I use the second tin can for the lid. To do this, I cut it at a height of 2 cm. I make holes in the lid for hooks that secure it to the cylinder. I make hooks from wire with a diameter of 1.5 mm.
I make a handle to which a fishing line or rope is tied to lower the feeder to the bottom.
Winter feeder for fishing
Let's talk about feeders for winter fishing.
First, let's find out where you need to use a winter feeder, and where, you can easily get by by simply throwing lumps of bait into the holes.
If we catch bream, roach or crucian carp in winter, from under the ice, and the depth in the fishing area is more than 3 m, then it is wiser to use a winter feeder to be sure that the bait will be at the bottom in the fishing area and will not yet completely dissolve and disintegrate on the way to the bottom.
If the fishing takes place in the current, and even at good depths, then there can be no talk of simple feeding. Here a feeder is a must!
The operating principle of a winter feeder. The essence of a winter feeder is to deliver the bait closer to the bottom, at the fishing site, without spraying it too high in the water column. To do this, we place the bait mixture in the container of the cone feeder. Close the lid on the bottom. We lower the winter feeder into the hole, having previously measured the depth there. And 30-40cm from the bottom we pull the cable. The lid is closed with a latch, which breaks off with a sharp jerk. Reset! And a bunch of bait crumbles along the bottom. What an idea!
When fishing in a very fast current, bait is used according to a different scheme. Even if we drop the bait at the very bottom, according to the usual method described above, the strong current will quickly carry it away and our bait will not have the desired effect. In this case, we need to drill a hole 3-4 meters upstream from the holes where we fish. And we lower a specially designed feeder there. We do not discard the bait or remove the feeder. It remains lying on the bottom or hanging on a cord, at the very bottom. The current will gradually wash away the bait and form a stream of bait fractions. Just this stream will pass under our holes with loaded fishing rods. The bream will smell the bait and will rise up to the source. So he will encounter the “fat piece” on the hooks of our gear, where he will find his finale.
Winter feeding technique
The best option among universal baits is a small live bloodworm. It is quite popular among fishermen as it can be used for different types of fish. Most often, they are used to feed perch and ruff. When catching “white” fish species, it is better to combine bloodworms with bait from plants and herbs.
The main nuances - in stagnant water, the bait should be more crumbly, and if it is, then the bait should have more mass.
Fishing on the current
- When fishing in a current, even if it is not very strong, you need to take into account that the bloodworm is not very massive, so it can easily be carried away by the current. To prevent this effect, motes must be mixed with river sand and delivered to the bottom of the reservoir using a feeder. In this case, the bloodworm will not be carried away even by a very strong current. In some cases, it is better to make a hole for complementary feeding at the beginning of the flow. In this case, the effectiveness of the bait will increase slightly.
- There is one specific feature when feeding “white” fish. In order for the bait to function correctly, it must lie on the bottom of the reservoir immediately after leaving the feeder. This can be achieved by weighting the bait. You need to form a large lump of bait, put it in the feeder and open it at the very bottom. The lump is made so that the lump of bait immediately sinks and does not float up. The second effect often occurs when mixing in cold weather, when the bait freezes and absorbs water very poorly.
At great depth
If there is no current, then the bait can be lowered directly into the hole, but at great depths this is only effective when the fish are found above the bottom, since the bait will be scattered gradually with the movement of the feeder. In order to prevent this, you can make balls from complementary food and water from the reservoir and lower them into the hole.
Such lumps sink to the bottom of the reservoir quickly, but deviate slightly from the trajectory and move away from the hole. It is enough to fashion only two or three such lumps of bait, not very tightly, so that when moving they gradually collapse, forming a cloudy cloud in the water column.
The most effective method at great depths is to use a feeder. Since in this case, the bait is placed exactly at the casting point and all the fish are concentrated there. You need to open the feeder at a distance of at least one and a half to two meters from the bottom.
During the second feeding, the feeder should be opened a little further from the bottom than the first time, otherwise the fish will bite less willingly. Bloodworms should only be used when using a feeder.
In shallow water
At shallow depths, it is best to use the “pillar” bait technique, throwing the bait in powder form directly into the hole or squeezing it a little into a lump so that it dissolves immediately when it hits the water. With this approach, the smell from the bait dissolves and spreads very quickly, and the cloudy spot immediately attracts fish. To do this, the bait used should not be very heavy.
In this method, bloodworms are used directly “by hand”, or by opening the feeder directly under the ice. During the spring thaw, bloodworms and “white” bait can be scattered right next to the hole in a small mound. In this case, during any of the postings, a small amount of bait is thrown into the hole. With this approach, the fish rises for such bait close to the ice.
This article will help novice fishermen in proper fishing in winter. Namely, in the manufacture of different variations of feeders and their proper use. Happy fishing and good catch, beginner fishermen!
How to make a winter feeder with your own hands
Winter feeder fishing is gaining popularity among fishermen. This is not surprising, because with its help you can achieve a good catch. Moreover, the device is simple and allows the fisherman not to spend money on buying a feeder in a store, but to make it himself. In this article we will talk about how to make a winter feeder with your own hands, what equipment and bait is needed for it, and we will describe the principles of fishing with it.
Buy or make your own
Most fishing trips do not like to waste their time and buy all their gear in stores. True, there is a risk of buying a low-quality product. That’s why professional fishermen prefer winter feeders made by themselves.
You also need to understand that during the winter fishing season, even experienced fish catchers often lose their feeding equipment forever. Therefore, homemade feeders that do not require significant costs are not so bad to lose.
How to make a winter feeder
Anyone who has decided to make an ice feeder on their own should know that the main types of gear used in the feeder are a reel, fishing line and hooks . It is necessary to make universal tackle that will be good both on the river and on the lake. You should choose a winter fishing rod, small in size, with whips at the end. A long summer one will be much worse and completely uncomfortable.
If a fisherman expects to catch not very large fish, then it is best to use a flexible and sensitive whip; if a large catch is planned, the best option would be to use rigid and elastic equipment for an ice feeder.
fishing line
The standard diameter of the fishing line for an ice feeder is considered to be 0.16 mm. In fact, if you catch large fish such as bream, this will not be enough. For small fish, you can even reduce the thickness to 0.12 mm, but the main thing when purchasing is to make sure that the material is of high quality.
Advice! When ice fishing, it is best to use soft types of fishing line with high abrasion resistance. This is usually 0.18mm thick nylon thread, if used for a leader the thickness is reduced to 0.12mm.
Team Salmo Micron produces excellent, high-quality fishing line for catching small fish. If you plan to catch pike , a completely different approach will be required, given the cunning of this predator. Moreover, it will require live bait, as well as a special leash . You can find out more detailed information about choosing a leash for pike from our other article.
Sub-ice feeder equipment
There is no need to invent anything new here. A rig from a summer fishing rod is quite . And in particular , this is:
The only recommendation at this point is that it is not advisable to install a large coil on the feeder. This may cause some inconvenience when fishing . The best option would be a small and reliable reel for small fish. It is important that there is no play in the handle and that the reel itself does not wobble.
What bait is suitable
Winter fishing in this regard is not much different from summer fishing. You can use any bait , but there are several useful recommendations that it is advisable to follow, as this will increase the efficiency of fishing and increase the catch.
The most effective are baits of animal origin :
In winter, fish bite better on this kind of bait. However, you can also try fishing with corn kernels, bread crust or dough balls . But using this bait, the result will be slightly worse than using the first option.
Also, do not forget about particularly finicky inhabitants of reservoirs; for this you can use so-called “sandwiches” of maggots and worms, between which bloodworms are located. But as practice shows, such extreme measures are generally not required.
also use some tricks to improve your catch . For example:
- add pheromones ;
- use a bite activator ;
- increase the sensitivity of gear.
What types of winter feeders are used?
The most common types are:
- Feeder feeders. This type of design is most effective when there is a rapid flow at a significant depth. Feeder feeders, due to their weight, are quickly delivered to the bottom of the reservoir, and are less likely to be carried away by the current. The bait is washed out evenly. They are good to use when catching roach or bream.
- Stationary feeders. They are used on familiar bodies of water, where the strength of the current and in which direction the water is moving are known. The feeding device is lowered into a prepared hole in the ice, drilled a few meters upstream from the working ice hole. The bait from the structure should be gradually evenly distributed towards the working hole. Such permanent fixtures are very difficult to use because the weight of the structure and the size of the holes made must match each other. If the proportions are not observed, the bait can be carried far to the side and then it will be useless. There is also the risk of losing the structure itself.
- Opening feeders. They are best used when fishing in still water or low currents. The self-opening design is equipped with a hinged bottom. This way the complementary food easily falls right to the bottom. On numerous photos of feeders for winter fishing on the Internet you can get acquainted with this device in more detail.
Feeders also vary in shape and material from which they are made. Winter feeders are:
- Cylindrical;
- Cone-shaped;
- Rectangular.
In low currents or in standing water, winter feeders of any shape can be used. And with a stronger current, it is best to take a rectangular feeder. This design, unlike a cylindrical device, will not move far from the desired feeding location.
- The material from which winter feed delivery devices are made also affects the fishing result.
- In extreme cold, for example, plastic feeders become brittle.
- Such a structure may collapse when exposed to low temperatures when it hits the bottom of a reservoir.
- Therefore, in winter, fishermen prefer metal products.
Experienced fishermen know where and when to use a certain type of feeder. Closed feeders are best used in heavy currents, and a dump truck is useful in stagnant water.
When there is a current, it is better to make the structure heavier, otherwise it will constantly be carried away from the feeding area.
What to use for bait
Basically, 2 types of bait are used: porridge and dry mixtures. The porridge is cooked at home in advance, and the mixture can be prepared right at the fishing spot. It is recommended to take water for the mixture directly from the hole. The food needs to be kept in a warm place so that it retains heat for as long as possible.
A good bait porridge contains wheat grits, as well as various additives, flavorings, and pheromones. All this is selected depending on what kind of fish you plan to fish.
Next, we’ll look at a few simple and popular feeding recipes. To prepare, you will need a base that will make it sticky, and a crumbly additive. For example, for catching bream, the ideal choice would be peas and millet, but pearl barley and corn would be just good.
Another popular bait recipe :
- You need to take breadcrumbs.
- Add bran – 20%.
- Cake – 15%.
- Semolina – 10%.
- Porridge “Hercules” – 10%.
- The remainder is any flavor from the store.
Using such bait even on days when the bite is very bad, in any case the fisherman does not return home empty-handed. That is why many fishermen value this “universal” composition . It also cooks quite quickly.

