Installation of equipment for fishing on a balancer
Position of the balancer on the fishing line
The correct play of the balancer depends, in particular, on its location on the fishing line.
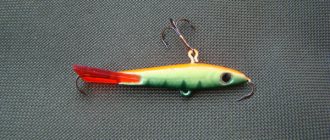
Purchased baits have a loop on the back of the body to which they are tied to the fishing line. The position of the balancer is considered normal when it, suspended from the fishing line, has a slight tilt. The value of the latter should not exceed 10° and be larger for small baits and smaller for large ones. Moreover, the head of the balancer should be raised up, and its tail should be lowered down.
Connecting the balancer to the fishing line
This issue is solved in two ways:
- - tie the fishing line directly to the bait;
- — attach the balancer to the fishing line through a swivel with a carabiner.
The last option is suitable for large (more than 5 cm) balancers. In this case, mini-swivels with carabiners corresponding in size are used. The second option is universal, but is used more for small balancers. Along it, the fishing line is tied to a loop on the back of the bait’s body. The most reliable knot in this case is considered to be the “clinch” (you can also use “clinch 2”.
What should be the correct position of the balancer?
The fisherman needs to know the main features of playing with a balance beam during winter fishing; this is simply necessary for the correct fastening and installation of the balance beam on the fishing line. If the balancer is installed incorrectly on the fishing line, the performance of the balancer can deteriorate quite significantly, which will cause unsuccessful fishing. Read the article - Catching perch with a balance beam The most correct position of the balance beam is its horizontal position, while all kinds of decorations that fishermen place on the hooks can also affect the position of the balance beam. At the same time, some fishermen note the fact that it is acceptable for the tip of the balancer to be slightly higher.
For such a correct position of the balancer when performing a blind installation, the unit must be attached in the center of the balancer ring; it does not need to be attached to the base or side, otherwise the correct position will begin to be disrupted. By using a sliding fastening through a loop, ring or clasp, it helps eliminate irregular sagging. Among other things, the correct position of the balancer on the fishing line is in some cases indicated on the packaging of the balancer itself.
And if the installation is carried out correctly, but the balancer itself is positioned incorrectly, then in this case the balancer itself is faulty. The process of winding copper wire on the front or back hook, as well as hanging jewelry on the hooks, helps to correct the position.
[custom_ads_shortcode1]
Fishing rod
When buying a fishing rod for fishing with a balancer, first of all you need to pay attention to its strength, convenience, reliability of fastening the rings and the build quality in general. Carbon fiber is considered the ideal material for a whip.
It is light and clear, unlike plastic, it does not become “wooden” in the cold and does not crack. It can only break if there is a large temperature difference, so you can’t immediately put a load on it. When leaving the car, it is better to wait about ten minutes until it cools down, and then start fishing.
How long should a fishing rod be for balance fishing? This parameter depends on what predator she will catch. Pike and pike perch are usually caught standing, and since the balancer is a fairly active bait, a rod up to half a meter long is more suitable for such fishing. When fishing for perch, you can sit on a box. In this position, swinging a fishing rod that is too long is extremely inconvenient, so it is better to use a shorter fishing rod - 25-30 cm. The ideal option would be a telescopic rod that allows you to adjust the length. If you need a short rod, you can simply not extend the first knee.
Fans of winter fishing with a balance beam never cease to argue about whether such equipment requires a nod. Some put it on, others refuse it. This element smoothes out the bite, thereby reducing sensitivity in the hand
Serious minus! On the other hand, with low activity of underwater inhabitants, you still won’t feel the fish’s careful touch of the bait with your hand, so a nod is necessary
Tackle
Rod.
To catch pike, you need to choose a strong and reliable balance rod of the largest winter size; catching pike with a perch rod, as some anglers do, is not effective. There are most likely two options for choosing a fishing rod: either use a smaller copy of a spinning rod, or use original plastic (mostly Finnish) fishing rods, and the most powerful models. The handle should be no smaller than your palm and must be made of non-thermal conductive material.
The whip on a pike fishing rod should be long enough, 20-40 cm, otherwise you will have to play and hook with your whole hand, and this is not very convenient. In addition, a long whip better absorbs the jerks of the pike and additionally helps the angler during the first most powerful throws of the fish.
Coil.
Many fishing rods are already equipped with a perfectly acceptable reel. Models without a stationary coil are better equipped with an inertial multiplier coil. There are special small models of multipliers for winter fishing. These reels are quite powerful and can withstand serious loads, and in many models you can adjust the brake (almost like the clutch of an inertia-free reel), which also helps when fishing for pike.
Gatehouse.
This is a good thing, but, in my opinion, not necessary when fishing for pike. I repeat - this is my personal opinion and I will explain why. When fishing for perch, yes, the guard is relevant, since baits are used of approximately the same size and weight, and the guard fits and works well with almost all perch baits, and besides, perch bites differently than pike. In most cases, pike bite powerfully “in the hand.” But even weak pokes, when the pike is just “tasting” the bait, are also clearly transmitted to the hand.
Of course, hands are different, but in my opinion only a beginner can not feel the poke of a pike. In addition, the pike rarely raises the guard upward; it attacks from below or from the side and the role of the guard is reduced to nothing. I confess, there were several times that the bait seemed to hang in the water, but this happened at quite serious depths of 4-5 meters, and in such conditions the pike could really attack the bait from the bottom up. But such “freezes” are also noticeable, since the pace of the game is disrupted. And any change in the action of the bait is an inertial reason for hooking.
Fishing line.
As always, we have two options for fishing line. Some fishermen fight for the fishing line, others for the braid. Here everyone chooses what he likes best and will be right. If you choose monofilament fishing line, it is better to use fluorocarbon fishing line; they are less susceptible to abrasion on the edges of the hole, stretch less, freeze less and are more durable at the knots. The diameter of the fishing line for pike is 0.25-0.3mm. As for the braided line (personally, I prefer it), I don’t experience any particular problems with it. I am always confident that the braided line will withstand any trophy, and the jerks of the pike will be perfectly damped by the flexible whip and reel brake.
Leash.
This detail is absolutely necessary when fishing for pike. Homemade leashes made of Kevlar threads and equipped with a good swivel and a carabiner with a clasp work well. Swivels are required, otherwise the balancers twist the line, and the bait spends part of its inertia not on play, but on turns. The result is an awkward and unstable game. To this day, I sometimes fish with leashes made from guitar string No. 1 or 2. Well, if you buy a ready-made leash in a store, then take the best flexible leash from a serious manufacturer.
The quality of the leader plays a decisive role and is even more important when fishing with a balancer than when fishing with a spinning rod in summer, since a deformed leader can radically change the game of the balancer. The length of leashes for winter fishing is 10-15 cm. In the vast majority of cases, the pike clings to the edge of its mouth with a balancer and a long leash is not required. Occasionally the balancer ends up in the mouth, but even here 10-15 cm in length is sufficient.
Another important detail: regularly check the knots and periodically (preferably after each fishing) cut off the damaged section of the fishing line. When fishing in winter, the fishing line is constantly damaged because it rubs against the edges of the hole, and frequent scraping of frozen ice from the fishing line also damages it.
Lures.
To catch pike, unlike perch, you can buy the cheapest balancers without a twinge of conscience. After losing expensive baits (and many balancers cost as much as wobblers), you inevitably start looking into your wallet. We’ll leave the expensive and “sophisticated” baits for perch. Pike are not often selective in color, much less the weight and size of the balancer. If the bait plays near its mouth, a rare pike will resist the temptation.
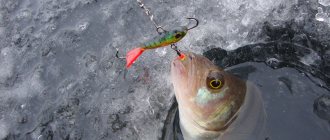
You need to purchase balancers in a store with pike in mind. How are these balancers different? The first is the size: 5-10 cm. Of course, you can catch with smaller balancers (I often caught pikes even with 2-3 cm of bait), but still the mouth is happy with a larger piece, and what is no less important with a larger one There are fewer gatherings of bait.
Also pay attention to the fact that the single hooks on the sides of the balancer are large, and the attachment of the tee at the bottom of the bait should be with the possibility of replacing the standard tee with a more powerful one. If you look at the model range of balancers in a store, you will notice that some of them, although the same size, differ precisely in the size of the hooks.
Manufacturers do not specifically install large tees for pike, which means we immediately replace the stationary tee with a tee two sizes larger. Check that the hooks of the new treble do not catch on the back of the bait and do not remain on it. The hooks must slide off the body of the balancer, otherwise when playing they will often hang on the body of the balancer, and in this form the pike will not bite the bait.
It is better to start fishing with large baits, since often the largest pikes attack first. And lastly, it wouldn’t be a bad idea to check the game of the balancer at home in the bathroom. If a large tee, and even one with some kind of “glitter,” will seriously spoil the game, then it is better to replace such a tee.
I prefer to place naked trebles without decorations on pike. In my opinion, all sorts of beads and threads on a tee are good for perch, but for pike, the object of attack is the whole bait and a clear “point” it does not need. With great pleasure I put a small silicone tail on the rear hook of the balancer.
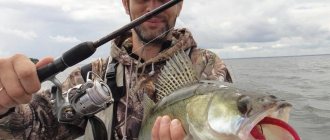
Fishing with a balance beam in summer
It is worth admitting that fishing with a balance beam in the summer and, for example, from a boat is quite an interesting and very gambling activity. This is explained by the fact that most of the fish species that fishermen go after with the above-mentioned gear are predators. And when was fishing for predatory fish boring, passive and uninteresting? Right! This has never happened before. Catching predatory fish is an extremely responsible and stressful task. However, this fishing method has its own advantages that cannot be compared with any other fishing method.
In our article today, we will discuss in detail fishing with a balance beam in the summer. In particular, we will answer the following questions:
- What is a balancer?
- What types of balancers are there?
- How is fishing carried out?
- How does summer fishing differ from winter fishing?
Types of balancers
Although balancers are produced by a variety of companies, all models can be divided into 3 types.
- The first type is with plastic wings at the back;
- The second type is with a fur tassel, in the same place;
- The third type is silicone, which have been sold not so long ago.
The following varieties are also available:
Balancers with classic triangular tail. Fishing with a balance beam in the summer from a boat will be more effective if you resort to using classic options that differ from each other only in shape and proportions. The most important thing is the perfect balance, thanks to which our artificial fish can take a horizontal position, without significant deviations. These products may also differ in the shape of the mouth; With a big head. The use of these models must be accompanied by masterful control of the fishing rod. If you make sudden movements, the “fish” will behave unnaturally, which will scare off predators
Do not forget that the main task of the bait is to attract the attention of the fish, thanks to its natural “behavior”; Narrownose or zander. These varieties are used in winter and their properties are very similar to balance beams, which have an enlarged head
In the depths of water, the balancers make circular movements. The fisherman must carefully lower the rod so that the “fish” completes its maneuver without jolting;
Winter balancer with fur tassel. For winter fishing it is complemented with a small fur tassel. A very popular variety, which is used more and more nowadays, especially in the winter season.
Wobblers that catch 100%:
How to fish correctly with a balance beam
In summer, when it is hot, you need to look for fish in the shade of plants, because pike and perch are cold-loving creatures. Now we will discuss the question: how to fish with a balance beam in the summer? The most effective places include small openings in dense vegetation. If you use spinning rods in these areas, the fisherman will ruin the gear. Thanks to the balancer, you will be able to fully explore and fish every suitable “opening”. We recommend purchasing and using compact and lightweight boats. This is due to the fact that fish are extremely cautious in summer, which means the fisherman must be careful and not particularly attract attention to himself.
The best option is a two-seater rubber boat of some unsightly color. Never use anchors; it is better to choose areas of reservoirs where there is no current. Most effectively, fishing on a balance beam in the summer will be carried out together with a partner. One is fishing, the other is driving the boat. Fishing technique: the bait is lowered, it taps the bottom and a cloud of dust rises. Naturally, summer fishing with a balancer differs from winter fishing, since winter has its own characteristics and nuances. Now you know that the balancer was mistakenly considered a tackle only for winter fishing; it copes with the task perfectly at any time of the year!
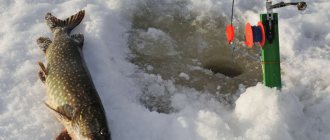
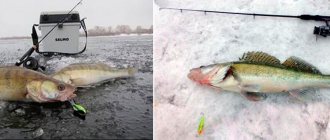
How to catch pike with a balance beam
You can catch the toothy beast on the ice at the beginning of winter, in the middle, and at the end. Prey hunting can happen on almost any body of water, the main thing is to know where to look and how to catch.
Catching pike on a balancer on the first ice
Catching pike on the first ice on a balance beam is always promising and exciting. The fish are quite active and respond well to artificial baits. Models with a length of 50–70 mm have increased catchability. The best results are observed with vertical lures; a pike balancer is used when there is a high probability of losing an expensive lure.
In the wilderness
In the middle of the cold season, the toothy robber shows mostly passive behavior, she is practically not interested in the offered bait. She can see the fish playing, but not take any decisive action.
To catch a sedentary pike under the ice, you will need to examine more than a dozen holes. The optimal distance between working points is 5–7 m. They can be drilled according to any pattern. You can simplify the task of searching for promising areas on a specific body of water with the help of such a modern gadget as an echo sounder. It will determine the depth in a matter of seconds and study the bottom surface. Since it is unlikely that it will be possible to stir up a sluggish fish with sudden movements, more delicate tactics should be used.
On the last ice
At the end of winter, when the ice becomes quite loose, the fish go to spawn. This happens at the end of February - at the beginning of March. The increased activity of pike only benefits the angler. She throws herself at everything that is offered to her. The size of the artificial fish should be from 70 mm. Additional equipment includes feathers and planes that help change the direction of the balancer when moving under water. You need to play confidently, actively, with sharp twitches in a vertical position.
On the river
The river balancer is mainly used in hard-to-reach places. It is not subject to snags, which is its advantage. If you use large versions weighing from 32 g, then during the current they will be able to fully demonstrate all their abilities.
Among the favorite places for spawning, pike chooses small rivers and the upper reaches of large ones. There are steep banks and a large amount of bottom vegetation. Consequently, there are many places where you can set up an ambush.
On the lake
To attract the attention of a predator, you need to play the tackle correctly. Pike are caught on the first ice here at a shallow depth, 2–3 m. Areas bordering reed thickets should be fished. During the deep winter period, the fish are in wintering pits, falling into suspended animation. As warm weather approaches, she goes out into shallow water to breed. Here it makes sense to take several different baits with you.
In the snag
Considering the high probability of a snag, you should choose areas of the reservoir that are freer from snags for pike hunting. The working depth should be 2–3 m. Wiring is done in the horizontal direction.
It is quite possible to catch pike in winter if the fishing rod rig for the balancer is prepared correctly. Only durable and effective gear can cope with the predator under the ice. The technique of catching pike on a balance beam is not complicated, the main thing is to drill at least 10 holes and not wait more than 5 minutes at one point. If there are no bites, then immediately move on to the next one.
How to attach balance beams to a perch
Recommendations for properly securing the bait are related to the purposes of its use. To interest the fish, during the game the balance bar must make uniform oscillations and constantly be in a horizontal position. There may be a slight deviation of the nose towards the top.
There are three main methods of fastening.
Tying directly to the fishing line
This method is chosen by most fishermen. As a rule, the balancer is secured using a palomar knot. To do this, a long loop of fishing line is pulled into the bow of the load, which is tied with a simple knot. Afterwards, the balancer itself is passed through the loop, a new knot is tightened and the protruding ends are cut off.
Tying the bait with a palomar knot
The main disadvantage of this option is the inability to quickly replace the bait. Also, the fishing line can rub against the metal shackle and break at the most inopportune moment when fishing for large fish.
Via non-slip loop
This option is the most competent from the point of view of ensuring the most realistic game. The load hangs freely in a blind loop. To secure the loop, some fishermen use a standard double or even a simple knot. However, these fastenings are not reliable and can fail if there is a strong bite.
It is best to use a rapala bunch. To do this, a simple knot is tied on the fishing line, the free end of which is threaded through the bait ring, and then returns, passing through the tied knot. Afterwards, the free end goes around the molar in several turns and returns to the original ligament, and then enters the formed loop and tightens.
Sliding double knot Grinner
The main disadvantage of this mount is its complexity, especially for novice fishermen. Also, this option does not provide quick replacement of gear.
Through carabiner
The weight is attached using a special fastener, which must be tied to the main fishing line. A correctly selected carabiner does not spoil the game and allows you to quickly replace the bait if necessary.
The disadvantage of this method is the risk of the hooks of the load catching on the carabiner, which can be avoided if a short fly fastener is used.
Knots for tying the balancer
There are many factors to take into account when choosing a fishing rod and related gear. These include the location of the reservoir, the average size of the perch living there and its reaction to the game
This knowledge can only be gained through practice, by hitting a lot of “bumps” while fishing.
What are the requirements for installing a balancer on a fishing line?
To properly secure the balancer to the fishing line, there are a number of specific requirements, which will directly determine the catchability and effectiveness of the balancer. Among the main requirements, the following, the most basic of them, can be identified:
- — when securing the balancer, all knots should not weaken the entire equipment;
- — when installing the balancer, the performance of the balancer itself should not deteriorate;
- — among other things, the entire mount must fully ensure the correct position of the balancer when playing;
- — you need to choose the right fishing line for fishing with a balancer.
[custom_ads_shortcode2]
Fishing line classification
Fishing line is the main thing in fishing equipment.
She meets:
- Monofilament. It is made from nylon. It can be done in several ways and each has different properties. There is multi-filament, also called braided or braided. This type also has two options: the first is a fairly common type, which consists of thin threads that move along the shape of the bundles. The next type is a sheathed cord, it is braided and covered with a sheath on top.
- Flucarbonic. It differs in that it is not invisible in the water.
Pros of monofilament:
- Reasonable price, therefore refers to budget options;
- High strength;
- Huge range of sizes, brands, manufacturers.
- Very elastic and tough. Doesn't get tangled;
Despite the abundance of positive aspects, there is also a minus - it stretches in water
This is very important, because when fishing the main thing is constant contact between the fisherman and the bait, but this will not work with monofilament fishing line
But if the fishing line is of very high quality, then the stretching is not felt if you fish with a jig. Many professionals advise starting with this line, and only then moving on to using braid.
Braid is often used for jig fishing.
We invite you to read: How to make a donk for pike
It has the following advantages:
- Cannot be stretched;
- Excellent sensitivity to bait;
- It is very durable and can withstand a load that exceeds the placed mass by 2 times.
But, like any fishing line, this one has its negative aspects:
- Knots and beards may appear, which is natural for this material. And in this case, it looks like an ordinary thread that constantly gets tangled. There are several ways to combat this, but, unfortunately, they do not always save.
- It is very expensive;
- She could hurt her hands;
- During use, it may begin to crumble into threads, which will necessarily require replacement.
The next type is flucarbonic. It is suitable for spinning rods, feeders and other equipment. This fishing line has the main advantage of being invisible in the water. The fish cannot notice the fishing line, so it strives for the bait that interests it.
But, like any fishing line, it has its negative aspects:
- This fishing line is very expensive, but it is usually used for leashes, so a 5 meter reel will be plenty, and its price is more or less affordable;
- Does not always withstand loads well;
- In terms of strength, it is almost 2 times inferior to monofilament;
- Very tough, so the knots spread;
- It has poor elasticity, so it constantly stretches and deforms, leaving places where there are bends.
Many men love to fish. Among which there are fans of winter fishing. But the main success in fishing lies in good equipment and the correct use of all accessories. Therefore, many are interested in the question of how to properly tie a winter lure to a fishing line.
This is done like this:
- Choose a mounting method; this choice will be influenced by fishing conditions. There are several methods: attach the spoon to the fishing line; fix the spoon to the leash, tie the spoon by the ring;
- Then you need to make a knot at the end of the fishing line. Insert the fishing line twice into the hole of the spoon and close it with a simple knot. The knot needs to be firmly fixed and excess fishing line removed;
- If you wanted to secure the spinner with a loop, then the knot on the fishing line will weaken it. And the double line will be very noticeable;
- If the spoon is attached to the fishing line, then it transmits its movements to it, which will cause vibrations and they will depend on the thickness of the fishing line;
- Metal wiring should be used when fishing in a place where there are a lot of pike.
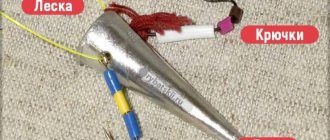
Also, many beginners in their search for information may stumble upon such nuances as tying a spinner with a match to the fishing line. This is done to tie the balancer - a match is inserted into the loop of the knot, after the knot is tightened it will need to be removed and then the knot will be strong.
The next question, which is also of interest, is how to tie a lure for navaga to a fishing line. The spinner for navaga is small and narrow. The hook is usually single and well sharpened. A spoon is attached to the end of the fishing line, and a weight is attached at a distance of 20-30 cm.
Node options
To tie fishing line and braid, several methods of forming and tightening knots are used, differing from each other in the value of the permissible tensile load. After practicing for a few minutes, a novice fisherman will be ready to tie any of the knots he likes in a real situation, directly on the shore of a reservoir. Spending a little time, he will achieve a knot no less strong than his more experienced comrades.
Shock leader knot
This knot is durable and invisible to passing fish, any of which can taste the bait on a spoon tied with the same knot. To attach the fishing line to the cord in this way, do the following.
- Form a simple knot at the end of the “lead” monofilament without tightening it.
- Thread a 20 cm end of the cord through the loop remaining after forming the knot. Tighten the knot.
- Wrap the monofilament with the same end of the braid. Make up to 8 turns.
- Pass the remaining end of the braid between the fishing lines, pulling it towards the original knot. A new loop is formed.
- Insert the end of the cord into this loop. Tighten the knot by pulling on the main line and cord.
- Trim the excess ends of the monofilament and cord to a few millimeters. Use a lighter to burn the ends of the lines to prevent them from coming loose.
Bloody
Tying with a “bloody” knot will allow you to attach a braided line to a fishing line with a minimal difference in thickness and maintain 85-90% of the original strength. To tie a monofilament line to a cord with such a knot, do the following.
- The ends of the fishing line and braid are fastened together. The end of the cord should be at least 15 cm, and the fishing line should be half that length.
- The cord is then wound an average of 14 turns around the nylon axis towards the main line.
- Holding the ends of the fastened fishing line and cord in the center of the winding turns, separate the fishing line and cord, forming a loop between them.
- The end of the braid is threaded through this loop.
- Opposite the passage of the missing end of the cord, the end of the fishing line is pulled into the same loop.
- The knot is wetted before tightening. By pulling the fishing line and cord, tighten the entire knot.
- After tightening the knot, the excess ends are cut off.
Liana
The simplicity and strength of the knot characterize it as a non-slip connection. It will not be difficult to untie it by moving any of its loops. Follow these steps to form and tighten the knot.
- The line is placed in a loop. In this case, the shortened end is moved forward. After being thrown over the main thread, it turns downwards.
- On another piece of line, follow the same steps, first passing the end of the braided line through the loop of the mono line.
- Moisten the knot before tightening. Pull it evenly, without sudden movements.
Albright
The Albright knot is suitable for fishing lines and cords that differ from each other in diameter (thickness). They also knit homogeneous fishing lines and cords. To shape and tie it, do the following.
- Fold the cord end into an open loop. Pass the end of a single line through it.
- Wrap this loop once with a turn of monofilament. The cord and monofilament should eventually form one loop each. Both loops are opposite, which simplifies the process.
- Using the free end, make up to 10 turns around the monofilament loop. Pull what's left of the end into a loop of thick cord.
- Moisten the resulting wrap. Remembering to tighten the ends of the lines, tighten the loops from each other.
How to knit a clinch
Every fisherman should know how to tie a clinch knot. The quality of preparation of the gear, as well as its suitability for fishing, depends on this.
Before tightening the knot, it must be moistened with water. This is the only way to securely attach the tackle.
Simple
How to tie a clinch knot will become clear the first time you read the step-by-step instructions. You need to do the following:
- We pass the fishing line through the eye about 10-15 cm. We twist the free end around its main part. Make 5-8 revolutions;
- We insert the end of the thread into the loop that has formed near the eye;
- Wet the bundle with water and tighten it;
- Cut off the extra piece.
Improved
A more reliable variation is the improved clinch fishing knot. It is often used to attach boat anchors, which indicates its high strength. It is tied in almost the same way as the simple version.
Improved clinch knot
- We insert the thread into the hole 10-15 cm. With the smaller end we make 5-8 turns around the main part;
- We thread the working end into the loop near the eyelet, do not tighten it;
- We pass the working end of the thread through the resulting large loop between the eyelet and the spiral;
- Wet with water and tighten;
- Cut off the extra piece.
Hardened
If there is a possibility that a high load will be placed on the thread, you can tie a reinforced version. This is done in this order:
- Bend the fishing line in half to make a loop 10-15 cm long;
- We pass the double thread through the hole on the part. The working end should be 8-9 mm long;
- We wrap the main line 5-8 times;
- We pass the thread through the formed loop near the eye;
- We wet the bundle and tighten it;
- Trim off the excess, leaving about 2 mm.
Clinch knot reinforced
Double
The main distinguishing feature of the double clinch fishing knot is the double loop. It boasts great strength, which allows it to withstand heavy loads. A double fisherman's knot can be used on monofilament and braided threads.
The double clinch knot is performed in the following order:
- We pass the fishing line through the ear 10-15 cm;
- After this, we do a similar action again to make a double loop;
- We make 5-8 turns around the main line;
- Pull through a double loop;
- Wet;
- We tighten it.
Simple locking clinch
This option is usually knitted from wool thread or thin braid. It is intended to limit the movement of the float along the fishing line. To tie it, you need to do the following:
- Take a piece of braid or thread approximately 25 cm long and fold it in half;
- We place the piece under the main thread, matching its middle with the place of tying on the main line;
- We throw one end over the main thread, make 5-6 turns around it and the second half of the segment;
- Pass the end of the thread through the resulting loop, moisten it, and tighten it well;
- Trim off the excess, leaving approximately 2 mm.
To knit a stop version, you can use a thread with a cross-section equal to the main line or slightly larger.
How to tie a Palomar knot?
This unit is very simple and does not require any special skills:
- - you should fold the fishing line in half, and then pull it through the bow;
- - then you need to use the free tip to tie a simple knot, but you should not overtighten this knot;
- — double fishing line makes a loop into which you need to thread the balancer;
- — then you should carefully tighten all four ends of the fishing line, and then cut off the excess fishing line about five to seven centimeters directly from the knot itself, so that there are no unties.
[custom_ads_shortcode1]
Alternative nodes
To provide the bait with a greater degree of freedom, instead of the Rapala knot, you can use winding rings and clasps (carabiners) for fastening; swivels will also be in place. But due to their weight, these additional elements of equipment located in front of the bait will inevitably make it difficult to play.
Important! If for heavy wobblers and spinners some deterioration in their performance due to winding rings, carabiners and swivels is not critical, then the performance of small light baits can deteriorate noticeably. Therefore, the lighter the model used, the more justified its installation using a Rapala loop or a similar unit
There are also alternative loop knots that are not much inferior to the Rapala loop. In addition, you can use non-loop methods for mounting baits.
Tight loop
This installation method is well suited for tying wobblers and flies; they can also be used to attach other baits and equipment. Like the Rapala knot, it provides the maximum degree of freedom. As you can easily see from the diagram, the Tight loop is knitted in a similar way, but it is simpler to perform and does not require such a large consumption of fishing line.
Learn more about the Tight Loop Knot
How to knit a tight loop knot is clearly shown in this video:
Blind (corner) loop
Another loop method of attaching baits and equipment elements, which guarantees a very high degree of freedom. In terms of simplicity and speed of knitting, it surpasses the Rapala loop and is not inferior to the Tight loop.
Palomar
A very simple to implement and at the same time very durable method of tying hooks, spinning lures, flies, jigs, swivels, snap hooks and other equipment elements that should be located at the end of the fishing line. Unlike the Rapala knot, it is not a loop knot.
More about the Palomar node
How to tie a Palomar knot is clearly shown in this video:
Clinch
Another very strong and fairly easy to tie knot, which is a worthy alternative to Palomar.
More about the Clinch knot
How to tie a Clinch knot is clearly shown in this video:
Uni (Grinner)
Uni is not used as widely as Palomar or Clinch. But the connection strength it provides is also excellent.
Grinner knot, or Uni
How to knit a Uni knot is clearly shown in this video:
Homer
An installation method suitable for tying hooks, swivels and other end elements of equipment, the strength of which is about 90%. The process of tying it is similar to tying the Rapala knot. But, unlike it, Homer is a non-loop method of connection, like Palomar, Clinch and Uni.
Learn more about the Homer Knot
How to knit a Homer knot is clearly shown in this video:
Do I need a leash on the balancer?
This is another topic that haunts winter spinners. It is clear that a heavy metal leader makes the game worse, especially for small and light lures. In winter, the water is cleaner, so such a leash will be noticeable to the fish. Experienced fishermen know that in winter the number of pike bites on a rig without a leash is an order of magnitude higher. At the same time, you don’t want to leave an expensive (or even worse, your favorite and catchy) bait in the pike’s mouth.
The general system for using leashes in winter is as follows:
- A leash is not used for catching pike perch and pike perch.
- It can also be neglected when fishing for pike, especially in the dead of winter, if it is known for certain from other anglers that the predator does not swallow deeply in this particular body of water.
- When specifically fishing for pike, as well as in reservoirs where its grip is very likely, it is better to use a leash.
The winter leash for the balancer should be thin and soft. Therefore, hard steel summer options are not suitable. It is recommended to use the following options:
- Thin tungsten leash from the store. In this case, the fittings hanging on it are removed (carefully bitten off with wire cutters). At the top of the main line it can be tied with a clinch, palomar, rapala knot or loop in a loop. Below - through a winding ring or a small carabiner.
- Fluorocarbon twist (2-3 strands of 0.2-0.3 each).
- Special leader material, for example, surflon.
Some fishermen advise using braided line as a leash, but in vain. Braided line can be cut by pike just as quickly and easily as monofilament. Always carefully approach the equipment of the balancing gear; all components must be neat and durable. Don’t forget, the main thing is the correct action of the bait.
Tying the balancer to the fishing line (video):
Mounting a carabiner using a crimp tube
It is quite difficult to tie a small carabiner to a thick fishing line. Fishermen used many different methods for this and as a result came to the conclusion: you can use a crimp tube.
It is a metal tube, a fluor loop is inserted into it, then clamped with pliers. The connection will be strong. The loop can withstand high tensile load.
Crimpers come in different thicknesses. To determine the diameter of the crimp tube, you need to multiply the fluor diameter by 2 and add 0.1 mm. If you are making gear from fluor with a diameter of 0.45 mm, then you will need a crimp tube with a diameter of 0.95-1 mm.
You can attach a fishing snap hook to any cord, regardless of its thickness. Carabiner clasps help the angler save time and create a durable structure for fishing gear for both summer and winter fishing. In winter, after attaching the carabiner, we tie the jig to the fishing line, and you can start fishing.
General rules
Let's look at how to properly tie a sinker to the main line.
- Attach it at the end of the tackle, and not above the hooks or in a random place between the leads.
- Attach this load using one of the special knots, rather than tying a simple double knot. The fact is that ordinary knots tend to quickly unravel, and the sinker can be lost in the pond forever.
- Do not exceed the permissible weight of the sinker. It should not overload the “lead” section of the tackle, pulling the hooks far, to the very bottom, where the fish do not always move in schools. Bottom fishing is possible only in bad weather caused by low atmospheric pressure. A sinker that is too large will overload the float and it will go under water.
- Do not underestimate the weight of the sinker. A sinker that is too small will not load the float enough when fishing with a float rod. It will not stretch the tackle from the surface of the reservoir to the required depth - normally this distance coincides with the length of the tackle section from the float to the sinker. Insufficient weight of the sinker when fishing in a river or during small waves in the sea or ocean will lead to the fact that the current and wind will carry the tackle far from the fisherman - close to the shore, where the fish may not go at all.
In any case, one of the universal rules is that the section of fishing line with leashes must be stretched as much as possible with a sinker and float in order to avoid twisting and tangling of the tackle during active currents and frequent bites.
Lures
Many companies produce balancers. Rapala, Kuusamo, Nils Master, Rauhala, Lucky John - this is not a complete list of famous world manufacturers. Recently, quite decent “ours” have begun to appear, mainly from Leningrad. When purchasing unfamiliar baits, pay attention to the quality of the hooks and the shape of their bend (it is better if it is not straight, but slightly “bent upward”). The tee, of course, can be replaced, but two soldered single pieces are unlikely. With the “Finns,” by the way, deformed hooks can be easily bent back several times, but with “ours,” in most cases they break.
For the game of a balancer, it is better if its shape (and plumage) resembles the “branded” ones you are familiar with. Then, most likely, they will also work normally (i.e., not just jump up, following the fishing rod, but move far to the side and quickly turn around). According to average statistics, color does not significantly affect catchability. But somehow I can’t bring myself to buy all the same ones...
The entire natural range of colors (“perch”, “roach”, “green back”, etc.) works equally well, the usual “firetigep” and other aggressive colors too. But with really “exotic” things, it’s still better to be careful. Several times I came across phosphor-coated balancers that glowed in the dark after a short “charging” in the light. I’ve never caught anything with them (however, I don’t rule out for now that on other bodies of water they, on the contrary, will work better). In order not to make a mistake when buying, immediately, in the store, bring the suspicious balancer to the lamp for a couple of seconds, and then cover it with your palms, and everything will become clear.
At a depth of 30-70 centimeters, small and light balancers with tails (wool and plastic) work well. Such “slow” breathing baits are also respected by coastal pike - grass. For shallow depths, from 1-1.5 to 2.5-3 meters, it is better to purchase more of the smallest 2-2.5 cm balancers. Further, from 3 to 5 meters, 3-4 centimeter ones are used. When fishing at depths of 5-8 (or more) meters, take heavier balancers (from 4-5 cm or more). Then it’s not difficult to find your way around...
When choosing a balancer for specific fishing conditions, remember that the main thing is not to “overweight”! Those. a small balancer will catch fish even at a depth of 10 meters, but not immediately (the vibrations are weak). And you won’t feel the bite right away. But a heavy one aground won’t catch anything! And you will feel this right away - he simply will not play normally. Here, however, not everything is clear, we must also take into account the activity of the fish: if the fish is active, then the rule “the heavier the bait, the greater the catch” works, but in this case it would be more correct to simply replace the balancer with a regular vertical spoon - in high-speed fishing it is preferable .
Sinker
Methods for tying the weight will depend on the installation and fishing methods. The weight can be tied on a separate leash, be sliding and attached like a jig, or simply pressed motionless onto the fishing line.
If the rig uses a sliding sinker, it is attached with a small loop. The loop is inserted into the eye and the ends of the fishing line are pulled through it. This loop allows the knot to move.
If the sinker is a regular suspended one, then a fixed knot is used to attach the leash to the fishing line; you can see how to make it in the video:
In general, you don’t have to tie the sinker, but simply squeeze the line with a lead pellet using pliers.