For production you will need:
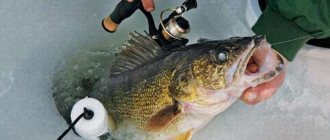
I use these fishing rods for fishing. Due to its length and good flexibility, with such a fishing rod you can always compete with pike, and pike is not at all a rare guest when fishing with bullheads.
For production you will need:
1. Whip from a telescopic fishing rod 2. Reel 3. Wine bottle caps. 4. Silk threads of 2 different diameters 5. Paper clips 6. Mylar nod 7. Bank rubber band (for money) 8. Sandpaper 9. “Monolith” glue or other second glue (the main thing is that it does not turn white after drying).
Wine corks are cut into even circles (like sausage), then holes are made in the center of them, equal to the diameter of the base of the whip. We put the cork rings one at a time on the whip and glue them.
Then we process the semblance of a handle with sandpaper; some irregularities can be left for convenience.
Now we secure the spool with silk threads and glue it.
We make the rings from paper clips and also fasten them with threads only of a smaller diameter and carefully glue them so that they do not spin on the whip. We secure the nod with an elastic band for money, its use is not accidental, it is thin and light, but the truth is not very reliable. Using just such an elastic band makes the tip of the fishing rod lighter.
And the fishing rod is ready. Its main disadvantage is that it is not foldable.
11/28/2015 I tried to assemble a fishing rod for small balancers using this principle. You can view it here. I tried the fishing rod and really liked it))
Step 10
Now, carefully sand the handle with sandpaper.
There is probably still a person in the world who loves winter fishing. And there are quite a few such lovers. Most people prefer trolling perch on Ladoga.
But for good fishing, you need a good fishing rod, and it’s simply impossible to buy one in a store. The best option would be to make it yourself. So, better quality and more reliable.
But in order to make this important element yourself, you will need the following:
From materials: • An ordinary piece of polystyrene foam, the harder the better • A wiring coil, the diameter of which must be at least 65 millimeters • A simple whip, the length of which does not exceed 500 millimeters. It can be very different, both from the category of vinyl plastic and fiberglass • Spring-type nod • Glue. It is advisable to take an epoxy • Ring so that you can pass the fishing line and secure the spinners.
Remember that when choosing reels, as well as a whip, you need to take into account your own individual characteristics. For example, the size of your own palm, namely, so that you can comfortably hold the handle of the fishing rod. Your hand should be in a freer state, not clenched.
So, in order to make the job easier, you will also need tools, in addition to materials. You simply cannot do without them.
Tools: • A simple office-type knife • Drill and drill bits (of all kinds) • Pliers • File, needle file • Skin, rougher (the thicker the better and easier) • Specialized scissors designed for working with metal • Utensils for it was possible to dilute the glue • A simple pencil and a compass • A strong ruler
After you have acquired all the necessary components for the work, you can proceed directly to it.
First, you need to process a piece of pre-prepared foam plastic so that its thickness is no more than 3 millimeters and at the same time does not exceed the volume of the coil. Styrofoam can be taken anywhere. As a last resort, you can take the one that remains from the purchased equipment.
Step 2.
Now is the time to make markings on the plane of a piece of foam, namely, the outline of the handle of your fishing rod. Mark the location of its axis, and the contours of the spool together with an allowance of one millimeter.
It's not that difficult.
Step 4.
The time has come to use the stationery knife you have prepared, as well as the skin, in your work. To do this, first process a small spool socket. As for its height, it should be about three millimeters. You can take a little more.
Step 5.
Now you need to process the bottom of the nest. For this, it is very good to use a drill. You can choose the nozzle as you wish.
Step 6.
The last steps remain. It is imperative to modify the coil. Take scissors designed for working with metal and use them to remove the leg that is absolutely not needed. To lighten the fishing rod, process the base of the reel to a diameter that would be ten millimeters. Be sure to leave about three tabs that are positioned at a straight angle. They are needed so that the coils can be fixed in the socket itself.
Now, try the coil on the socket. If necessary, you can refine it with a knife and sandpaper. At the same time, make sure that there are no protrusions above the surface of the handle.
Carefully begin to bend the legs outward so that the base itself is very tightly inserted into the socket and can be held there. To be sure, re-check the gap around the entire perimeter.
Step 9
The most difficult work is over.
All that remains is to carefully process the handle from the outside, using a knife, skin and, of course, a file. Leave a small layer of foam around the circle, approximately 6 millimeters. It is advisable to process the place where the whip will be glued with a small allowance, which can be eliminated after gluing. Tips for fisherman: How to catch roach in winter using a jig - Detailed review
Step 10
Now, carefully sand the handle with sandpaper.
Step 11
Next, you need to burn a hole intended for the fishing line with a very thick and dense needle so that it can enter parallel to the hole that belongs to the whip.
Step 12
Now you need to start gluing. To do this, dilute the epoxy glue. Apply a little glue to the ends of the whip and gradually put on the nod so that the outer side is flush with the end of the whip. In order for the glue to dry well, it is necessary to place the fishing rod in a vertical position.
Step 13
Once the fishing rod is completely dry, it can be used for work. Have a great fishing!
As I already said, there is nothing complicated in making this gear, because, in fact, we just need to do the following basic things and connect them into one whole:
Secrets of catching pike perch in winter
Let's look at tips for catching pike perch in winter:
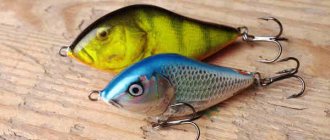
Silicone baits
Such baits attract the attention of a predator. Silicone baits should be used in dense snags.
Winter fishing for pike perch using balance beams
To catch fish in winter, you need to use medium-sized balancers (from 5 to 12 cm). It is necessary to catch pike perch in the bottom layers of water.
Fishing technique. Professional fishermen use a special technique to activate the bite. First, the bait must be lowered to the bottom. After this, the bait must be lifted smoothly. And after a pause, the bait must be dropped sharply. Using this technique activates the pike perch’s bite.
Weather. It is necessary to catch pike perch in the evening and morning dawns.
Catching large pike perch in winter
Pike perch is a cunning and curious fish. The best time to fish is during the first ice.
First you need to prepare your winter gear:
- Lures. You need to use big baits.
- Coil. Inertial reels are suitable for catching large pike perch.
- Fishing rod 50–70 centimeters long.
- Fishing line. You need to use thick fishing line.
Large pike perch, leads an isolated lifestyle.
Habitats:
- deep areas;
- channel dumps;
- shallow water areas;
- channel pits.
It is necessary to catch large pike perch in the twilight hours and at night.
Winter pike perch fishing on the Volga
The Volga is one of the largest rivers in Russia. It is the central waterway of the country. The river is home to various species of fish, including pike perch.
The Volga allows every fisherman to try his hand at fighting trophy fish.
The best places to catch pike perch:
- braids;
- overgrown with grass irrigation;
- shallow watering;
- dumps.
The best time to catch pike perch is the end of winter.
Fishing for pike perch in winter from ice
To catch pike perch from the ice in winter, you need to use the following winter gear:
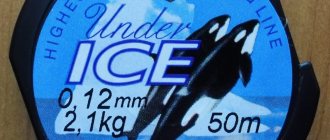
- Braided cord or fishing line. Of course, it is better to use fishing line (0.2–0.3 mm).
- Coil. The reel should move easily.
- Nod. If necessary, the nod can be made from a plate.
- Rod. The length of the rod should be 0.4–1 m.
Catching pike perch from ice requires special safety measures. You need to go fishing when the ice becomes thick and strong.
Choosing a place to catch pike perch using a spoon from ice
To catch fish you need to know the behavior and habitat of pike perch. Pike perch loves depth, heterogeneous terrain, and clean water.
Let's look at the typical habitats of pike perch:
- flooded snag;
- pits;
- flooded riverbeds;
- snags;
- whirlpools;
- piles;
- riffles;
- channel pits;
- eyebrows.
Pike perch lives in reservoirs, rivers, and flowing lakes.
To catch pike perch, you can use various winter gear and bait. Winter gear consists of the following components: rod, reel, fishing line, nod, bait, etc. The best time for fishing is morning and evening dawns.
Equipment
It is better to equip a fishing rod for lure fishing in advance, that is, at home. When going perch fishing, you need to acquire all types of gear - a fishing rod with a jig, and a fishing rod for trolling, so that you can use the entire arsenal on the pond. A fishing line of 0.10 mm – 0.14 mm is suitable for the spinner. The spoon should be no more than 3.5 cm; the best material from which catchable winter baits are made is copper and brass.
Particular attention should be paid to ensuring that the winter fishing rod for trolling has a hard and elastic nod, its handle should be comfortable, it can be made not only of cork, but also of foam plastic. The coil is used as an open type. To some extent, it is true that for spinning perch, pike and pike perch, the tackle should not be too sensitive, because the game of a spinner cannot be compared with the game of a jig. But you still have to adjust the fishing rod if you want to return home with your catch.
The setting depends on the type of fish you plan to catch. In wild bodies of water there is an effect of surprise, so it makes sense to play it safe, but this can only be done against active fish. Using a thicker line on a passive bass would be a grave mistake. It is not necessary to use a large spoon when fishing for pike. This can be done at the beginning of winter, on the first ice, and in the dead of winter small spoons are used to catch pike.
With an open reel for trolling, jig fishing, float fishing
In a real balalaika, the inertial reel with a stopper is recessed into the round handle of the fishing rod. Making such a coil yourself at home is problematic.
You can glue a used line spool to the handle of your fishing rod, but then you will have to wind the line onto the spool by hand.
You can use a purchased inertial coil, but the manufacturing process will be much more complicated - you will have to cut a round hole in a round handle, and come up with a reliable way to attach the coil inside the handle hole.
It is much easier to use an inexpensive purchased inertial reel (from 30 rubles) and attach it to the fishing rod handle with insulation, or by drilling two holes in the reel holder, secure it with screws on the handle.
With wooden handle and open inertia reel
- A 20-22 cm long section is sawn off from the wooden handle of an old, unnecessary mop.
- Cork chips are mixed with waterproof glue and gradually, layer by layer, applied to the handle at the place where the hand grips (10-12 cm). You can create a convenient handle shape according to the angler’s request.
- After the glue has dried, sand the handle with fine sandpaper (you can coat the handle with yacht varnish).
- In the center of the wooden handle, on the side where the whip is attached, a longitudinal hole is drilled to a depth of 6-8 cm with a diameter equal to the diameter of the thick end of the whip.
- The resulting hole is gradually filled with epoxy resin.
- Insert a whip from an unnecessary telescopic fishing rod 40-70 cm long. Carefully center the whip in place.
- Carefully remove the protruding resin.
- After the resin has hardened, sand the place where the whip is fixed in the handle with fine sandpaper to remove irregularities and resin build-ups.
- A purchased inertial reel with a brake is screwed to the handle.
Expert opinion
Knipovich Nikolai Mikhailovich
Zoologist, hydrobiologist. I am interested in fishing at a professional level.
Attention! There are inertial reels with and without a holder, with a hole in the center for attaching the reel with a screw. It is better to purchase a cheaper option with a central hole
To install such a reel on the handle, you will need one screw of a certain length for secure fastening.
This fishing rod can be used with a nod for jig fishing. It can also be used for float fishing and trolling. In these cases the nod is not used.
Pistol
A winter fishing rod with a pistol-shaped handle is used for trolling in currents and in still water. Since the structure is subjected to heavy loads when attacked by predatory fish, its handle can be made of hard material - wood.
- The required pistol-shaped handle shape is cut from a block of wood.
- The final rough shape of the handle and line holder is planed with a knife.
- The forest storage facility is located on top of the pistol and has a random appearance. The main thing is that the fishing line is convenient to wind onto the fishing line.
- The final shape is achieved by sanding the surface with fine sandpaper.
- The handle is treated with stain and covered with deck varnish.
- A hole is drilled in the horizontal arm of the handle for the whip (the whip must be strong and flexible. The tip of a spinning rod with a test of 10–30 is suitable).
- Waterproof glue is applied to the whip at the junction with the handle. The whip is inserted into the hole.
When catching a predator with a fishing rod of this design, the hand experiences less stress when jerking a heavy fish. Often winter fishing rods for trolling are equipped with a hand loop made of strong rope so that the pike does not tear out the light rod. For a pistol, there is no need for a rope loop.
DIY fishing rod for trolling perch
There is probably still a person in the world who loves winter fishing. And there are quite a few such lovers. Most people prefer trolling perch on Ladoga.
But for good fishing, you need a good fishing rod, and it’s simply impossible to buy one in a store. The best option would be to make it yourself. So, better quality and more reliable.
But in order to make this important element yourself, you will need the following:
From materials: • An ordinary piece of polystyrene foam, the harder the better • A wiring coil, the diameter of which must be at least 65 millimeters • A simple whip, the length of which does not exceed 500 millimeters. It can be very different, both from the category of vinyl plastic and fiberglass • Spring-type nod • Glue. It is advisable to take an epoxy • Ring so that you can pass the fishing line and secure the spinners.
Remember that when choosing reels, as well as a whip, you need to take into account your own individual characteristics. For example, the size of your own palm, namely, so that you can comfortably hold the handle of the fishing rod. Your hand should be in a freer state, not clenched.
So, in order to make the job easier, you will also need tools, in addition to materials. You simply cannot do without them.
Tools: • A simple office-type knife • Drill and drill bits (of all kinds) • Pliers • File, needle file • Skin, rougher (the thicker the better and easier) • Specialized scissors designed for working with metal • Utensils for it was possible to dilute the glue • A simple pencil and a compass • A strong ruler
After you have acquired all the necessary components for the work, you can proceed directly to it.
Step 1
First, you need to process a piece of pre-prepared foam plastic so that its thickness is no more than 3 millimeters and at the same time does not exceed the volume of the coil. Styrofoam can be taken anywhere. As a last resort, you can take the one that remains from the purchased equipment.
Step 2.
Now is the time to make markings on the plane of a piece of foam, namely, the outline of the handle of your fishing rod. Mark the location of its axis, and the contours of the spool together with an allowance of one millimeter.
Step 3
Next, in the inner circle that has turned out, draw another contour, the diameter of which should be 21 millimeters smaller than the dimensions of your spool.
It's not that difficult.
Step 4.
The time has come to use the stationery knife you have prepared, as well as the skin, in your work. To do this, first process a small spool socket. As for its height, it should be about three millimeters. You can take a little more.
Step 5.
Now you need to process the bottom of the nest. For this, it is very good to use a drill. You can choose the nozzle as you wish.
Step 6.
The last steps remain. It is imperative to modify the coil. Take scissors designed for working with metal and use them to remove the leg that is absolutely not needed. To lighten the fishing rod, process the base of the reel to a diameter that would be ten millimeters. Be sure to leave about three tabs that are positioned at a straight angle. They are needed so that the coils can be fixed in the socket itself.
Step 7
Now, try the coil on the socket. If necessary, you can refine it with a knife and sandpaper. At the same time, make sure that there are no protrusions above the surface of the handle.
Step 8
Carefully begin to bend the legs outward so that the base itself is very tightly inserted into the socket and can be held there. To be sure, re-check the gap around the entire perimeter.
Step 9
The most difficult work is over. All that remains is to carefully process the handle from the outside, using a knife, skin and, of course, a file. Leave a small layer of foam around the circle, approximately 6 millimeters. It is advisable to process the place where the whip will be glued with a small allowance, which can be eliminated after gluing.
Step 10
Now, carefully sand the handle with sandpaper.
Step 11
Next, you need to burn a hole intended for the fishing line with a very thick and dense needle so that it can enter parallel to the hole that belongs to the whip.
Step 12
Now you need to start gluing. To do this, dilute the epoxy glue. Apply a little glue to the ends of the whip and gradually put on the nod so that the outer side is flush with the end of the whip. In order for the glue to dry well, it is necessary to place the fishing rod in a vertical position.
Step 13
Once the fishing rod is completely dry, it can be used for work.
Have a great fishing! Source
Become the author of the site, publish your own articles, descriptions of homemade products with payment for the text. Read more here.
How to play with bait
Usually, even novice fishermen know how to catch perch in winter.
It is not difficult. After measuring the depth, the bait rises a few centimeters from the bottom. Then, with a wrist movement, the angler throws the bait to a height of about 20 centimeters, then allowing the spoon to fall under its own weight. Such movements are repeated over and over again. Periodically you need to change the fishing horizon and the frequency of throwing the bait. As the perch spinner falls, it glides through the water column, making an oscillatory movement. It is at this time that the predator's bite usually occurs. Having grabbed the spoon, the perch remains in place, so the nod sharply jerks down and freezes. This is a sign that the bait is in the fish's mouth. At this moment you need to make a short sharp hook. A hooked fish does not make sharp jerks when playing, and you can pull it out onto the ice even with a thin fishing line if you are not in a hurry.
You shouldn’t stay in one place for a long time when searching for this fish in winter, especially when fishing on first ice. If there is a striped robber under the hole, he will definitely respond to the first postings. The absence of bites after several minutes of playing with the lure throughout the entire thickness of the water is a sign that it is time to reel in the lure and move to a new place.
The technique of trolling perch in winter is simple, and even a novice angler can easily master it. When going after this beautiful fish, follow simple rules:
- You will need to move around the pond a lot, which means you should not dress too warmly.
- Always have a supply of spinners of different shapes and sizes with you.
- Sharpen the ice drill blades; there is a lot of drilling to do.
- Drill several holes at once, then systematically move from one to another.
- When moving from hole to hole, do not reel in your fishing rod. You can simply wrap the fishing line around your hand.
- It is quicker and easier to polish the lure with felt moistened with water.
Winter fishing rods for trolling and techniques for using them
When choosing winter fishing rods for trolling, you need to understand that you won’t have to just stand with it. The method itself involves the active participation of the fisherman in the entire process. Therefore, the product must be “the most correct”. So, experienced people use a fishing rod, the length of which varies around 0.5-0.8 meters. The elements are slightly longer than those used when fishing with a jig or a float is planned. This is not just like that, this was done so that a person can freely perform active wiring and at the same time not skimp on the sweep of movements.
Important! In order to be able to move quickly from hole to hole, the fishing rod must be equipped with a reel, and a nod will allow you to control the process - which you also cannot do without if you don’t want to miss a bite.
Today there is far more than one technique that allows you to effectively catch fish. The essence of all techniques is to imitate the behavior of a wounded fish.
The most popular games are:
- You pick up a homemade fishing rod (or a purchased one), and then with a sharp movement the product comes off the bottom by about 50 cm, and then slowly falls back to the bottom. After a couple of seconds the manipulation is repeated.
- The spoon is carefully lifted higher, about 70 cm, and raised so that the spoon goes as if horizontally.
- Near the very bottom, the bait is twitched with stops for several minutes.
Experienced fishermen have their own techniques, which they use depending on the month (at the beginning of winter it can be one thing, but at the end - completely different), on the type of reservoir, fish and other important points.
Read about the different types of winter fishing rods and how to assemble the right gear.
Where to look for a predator in winter
On the first ice, the striped robber can be found almost everywhere where there is white fish. Perch is a schooling fish, and it will always stay where there is food for it. Based on the first ice, it can be detected throughout the entire water area of the reservoir. At this time, “rotary” fishing is taking place, that is, the angler constantly needs to move around the reservoir in search of fish and drill many holes. The reward for an active fisherman will be a good catch. If you manage to find a school of perch under a hole, there is a high probability that the entire school will soon end up in the lucky fisherman’s fishing box.
As the ice thickness increases and the oxygen content in the water decreases, juvenile fish will migrate closer to the mouths and into the beds of rivers and streams. Perch will follow. In winter it is less active than in summer, its bite can be very uneven. Half an hour or an hour of a good bite can be replaced by days of its complete absence.
As daylight hours increase, the activity of perch increases, and its feeding trips become more frequent and longer. But the fisherman usually cannot wait for the peak of the active bite. It occurs at a time when spring ice has completely lost its strength and access to it is extremely dangerous or impossible.
Review of companies producing fishing equipment
The most famous in Russia are Finnish and Japanese manufacturers. But there are other options, each company has its own advantages:
- Japanese concern HIGASHI - excels in several series, among which there are telescopic rods, they are used for catching both freshwater and sea fish, the tackle is actively used for catching pike;
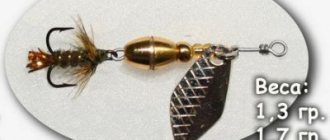
- the Finnish company Rapala has been a leader in the market for more than 70 years, producing all winter equipment of high quality, recently golden spinners with a characteristic shape have become very popular;
- the Latvian manufacturing company Lucky John is quite well known, starting with the Salmo brand. Having debuted in the late eighties, it has now conquered the market even in the USA, and production is developing in China, Japan and other countries of the world;
- Smolensk company PIRS can be distinguished from domestic manufacturers; its fishing products are distinguished not only by their quality, but also by their relatively low price.
How to catch pike perch with a jig
Loading …
Fans of jig fishing choose baits about 12-14 mm long, sometimes longer. The size depends on the depth. If it is large, then a fairly large jig is suitable, which can actually be used to catch large fish with a significant mass. Sometimes fishermen resort to weighting the bait with lead or other equally weighty materials. After this procedure, it is advisable to wash the jig well, since the same fused lead emits a burnt smell that is very unpleasant for pike perch. To avoid such problems, it is best to coat the jig with silver. As for the direct bait, you can use both a bunch of bloodworms and small parts of fish. Some craftsmen fish with the so-called “devil” or with one hook, others tie threads.
Feeding technique is of great importance
The jig is fed slowly and smoothly with slight swaying, which the pike perch simply has no chance of not paying attention to. Winter fishing for pike perch - the following techniques are distinguished:
- First. The jig sinks to the very bottom, stirring up a layer of turbidity, which rises up and forms a cloud, visually reminiscent of the one created by fry moving along the bottom. Such an action can provoke a nearby pike perch to attack, which will result in the successful capture of the predator.
Second. The jig, swinging, rises 30-40 cm, and the line at this time weakens, as a result of which the bait moves somewhat in the direction of the current. After this, the jig is lowered again and lightly dragged along the bottom, pausing. At the moment when the bait comes off, as a rule, an effective bite occurs, during which there must be a sharp hook, or better yet two, for greater confidence in the hook of the pike perch.
For mormyshing with a nozzle
If fishing with a jig will be carried out using a nozzle, you need to make a more massive rod. Use foam, wood or cork to make the handle.
It is necessary to give the product the appearance of a staple, often called a “filly” by fishermen. You need to make a groove in the workpiece in which the fishing line is wound.
«>
«>
If we are talking about the swing of a pike-perch spoon, then it is recommended that it be even softer than when hunting for pike. Often this cannot even be called a wave; rather, it is a leisurely rise, in the initial phase of which zander bites occur. The so-called vertical zander spoons, slightly curved at the tail, with a high swing are capable of moving a considerable distance away from the hole - the same feature of the bait is often used in deep hunting for large perch - humpback fish.
The most important point: the actual play of the spinner and the play of the spinner that the fisherman achieves are completely different things. The coolest bait is not able to catch fish unless a skilled hand is applied to it, i.e. it depends on the skill of a particular fisherman whether the bait will arouse keen interest in the predatory fish or whether it will not pay attention to it, then you will not get a bite.
Explosive move
Experienced spinners have developed original ways of sparkling, different from the endless mass of banal options. One of the options for trolling perch is considered especially effective, the features of which are as follows.
As the fishing horizon increases, the weakening of the sensation of the force of the push suggests that it is time to use a heavier bait, more suitable for the given depth.
Chasing pike
The fact that now you can’t see spinners in fishing stores that are positioned as specialized pike spinners is “a lie and a provocation” that diverts the pike fisher’s interest to the popular balancers. Yes, of course, balance beams are excellent baits, but the vertical bait is not a perfect bait either. Moreover, in fact, there are plenty of vertical models on sale that are well suited for pike fishing.
Tips for fisherman: In what weather does fish bite better in winter - Answers for beginners
Correct swings are the basis for success
If we are talking about the swing of a pike-perch spoon, then it is recommended that it be even softer than when hunting for pike. Often this cannot even be called a wave; rather, it is a leisurely rise, in the initial phase of which zander bites occur. The so-called vertical zander spoons, slightly curved at the tail, with a high swing are capable of moving a considerable distance away from the hole - the same feature of the bait is often used in deep hunting for large perch - humpback fish.
Pause
Skilled fishermen suggest clearly separating the concepts: a pause when playing with a vertical line and a pause in the game of bait itself.
When fishing for pike, the lion's share of bites are recorded a little earlier - at the most inert phase. Most pike perch are hooked either during the phase of a smooth rise of the bait, or on an already stationary spoon during a moment of a prolonged pause.
Benefits of hanging tee
On many lakes and reservoirs, winter anglers note the fairly high efficiency of perch spinners (including small ones) equipped with a suspended tee, rather than a soldered single or double hook. Moreover, a vertical with a suspended tee is characterized by increased catchability, regardless of what is on it (fly, cambrics, beads), and even if it is completely “bare.”
Light tackle
A nod must be attached to the edge of the fishing rod. In this case, I use a purchased nod. It is inexpensive and reduces the time it takes to make a fishing rod, because you don’t have to invent and make it yourself. But I equipped many of my winter fishing rods with homemade nods from a nipple, a mechanical watch spring, elastic wire, and even from an X-ray.
A little about the design of the “fillies”
The key feature of such a fishing rod is the absence of a reel as such. However, this does not mean that any reelless fishing rod can be called a “filly”. It got its name thanks to special stands that resemble horse legs, on which it rests on the ice.
In earlier times, the working handle of such a fishing rod was made of wood, which gave it stability. Today, most often it is cut out of a single piece of polystyrene foam, and the fishing line is simply wound onto stands, which simultaneously serve as a reel.
There are varieties of fillies equipped with a reel on both sides of the handle: this makes it possible to place two equipment prepared for fishing on one fishing rod at once. Equipping a winter fishing rod with fishing line occurs as follows: a loop is made at the free end of the fishing line with a “figure-of-eight” knot, which is simply thrown over the legs of the fishing rod and tightened. The line passes through the tip of the whip using a removable ring or a piece of dense cambric.
Types of fishing rods for winter fishing
For jigs
A fishing rod for winter fishing, which is used when fishing with a jig, is small in size, comfortable and light in weight. Fishermen appreciate this type of rod because catching fish with it is not difficult. Fishing with a jig has a playful nature, because of this the tackle should not be heavy, otherwise you won’t see fish. This fishing rod has a reel in the form of a handle. It is presented in a closed form and therefore it is very convenient to hold the rod.
Due to the short distance of the fisherman from the hole, the whip should not be long. But still, a certain number of fishermen have mastered fishing with long rods, but it is still not as easy as with short ones. In order for the catch to be rich, you need to purchase fishing rods with a friction clutch. With its help, the reel quickly scrolls, which allows you to save the fishing line from breaking.
Fishing rod with a nod
A fishing rod with a nod is a special tackle; instead of a float, it has a side nod at the extreme part of the rod. A jig is used as bait for summer fishing. Side nod fishing is very common among anglers. And all because such exceptionally convenient tackle provides a good bite even in places with heavy vegetation. The advantage of such a fishing rod is the play of the float, even when the fishing rod is swaying. With the help of such a structure you can catch carp, crucian carp, bream, or roach. But if you add additional bait, there is a chance of getting zander, perch and pike.
Delivery
A special feature of the supply is its simple manufacturing, without any defects in the elements of the gear. It will be quite problematic to find in special stores, but it is more than possible to build one at home. There are several ways to do this.
To prepare the supplies you need:
- durable stick made of wood;
- a piece of rubber hose;
- awl;
- fishing line;
- hooks;
- knife;
- sinker.
The process of fishing with a reel is quite simple. The main rule is to find an area that is promising and where the pike needs food. The production of live bait must be carried out in advance; it can be ruff, perch or roach. For supply, the catch is usually from 1 to 3 meters.
Zherlitsy
In appearance, the girders are similar to a slingshot made of wood. The rod can also be made of wire material with equipment wound around it.
Fishing with girders takes place in such reservoirs as small rivers, streams with fallen tree trunks, reservoirs and flooded large rivers. The advantages of the girder are easy production, quick collection of gear, self-hooking of fish, and lack of constant control.
Float rods
Float rods have a long history. When choosing a float rod for fishing, you need to focus on the correct assembly of the float. Often a conical shape is taken. To make this item, you need to stock up on materials such as foam or cork; after completion, they can be painted in a bright color. The standard diameter of the float should not exceed 6 cm, and the length 3 cm. The main component of successful fishing with a float is the sinker, because without it the float tends to be on the surface. The created sinker must be made of lead or tin. The best shape for a sinker is an oval.
Gear for strong currents
Most fishermen believe that fishing with a float in a strong current is different from still water. But on any body of water, even in calm weather, there will be a weak current, so gear for strong currents is very popular.
Tackle for lures and balancer
It is necessary to stock up on tackle with a spoon or balancer if the fisherman plans to fish for a predator or catch a large trophy. The rod has a reel and reel. The advantage of such fishing rods is the elastic rod, with the help of which quick hooking occurs. For fishermen who prefer standing fishing, it is recommended to use long rods. For convenience, they are designed to be collapsible so that there are no storage problems.
Electronic fishing rod
An electronic fishing rod for winter fishing is designed in such a way that, with the help of a mechanism, the whip begins to oscillate, twitch and jump, and therefore moves the jig. The catchability of this type of gear has not been determined. Nothing can replace the experienced hand of a fisherman.
Self-hooking fishing rod for winter fishing
A self-hooking fishing rod for winter fishing is very effective. It carries out effective fishing due to automatic hooking. Helps increase the angler's free time, which he can spend on preparing the site or collecting other fishing rods.
“Blesnilka” - a fishing rod for winter trolling
- home
- Archive
- RKG
- “Blesnilka” - a fishing rod for winter trolling
Ending. Started in No. 3(161), 2008
After one of his fishing trips, the author came to the conclusion that his fishing rod for winter trolling turned out to not correspond to the qualities that were needed. And he began to implement his next project, code-named “Blesnilka”.
Options
I’ll make a reservation right away that I will present to the public only those copies of my “spinners” that have not only undergone at least a two-season run-in, but also liked the work of the author, i.e. to me. In addition, I will deliberately leave out another version of the fishing rod (quite successful, by the way), since I can in no way claim to be the author of this model.
Additional material on this topic can be found on a number of Internet sites (for example, www.vlasenko.ru) or in fishing periodicals. In particular, I recommend the article by Surgut fisherman Stanislav Gaisin in the December 2007 issue of the magazine “Fishing in Rus'.”
Let's start with the basics. Let's try to make the simplest (but very functional!) fishing rod. So…
Model 1
The process of creating a “glitter” itself does not take too much time: one or two evenings and it’s done. The materials you will need are small pieces of hard foam or cork (champagne corks are quite suitable), epoxy resin and hardener (Poxipol is very good), nipple rubber and, of course, a graphite or fiberglass whip. I used the upper legs of the “telescopes” as the starting material for the whip. In this case, both solid whips (for example, the upper knee from the old Volzhanka) and hollow ones are suitable.
First of all, we decide for ourselves what thickness (diameter) the tip of our future fishing rod should be, since it is from this that we will dance. From my own experience, I will say that for perch and small (up to 1 kg) pike, a sufficient diameter is 2-2.5 mm. For larger fish, as well as pike perch, it is advisable to include fishing rods with a tip diameter of 3.5-4 mm in your arsenal. An “ultralight” option with a tip thickness of 1-1.5 mm is also possible and even very interesting to work with. But this is exclusively for the finest tackle and “Lilliputian” spinners.
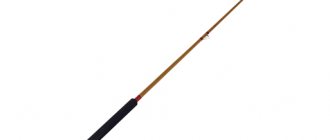
We carefully saw off the excess top with a file, and then smooth the end of the cut using fine sandpaper. Next, you need to perform a similar operation with the butt part of the whip. At the same time, I don’t advise you to get too carried away with the excessive length of the fishing rod, although here everyone decides for themselves according to their habits. My “spinners” have a length from 25 to 40 cm.
We prepare a handle from cork or foam plastic, which can be quite variable in shape and length. So, my first samples had only a cork cylinder as a handle, no more than 4 cm long and 1.5 cm in diameter. The handle blank is drilled through and placed on the butt part of the whip, previously coated with epoxy glue.
To wind the fishing line, you can use the simplest reel of two plastic brackets for fastening electrical wiring. Staples with a bend curvature of 6-8 mm are suitable. Since the whip has a certain taper along its length, I advise you to drill out the hole in the bracket to approximately half its length before attaching the hook of the shackle to the whip of the fishing rod. This is done, naturally, on the side of the bracket that will face the butt of the fishing rod. The staples are pressed onto the whip without the use of any glue. It is important not to overdo it here, so that the too tightly seated bracket does not burst in the cold.
That's all! As you can see, writing takes longer than doing. All that remains is to reel in the fishing line, put a piece of nipple on the tip as a nod, tie on the famous balancer and... go into battle!
We looked at the easiest model to manufacture and the extremely sensitive “sparkler” model - the basic version, so to speak. And now a few variations on the same theme.
Model 2
From my point of view, Model 1, for all its advantages, still has a drawback, namely the too simple shape of the reel, which allows you to change the length of the working part of the fishing line only with a fairly large step (it is equal to the distance between the hooks of the reel). In addition, the fishing line that dries out after fishing injures these same hooks, gradually unbending and tightening them towards each other, so that at the end of the season the reel may need repairs. A small thing, but unpleasant.
These observations led to the birth of Model 2, or more precisely, to a whole series of “spinners”, a little more labor-intensive to manufacture, but without the disadvantages of Model 1. The main difference is the length and shape of the handle. For variations of Model 2, the foam handle up to 10 cm long has its own small (3-4 cm) reel, which serves for precise adjustment of the line release. The appearance of these “sparklers” is presented in photos 1 and 2 , so it is unlikely that any additional description is required.
To be fair, I note that in terms of sensitivity and “vocality” this model is somewhat inferior to the previous one. A longer handle slightly dampens the pokes and blows of the perch on the bait, but this small value can be neglected. At least, I completed my research in the field of “spinners” with blind equipment after creating Model 2 and switched to reel options. Thus the Model 3 was born.
Model 3
Fishing rods and reels certainly provide some added comfort when fishing. However, all of them (despite reputable manufacturers) are, as a rule, poorly balanced and are neither sensitive nor light. During periods of active fish biting, you don’t pay attention to this, because the same perch during the feast is not too picky about the movements of the spoon, but with the capricious behavior of a predator, a more careful game is always required, which can only be achieved with a sensitive and balanced fishing rod.
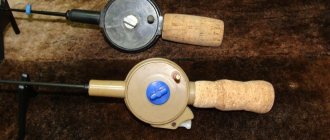
A simple technique of moving the reel itself from its traditional place (in front of the fingers) to the very butt of the fishing rod helped me find an acceptable balance for the “spinners” with the reel. Thus, the reel gets inside the palm, which significantly increases the sensitivity of the gear as a whole and allows, if necessary, to perform a variety of bait playing techniques. In this case, it is advisable to choose the size of the coil that is convenient for gripping by hand. It is better to abandon models with metal parts; firstly, they are heavier than plastic ones, and secondly, they are very cold on the hand. In the manufacture of Model 3, closed-type reels from old balalaika jigs were used, but lightweight open versions can be used just as successfully.
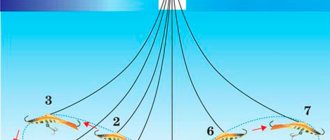
To ensure an even load on the spinner whip, I advise you to make the simplest passage rings from short (1-2 mm) sections of insulation of two-core wires (photo 3) . The rings are simply put on the whip and hold quite securely. The tulip is also made from the same material. Photo 4 shows a version of the tulip, which can be equipped with a nipple nod. The tackle turns out to be quite light, sensitive and easy to use.
Recently, however, I completely abandoned the nod as such, installing the smallest and lightest tulip that I could find on the top of the whip (photo 5) . Just like the rings, the tulip is installed without glue, simply tightly fixed with a piece of thick-walled cambric. When switching to the no-pin version of the fishing rod, I must admit, I was internally preparing for some kind of negativity, but no problems arose. The sensitivity of the gear remained high. Bites “on tap”, “on pressure”, and “on toss” were clearly recorded by the tip of the “spinner”.
As you can see, there is a clear parallel with the feeder. There was even an idea to use ready-made feeder tips, but it turned out that they were not very suitable, based on two parameters: firstly, the price, which clearly does not fit the “people's brand”, and, secondly, the abundance (albeit small) rings noticeably load the whip itself, gives parasitic vibrations when swinging, etc., etc. In general, it's not worth it...
The final result is recorded in photos 6 and 7 .
Model 4
The fundamental difference between Model 4 and all previous ones is the use of a hollow whip with a line inside (a kind of “InterLine”). Looking ahead, I will say that this “sparkler” is the most combative, and therefore the most successful.
There is nothing superfluous here, only a whip and a reel, rigidly connected into one whole. The fishing line running inside ensures an even load on the whip, does not sag anywhere, and does not cling to anything, both during transportation and during work. At first, of course, there were fears that the line would rub against the edge of the tip at the exit point or, conversely, split it. But over two seasons of active fishing, this did not happen, and the line held, and the tip was not sawed through. Maybe a piece of nipple, put on the tip as a safety band and a nod at the same time, helped (photo . For perch and grass pike, this turned out to be quite enough.
However, for targeted hunting for pike and, especially, pike perch, a more powerful version of the tackle was made with a tip diameter of about 4 mm, reinforced with a bandage made of winding nylon threads with epoxy glue.
What about the Finns?
The new “sparklers” showed remarkable results. Their sensitivity, light weight, and the ability to perform a wide variety of playing techniques - both with a spinner and with a balance beam - were positively assessed by all my acquaintances, lure anglers, to whom I gave my models for testing.
Unexpectedly, such a positive factor as ease of transportation was added. A one and a half liter plastic mineral water bottle can easily accommodate four fishing rods (more if necessary), and this unique tube lives perfectly in a backpack pocket (photo 9) .
It would seem that’s it! “Dolphins” and “charismaxes” are resting, their time is up! But no, they are not resting, and although their hegemony (at least in my winter arsenal) is over, there remains a vast ecological niche for them.
Graceful asthenic “spinners” are certainly good and convenient, but mainly in shallow water. Starting from about a depth of 5 meters, you want the diameter of the coil to be at least 70, or even 90 mm. Otherwise, you’ll get tired of winding the line. Well, the sensitivity is no longer the same, the long monofilament makes adjustments. In principle, you can switch to braided wire, but it has its own tricks (especially in cold weather). In short, all the advantages of the “sparkles” are leveled out, and the “Finns” are back in business, they rule again.
From general considerations, it is clear that elegant fishing rods are unlikely to be suitable for great depths, strong currents and heavy spoons - the requirements there are different. Well, so what? In spinning, for example, the concepts of “heavy”, “medium”, “light”, etc. have long taken root, but what are the concepts - a whole classification has been built! Any boy spinner easily juggles this, defending his right to a harmonious tackle.
Fine! Therefore, we will assume that I have presented to your consideration a line of “light” class “spinners”, and we’ll talk about “medium” and “heavy” some other time. The development is not completed, and testing continues!
Alexey Ulyanov, Moscow
Photo by the author
Autocutter
Postavushki and girders are not fishing rods. There are anglers who, as a matter of principle, do not use devices for passive fishing. However, even such fishermen, during a good bite, sometimes want to use an automatic mechanical means to take a break. But a fishing rod without a special device will not hook the fish itself.
A simple design for auto-cutting is shown in the drawing and consists of:
- Rectangular platform 10x20 cm for attaching a winter fishing rod of any shape. A simple option is to fasten the fishing rod handle to the platform with plastic ties and clamps.
- On the back side of the platform in the middle, nails are driven in and bent to form brackets for the pipe and for the springs.
- A frame permanently fixed to the base with a top crossbar made of a tube.
- Two springs with rings.
Operating principle:
The fishing rod is placed on the platform and secured with ties. Put the springs on the hooks in rings
It is important that the platform is horizontal. When a bite occurs, the platform tilts, the ring of the first spring flies off the hook, the edge of the platform rises sharply along with the fishing rod, and the fish is caught
With an open reel for trolling, jig fishing, float fishing
In a real balalaika, the inertial reel with a stopper is recessed into the round handle of the fishing rod. Making such a coil yourself at home is problematic.
You can glue a used line spool to the handle of your fishing rod, but then you will have to wind the line onto the spool by hand.
You can use a purchased inertial coil, but the manufacturing process will be much more complicated - you will have to cut a round hole in a round handle, and come up with a reliable way to attach the coil inside the handle hole.
It is much easier to use an inexpensive purchased inertial reel (from 30 rubles) and attach it to the fishing rod handle with insulation, or by drilling two holes in the reel holder, secure it with screws on the handle.
With wooden handle and open inertia reel
- A 20-22 cm long section is sawn off from the wooden handle of an old, unnecessary mop.
- Cork chips are mixed with waterproof glue and gradually, layer by layer, applied to the handle at the place where the hand grips (10-12 cm). You can create a convenient handle shape according to the angler’s request.
- After the glue has dried, sand the handle with fine sandpaper (you can coat the handle with yacht varnish).
- In the center of the wooden handle, on the side where the whip is attached, a longitudinal hole is drilled to a depth of 6-8 cm with a diameter equal to the diameter of the thick end of the whip.
- The resulting hole is gradually filled with epoxy resin.
- Insert a whip from an unnecessary telescopic fishing rod 40-70 cm long. Carefully center the whip in place.
- Carefully remove the protruding resin.
- After the resin has hardened, sand the place where the whip is fixed in the handle with fine sandpaper to remove irregularities and resin build-ups.
- A purchased inertial reel with a brake is screwed to the handle.
Expert opinion Nikolay Mikhailovich Knipovich Zoologist, hydrobiologist
I am interested in fishing at a professional level.
Attention! There are inertial reels with and without a holder, with a hole in the center for attaching the reel with a screw. It is better to purchase a cheaper option with a central hole
To install such a reel on the handle, you will need one screw of a certain length for secure fastening.
This fishing rod can be used with a nod for jig fishing. It can also be used for float fishing and trolling. In these cases the nod is not used.
Pistol
A winter fishing rod with a pistol-shaped handle is used for trolling in currents and in still water. Since the structure is subjected to heavy loads when attacked by predatory fish, its handle can be made of hard material - wood.
- The required pistol-shaped handle shape is cut from a block of wood.
- The final rough shape of the handle and line holder is planed with a knife.
- The forest storage facility is located on top of the pistol and has a random appearance. The main thing is that the fishing line is convenient to wind onto the fishing line.
- The final shape is achieved by sanding the surface with fine sandpaper.
- The handle is treated with stain and covered with deck varnish.
- A hole is drilled in the horizontal arm of the handle for the whip (the whip must be strong and flexible. The tip of a spinning rod with a test of 10–30 is suitable).
- Waterproof glue is applied to the whip at the junction with the handle. The whip is inserted into the hole.
When catching a predator with a fishing rod of this design, the hand experiences less stress when jerking a heavy fish. Often winter fishing rods for trolling are equipped with a hand loop made of strong rope so that the pike does not tear out the light rod. For a pistol, there is no need for a rope loop.
How to assemble tackle
For spinners
Installation of a fishing rod for winter lure fishing is carried out as follows:
- A fishing rod, if it consists of several elements, is assembled into one structure.
- Wind the line onto the reel or spool of the reel.
- Pass the end of the fishing line into the “tulip” at the end of the whip or into the cambric put on this end, or into the nod hole.
- Attach the clasp.
- Attach bait. The glitter is ready.
For jig fishing
With nozzle
- A fishing rod is assembled from individual elements.
- Wind the line onto the spool of the reel.
- Place a nod on the tip of the fishing rod.
- Pass the end of the fishing line through the holes in the nod.
- They tie a jig.
Nozzle jig
Everything happens exactly the same as in the previous case, but the so-called “balalaika” is used as a fishing rod.
To the balancer
Equipping a fishing rod for a balancer is no different from that for lure fishing, although some anglers who purposefully fish only with balancers prefer to use a softer whip.
Making a fishing rod for winter trolling
To make a homemade fishing rod for winter trolling with your own hands with a reel at home, you will need the following materials:
- solid fine-pored foam;
- ready-made whip with guide rings, either rings separately or cambrics;
- nod, if desired, use it;
- if necessary, superglue, paint and waterproof varnish;
- fishing line;
- clasp.
- hacksaw for metal;
- marker or pencil;
- knife;
- nail;
- file;
- sandpaper.
The process of manufacturing and equipping a fishing rod or “spoon thrower” is as follows:
We apply glue to the tip of the whip and put on the nod so that the outer end surface of its foam sleeve is flush with the end of the whip. Attention! The position of the nod should ensure the alignment of the passage ring and the hole in the nod spring. Apply a couple of drops of glue to the junction of the spring and the cambric at its “rear” end.
My favorite type of winter fishing is trolling perch
on Ladoga, and I use both vertical spoons and balancers. Sometimes homemade, sometimes purchased - all sorts. But I always make fishing rods myself. Why? Yes, because I am not satisfied with the fishing rods that are on sale and widely advertised by persons or organizations interested in their sale.
The purpose of this article is to introduce the reader to the design principle and technology of manufacturing a fishing rod for vertical trolling at home.
After analyzing all this, you understand why it’s worth working on the ergonomics of your fishing rod.
In addition, this design leads to an unjustified increase in the length of the fishing rod. A rather long handle spaced apart from the reel is a “parasitic” length. In order to keep the overall length of the product within reasonable limits, manufacturers are forced to sacrifice the length of the working part of the fishing rod - the whip, which does not improve the working qualities of the tackle.
Well, the reliability of the fishing rod is not the last thing. After hooking, the fishing rod usually flies onto the ice - the fish is caught by hand (those who describe fishing using a reel, in my opinion, have never been ice fishing), so all its parts must withstand such falls without breaking. Expensive Finnish fishing rods use impact-resistant plastic that does not lose its properties in the cold. But who can vouch for products originally from the Far East? Not all fishing rods are equally Finnish... So.
1. A suitable piece of “hard” foam. 2. Wiring reel with an outer spool diameter of 40 – 60 mm. 3. A whip about 400 mm long, made of fiberglass or vinyl plastic, with a diameter at the butt of no more than 5 mm. 4. Spring nod, like those used by smelt fishermen. 5. Epoxy glue. 6. A ring for passing the fishing line and attaching the spinner (not a “tulip”!).
Tips for fisherman: Which spoon is better for catching pike - Features of choice
Well, the whip determines the dimensions of the fishing rod, which should fit in your fishing box.
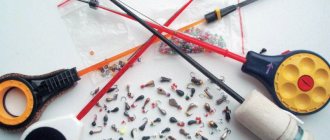
1. Stationery knife. 2. Drill. 3. Set of drills. 4. Pliers. 5. Files, needle files. 6. The skin is rough and thinner. 7. Metal scissors. 8. A container for diluting glue. 9. Pencil, ruler, compass.
We begin the manufacturing process by processing a piece of foam plastic so that its thickness is 2–3 mm greater than the size of the spool along the axis (excluding the handles, that is, from the back to the top surface of the spool).
Then we mark the contours of the handle of the future fishing rod on the plane of the foam block, mark the position of the reel axis, the contours of the spool with an allowance of 1 mm. Then inside the resulting circle we draw another one, its diameter is 16 - 20 mm less than the diameter of the spool.
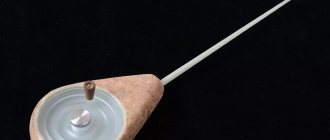
Using a stationery knife and sandpaper, we process the socket for the reel in the future handle, we make the shape of the socket as in photo 2. The height (along the axis of the reel) of the ledge at the bottom of the socket is 2-3 mm, this is exactly the thickness reserve that we left when processing foam thickness.
The hole for the fishing line is burned with a thick needle so that it runs approximately parallel to the hole for the whip and approximately tangential to the surface of the spool drum. The more accurately these conditions are met, the less resistance from friction of the fishing line against the edges of the hole will be and the easier and faster the spoon or balancer will go into the water.
But it’s better not to burn the hole for the whip, but to drill it. Let's select a drill with a diameter 0.2...0.3 mm smaller than the diameter of the whip in the butt and carefully drill the handle to the maximum possible depth, but so as not to get the drill into the reel socket. Hint: it is better to set the drill speed to moderate, because if the speed is too high, due to friction, the drilling zone heats up quite strongly, and the foam begins to melt, and this leads to an undesirable increase in the diameter of the hole.
As a blank for my nods, I take a nod that is used by smelt fishermen (photo 8). It has a fairly stiff spring, although a little long for my purposes. The remaining components of the purchased nod also need improvement.
I shorten the spring, choosing its length so that it bends approximately 30 degrees under the weight of the lightest bait I use.
We dilute epoxy glue. We try not to dilute it too much; at this stage we will need about two cubic centimeters of glue. When preparing small portions of glue, it is easy to make a mistake in the amount of hardener, so be careful! At room temperature, epoxy glue retains its working viscosity for an hour or even longer, so you can work carefully without rushing.
We apply glue to the tip of the whip and put on the nod so that the outer end surface of its foam sleeve is flush with the end of the whip. Attention! The position of the nod should ensure the alignment of the passage ring and the hole in the nod spring. Apply a couple of drops of glue to the junction of the spring and the cambric at its “rear” end.
Fill the hole for the whip in the handle with glue. We insert the whip into it, and at the same time orient it so as to ensure the concentricity of the hole in the handle for the fishing line with a passage ring and a nod. Carefully remove the glue squeezed out of the hole with a paper or cloth napkin. But don’t overdo it - the remaining glue should ensure a smooth transition from the handle to the whip. Remember: a sharp transition is a stress concentrator; it is in this place that breakdowns are possible in the future.
We coat the thread bandage that secures the pass ring to the whip with glue.
We place the fishing rod vertically to allow the glue to dry, but we keep this process under control: the glue is fluid, so you need to promptly remove any glue smudges with napkins and add glue where, in your opinion, there is not enough of it left.
While the fishing rod is drying, we disassemble the reel, place the spool on a horizontal surface and apply glue to the joints of the reel handles with the upper surface of the spool (photo 11). We try to form cones that will strengthen the reel handles at their base. In general, it is more convenient to perform this operation when the viscosity of the glue increases slightly, approximately half an hour after diluting the glue.
The technique of vertical trolling usually does not cause difficulties for novice anglers. First you need to measure the depth, then lower the bait to the bottom, sharply (within reason) tear it off the ground and throw it about half a meter up. The spoon should fall back to the bottom freely. A few seconds of pause - and the bait is thrown up again. This is a classic technique.
Features of fishing with a rod in winter
In winter, as in any other period, fishing has its own peculiarities. It is worth noting the most important:
- Fishing gear used in small parameters. All types of fishing rods measure about 30 cm or slightly more. They are convenient to transport, as they fit perfectly into a special box, which, among other things, contains sets of jigs, spinners, hooks, fishing line, and so on.
- For winter fishing you need a drill to create holes.
- The fisherman should always have a rope-type rope with him. This is necessary in case the ice turns out to be thin and falls through. It will be easier to save a person with a rope. Therefore, it is worth remembering that if the drilled ice is less than 10 cm thick, then it is better to find a place with thicker ice. It is also possible, for safety reasons, not to separate from the main mass of fishermen, so as to always be able to ask for help.
- Another feature of winter fishing that can be highlighted is that you can get to any part of the reservoir on ice, and this is sometimes extremely difficult to do in the summer, even with the help of a boat.