The spinning tackle must be correctly selected to solve specific problems, in other words, it must be harmonious and balanced. When choosing the model of reel, spinning rod, model and diameter of the fishing line (braided cord), many fishermen do not attach importance to the correct winding of the fishing line on the reel. This guide will discuss the nuances of winding fishing line, which will allow you to avoid unpleasant moments while fishing and disappointments from the gear (dropping loops, “beard”, casting range, shooting). You will also find here step-by-step instructions for winding, setting up the reel and a diagram of the nodes for tying the fishing line to the spool.
Many aspects have been discussed, so it wouldn’t hurt to share the outline of the article:
Using Backing
Backing is a layer of something wound under the main line to increase the diameter of the spool so as not to wrap kilograms of line on it.
The multitude of line diameters and different unwinding volumes on the market do not allow us to produce reels with a spool capacity for each type of line used. If the volume of the purchased fishing line is less than the capacity of the spool, then use rewinding under the main fishing line - backing. For backing, it is best to use an old braided cord (braid) or nylon thread, however, many people prefer just electrical tape. The volume of backing can be determined “by eye” with a margin, but in this case there is a high probability of “extra” volume of the main expensive braided cord appearing. It is preferable to add backing to the wound main line to the required level and then rewind it back. To connect the backing and the main line, you can use the following knots: “blood ties”, “grinner”, “Peter Minenko knot”, “shok leader knot”. It is necessary to wind the backing onto the spool very tightly (with force) in order to avoid the main line falling between the turns of the backing.
How to increase your fish catch?
Over 7 years of active fishing, I have found dozens of ways to improve the bite. Here are the most effective ones:
- Bite activator . This pheromone additive attracts fish most strongly in cold and warm water. Discussion of the bite activator “Hungry Fish”.
- Increased gear sensitivity. Read the appropriate manuals for your specific type of gear.
- Pheromone -based lures .
Becking
Most often, when winding the fishing line, a large distance remains to the edge of the spool side, so backing (winding under the main fishing line) is needed in order to completely fill the reel spool. It is made from thicker fishing line or nylon cord.
Some people use regular electrical tape, but in hot weather it has a negative property - the adhesive layer begins to seep through the coils and blinds the fishing line. After the dive cord was damaged, I abandoned this method.
Backing is calculated experimentally - we wound the main line on an additional spool, tied a nylon thread and wound it almost to the edge. Next, remove the spool, install the main one and wind everything in the reverse order. So we will have the winding from below, and the main line will lie under the side of the spool.
Tying the fishing line to the spool
Let's find out how to tie the fishing line to the spool.
The first rule is that tying the fishing line or backing to the spool is mandatory . You don’t know what kind of trophy you will come across, and it will be a shame if during the process of fishing the entire main line and backing unwinds, and there is no last line to hold the fish.
The fishing line can be tied with various knots: “arbor knot”, “self-tightening double loop”, “clinch”. On the first turn of fishing line or backing on the spool, you must additionally glue a piece of electrical tape or adhesive tape in the direction of winding. This will prevent the line from spinning on the spool, both during winding and when landing fish.
How such knots are tied in practice can be seen in the video:
How to spool fishing line correctly
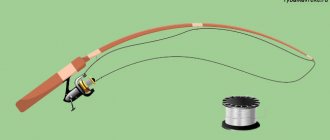
- You need to install a reel on the first leg of the spinning rod and remove the spool. The main line must be threaded through the spinning ring and tied to the spool. Don’t forget to open the line handle before installing the spool on the reel. The line must pass through the line roller. If you have a spare spool, then it is better to carry out this action with it when determining the volume of backing and the initial winding profile.
- The fishing line spool has a central hole, so it can easily be attached to a pencil or pen. To avoid twisting, the line should come off the bobbin as it unwinds, and not come off in coils when the bobbin is stationary. We ask a partner (children are the best helpers) to hold the spool of fishing line on a pencil. If there is no partner, you will have to adapt by holding a pencil with a spool between your knees. You can use special devices for unwinding fishing line from reels. They can also regulate the force of winding the fishing line onto the spool.
- Using one hand through a rag or wearing gloves, so as not to cut yourself or burn yourself on the fishing line, we clamp the fishing line above the first ring. With this hand you can regulate the force of winding the fishing line onto the spool (as tightly as possible, but without fanaticism). With the other hand, we begin to turn the reel handle at low speed.
- The volume of the fishing line being wound should be such that the fishing line does not reach the edge of the spool collar by 1-3 mm. If the volume of the fishing line is not enough, then we tie the backing to the fishing line and continue to wind it to the required volume. Winding the fishing line to the edges of the bead is fraught with loops coming off and “beard”.
- After winding the line and backing to the required level, it is necessary to rewind the line from the spare spool to the main one. If the line winding profile is unsatisfactory, you can adjust it by removing or adding the necessary adjusting washers. If there is no spare spool, then for the final winding of the fishing line you will have to rewind the fishing line either to another reel, or first to one reel, then from it to the second reel. This is necessary to turn the line over. For these purposes, you can use a drill by attaching bobbins to the spindle.
- After the final winding of the fishing line onto the spool, we attach the edge of the fishing line to the clip, which is located on the side of the spool.
Next is a video from a spinning fisherman, which describes and shows the process of winding fishing line onto a spinning reel.
Compliance with simple principles: the use of backing, the correct force, profile and volume of winding will allow you to obtain optimal use of the gear and ensure working with it at a high level of efficiency.
A group of fishermen revealed the name of the secret bait during interrogation.
Winding line onto an inertial fly fishing reel
According to the class used, the inertial action must be suitable for the fishing rod and cord. Unlike other types of reels, it does not take part in casting and retrieving equipment. A drum with a large diameter is preferable so that the scaffolding remembers the laying rings as little as possible.
Why do they use backing?
A trophy specimen of fish caught on a hook, and even if it has a fighting character, is capable of selecting a couple of hundred meters of forest. In other words, this is a kind of stock, which is tied at one end to the drum, and at the other to the cord. Therefore, before you properly wind the fishing line onto the inertial reel, you need to take care of the backing.
It consists of synthetic fibers and is placed on a spool of tens to hundreds of meters, which we wrote about in the article “Classes of fly fishing reels depending on the rods.” By the way, due to backing, the internal diameter of the drum is increased in order to bring the turns of the cord closer to the sides of the spool.
Fly fishing leaders and leashes
The selection of leashes and leaders plays a significant role in fly fishing equipment. It must be remembered that the undergrowth, which is considered the end, must be conical to ensure soft gliding of the fly into the pond. Moreover, they must be not only small in cross-section, but practically invisible.
The installation scheme for the equipment is simple: the thickened half of the cone-shaped undergrowth is tied to the cord, and then a leash. The undergrowth should be almost equal to the fishing rod, its length should be slightly less. Roughly speaking, the undergrowth for a one-handed blank is three meters.
It's easy to make undergrowth at home. Take a regular monofilament with a cross section of 0.16 mm, glue, and mounting thread. The timber is cut four meters long and folded in half to find the middle. Then, starting from the middle, it is twisted. When you finally get a braid, measure 60 cm from the loop and continue twisting. When finished, the end of the line is threaded into a loop and a knot is tied.
Next, a thickened part of three meters in length is made. It folds four times and then spins. Next it is connected to the part that was completed earlier. The thickening is coated with superglue and stitched with thread.
Now how to properly tie the fishing line to the inertial reel and wind it. Winding the line onto the reel drum is done manually, and it is necessary to ensure that the turns are laid in a cross pattern. To do this, we mount the reel on the rod, pull the line through the ring and tie it on the spool with a self-tightening knot. We lay the line with tension. To avoid cutting your fingers, you can use a wine cork by making a slit in it to the middle.
www.udim.ru
How to wind fishing line on a spinning reel
First, for convenience, you should put the reel with fishing line on some fixed object (for example, a pencil) so that it can rotate easily.
Next, we pass the fishing line through the rings of the rod and tie a knot at the tip. The next step is to secure the fishing line to the spool. To do this, lift the line handle and stretch the line around the spool. Then we tie a special Arbor knot, tighten it securely and lower the bow. If braid is used, you need to stick an adhesive plaster on the attachment point or put on a piece of rubber from a regular fingertip. After this, we begin to wind the line onto the spool by gradually rotating the reel handle.
When winding, the fishing line must be taut, so it must be carefully held. To avoid cuts, it is better to wear a mitten or use a piece of fabric.
You should not wind the line along the sides of the spool, as this may later cause the formation of a “beard”. The optimal distance of the wound fishing line from the edge of the sides is 1-2 mm.
Too much free space between the line and the sides (from 5 mm) can negatively affect the casting distance. To avoid such an unpleasant incident, fishermen use backing - reeling under the main line.
If you want to understand the topic of spinning reels in more detail, we recommend our review of spinning reels.
Winding line onto the spool
Different reels place the turns on the spool differently. There are three main windings:
- flat (cylindrical);
- with a slope (trapezoid);
- chaotic.
The first and second windings are inherent in good coils; the turns in them lie evenly, one to one. The third is a sign of a cheap Chinese reel, which will create a lot of problems for you, not to mention the pleasure of fishing. It is better to refuse them immediately.
Always wind the line onto the spool with a load (you can hold it with your hand, after putting on a mitten to avoid injury), leaving 1-2 mm to the edge. A larger quantity will lead to spontaneous release of loops and “beards”, and a smaller quantity will affect the casting distance.
Backing on a spinning reel
For backing you need a fishing line with a diameter of up to 0.3 mm. Winding thicker backing line may cause uneven winding of the main line. Nylon thread is also not the best option for backing, since if it gets wet it will take quite a long time to dry.
The volume of the backing line is calculated during a peculiar procedure using an additional spool. The process itself is not at all complicated: first we wind the main line onto the second spool, and then the backing, leaving 1-2 mm of distance to the sides.
Then the main spool is installed on the reel and the reverse process of winding from the additional spool is carried out. Naturally, the backing will be wound first, followed by the main part of the fishing line. If there is no additional spool, you will need to wind the entire line twice on another reel or bobbin, which is less convenient.
Spool winding
There are several types of bobbin winding:
- flat or cylindrical;
- chaotic;
- trapezoidal or sloped
The winding on the spool will determine its tangling and durability, as well as casting distance. The position of the turns on the spool depends on the type of reel.
The first two windings are used in good quality coils.
The coils lie evenly in them. Chaotic winding occurs in low quality coils.
Their use is not recommended as they can cause many problems during fishing. When winding on the spool, it is necessary to use a load, and 1 - 2 mm must be left to the edge. The more loops there are, the further you can cast.
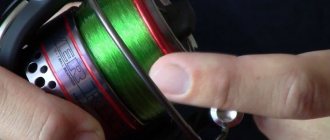
How to wind braid onto a spool?
It is necessary to secure the end of the braid when winding, or install a rubber gasket under it. This is the main difference between winding braid and fishing line. If you wind the braid directly without fixing, then there is a high probability of it twisting around its axis. The rest happens the same as when winding the fishing line.
How to wind fishing line or cord on a reel: practical tips for beginners
Just now, while fishing, an interesting incident arose: I was catching a predator with a spinning rod on the river. There are bites on almost every cast, and perch and pike perch delight with their activity. However, the neighboring fisherman is completely calm. I decided to take a closer look and understand why this situation is happening. At first I thought it was a matter of bait or a bad presentation. In reality, it turned out that everything is much simpler...
No matter how hard the neighbor tried to reach the fish, he couldn’t. Although, the weights used were approximately the same, and there were no obvious errors in the technique itself. So the reason is obvious - the braided cord is wound incorrectly. In general, I started a conversation with him, looked at the reel and was convinced that my theory was correct: the distance between the whip and the upper edge of the spool is gigantic. In addition, everything was full of bumps and hollows. It was then that I had this idea, to collect material and write a short article on this topic, addressed to beginners. I myself am, in fact, a novice fisherman, but curious!
How to properly wind fishing line or cord on a spinning reel
Before you get ready to wind fishing line or braided cord onto a reel, you need to decide what type of laying you need. This choice determines such parameters as: the probability of loops being dropped (the cause of the “beard”) and the maximum possible casting distance. It just so happens that there are only three types, so I suggest you pay attention to each one.
Laying the cord in a “reverse cone”.
They say that this method of laying has recently been considered the most common among experienced spinning players. Whether this is true or not, we will see in the reservoirs, but this form of styling should be given its due, the likelihood of a beard actually decreasing. And we will have to pay for such luxury in terms of casting range. If the reel is not cheap, then thanks to the high-quality polished spool and other technologies that the reel is stuffed with, the fee will not be so high.
This effect is achieved by reducing the winding pitch to the side of the spool. Pay attention to the photo. You've probably seen this form before.
Laying the cord in a “simple cone”
In the previous case, we reduced the likelihood of a beard and sacrificed casting distance. And now we will do everything exactly the opposite. With this installation, when the winding pitch increases from the top edge of the spool to the base, our cast in theory can be further by 15%; of course, these are approximate calculations. And, perhaps, it is possible to comfortably use such an advantage only in the case of ideal winding, and when other requirements are met that minimize the possibility of loops being reset.
“Cylindrical” cord laying
When purchasing a new reel from the factory, most likely it will be configured specifically for a cylindrical shape, i.e. straight, with a uniform step from the top edge of the spool to its base. Perhaps this is an excellent compromise between casting range and the ability to “catch a beard”. I don’t know why many people write that the “reverse cone” is considered the most popular. It seems to me that “cylinder” should occupy the top line of the chart.
Winding braided cord onto a spinning reel for casting
I will describe how to correctly lay a braided line when winding it on the spool of your casting reel, in relation to fishing for lakedra. To avoid confusion, I’ll explain what “laying” and “winding” are. By “laying” we mean a figure formed by a braided cord wound on a spool. There are three such figures - “straight cone”, “reverse cone” and “cylinder”. The shape of the laying depends on the shape of the spool, its position on the reel rod, the design of the spool oscillation mechanism itself, as well as the technical condition of your reel. By “winding” we mean the placement of turns on the spool. It also depends on the design of the spool oscillation mechanism relative to the rotor, the geometry of the line guide bow and the position of the spool on the rod relative to the line guide roller. The casting distance depends on the placement of the braided cord, and the formation of loops on the cord when casting depends on the winding of the braided cord on the spool.
All spinning reels use one winding method - layer-by-layer winding from wall to wall of the spool. In relation to marine casting reels, the winding pitch (the distance between adjacent turns) is constant in the middle of the spool, variable along the edges (when winding with a cylinder). The larger the winding pitch, the less likely the formation of so-called wind knots, but also the less braided cord is placed per unit length of the spool. Therefore, winding with a large pitch looks “loose” in appearance.
The design of the reel provides that we can change both the winding pitch and the method of laying the braided cord on the spool within certain limits.
Straight Taper: A variable-pitch layup in which the winding pitch decreases away from the wall of the spool (which is closer to the fisherman). As a result, the closer to the spool wall closest to the fisherman, the more braided cord is wound and the laying takes the shape of a cone of a friction clutch tapering towards the nut (the spool wall is closer to the tip of the spinning rod). This arrangement provides the least friction when the turns come off, since each turn farthest from the edge of the spool next to the clutch nut has a larger diameter than each turn closest to the edge of the spool with the clutch nut, and therefore the friction of the far turn on the near one when coming off is minimal.
In addition, most of the turns come off at an angle to the edge of the spool near the drag nut close to 90*, which ensures minimal friction on the edge of the spool. As a result, the casting distance compared to the “cylinder” increases up to 15%, depending on the taper, the thickness of the braided cord, wind and the weight of the bait being cast. On the other hand, the ease of the braided cord coming off, together with the small winding pitch, increases the likelihood of shedding turns laid closer to the spool wall (which is closer to the fisherman), and the formation of so-called wind knots on the braided cord . The winding height near the wall should be at least 2 mm below the side, and when using a long, thick nylon shock leader, more than 2 mm. The “straight cone” laying is best used for casting relatively small and light sticks (30-50 grams) over a long distance.
How to change the type of fishing line or cord
Actually, now we know how the types of styling differ from each other, their advantages and disadvantages, and we can choose the option that is more suitable. That is, to focus on casting distance or reduce the likelihood of “catching a beard,” or even settle on the golden mean.
To obtain one or another type of installation, it is enough to add or remove an adjusting washer (sometimes even several) from the rod. Usually a set comes with 3 to 5 of these things. To understand how your coil is initially configured, you need to make the first winding.
Surely your reel comes with some kind of instruction, in which everything is clearly drawn. And, of course, it is unlikely that you will be able to achieve the desired result the first time. Because each reel is unique, you will have to experiment with the number of shims, rewinding the braided line 5 times until you come to your ideal.
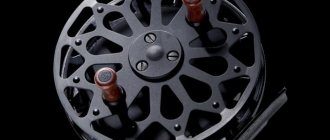
Inertia coils
Inertial coils
Now let's focus on such coils as inertial coils (Fig. 25-29). It would seem that inertial coils are a relic of the past, and, in general, they are so outdated that there is no need to remember them.
In reality this is not entirely true. At a time when it comes to fishing with heavy jig baits, it is quite difficult to argue with an inertial reel, due to the fact that, in addition, when compared with a multiplier, it is quite simple. Otherwise speaking, it is made so easily that there is nothing to break there. Having dropped an inertial coil into the sand, it can be immediately disassembled, untwisted, washed with water, lubricated with lubricant, and it will work without any trouble.
Rice. 25-29 disadvantages and what advantages does an inertial coil have? The advantage is reliability and simplicity of design. It is difficult to break or disable it. It is possible to bend the drum (it is made of aluminum), but it is possible to bend it back and it will continue to work.
Rice. 25-30 The main disadvantage of an inertial reel is that it has a low rewinding speed. For example, the coil in Fig. 25-30 reels out 31 cm of fishing line in one turn. The “Neva” reel, for example, reels out 33 cm of fishing line. The coil in Fig. 25-31 has an enlarged drum, and due to this drum it reels out 40 cm of fishing line. But, unfortunately, it also has more weight. When switching from a snare drum to a larger one, just as you win in reeling speed, you must therefore win in casting range. In reality, everything is not so easy, due to the fact that the inertial drum is heavier, and you need to get used to it. But in general, it goes without saying that the inertial coil is a very ergonomic thing.
Rice. 25-31 Russian champion Viktor Golubev fishes only with inertial reels placed on bearings, using a jig, and he fishes superbly. And the fact that he became the champion of Russia in spinning shows that inertial reels are not forgotten and outdated things that should be forgotten. It goes without saying that the inertial coil looks a little strange. For example, on a carbon fiber spinning rod, on a rod designed for fishing with a multiplier reel, the so-called rod with a trigger, there is a finger trigger. But, however, the reel is very good if it is brought to mind and placed on bearings.
In addition, in order to place the reel on bearings, Ukrainians use the following trick: the reel rotates on cones. Such a reel, on cones and bearings, allows you to cast up to 100 meters. Let us emphasize that not every spinning reel with perfect casting technique allows you to cast over such a huge distance. Based on this, the inertial coil is not as outdated as we think. It must be stated that the negative attitude towards inertial coils is due to the fact that there are no good inertial coils in the Russian Federation. In St. Petersburg, for example, they are still creating a “Neva” reel, but they do not put bearings on it, so its rotation is not very good. Now take a look at the Ukrainian coils (Fig. 25-31). For these two coils, the rotation unit is made according to the principle of a car's ball joint. There is a special plastic, and the system is very unique, making it easy to fish in the most difficult conditions. Has a very easy drum movement.
Rice. 25-32 Coil in Fig. 25-32 is also Ukrainian, but its drum rotates on bearings. At this point we will unscrew the bolt and it will be seen that the drum rotates on two bearings. Here, you can see the bearing on one side (Fig. 25-32). At this point we will remove the drum and it will be seen that there is also a bearing otherwise (Fig. 25-33). Such a reel is much preferable to a reel without bearings, due to the fact that it has an easier movement, a better system.
Rice. 25-33 But it must be stated that the bearing system is also not ideal, due to the fact that if water, grains of sand or anything else gets into the bearing, then this system fails. The reel stops rotating, and in order to bring it back to its normal state, it is necessary to either replace the bearing, or thoroughly rinse the bearing and apply thick or liquid lubricant in that direction. For long casting we recommend using liquid lubricant.
Rice. 25-34 The coil shown in Fig. 25-34, made on a base similar to the ball base of a car. Its body is more insulated from water and from the ingress of any grains of sand. To remove the drum, you need to unscrew the nut; there is a rather complex system of plastic bushings, which are well insulated. Such a reel, for all its simplicity, is also not very far behind a reel that rotates on bearings in terms of ease of movement. Today, for the most part, all manufacturers are developing a drum made of aluminum. We were, for example, in Ukraine, walked through the fishing market, and noticed something beautiful there. The reel is made entirely of titanium alloy.
The movement is effortlessly amazing. You pick up such a reel in your hands, and you just don’t want to put it on the counter. The price, of course, is also not childish - about 80-100 dollars for this reel, but it is worth it. Based on this, it is incorrect to assume that there are no good inertial coils today. In fact, they are available, look for them. Ukrainians actively use inertial reels even now, despite the fact that it is possible to buy both an inertia-free reel and a multiplier. Many fishermen, especially when fishing with heavy lures, extensively and successfully use simple inertial reels. Such reels are also made with an enlarged drum, which is an undoubted advantage of such a reel, due to the fact that the capabilities of the spinner, when compared with a reel with a standard drum, increase. What specific tricks do inertial reels have?
The inertial coil is considered low-speed. So, with a spinning reel you make one turn and reel out about 70-80 cm of line, but with a reel like this, with a huge drum that reels out 40 cm of line, you have to make two turns in order to reel in the same amount of line as with a standard spinning reel. But there is also a trick here. The handles of this reel are located quite extensively. What if we take away and place two handles ourselves closer to the center, then we will be able to rotate the reel much easier and faster.
The handles must be placed so that they balance each other. But the power of the reel will suffer from this, so we threw it in, and at the time when we need to quickly reel in the fishing line, we use small handles, which we ourselves installed, closer to the axis. And when a fish bites, we jump to the far handles, which allow us to land the fish more efficiently and easily control the fishing. What else is good about an inertial coil? It makes casting very easy. If you have never cast from an inertial reel under any circumstances, then I think it is difficult. But once you get out on the lawn, practice casting, everything will work out.
Rice. 25-35 Inertia reels, in most cases, have a mechanical brake system. This nut (Fig. 25-35) is nothing more than a mechanical brake. But this kind of mechanical brake on inertial reels is used mostly by novice fishermen. Those who have been fishing with an inertial reel for a long time turn it off or remove it completely, and the mechanical brake function is performed with their finger. We cast the reel and see that the line begins to run across. And due to the fact that the drum of this reel is large, the moment the line begins to run is clearly visible. In other words, the line on the drum suddenly begins to swell, we immediately press it with our finger, and everything is fine. Or at the moment of casting it flies, we hear that the bait is pulling the drum, and we ourselves easily slow down with our finger.
If you have mastered the reel cheek finger braking system, you can easily use any bait. The undoubted advantage of an inertial reel with a huge diameter is that when casting, the drum rotates at a lower speed. And the lower the rotation speed of the drum, the harder it is to make a beard. If you are starting to master fishing with an inertial reel, in this case a reel with a large diameter is preferable. In addition, due to the fact that the drum has an increased diameter, there is no need for any systems, as in multiplier reels - centrifugal brakes, magnetic brakes, mechanical brakes. Everything here is easily controlled with your finger.
Due to the huge drum, the speed is not quite high, but the casting range, roughly speaking, is no different from a multiplier reel, and in some cases even exceeds it. When choosing an inertial reel, it is extremely important to know how much line it reels. This is quite easy to find out. It is possible to make one turn of the fishing line, and then use a ruler to count how much fishing line it has wound. There is another method, much simpler - to use a simple formula. 2?R is the length of the circle. This coil has a diameter of 7 cm. – this is 3.14. So, we multiply 3.14 by 2, then by 7, we get 43.9 cm - which means that’s how much line this reel reels out in one revolution. This is very easy to calculate, and based on this, when choosing a reel, you can immediately figure out which reel is right for you.
It goes without saying that a reel that winds more line is preferable due to the fact that it is faster. For example, if with a smaller reel when catching an asp you have to easily twist the handle madly, then with a huge one you can rotate it normally, and the same amount of fishing line will be wound. Multiplier reels have a reverse stopper. As a result, while we are catching fish, the multiplier reel works like a simple winch. In other words, we rotate the reel all the time in one direction, and the role of fishing is mainly taken on by the friction brake. When the fish jerks, he slowly gives up the line. The inertial reel is good because with it we can perfectly feel almost every movement of the fish, due to the fact that the fishing line directly transmits every movement except the fin of the fish, based on this we recommend controlling the fishing using an inertial reel.
In addition, if the fish moves very quickly, and you feel that the line is about to break, it is very easy to pull the line back under load, and then back to yourself. By the way, when jig fishing, when we are fishing in the current and we need to do a retrieve with the recoil of the line, the inertial reel has no competition, because neither the inertialess reel nor the multiplier allow such a smooth recoil of the line in order to reach with an easy head the bottom is in a strong current. And the inertial reel easily allows you to give the line: we made two turns, then we smoothly give the line back, we touched the bottom - again two turns, we give the line back again. It's very comfortable.
Another advantage of the inertial coil is that it is power-driven. We can catch fairly large fish quite easily. Until now, it was believed that an inertial reel must be used with monofilament. The good thing about monofilament is that it has stretchability. And what is its advantage? We are fishing for fish and we see that the line is springing, and then again - and you feel how the line has been stretched to such an extent that it has stopped springing. In other words, it can break under the slightest load. Now we can easily give the line back a little, without retaining hope for any specific friction - this is very comfortable.
If we supply me with braided fishing line, we must take into account that braided fishing line does not have such features. In other words, we must focus on the jerks of the fish and approximately estimate the time when the braid may break. But the braid can break at any second of load, and we will not be able to control the strength and speed of fishing as completely as when using monofilament. Based on this, with braids, not everything is so concrete and simple. But in principle, if we put a braided fishing line on an inertial reel, then the gain in sensitivity is quite remarkable. When using an inertial reel, the casting distance actually does not depend on the diameter of the fishing line. In other words, no matter what kind of fishing line we supply to me - 0.3, 0.4, 0.5, or even 0.7, the casting distance will be approximately the same.
It is believed that even when using multiplier reels, the diameter of the fishing line does not affect the casting distance, but in reality this is not true. The reason for the influence is that the multiplier reel has a small drum. And if we use a narrow line, then we cast, and the line is consumed as the bait flies slowly. There is less and less line on the spool, and the less line on the spool, the faster the drum spins. We end up with such a torn casting system, and the centrifugal weights turn on and off. As a result, when the diameter of the drum decreases significantly, the casting range immediately begins to decrease. The inertial coil does not have it.
In addition, if the winding diameter on the reel drum is significantly reduced, this does not have such a significant effect as on a multiplier, due to the enormous diameter of the drum. Based on this, it is very comfortable to use thick fishing lines. The undoubted advantage of inertial and multiplier reels is that they do not twist the fishing line, this is especially important when using monofilament, which twists much better than braid. It goes without saying that inertial reels are preferable to inertialess reels; with them, the fishing line lasts longer, and there are significantly fewer troubles when fishing.
Now let’s briefly look at where and with what methods of spinning fishing, and when fishing, by and large, it is more ergonomic to use inertial and multiplier reels. Firstly, this is fishing from a boat. When fishing from a boat, without a doubt, a multiplier or inertial reel is much more ergonomic than a spinning reel if we are fishing with jig baits and we do not need ultra-long casting.
Rice. 25-36 Secondly, this is trolling. When trolling, reels with counters are much preferable to inertial reels (Fig. 25-36. These are quite wonderful reels. They are not intended for casting fishing, but they are very suitable for trolling fishing. They are ergonomic, high-quality and help for a long time. The next stage of application inertial multipliers and reels - this is fishing with wobblers with alloy. When fishing with alloy, it is very convenient to use this tactic: we adjust the wobbler, and we don’t just float it downstream. We float it with a small hardening. On a multiplier reel, this hardening can be done with a mechanical brake, and on an inertial reel - easily by braking with your finger.As a result, floating downstream, the wobbler works, the current carries it down, but we easily hold it, and it works.
This method is excellent for catching both chub and asp, in other words, riding fish, since the wobbler works quite lazily in the upper layer of water. Later we start reeling - the wobbler dives. This especially applies to deep-diving wobblers. Having dived, it begins to work at a higher frequency, and we catch pike perch or pike - more bottom-dwelling predators. Both multipliers and inertial reels are also widely used in jerkbait fishing. It must be stated that when fishing with heavy, wonderful, huge baits, like jerkbaits, inertial reels work no worse than baitcasting reels, due to the fact that the wiring with them is better, and the most important thing is that the price of a baitcasting reel and an inertial one are incomparable , because the inertial coil is much cheaper.
And if the angler does not always plan to fish with jerkbaits, then it makes no sense to take an expensive specific model of spinning rod, for example, for a small wonderful jerkbait - a special wonderful multiplier. It is possible to get by with more inexpensive gear. You take an inertial reel with you, carry it in your briefcase, if you want to fish with a jerkbait, you take the spinning rod, put in an inertial reel, and you no longer need to worry about the fact that the gears can break, while when fishing with a jerkbait with an inertialess reel it is freely possible break.
Spinning.Inertial reels
Nelma inertia reel versus non-inertia reel!
How to wind fishing line or cord onto a reel
So, we have chosen one of the types of laying, configured the spool as needed, and now all that remains is to wind it correctly. And before we get down to business, I would like to note some fundamentally important points: the winding should be tight, without sagging, bumps and depressions. Otherwise, the “beard” cannot be avoided, and with it, as you know, fishing turns from relaxation into torture. And if the wicker is also expensive, then it’s no time for jokes.
Backing. What is it and what is it for?
It's time to say a few words about backing. For a longer cast, it is necessary that the cord be wound almost under the very edge of the spool. It is enough to leave a distance of 1 - 1.5 mm so that there are no discharges. As a winding, they usually use old braid or fishing line similar in diameter to the main one. If you don't have them, you can buy them in the cheapest price range. In the end, you can't fish on backing, so quality plays the most important role here.
They also say that they use electrical tape. However, I am skeptical about this alternative for one simple reason: I have seen what happens to such materials in the heat. But sewing thread, on the contrary, is a very interesting option and is recognized among many fishermen. Well, let's finally get to the point?
So, let's go in order. What we need to wind the cord onto a reel:
- The reel itself and the main braid or line;
- Spare spool (there is one);
- Volume “War and Peace” (no matter which one);
- Backing (winding: sewing thread, fishing line, cord);
- A comrade or a basin, but a comrade is still better;
- Patience.
If all of the above is available, then you can proceed. However, first of all, I would like to pay attention to the following point - how to tie the fishing line to the reel. It just so happens that without this fastening nothing good will definitely happen.
In expensive reels, some manufacturers have a special recess on the working surface of the spool, where you can easily hook the cord and continue winding. But this is the exception rather than the rule, because most models do not have this option, so you will have to tie it the old fashioned way. Yes, so that the braid does not slip, but holds relatively tightly. Perhaps this is the only requirement for the node.
Look at the photo, there is a diagram here. Everything should be clear, and most importantly, reliable. I prefer the top knot, it just so happens.
Let's assume that we have tied the main line to the spool. Next, we take out “War and Peace” (or any other thick book), open it somewhere in the middle and put fishing line between the pages. We safely close the reading and move on to the next stage. By the way, the book is needed so that the fishing line or cord is wound under uniform tension. You can also press the whip against the rod with your finger, just be sure to wet the cloth so as not to damage the skin.
If you have a friend next to you, you can ask him to hold the reel, exactly opposite the reel, in the same plane as the direction of the fishing line (mirror it). This way we can avoid excessive curling, which can later turn into a “beard”. The cord will simply twist to a critical value and a fiasco will inevitably happen, a matter of time.
But if there is no friend, some kind of container, basin or deep cup will do. Just put the bobbin there and it will not jump out, preventing you from doing normal winding. It’s not as convenient, of course, as with the help of a friend, but you can manage!
If there is no spare spool, you will have to tinker longer. And the principle itself changes a little. We also tie the main fishing line or cord to the spool, wind it to the end (until it runs out), and finish off the remaining capacity of the reel with backing. Next, we wind the backing separately onto one reel, fishing line or cord onto another. And only after this we re-attach the winding to the spool, and carefully tie the main line to it. Using this scheme, we will accurately determine the required amount of backing the first time and our winding will be to the very edge of the spool.
How much fishing line does it cost to reel?
Before winding braid onto a spool, every fisherman asks the question of how much fishing line to wind on the spool?
For each tackle, there is a fishing line with a certain cross-sectional diameter and a certain number of tens or hundreds of meters that it can hold. Therefore, if you want to know how to properly wind braid onto a reel and how much line to wind on a reel, then strictly follow the manufacturer’s instructions.
But often fishing enthusiasts are guided not by instructions, but by their own ideas about how much line to wind on the spool. The calculation takes into account the scaffolding’s ability to withstand the load, its length and thickness.
As a result, it happens that the tackle turns out to be too small or large for the needs of the fisherman. In the first case, you can purchase a larger product, and in the second, do backing before winding the braid onto a reel.
So, we have chosen one of the types of laying, configured the spool as needed, and now all that remains is to wind it correctly. And before we get down to business, I would like to note some fundamentally important points: the winding should be tight, without sagging, bumps and depressions.
Otherwise, the “beard” cannot be avoided, and with it, as you know, fishing turns from relaxation into torture. And if the wicker is also expensive, then it’s no time for jokes.
Backing. What is it and what is it for?
It's time to say a few words about backing. For a longer cast, it is necessary that the cord be wound almost under the very edge of the spool.
It is enough to leave a distance of 1 - 1.5 mm so that there are no discharges.
As a winding, they usually use old braid or fishing line similar in diameter to the main one. If you don't have them, you can buy them in the cheapest price range.
In the end, you can't fish on backing, so quality plays the most important role here.
They also say that they use electrical tape. However, I am skeptical about this alternative for one simple reason: I have seen what happens to such materials in the heat. But sewing thread, on the contrary, is a very interesting option and is recognized among many fishermen. Well, let's finally get to the point?
So, let's go in order. What we need to wind the cord onto a reel:
- The reel itself and the main braid or line;
- Spare spool (there is one);
- Volume “War and Peace” (no matter which one);
- Backing (winding: sewing thread, fishing line, cord);
- A comrade or a basin, but a comrade is still better;
- Patience.
If all of the above is available, then you can proceed. However, first of all, I would like to pay attention to the following point - how to tie the fishing line to the reel. It just so happens that without this fastening nothing good will definitely happen.
In expensive reels, some manufacturers have a special recess on the working surface of the spool, where you can easily hook the cord and continue winding. But this is the exception rather than the rule, because most models do not have this option, so you will have to tie it the old fashioned way.
Yes, so that the braid does not slip, but holds relatively tightly. Perhaps this is the only requirement for the node.
Look at the photo, there is a diagram here. Everything should be clear, and most importantly, reliable. I prefer the top knot, it just so happens.
Let's assume that we have tied the main line to the spool. Next, we take out “War and Peace” (or any other thick book), open it somewhere in the middle and put fishing line between the pages.
We safely close the reading and move on to the next stage. By the way, the book is needed so that the fishing line or cord is wound under uniform tension.
You can also press the whip against the rod with your finger, just be sure to wet the cloth so as not to damage the skin.
If you have a friend next to you, you can ask him to hold the reel, exactly opposite the reel, in the same plane as the direction of the fishing line (mirror it). This way we can avoid excessive curling, which can later turn into a “beard”. The cord will simply twist to a critical value and a fiasco will inevitably happen, a matter of time.
But if there is no friend, some kind of container, basin or deep cup will do. Just put the bobbin there and it will not jump out, preventing you from doing normal winding. It’s not as convenient, of course, as with the help of a friend, but you can manage!
So, now everything is ready to begin the actual winding. The line (or lash) is under tension, the reel is also fixed, we begin to twist the reel.
As soon as the main line runs out, you need to tie the backing to it and reel it in until there is 1 - 2 mm left to the edge of the spool. If everything turns out smoothly and you are satisfied with the type of installation, we rewind the result back to the spare spool.
However, it is advisable to hide all the knots at the very edges so that they do not protrude anywhere, I mean the connection of the backing with the main winding. After all, we do it “to the finish”.
If there is no spare spool, you will have to tinker longer. And the principle itself changes a little.
We also tie the main fishing line or cord to the spool, wind it to the end (until it runs out), and finish off the remaining capacity of the reel with backing. Next, we wind the backing separately onto one reel, fishing line or cord onto another.
And only after this we re-attach the winding to the spool, and carefully tie the main line to it. Using this scheme, we will accurately determine the required amount of backing the first time and our winding will be to the very edge of the spool.
Before you start winding, you need to decide how much fishing line we really need? You can throw a heavy jig at 100m, a medium jig cast at 60-80m. And a light bait - a wobbler or a regular spinner - can be thrown only 25-30m.
Naturally, you need to have a reserve of fishing line for fishing, tangling and breaks. It is also advisable to fill the entire spool with one unwind of fishing line without connecting nodes, although this is not always possible.
Here's what you need to know: Tip 5: How to cast a fishing rod
As a rule, the optimal length of line on a spool is 100-150m. It is in such unwindings that most modern fishing lines are sold.
Reel spools usually indicate their line capacity, i.e. how much fishing line of different diameters fits there.
Usually, the dimensions of the reels themselves are designed for a certain load - and therefore for a certain “working” range of fishing lines. Therefore, for most manufacturers, the numbers on the reels are “consonant” with similar fishing line diameters. Thus, the most popular model 2500 is optimal for use with monofilament with a diameter of 0.25 mm, which should fit exactly 100-150 m per spool.
Therefore, you should not take a line thicker than the largest diameter indicated on the spool - it’s better that the line breaks than the reel breaks. Although with careful fishing this will not happen thanks to the friction brake. But for thick fishing line it is better to immediately take a more powerful reel.
So, if 100-150m of the required fishing line fits on the spool, then there is no problem - a 150m reel is enough for the entire winding. This will be the best option - but not the only one, which we will talk about further.
Why is it important to properly wind the line onto the reel spool?
Firstly, correct winding ensures casting without tangling or breaking, which means the safety of the fishing line and, accordingly, the possibility of further fishing.
Secondly, only correct winding ensures the longest cast possible, if necessary.
And to do this, we will wind exactly as much fishing line as needed - no more and no less. The line must completely fill the working space of the spool - this is the basis for proper casting.
In addition, the larger the winding diameter, the less the line bend and the residual ring “memory”. But you can’t wind too much either - all the excess will immediately fly off and get tangled in the rings.
Therefore, it is considered correct to wind monofilament line 2-3mm below the front edge of the spool; for thinner braid this figure is slightly less - 1-2mm.
Usually they reel in a little more line and check how the reel works when casting. If the side of the spool does not hold the upper turns, and they fly off and get tangled, then cut off a few meters and continue checking until the winding height is optimal.
Alas, it will not remain like this forever - inevitable snags, tangles and breaks will gradually reduce the winding height.
And the lower the winding, the greater the bend and braking of the line when casting on the front side of the spool. And at some point this begins to noticeably affect the casting distance, especially with light and sailing baits. And if there are dents and scratches on the side, it also quickly wears out the fishing line and reduces its strength. So it’s time to either rewind a new line, or...
Video for beginners
Telling with words is good, but showing is better. I found a good training video in which the author simply and clearly explains how to properly wind the fishing line on a reel. I recommend you watch it so you don’t have any questions!
Friends, perhaps that's all. He told me that he knew about winding and styling! One could also mention inertial coils and multiplier coils, but I will pay special attention to this and write about it later. If I forgot to include something, please write about it in the comments! And also add your own ways as you do it.
What is backing
Using a base or backing allows you to wind fishing line onto an inertia-free reel without flaws and waste of expensive cords. Often the volume of the spool is much more capacious than the diameter of the cord required for fishing conditions can fill. As a rule, the working dimensions of the thread do not exceed one hundred meters, and manufacturers strive to produce for sale precisely these volumes of bobbins.
In addition, braided cords of small diameters and fishing lines specialized for spinning equipment are expensive enough to fill the free volume without any practical use. In these cases, the excess spool height is filled with another, cheaper material. In various sources devoted to this problem, anglers are recommended to use electrical tape as backing, considering it a quick and effective way, but based on practice, I will say that this solution can subsequently cause a number of problems and lead to difficulties in using the reel.
The insulating tape is exposed to water, and water constantly gets onto the base of the spool from the winding cord, either getting wet or completely drying out. As a result, the electrical tape loses its elastic properties, begins to warp and break the winding pattern of the rings. As a result, the rings overlap each other, which ultimately leads to a loss of range of the tackle and increased wear of the cord, especially braided ones.
The most correct solution is to use monofilament fishing lines as backing with a slightly larger diameter than the main thread and, of course, with lower requirements for its quality. When winding fishing line onto a reel, you simply need to tie the fishing line together with a regular knot and cut the ends of the connection as short as possible, soaking the knot with glue to prevent it from untying. A knot hidden in the depths of the coiling will not interfere with the convergence of the rings when casting.
How to properly wind braided fishing line onto a spinning reel.
It would seem that there is nothing complicated here: attach the reel to the butt of the spinning rod or feeder, tie the braid to the spool with a “noose” knot, throw the reel into a bucket of water and reel in, but that’s not the case.
Let's start with the fact that braided fishing line is not “monofilament” and there is no need to throw it into a bucket of water when winding it, because the thread tends to absorb moisture. And if you also wind the cord, relying only on the resistance of the water, then at the very first cast the loop may be reset, which is not always possible to untangle. Impregnated brand cords are less likely to get wet, but it's still better to have someone hold the spool on a pencil than to use a bucket of water.
It is very important that the winding density is good. A wet cord, at least slightly, still expands, and when it dries on the spool, the winding density decreases, so even if you had to resort to water during winding, you must wind the braid with force, which is achieved by pressing the cord against the blank. The index finger of the hand that holds the blank is wrapped with electrical tape and when winding occurs, this finger slightly presses the braided line against the blank, while the whole hand holds the butt about thirty centimeters from the reel. The pressure of the fence is adjusted so that the reel handle rotates evenly, but with some effort.
In addition, this device, which is sold in fishing stores, can help you wind the cord tightly around the reel spool.
It may look different, although the essence is the same: the reel with the cord is attached to the shaft and is slightly pressed with clamps to create a force with which the cord will be wound as expected, without any slack, evenly, turn to turn.
By and large, this entire structure can easily be replaced by an assistant wearing gloves and a pencil, who can hold the reel on the pencil, slowing it down a little when winding it with the phalanges of his thumbs. So, let everyone decide for themselves whether it is advisable to buy a special design, and we will return to other important points.
Backing (Backing, backing)
The correctness of winding the cord, and indeed the monofilament line, does not end only with the density of its placement on the spool. Another important detail is the winding height. This parameter very seriously affects the casting distance of baits, so you should not neglect it. The fishing line (cord) should be wound in such a way that there is only a couple of millimeters left to the top edge of the spool
and it is not always possible to achieve this without backing.
What is backing?
This is the name given to the backing for the braided cord, which fills the volume between the spool and the cord so that the winding ends at the height the spinner needs from the edge of the side.
The easiest way to “raise” the cord is to wind electrical tape onto the spool, but this method has significant disadvantages:
1. How to calculate the amount of backing so that there are two millimeters left to the side?
2. Some argue that in hot weather the adhesive of the electrical tape flows and damages the lower turns of the cord.
It’s hard to say how real the problems with glue are, but I don’t want to experiment, especially since the first drawback is enough to give up this method. Although there are stubborn fishermen who are not too lazy to rewind the line from spool to spool several times (and in the absence of a second spool, back to the reel) in order to achieve the desired winding height. That is: the spinning player wound up the electrical tape, then wound the cord, looked... - “more is needed”! I rolled up the fence, wound up the electrical tape again, etc.
The process is labor-intensive, but it can be done; the only thing that can be advised to tireless enthusiasts is to use good FUM tape instead of electrical tape.
A simpler, faster and better way to achieve the desired winding height is to use regular monofilament fishing line. If the reel has an additional spool, everything is done this way:
-the tip of the cord is inserted under the clip, and the braid is completely wound onto the spool. With effort, as stated above. Next, take a fishing line and tie it to the end of the fence with an academic knot,
then winding continues until the fishing line has filled the required volume to the edge of the spool side.
It turned out that the fishing line is on top, the fence is on the bottom. Now the spool is removed from the reel, an empty one is placed on which one of these loops
the fishing line is tied, and everything along with the cord is rewound. Here we must remember that ideally, the backing line should be no thicker than the section of the braid, then together they will “lie” evenly on the spool, and the knot with which the cord was connected to the fishing line will fit well and will be invisible.
If you don’t have the required amount of thin fishing line on hand (sometimes you need 100 meters of “monofilament” with a cross-section of 0.15 mm), then you can use monofilament up to 0.25 mm in diameter. True, there is a nuance to this. There is no need to tie the fishing line with a braided cord, because the knot turns out to be bulky, which will interfere with the flow of the latter and, during a long cast, will lead to the loop being dropped.
The “braid” is simply wound onto the spool, then the tip of the fishing line is wound into the clip in the same way and the fishing line is wound. Then the fishing line is wound onto the new spool. A couple of turns of the same FUM tape, which you just need to hold the tip of the fishing line, will help you get by without a large knot with a thick monofilament
after which, a cord is tied over the backing and wound onto a working spool.
This is how the braid with a cross section of 0.10 mm lay down. (in our opinion) on the above shown backing-
The situation with winding backing becomes more complicated when the spinning reel does not come with an additional spool or has two spools of different depths. In this case, you will have to use the help of another reel, the volume of the spool of which should be the same as the volume of the working one, and wind it in this order: first, a braided cord is wound onto the spool of the assistant reel, then the required amount of backing is wound. Next, take a working reel with an empty working spool and rewind everything onto it.
And the last thing that may also be useful to someone. During winding, the line or braid can lie on the spool in the form of a proportional “cylinder”, “straight cone” or “reverse cone”.
It is believed that winding with a “straight cone” contributes to better line flow. To achieve the desired winding, it is enough to “play” with the adjusting washers, which for reels with a front clutch are located on the main reel rod.
For example, if the cord is laid in a straight cone, and the spinning player prefers an even laying in the form of a barrel, then one should remove one adjusting washer and repeat the winding, etc., by analogy with the example.
On most rear-drive reels, the shims are located in the spool itself. To get to them you need to unscrew a special nut that is located on the top of the spool
But the adjustment is exactly the opposite: you need a barrel made of a straight cone - you need to add a washer.
Types of winding line on a reel
Winding - the location of each turn of the fishing line relative to the spool.
2 types are used:
- Parallel - most applicable in practice among fishermen. The basic principle is a small angle when applying a turn to the spool, but at the same time the line is laid parallel. Despite its widespread use in practice, another winding is more practical. But not every spinning rod is suitable for it.
- Cross-shaped - only used for reels with an “endless screw”. This type of knot makes movements in the bobbin in different directions at unequal speeds, which, when wound in parallel, leads to tangling of the thread.
Most professional reels are equipped with an “endless screw”, which greatly simplifies the fishing process.
Fishermen often confuse the terms “reeling” and “laying”. They are really close in meaning, but the second term suggests the shape that should be formed on the spool as a result of winding.
There are also several distinctions between them:
Spinning reel
Before you start winding on such a reel, you must select a cord in accordance with the manufacturer's recommendations. This is the main condition for avoiding the appearance of furrows. Then perform all the necessary actions for winding.
Inertia coil
The process of winding the cord on this reel is no different from the previous one. The only advice is to unhurriedly wind it carefully, the movements of the handle are smooth.
Multiplier reel
The only difference in laying the cord on this type of reel is the fastening in the presence of perforations on the spool. If it is missing, then the fishing line is attached traditionally using a self-tightening knot and then winding is carried out according to generally accepted instructions.
- A loop of small diameter is formed at the end of a fishing line or braided cord.
- Now the main core is inserted into it to form a kind of loop with a large diameter.
- After this, a large loop is thrown onto the reel spool and tightened (you need to be careful, otherwise it is very easy to confuse the tightening direction).
- Then the process of evenly laying the line onto the reel begins.
Step-by-step instructions for winding fishing line on a spinning reel
- Insert the reel into your rod.
- If the rod is telescopic, stretch it out, if the rod is plug-in, connect the plugs to get a working tackle.
- Take the fishing line and insert its end into the rod rings, starting from the very last one (the small one at the tip and ending with the one closest to the reel).
- Now remove the spool from the reel (how to do this is described in the caption to the picture).
- Tie the fishing line around the working area of the spool with an ordinary double knot (when the fishing line is folded in half and the simplest knot is made, several knots can be made to be sure).
- Open the line guide rim and insert the spool into place, then close the line guide rim back into the working position.
- You can start winding the line by rotating the reel handle, but try to hold the line with your hands so that it goes into the reel with a slight tension (you can hold the line with your hands in the area of the ring closest to the reel).
Spinning rod and feeder
The type of laying has been chosen, the reel is installed on the tackle, it’s time to start the process.
If it is still not clear how to properly wind the fishing line onto a reel, then here is a detailed action plan:
- Assemble the spinning rod or feeder, and starting from the top ring, thread the braid to the spool.
- The line arc must be lowered.
- Tie the cord around the spool using a simple knot or self-tightening loop.
- While holding the braid against the rod, begin reeling using the reel handle.