The spinning tackle must be correctly selected to solve specific problems, in other words, it must be harmonious and balanced. When choosing the model of reel, spinning rod, model and diameter of the fishing line (braided cord), many fishermen do not attach importance to the correct winding of the fishing line on the reel. This guide will discuss the nuances of winding fishing line, which will allow you to avoid unpleasant moments while fishing and disappointments from the gear (dropping loops, “beard”, casting range, shooting). You will also find here step-by-step instructions for winding, setting up the reel and a diagram of the nodes for tying the fishing line to the spool.
Many aspects have been discussed, so it wouldn’t hurt to share the outline of the article:
- Adjusting the winding profile (taper)
- Using Backing
- Tying the fishing line to the spool
- How to spool fishing line correctly
Adjusting the winding profile (taper)
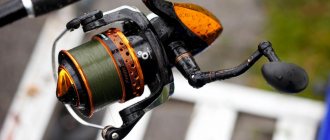
Each reel model has its own winding profile. There are:
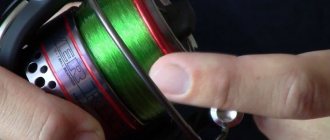
- cylindrical profile (photo 1);
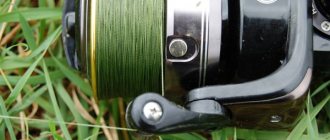
- reverse cone, where the profile of the wound line expands towards the front side of the spool (photo 2);
- straight cone, when the profile of the wound fishing line tapers towards the front edge (side) of the spool (photo 3);
- chaotic profile inherent in cheap Chinese coils.
Spinning anglers use a cylindrical or light reverse cone . The winding geometry is adjusted using adjusting washers.
The adjusting washers for reels with a front friction brake are located on the axis on which the spool is mounted, above the ratchet sprocket. The reel kit usually comes with 2 to 6 washers of varying thickness. As the thickness of the washers increases, the winding profile changes towards a straight cone, and when the thickness of the washers decreases - towards a reverse cone. If the package does not contain shims, it means they are already installed on the axle. This point must be taken into account.
To remove (install) washers you must:
- Unscrew the spool by rotating the clutch counterclockwise.
- Remove the spool from the reel axis (rod).
- Remove (install) the required number of washers. There were cases when it was necessary to remove even the sprocket to achieve optimal winding geometry.
The adjusting washers for reels with a rear friction brake are usually located in the spool itself. The principle of adjusting the line winding profile is exactly the opposite of reels with a front friction brake. Increasing the thickness of the washers leads to a reverse cone, decreasing - to a straight cone.
To remove (install) washers you must:
- Remove the bobbin.
- Unscrew the special nut on the front of the spool.
- Remove the shim retainer.
- Remove (install) the required number of washers.
Reverse taper
It is possible to manufacture spinning reels with variable pitch, which decreases towards the side of the spool. In this case, the angle of convergence of the line is slightly smaller than that of a straight cone, which will be discussed below. That is, the far turns will rub less against the near ones.
In a reverse cone, the turns located closer to the body always have a smaller diameter, which minimizes the formation of beards and spontaneous removal of the line from the spool. However, the disadvantage of such winding is that the line experiences more friction when it touches the side of the spool, and, as a result, the range of the tackle is reduced by about 10-15 percent depending on the angle of the cone itself, when compared with a straight cone.
One of the advantages of such a winding line is that it is considered the safest, and even a beginner, making mistakes, can fearlessly throw the equipment without fear of the formation of beards. In addition, spools with similar geometry are now available for sale. It is excellent for uneven wiring, when the line is reeled in with varying tension.
Meat grinders with a polar cone are marked with the abbreviation ABS - Anti Backlash Sistem. This should not be confused with the Advanced Ballistic Sistem, a device capable of increasing the range of gear. Such reels are used for competent reeling of the same cord, which will not come off due to inertia, which often happens when fishing in the wind or with light baits.
Using Backing
Backing is a layer of something wound under the main line to increase the diameter of the spool so as not to wrap kilograms of line on it.
The multitude of line diameters and different unwinding volumes on the market do not allow us to produce reels with a spool capacity for each type of line used. If the volume of the purchased fishing line is less than the capacity of the spool, then use rewinding under the main fishing line - backing. For backing, it is best to use an old braided cord (braid) or nylon thread, however, many people prefer just electrical tape. The volume of backing can be determined “by eye” with a margin, but in this case there is a high probability of “extra” volume of the main expensive braided cord appearing. It is preferable to add backing to the wound main line to the required level and then rewind it back. To connect the backing and the main line, you can use the following knots: “blood ties”, “grinner”, “Peter Minenko knot”, “shok leader knot”. It is necessary to wind the backing onto the spool very tightly (with force) in order to avoid the main line falling between the turns of the backing.
Features of winding fishing line on a reel
Why is proper winding necessary?
- First of all, the quality of winding greatly influences the casting distance: the ideal winding would be one that provides close to the maximum distance corresponding to the technical characteristics of the reel.
- Winding also has a great influence on the service life of the fishing line. For example, if the level of the top layer exceeds 3 mm from the side of the spool, then the fishing line, due to physical friction, will have greater mechanical wear. If this level coincides with the side, uncontrolled discharges will occur, which will lead to the appearance of a “beard” and the need to cut the line.
Connecting the fishing line to the spool
The first step in equipping a reel with fishing line is securing the line to the spool. Many anglers do not secure the line, hoping that the lower layers will not be used, but this is not entirely the right approach. Over time, the top working layer will wear out and gradually shorten. There are many methods of tying, but the most common are a specially designed knot and a self-tightening loop:
- The special knot is very reminiscent of a clinch. Its advantage is that it practically does not stretch and holds perfectly.
- The self-tightening knot has a slight stretch, but under the influence of the tension of the fishing line it will continue to be tightened until it stops.
It is advisable to secure the fishing line or cord at the bottom of the spool, this will reduce the number of contacts between the knot and the unwinding turns.
Backing (rewinding)
Thanks to the development of technology, modern fishing lines are produced increasingly thinner in diameter without loss of strength, so very often the length of the wound line is significantly less than the capacity of the spool . In this case, there is a need to fill the free space with something. Some anglers fill it with insulating tape or nylon thread. These methods are not very good, since over time the tape peels off the glue that holds the lower layers of the fishing line together, and nylon thread takes a very long time to dry if it gets wet while fishing. American fishermen came up with the best option: reel in a cheaper line into the lower layer, and then tie the main one of better quality to it. The bottom layer is called backing, in our country it is better known as winding.
The backing is an inexpensive fishing line with a diameter of up to 0.3 mm. It is not recommended to use thicker fishing line, as it will deform the main layer. The winding length can only be determined experimentally. This will require an additional spool. First, the available amount of main line is wound onto it, then the backing. After which the winding is shortened to the required size after filling the spool. Winding onto the main reel occurs in the reverse order: first the backing section is wound, then the main component.
Taper profile
Different fishing reels apply wraps of line to the spool differently. There are three types of winding:
- Cylindrical.
- Trapezoidal.
- Chaotic.
The first two types correspond to expensive well-known manufacturers. The coils lie smoothly and in a row. The latter is typical for cheap Chinese counterfeits. Technical shortcomings of such reels can ruin fishing, and it is better to abandon them. It is impossible to radically combat the negative effects of winding, since the spool stroke is structurally provided for by each manufacturer. But it is quite possible to improve winding to some extent. For this, the mirror method is used. That is, in those places where the coil leaves depressions, hills are created, and vice versa. This process is a very painstaking task, and it is done only by hand. Thus, the uneven laying of turns is compensated by manual laying of abnormal sections, and the winding acquires the necessary taper.
In turn, trapezoidal winding has two types of taper: direct and reverse.
A straight cone is formed if the technical feature of the reel provides for laying the turns with a decreasing pitch towards the spool wall. This cone ensures minimal friction of the turns during release. With a reverse taper, the pitch gradually decreases towards the spool flange. The friction of the turns with such a cone is greater, but the likelihood of spontaneous dropping of the line is reduced.
Tying the fishing line to the spool
Let's find out how to tie the fishing line to the spool.
The first rule is that tying the fishing line or backing to the spool is mandatory . You don’t know what kind of trophy you will come across, and it will be a shame if during the process of fishing the entire main line and backing unwinds, and there is no last line to hold the fish.
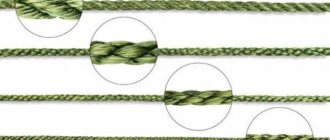
The fishing line can be tied with various knots: “arbor knot”, “self-tightening double loop”, “clinch”. On the first turn of fishing line or backing on the spool, you must additionally glue a piece of electrical tape or adhesive tape in the direction of winding. This will prevent the line from spinning on the spool, both during winding and when landing fish.
How such knots are tied in practice can be seen in the video:
How to thread line into the reel of a STIHL trimmer
A trimmer is one of the most common tools that can be used to quickly and easily cut grass, small bushes, lawn grass and other weeds. It's no secret that in order for grass mowing to be successful, you need to use the tool correctly and handle the individual cutting elements correctly.
In trimmers, it does not matter what fuel they operate on; special cutting attachments (knives, discs) are used, and some trimmers are supplied to the market with heads in which a cutting element such as fishing line is installed, and therefore many people wonder how to thread fishing line into the reel of a STIHL trimmer , if there are no skills as such at all.
- Cutting attachments in the form of knives can be sharpened, but the fishing line (also a cutting element) tends to be consumed. Below we will talk about how to correctly thread the cutting element - fishing line - into the STIHL trimmer reel.
READ How to Wind Line from a Trimmer
How to spool fishing line correctly
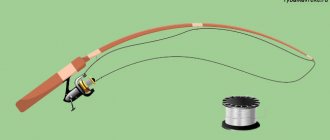
- You need to install a reel on the first leg of the spinning rod and remove the spool. The main line must be threaded through the spinning ring and tied to the spool. Don’t forget to open the line handle before installing the spool on the reel. The line must pass through the line roller. If you have a spare spool, then it is better to carry out this action with it when determining the volume of backing and the initial winding profile.
- The fishing line spool has a central hole, so it can easily be attached to a pencil or pen. To avoid twisting, the line should come off the bobbin as it unwinds, and not come off in coils when the bobbin is stationary. We ask a partner (children are the best helpers) to hold the spool of fishing line on a pencil. If there is no partner, you will have to adapt by holding a pencil with a spool between your knees. You can use special devices for unwinding fishing line from reels. They can also regulate the force of winding the fishing line onto the spool.
- Using one hand through a rag or wearing gloves, so as not to cut yourself or burn yourself on the fishing line, we clamp the fishing line above the first ring. With this hand you can regulate the force of winding the fishing line onto the spool (as tightly as possible, but without fanaticism). With the other hand, we begin to turn the reel handle at low speed.
- The volume of the fishing line being wound should be such that the fishing line does not reach the edge of the spool collar by 1-3 mm. If the volume of the fishing line is not enough, then we tie the backing to the fishing line and continue to wind it to the required volume. Winding the fishing line to the edges of the bead is fraught with loops coming off and “beard”.
- After winding the line and backing to the required level, it is necessary to rewind the line from the spare spool to the main one. If the line winding profile is unsatisfactory, you can adjust it by removing or adding the necessary adjusting washers. If there is no spare spool, then for the final winding of the fishing line you will have to rewind the fishing line either to another reel, or first to one reel, then from it to the second reel. This is necessary to turn the line over. For these purposes, you can use a drill by attaching bobbins to the spindle.
- After the final winding of the fishing line onto the spool, we attach the edge of the fishing line to the clip, which is located on the side of the spool.
Next is a video from a spinning fisherman, which describes and shows the process of winding fishing line onto a spinning reel.
Compliance with simple principles: the use of backing, the correct force, profile and volume of winding will allow you to obtain optimal use of the gear and ensure working with it at a high level of efficiency.
Straight taper
This method of laying provides a variable pitch, which decreases at the spool wall. As a result, most of the forest lies here, creating a cone that descends towards the side. Friction on adjacent turns in this case is minimal due to the larger angle formed, and it is also reduced on the side.
This conical winding increases the casting distance of the tackle compared to a cylinder. However, such ease of sliding of the line with a small rewinding step significantly increases the risk of spontaneous removal and getting a beard. As in the case of reverse-taper spools, the production of reels with straight geometry has now been launched.
If you look closely at the spool, you can find a manufacturer's marking on it, above which it is not recommended to wind the line. If there is no mark, the distance from the turns to the edge of the side should not exceed two millimeters. The straight cone is effective when working with light baits.
How to wind fishing line
The cord is wound onto the spool of the mechanism after the reel is secured to the spinning rod. This operation can be done independently, or with the help of a friend, which greatly simplifies the process and does not require additional actions or the use of devices. Initially, the spinning rod is assembled along the entire length of the rod and starting from the tulip, the very first ring on the quiver tip of the tackle, the cord is passed all the way to the spool. The cord is attached to the spool using the technique of tying a self-tightening knot. Having tied a knot and tightened it at the base of the spool, the tip of the free fishing line is cut off to a residue of no more than 2 mm, since a longer tail can interfere with the release of the thread during casting, slowing down its release. Next, wind the thread. In this case, the cord must be in constant tension.
How to adjust the reel clutch
By properly setting up the reel, you will minimize the possibility of line breakage and will be able to catch large fish. All models of spinning reels are equipped with a friction brake that allows you to adjust the force.
When loaded, the reel spool rotates and the line is gradually released, which allows you to “extinguish” sharp and strong jerks of the fish. The clutch can be front (located on top of the spool) and rear (at the bottom of the reel).
When setting the friction brake, you need to focus on the breaking load parameter of the fishing line. So, if the latter is about 7-8 kg, then the clutch is adjusted to 4-5 kg. If the fish jerks, the friction brake mechanism will work and the reel will “release” a certain amount of fishing line, protecting you from the gear breaking.
In order to adjust the clutch, ordinary weights with a certain weight are most often used, which are attached to the end of the fishing line. Although many fishermen practice adjusting the clutch in a different way, right before fishing. To do this, the spinning rod is fully equipped and put into working condition, and then the bait with a hook is hooked onto a tree or other static object.
Next, you need to step back a little and tighten the spinning rod as if fishing for a potential catch, and, having reached the maximum tension at which the rod bends into an arc, release the friction brake until the ratchet operates. Do not overdo it, otherwise, instead of a adjusted drag, you will only get a broken rod.
There are two types of friction brake: front and rear. The front clutch is more accurate and reliable, the rear clutch is more convenient to set up. Read more about friction clutches in the article - friction brakes.
How to install a reel on a spinning rod
The versatility of the fastening elements of the rod and the mechanism itself allows you to reliably and quickly install a reel on a spinning rod. On spinning rods, the design provides for the presence of a so-called fastening leg, and on the butt of a spinning rod there is a device for gripping this part of the reel.
It is worth noting that the fastening mechanism on a spinning rod can be made in two versions: a device using a worm gear and a device based on gripping the leg with the force of spring clamps. Preference should be given to fasteners based on a worm gear. Before installing the reel, check the dimensions of the support legs of the mechanism and the mounting sockets on the fishing rod.
How to adjust the drag on the reel
So, how to properly adjust the clutch on a spinning reel. Many anglers completely tighten the clutch and release it back three to five clicks; this adjustment method is not correct. Since all the reels are different, some have three clicks, others have eight clicks, and others have a clutch without a ratchet and no clicks at all. What should I do? The friction is not adjusted simply on the reel, but is adjusted on a fully assembled spinning rod, so that the tackle works as one whole.
How to replace fishing line on a trimmer?
Replacing the trimmer line with step-by-step instructions will allow even an inexperienced lawn mower owner to perform quite complex work.
However, before starting work on replacing the fishing line on the trimmer, it is necessary to ensure the safety of the work. In particular, measures should be taken to protect against careless or unintentional starting of the lawn mower:
- prevent spontaneous startup,
- remove the battery (if applicable),
- Place the tool on a platform convenient for work.
It is convenient to carry out work on replacing the trimmer line when the lawn mower is lying on the table, and the master who is replacing the trimmer line has the opportunity to approach the tool from any side.
How to adjust the reel clutch
Having installed the mechanism on the spinning rod with the fishing line wound on the spool, all that remains is to correctly adjust the spinning reel. The adjustment consists of setting the friction brake to parameters that help prevent the line from breaking due to excess loads on the cord as a result of playing fish or freeing the bait from a hook.
Important! Knowing the magnitude of the breaking load of the fishing line, the brake is set one third lower than this limit value.
At home, in an ideal tuning process, these values are calculated using weights corresponding to the values. A load of critical mass is connected to the cord and, by pulling the line, the desired value of the friction is set by pressing or releasing the mechanism. On a pond, the adjustment is made by equipping the fishing line with bait, fixing it by hooking the hooks onto a nearby tree or other static object.
Having moved 5-7 meters away from the bait with the spinning rod, pull the line with the clutch fully clamped until the spinning rod begins to bend into an arc. Next, smoothly release the clutch until the ratchet operates. This technique helps to avoid not only line breakage, but also prevents breakage of the form. After adjusting the clutch, you can start fishing without fear of excessive loads on the tackle, which are compensated in the process of fishing or hooking by an automatically triggered mechanism.
Why do you need to adjust the spinning reel?
Imagine the situation - you bought a new reel, wound a brand new cool Japanese line and went fishing for the first time with a new reel, and this is where the surprises begin. Especially, they lie in wait for those who like to fish with twitching, i.e. jerk wiring. The main problem is the dropping of loops, or “beards” as they are called. Unraveling them takes a lot of nerves and time, and when fishing there is never enough of it.
And often we don’t untangle them, but simply cut off the tangled piece of braided cord. If she often sheds these same “beards,” then you can lose half of the line on just one fishing trip. To avoid this, you just need to try to adjust the winding profile on the spool and in 90% of cases, this will help avoid loops.
