How to wind fishing line on a reel is a question that interests many novice fishermen. It would seem that it could be simpler than winding the fishing line onto the reel spool, but this process contains a number of complexities and nuances that are better to know than not to know. Incorrectly wound fishing line on the reel leads to a decrease in casting distance, loops coming off, beard formation, line twisting during fishing and other unpleasant things.
Read our article carefully, add it to your bookmarks, so that when winding fishing line onto a reel, you do not make mistakes and do not create problems for yourself in the future.
How much fishing line to wind on a spinning reel: how many meters, what kind of fishing line?
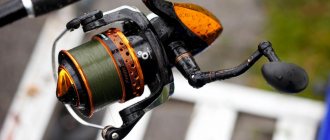
Line on a spinning reel
The number of meters for each reel is individual, since it can have its own individual diameter and side height. Everything will also depend on the parameters of the purchased fishing wire. So, how much fishing line to wind on a spinning reel, how many meters, what kind of fishing line?
In this particular case, you should adhere to the following rule:
- The line should not reach the edge of the sides by 1-2 millimeters , but not exceed 5 mm, since long casting will become impossible.
The reels are always marked with a line capacity marking. For example, if we take a fishing line with a diameter of 0.25 mm , we can wind 153 m , but with a diameter of 0.30 mm we can only wind 106 m.
Thickness:
- The golden mean is a 0.25 mm , as it can withstand a tensile load of 6-8 kg .
- For catching pike perch and pike, it is better to use a fishing line up to 0.35 mm , and for perch 0.16-0.2 mm .
As you can see, everything here is also individual. In any case, when purchasing, the seller will be able to recommend something to you, depending on which “predator” you are going for.
Types of winding fishing line on a spool
You have probably already become familiar with the main criteria for choosing a spinning rod from the published article on the blog. It will also be useful for you to read the materials of the Siberian spinning fishermen of the Tugun club. As for the types of winding line on a reel, first let me give you a little advice. Correct filling of the reel spool with line also depends on the reel itself and its quality.
By spending on a reel you will save on buying baits
The cost of such a toy averaged 1,600 - 2,000 thousand rubles. Plus, additional money was spent on buying fishing line. Frequent beards catastrophically quickly reduced the winding footage. As a result, in one season it was possible to spend an average of about 5,000 thousand rubles. And over the past 3 years?
I'll be brief. In order not to waste money and spend the saved money on catchy baits, just fork out for a normal reel right away. Don't chase top models. Pay attention to such manufacturers as Ryobi, SPRO, Okuma. Now, with the deplorable rise in prices, reels have become somewhat more expensive, but still, spending 5-6 thousand once will last you for 5-6 years. This is exactly how long my Ryobi Excia 2000 lasts.
Types of line laying on the reel spool
To avoid further confusion, let's immediately define two terms - laying and winding fishing line.
The lay is the shape the line takes after the spool is completely filled. There are three of them in common use:
- straight cone;
- reverse cone;
- cylinder.
The shape of the laying depends on the shape of the spool and its position on the reel rod. The casting distance depends on the placement, and the winding of the fishing line determines the likelihood of a “beard” forming.
Winding - placing turns of fishing line on the spool.
Recently, many spinning reels, including the above-mentioned companies, have used cross-shaped winding. But on different coils, depending on their design features, the winding pitch (the distance between adjacent turns) can be different, and can also be constant or variable. The larger the winding pitch, the less likely the formation of a “beard”, but also the less line is placed on the spool. Therefore, winding with a large pitch looks loose in appearance.
The most acceptable is cylindrical installation. Problems with beards often do not arise. The bait flies further due to less friction on the sides of the spool.
Adjusting the taper of inertia-free reels
Adjustment of line laying is done by moving the spool along the reel rod. This can be achieved by using special washers. They can be factory-made or self-made. Excellent pucks are made from wobbler boxes.
If we raise the spool, then more turns are wound at the wall and we get a straight cone; we lower it along the rod - at the side, and a reverse cone is formed. It's still a bit of a hassle, but it's necessary. You can verify its effectiveness while fishing.
Optimal use of gear and ensuring uninterrupted operation is possible when the entire system is executed in the correct order, as well as using certain rules and schemes, that is:
How to wind fishing line on an inertial spinning reel?
The fishing line is correctly wound on the inertial reel of the spinning rod.
If you bought a spinning rod, but do not yet know how to use it, you need to look at the instructions that came with it and check it. According to the class offered for sale, the inertial reel must be suitable for the given fishing rod, as well as for its cord. The inertial reel is interesting because it does not directly participate in throwing the spinning rod into the water. How to wind fishing line on an inertial spinning reel?
It is worth noting: Sometimes a trophy caught on a hook - a fish - can “choose” up to 200 meters of fishing line, especially if this aquatic animal is of a predatory nature, which also often happens. Therefore, you need a good margin in the length of the fishing line.
The fishing line in a spinning rod is tied to the drum at one end, and to the cord at the other. This is a feature of winding fishing line on this type of reel.
Professional fishermen advise: Before you start learning how to properly wind fishing line onto a reel, you should first buy backing.
Backing consists of synthetic fibers that are laid on a spool of 10 to 100 meters. Due to this device, the diameter of the drum increases. Thanks to this, the turns of the cord will be positioned correctly, closer to the side of the spool.
Experienced fishermen note: Many people make a mistake when preparing a spinning rod for work.
There are only two correct ways to wind:
- When the line is positioned against the rotation of the inertial reel.
- When it is located along the rotation arrow.
If you place the line in rotation , you may get a “beard”. In this case, it will be difficult to withstand the process of fishing in this case. The fishing line will constantly get tangled.
Placing the fishing line opposite the movement of the reel is the surest way, since in this case, the reel drum will rotate correctly and there will be no “beard”.
That is, if you wind the line clockwise, the reel can drop the line, if counterclockwise, it will spin correctly. In other words, the line wire in a spinning rod with an inertial reel should be wound along the rod - it’s simple.
How much fishing line will fit on the spool. Spinning reel spool capacity calculator
Very often, before purchasing the spinning reel of your choice, it would be useful to know how much fishing line of the diameter you need will fit on its spool. After all, the manufacturer indicates in the specifications only one fishing line diameter, which is often slightly different from what is needed. In order not to guess what and how much can be wound on a reel, we have written a simple calculator that will do all the calculations automatically. Simply indicate the marking on the reel spool and enter the diameter of the fishing line that you expect will be wound on it. You can also approximately calculate the amount of fishing braided cord, but you should remember that braided cords do not have a perfectly round cross-sectional profile and the counting accuracy will be lower.
PS We gave ourselves a little work and now you can use this calculator on your Android device
(you can download it from this link).
Plus, it's absolutely free. Now, if you decide to buy yourself a fishing reel in a regular/stationary store, you can immediately, on the spot, standing in front of the display window, estimate how much fishing line you need will fit on its spool. The line on the spool of your reel fits: Meters millimeters
| If you wind mm line on this spool |
| Then it will fit meter(s) |
In one of the comments to this entry, the thought was voiced that the calculator does not calculate correctly, its results do not coincide with the declared ones. And this, supposedly, can be easily seen on the spools of Shimano reels.
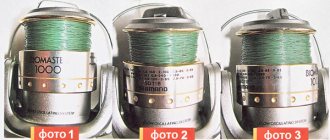
Well, let's check this thesis in practice. One of my old friends sent me a photo of the spool of his reel (I understand that this is the Catana series), where the line capacity marking is clearly visible.
So: we should fit on such a spool:
240 meters 0.20 fishing line
160 meters 0.25 fishing line
110 meters of 0.30 fishing line (it’s not very visible, but I double-checked it).
Now let’s see how things stand with the calculations on the calculator: we basically set 240m/0.20mm as the initial data.
0.25 mm will fit 153.6 meters - 6.5 meters less than stated.
0.30mm will fit 106.7 meters - 3.5 meters less than stated.
It would be possible to indicate other combinations of diameters and results, but, really, if desired, everyone can easily do this on their own (I’ll tell you a terrible secret - with other combinations of the same parameters, the data can sometimes be calculated exactly to fit).
Mathematically, the results are slightly different from those stated. But let's be honest, will it be so critical for most fishermen if, when winding the fishing line onto the spool, the fishing line will fit 3-5 meters less or more than the calculated one? I think not, and such an error in real life can be neglected.
How to wind fishing line on a spinning reel alone: video
Inertia-free spinning reel
The procedure for winding fishing line on a spinning reel is considered one of the simplest. It can be done alone, without assistants. Here are the steps:
- Place the bobbin on a metal pin, which must first be secured statically. This could be a pencil, a knitting needle or a long screwdriver. The main thing is that the bobbin rotates freely.
- Thread the fishing wire through the rings and tie a knot. Start threading from the spool mount.
- Now raise the line arc and wrap the line thread around the spool. Make another knot and tighten. Lower the line guide.
- You can stick a patch under the attachment point or attach a piece of elastic cut from the fingertip. This will help the fishing wire wrap properly and prevent it from slipping.
- Now wind the fishing line by rotating the handle.
- The line must be kept taut at all times. To do this, hold the reel with your free hand.
Watch the video. In it, an experienced fisherman tells how to reel in a fishing line alone using backing.
Connection of backing and main line
You can connect the backing and the main line using several different knots.
Albright Knot
The Albright knot is well suited for tying the main line to the backing; the knot is easy to knit, reliable, and does not weaken the line in the knot.
To tie the main line to the backing using the Albright Knot, follow these steps:
- Make a loop on the backing
- Pull more main line through this loop
- We bring the end of the main line to the base of the loop, fix the main line and backing with our fingers, make 10 turns of the main line around the main line and backing
- We pass the end of the main line through the loop in the opposite direction
- We tighten the knot to give it a shape, without tightening it to the end, moisten it, tighten the knot to the end, cut off the excess ends
Leader knot
The Leader knot is well suited for tying the main line to the backing; when tied correctly, it turns out to be very compact and neat.
To tie the main line to the backing using the Leader knot, follow these steps:
- At the end of the main line, make a simple knot
- Thread the end of the backing through it
- Make a loop out of backing
- Make 5-6 turns inside the loop, while grabbing the main line and backing, wet them, tighten the knot, trim off the excess ends
Carrot knot
The Mahin knot gets its name from its conical shape and can also be used to tie the main line to the backing.
You may be interested in: Fishing knots
To tie the main line to the backing using the Carrot knot, follow these steps:
- About 5 cm from the end of the main line, tie a simple knot, but do not tighten it
- Insert the end of the backing 15-20 cm long into the resulting loop
- Use the free end of the backing to make 10 turns around the main line.
- Holding the last turn with your hand, make another 6-10 turns in the opposite direction, on top of the previous ones
- Insert the end of the backing into the loop
- Wet the fishing line, tighten the knot, pull both ends, slowly pushing the turns towards the knot with your thumb and forefinger, cut off the excess ends
How to wind fishing line on a fishing reel: tips
The fishing line is correctly wound on the fishing rod reel
. The main thing when winding fishing line on the fishing rod reel is to take this matter seriously. After all, if you wind the fishing line incorrectly, the loop may be thrown off, and then you will not have to remove the fish, but will have to untangle the lump of fishing line for a long time. So how can you avoid making mistakes? Adviсe:
- Hook the bobbin onto a rigidly placed, level stick, handle, knitting needle or similar object. Most importantly, the fishing line must be perfectly straight - this is very important.
- You'll need one more free hand. But, if there is no one to help, then you can manage this process yourself. The above describes instructions on how to wind fishing line alone.
- Then pull the line through the ring and tie a knot at the end.
- Then attach the fishing line on top of the bobbin in a circle, first raising the arc of the line guide, and after the next tightened knot, lower the arc.
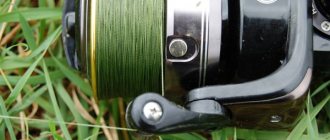
- It is important to ensure that the line is not level with the sides of the bobbin to avoid dropping loops. As described above, it is best to leave 1-2 millimeters to the side and preferably no more
- Ready.
For many fishermen, it is important when winding fishing line what material the spool is made of. Read about it below.
Adjusting the winding profile
The profile of winding the fishing line on the reel spool plays an important role during fishing. The casting distance, the likelihood of the formation of beards and loops, the number of bait shots, and the lifespan of the cord or fishing line depend on the fishing line winding profile.
When winding fishing line onto a reel spool, one of the winding profiles is formed:
- Cylindrical winding is a winding profile in which the fishing line is evenly distributed throughout the spool, resulting in a regular cylinder. The most universal winding profile, used both when fishing with a spinning rod and when fishing with a feeder. Provides a normal casting distance and a low probability of beard formation from the fishing line.
- Cone winding is a winding profile in which the winding diameter near the front side of the spool is minimal and gradually increases towards the rear side, the winding profile is in the form of a cone, tapering towards the front side of the spool. With a cone winding, the casting distance increases by about 15%, but at the same time the likelihood of the formation of beards from the fishing line increases.
- Reverse cone winding is a winding profile in which the diameter near the front edge of the spool is maximum and gradually decreases towards the rear edge. With reverse conical winding, the casting distance is slightly reduced, but at the same time the likelihood of the formation of beards from the fishing line is reduced.
Most anglers use a cylinder or small reverse cone spool of line. The line winding profile is adjusted using washers that come with the reel. Typically, the reel comes with 3 to 5 adjusting washers, which can be of different thicknesses. In order to adjust the winding profile, the angler has to experiment with the number of adjusting washers, rewinding the line several times until the desired result is obtained.
In a reel with a front drag, the adjusting washers are placed on the spool axis, above the ratchet sprocket. By reducing the total thickness of the adjusting washers, the winding is changed towards a reverse cone; with an increase in the total number of adjusting washers, the winding is changed towards a straight cone.
In reels with a rear drag, shims are installed inside the spool; to obtain a reverse cone, the thickness of the shims is increased, and to obtain a straight cone, the thickness of the shims is reduced.
You may be interested in: Underwater fishing cameras
How to wind fishing line on a baitcasting reel?
Multiplier reel with fishing line
This process will not seem complicated to you, but it is important for successful fishing and a good mood in the process. Incorrect winding of the fishing line can result in it getting tangled at the most inopportune moment. Undoubtedly, the resulting “beard” will not allow you to get a good catch. How to spool fishing line onto a baitcasting reel?
Unlike a spinning reel, winding on a multiplier device will be much simpler and does not have any different options or methods. In its process, three basic rules must be observed:
- The fishing line is tied to the reel in the hole intended by the design. In this case, it makes sense to use a knot that will definitely not come undone and will hold the end tightly.
- The rings should overlap tightly - one to one. The fishing line should be stretched well and, rotating the handle of the product, apply ring after ring.
- Subsequent layers of fishing line should not cross each other. This consistent and even winding prevents tangling.
This is the entire process of winding the line. It is worth noting that it is important to tension the thread well so that it lies tightly on the spool and subsequently cannot cross and tangle.
Attaching backing to the reel spool
You can secure the backing or main line to the reel spool using several different knots.
Arbor knot
The Arbor knot is the simplest and most reliable knot for tying fishing line to the reel spool. In ancient times, a knot was used to tie a string to a bow. The knot is self-tightening.
To tie line to the reel spool using an Arbor knot, follow these steps:
- Wrap the line around the reel spool, leaving a small end just enough to easily tie a knot.
- Wrap the free end of the line around the main line and tie a knot in it so that it slides along the main line
- Tie a knot at the free end of the fishing line, which will act as a stop knot and will not allow the first knot to come undone
- We wet the knot, carefully tighten it, cut off the excess end of the fishing line so that it does not interfere with winding the fishing line onto the spool
Attaching line to the reel spool using a self-tightening loop
A simple and reliable way to tie line to a reel is to use a self-tightening loop. With this method of tying the fishing line to the reel, the knot is tightened even tighter under load, does not turn, and can be easily removed from the spool if necessary.
To tie the line to the reel spool using a self-tightening loop, follow these steps:
- We make a small loop at the end of the fishing line, using a figure eight knot for this, tighten the knot tightly so that the knot is motionless
- We thread the main line through the resulting loop to form a large self-tightening loop
- We put a large self-tightening loop on the reel spool
- Rotate the reel handle to wind the line onto the spool
If when you turn the reel handle the loop turns on the spool, remove it and put it on the other side.
Attaching line to the reel spool using a long loop
Tying the fishing line to the reel using a long loop is in many ways similar to the previous method with a self-tightening loop and is an improved version of it.
To tie the fishing line to the reel spool using a loop length, follow these steps:
- Make a loop about 15 cm long at the end of the fishing line using a figure eight knot, the knot should be motionless
- Thread the main line through the resulting long loop to create a large self-tightening loop.
- Place a large self-tightening loop on the reel spool
- Throw another round of loop over the spool and tighten the loop
- Rotate the reel handle to wind the line onto the spool
This method of tying fishing line to the reel spool has the same advantages as the previous option: it is tightened even tighter under load, does not turn, and can be easily removed from the spool if necessary.
Spool Knot
The Spool Knot is used to tie line to the spool of a reel, somewhat reminiscent of the Clinch Knot.
To tie line to the reel spool using the Spool Knot, follow these steps:
- Wrap the end of the line around the spool
- At some distance from the spool, we bend the end of the line around the main line going to the spool
- We make 4-5 turns with the end of the line around the line coming from the spool
- Pass the end of the fishing line through the resulting loop
- Wet the line and tighten the knot
- We cut off the excess end of the fishing line, rotating the reel handle, and wind the fishing line onto the spool
The knot is self-tightening; the greater the load on the line, the stronger it is tightened on the spool.
How much fishing line should I wind on the girder?
Fishing line on a zherlitsa
A zherlitsa is an effective device for catching predatory fish, for example, you can use it to catch pike. Knowledge of the rules for its installation, including the amount of fishing line required, can provide a good result. Fishing line for a girder: how much should you reel?
- The amount of fishing line on the girder should exceed the depth of the reservoir by 3.5 - 4.5 times.
It is important to understand: The value is calculated not from the greatest depth of the reservoir where fishing will take place, but from the place where the girder itself is installed. Taking into account the fact that such a structure is not installed at a depth exceeding 4 meters, fishing line is not wound onto the girder for more than 15 meters.
- The length of fishing line required varies depending on the bottom of the reservoir.
- If it is abnormal, there are a lot of snags and other “interference,” then the length of the fishing line should exceed the depth by no more than 2.5 times maximum.
Such parameters of the fishing wire limit the pike’s movements and prevent it from entangling the bait in underwater vegetation. If the bottom is bad, then you should be prepared for the fish to be restless. It will actively tangle the line, dive sharply into the depths - making candles, and can wrap the tackle around the pole, therefore, pull out the entire structure.
Now you need to wind the cord onto the reel spool
Before this, put a bowl of water on the table and place a spool of braided wire in it. This is necessary so that the cord is saturated with water and becomes exactly what it is in fishing conditions, that is, it acquires volume and density. In addition, the wet cord fits better on the spool. But it does not need to be removed from the water during winding. So, rotating in a container with water, the braid is wound onto a reel.
After the cord is wound onto the reel spool, you need to wind the so-called backing , that is, the material that will serve as a lining for the cord. At the moment, the level of the wound braid is too low from the upper edges of the spool and such winding cannot be considered correct. For backing, you can use any fishing line of the same diameter as the cord or a little thicker. The ends of the braid and fishing line are connected with a fisherman's knot, and the fishing line is now wound onto the spool, which will serve as a backing lining.
When the line is almost level with the edges of the spool or lower by a millimeter, winding should be stopped. It should be noted here that the braided line can be wound flush with the edges of the spool, and the monofilament only below the edges, otherwise there will be tangles and line breaks. But it’s better to wind the braided line just below the edges of the spool, about a millimeter.
After this, the spool with the wound braid and fishing line is removed and a new spool is installed . The backing and cord are already wound onto it in reverse order. As a result, the braid will be perfectly wound onto the spool, having an elastic lining underneath - backing. And the level of the wound braid will be exactly the same as that chosen during the initial winding of the cord and backing, that is, level with the edges of the spool or slightly below them by half a millimeter or a millimeter.
How to wind fishing line onto the reel of a trimmer, mower, or lawn mower: video
Properly wound fishing line on the trimmer reel
A trimmer, mower or brush cutter works the same way as a fishing rod using fishing line thread. Only in a spinning rod is a line rope needed to cast the rod, but in a trimmer it is needed to cut off the greens. How to wind fishing line onto the reel of a trimmer, mower, or lawn mower? Here are the steps:
- Remove the spool from the spool box.
- The single-barrel reel has markings in the form of pointing arrows. They show the winding side, you will need 2 to 5 m of fishing line.
- For a trimmer head with two whiskers, you will need from 1.5 to 3 m. Wind the line wire in the opposite direction of rotation of the head.
- The trimmer head with auto-threading line rope is easy to thread: thread it correctly and secure the ends. The tool will automatically wind, you just need to turn it on.
What is backing
Using a base or backing allows you to wind fishing line onto an inertia-free reel without flaws and waste of expensive cords. Often the volume of the spool is much more capacious than the diameter of the cord required for fishing conditions can fill. As a rule, the working dimensions of the thread do not exceed one hundred meters, and manufacturers strive to produce for sale precisely these volumes of bobbins.
In addition, braided cords of small diameters and fishing lines specialized for spinning equipment are expensive enough to fill the free volume without any practical use. In these cases, the excess spool height is filled with another, cheaper material. In various sources devoted to this problem, anglers are recommended to use electrical tape as backing, considering it a quick and effective way, but based on practice, I will say that this solution can subsequently cause a number of problems and lead to difficulties in using the reel.
The insulating tape is exposed to water, and water constantly gets onto the base of the spool from the winding cord, either getting wet or completely drying out. As a result, the electrical tape loses its elastic properties, begins to warp and break the winding pattern of the rings. As a result, the rings overlap each other, which ultimately leads to a loss of range of the tackle and increased wear of the cord, especially braided ones.
The most correct solution is to use monofilament fishing lines as backing with a slightly larger diameter than the main thread and, of course, with lower requirements for its quality. When winding fishing line onto a reel, you simply need to tie the fishing line together with a regular knot and cut the ends of the connection as short as possible, soaking the knot with glue to prevent it from untying. A knot hidden in the depths of the coiling will not interfere with the convergence of the rings when casting.
Backing
Backing may also be needed if you do not need long casting or if you want to put part of the line on another reel. Backing is a fishing line or an old cord designed to fill excess space on the spool, in other words, winding under the main fishing line.
The backing should be stronger than the main line, but at the same time not differ much in diameter from it, then the winding will be smoother.
All fishermen know that the line should be wound almost under the side of the spool, namely not reaching the edge 1-1.5mm. Everyone achieves this in different ways, some use electrical tape, others use regular thread, others come up with other methods, but the only correct option is backing.
In order to correctly calculate the reel length, it is advisable to have a spare spool, which you need to install on the reel. If you don't have one, you'll need two free spools of fishing line.
First of all, we take our reel, put a spare spool (if available) and snap the free end of the line into the clip.
Now you need to create tension. You can do this in several ways:
- Place the spool of fishing line in a bucket of water
- Ask a second person to hold the bobbin on a pencil while adjusting the tension
- Using a special winding device (machine)
- Clamping the fishing line between the sheets of any book (this method is not suitable for braided lines)
I will use a bucket of water. We throw the reel with fishing line into the bucket and start reeling.
Connecting the backing and the main line
When the main line runs out, we need to tie the backing. You can connect the braid and backing using any knot for connecting two lines, for example a gripping one, for this:
- We go around one of the fishing lines with the second
- We make 5-7 turns with the short end of the fishing line around the long one
- Thread the short end under the twist
- Tighten the knot
We repeat the same operations with the second line and get this connection:
After connecting, throw the reel with backing into the water and continue winding until there is about 1-1.5mm left to the side of the spool. Depending on the rigidity of the fishing line, this distance can be increased or decreased. If the fishing line is rigid, the distance must be increased to prevent the loops from coming off when the bow is opened.
Now we need to tie the end of the backing to the spool that we will use for fishing. I have a spare spool so it will save a lot of time. If you don’t have a bobbin, you will have to first rewind all the equipment onto one bobbin, then onto the second, and only then start tying the backing to the main (working) bobbin.
Winding
Let's move on to the most crucial moment - winding the fishing line. Place the reel on the rod, and then thread the line through the guides and tie it to the spool.
We tie the fishing line to the spool
The most correct option would be to use a self-tightening knot. In order not to learn a new knot, we use the same gripping knot:
- First we form a loop
- Next, we bend the line around the free end and begin to form a gripping knot
- Now all that remains is to thread the short end of the fishing line into the loop under the twist and tighten the knot
- All that remains is to put the loop on the spool and tighten
At this point the knot is ready, do not forget that the knot should be at the bottom of the spool! If for some reason you do not want to use this knot, you can read the article about how to tie a fishing line to a reel, there you will definitely find an option to your liking.
Creating tension
In the section on backing, I already mentioned stringing methods, here we will look at these options in more detail.
The first simple way is to lower the spool of fishing line into a bucket of water; for this you need:
- Pour a little less than half of the water into the bucket (no matter what splashes fly)
- Place the bobbin in the bucket
- Move 1-1.5 meters away so that the line runs smoother
- Start winding
Due to the resistance of the water, tension is created, and the fishing line lies flat. I always use this method.
The second option would be to ask another person to create tension; for this you need:
- Give a friend a pencil (pen, stick, etc.)
- Place a reel of fishing line on a pencil
- A friend must slow down the reel with his finger to create tension.
- Start winding
This method is not very effective, since a person may be distracted and the tension during the winding process will not be uniform. This may cause extra loops to come off when casting.
Third, let's consider using a special winding machine. It looks like this:
It is used quite simply:
- We put a bobbin on the working part
- Using cones we fix it
- Use the nut to adjust the tension force
- We reel in
Well, the fourth option to create tension is to use a book. Be careful, this method is not suitable for winding braid, as it will tear the book and collect pieces of paper on itself. Winding is done like this:
- Take a book at least a centimeter thick
- Open the book in the middle and pass the fishing line there
- All that remains is to close the book and start winding
All these methods are just insurance for the first cast, and there is no point in saying which is better. After the first cast and reeling out the fishing line on the pond, the fishing line will take on the necessary tension. It depends on the weight of the equipment, casting distance, and many other small factors.
However, you should not ignore this stage; here is an example of winding with and without tension:
As you can see in the photo, on one spool the braid is laid turn to turn, on the other the turns overlap each other. From this we can conclude that without tension there is a possibility of excess (loose) loops coming off, and this will lead to the formation of a “beard”.
Let's start winding
Now we just have to choose the method of tensioning the fishing line and wind the entire reel equipment. As I said above, I use a bucket of water.
Thanks to these simple manipulations, we correctly wound the fishing line onto the spool and ended up with something like this:
Friends, since I gave an example on an old reel, the photo turned out unattractive. Don't worry, if you do it right it will turn out great.
