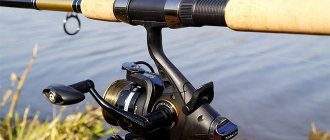
Fishing is one of the most common ways to relax outdoors. But not everyone can relax profitably; some simply cannot fish or tie fishing knots. The first thing an angler should know is how to tie a line to a reel.
This is one of the basic rules, without knowledge of which you will not be able to catch a fish. Every experienced fisherman, who has more than a dozen tattered gear behind him, has already understood how it is necessary to carry out such actions.
Well, for those who don’t understand, we decided to write an article about how to tie a fishing line to a reel on a spinning rod and a winter fishing rod, as well as to the spool of an inertia-free reel, inertial and multiplier. Let's get started.
On a spinning rod
If you want to know how to tie a fishing line to the spool of a spinning reel, then you should think a little about whether you will use additional winding. I think that since such a reel only fits a small amount of fishing line or braid, it is of no use at all.
There are also many nuances in the technique of winding cord and fishing line onto a reel, but we will make a separate article about them to show you everything and not miss important details. Now I think we can move on to the binding technique:
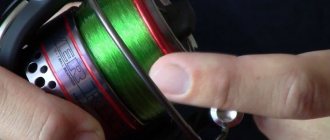
- Take the reel spool in your hand and wrap it with fishing line;
- The end of the fishing line must be wrapped around the entire base and made into a loop;
- Now you need to make several turns around the base and pass the free end of the fishing line through the loop;
- Tighten the knot and you're done.
I recommend everyone to watch the video below.
Is there a high probability of a pike biting the leash?
How likely is it to have a snack? We won't even say it as a percentage. In absolute numbers, over the past 15 years of considerable experience in the fishing industry, pike have bitten off live bait with a tee once. Well, let’s add one more “snack” of the fishing line on a spinning rod with a wobbler. Even smiled.
In principle, the fear of a “snack”, motivated by the fact that “suddenly” a super-duper large pike would take hold and bite off the tackle, pushed me, as they say, into thought. We think that only fluorocarbon and similar leashes can properly “camouflage” the tackle without harming its visibility.
We tried to install a “water” colored braid, which is less prone to “overbiting”. It removes many of the “harmfulness” of a metal leash, but does not “work” better than fluorocarbon. We finally settled on the leashless option, while continuing to “test” fluorocarbon leashes.
The so-called “double” line, when a loop with double walls going up 10-15 cm, the depth of the pike’s grip, can be reduced from the main line.
In theory, even with the risk of being bitten, a leashless harness is more effective and smarter than a leash. Of course, this is not a call, and clearly not a requirement to “eliminate” the leash as such, but just, IMHO, a subjective assessment. Happy fishing!
Alexander Kuzin - Specially for the site DIY fishing crafts, Bryansk, Russia
In my opinion, when fishing for pike, it is enough to wind about twenty meters of fishing line with a diameter of 0.35 mm on a reel. Such a relatively thick fishing line does not hurt your hands, and its strength is enough for you to confidently fish out any pike. It can be of any color (the color does not affect the bite), but it is desirable that its stretchability be minimal - then the hooking will be of better quality.
For me and many other fishermen, the first ice is interesting primarily because you can catch pike with girders. This tackle, in its design and principle of operation, can be said to be simple, however, there are many subtleties that you should know in order for the first ice to leave pleasant memories of girder fishing and give worthy trophies.
Ice appears first on small shallow ponds and lakes, and in shallow bays of large reservoirs. These are the places that are most suitable for fishing with girders.
When planning to go fishing, you need to keep in mind that in many reservoirs during the period of the very first ice it can be extremely difficult to catch live bait. Perhaps there is still too little of him here or he has not had time to adapt to new conditions and is passive. In any case, if you are going to fish with girders, you need to take care of live bait in advance.
DESIGN FEATURES
Even if the pike is caught on its own, there is nothing to miss when dragging it through the ice crust. The crust has to be punched or pressed with your foot, and when there is a fish on the line, this is “not good.” It is much better if the base of the vent itself darkens the hole and protects it from freezing. The round stands for most models have a diameter of 20 cm, and this is enough to cover virtually any hole.
Tips for a fisherman: How to make a girder for summer fishing - What to choose for fishing
Another advantage of models with a round base is that they have a relatively high stand, which allows you to additionally “insulate” the hole with snow. To do this, the stand should be sprinkled with a layer of dry snow right up to the reel. This thermal insulation allows you to fish throughout the day in any frost, since the fishing line does not freeze into the ice.
The length of the spring on which the flag is attached also matters: it is better if it is longer. The baits often have to be placed at a decent distance from each other, and a high flag makes it easier to track bites.
Spring mounts have some minor drawbacks that should be addressed immediately. For example, the plastic sleeve into which the spring is inserted is usually very short, and when removing the lugs you have to grasp the spring with your bare hand. In the cold, your fingers instantly catch on the metal, which is very unpleasant. To avoid this, I wrapped the lower part of the spring (10 cm) on my vents with electrical tape - it became more comfortable to work in the cold.
Another drawback of many girders is that their coils are often dark in color. As a result, it is difficult to tell from a distance whether it is spinning or not. After the bite, when the flag flies up, it is important to immediately understand whether this is an idle response and, if not an idle response, then what the pike is doing: standing with bait in its mouth or moving.
It is much easier to navigate when the reel has contrasting segments, such as yellow and black or black and white. They can be painted over with markers or colored segments made of some thin waterproof material can be glued on.
NUANCES OF EQUIPMENT
The success of fishing with girders largely depends on how well they are equipped, and there are also some tricks here.
In my opinion, when fishing for pike, it is enough to wind about twenty meters of fishing line with a diameter of 0.35 mm on a reel. Such a relatively thick fishing line does not hurt your hands, and its strength is enough for you to confidently fish out any pike. It can be of any color (the color does not affect the bite), but it is desirable that its stretchability be minimal - then the hooking will be of better quality.
The sinker is put on the fishing line, now it’s the turn of the silicone stopper - it protects the knot that attaches the clasp for attaching the leash from damage when hooking. The fastener can be anything - the main thing is that it is convenient to change leashes in the cold.
STILL FLUOROCARBON
Leaders, in my opinion, are best made from fluorocarbon, although anglers have mixed feelings about it. This material is almost half as strong as a good monofilament line, and is much more expensive, but practice shows that with all this, fluorocarbon also has significant advantages. It does not stretch, is not afraid of ultraviolet radiation, ages very slowly and is much more resistant to mechanical damage. But most importantly, when using fluorocarbon leashes, the number of bites increases noticeably.
Leash length 35–40 cm, diameter 0.35 mm. Most fishermen simply tie the hook to the leash, but I prefer to make small loops at the ends of the leash using clamping tubes. The length of the bottom, in which the hook dangles freely, is 6–8 mm. This method of installation gives the baitfish more freedom, and it remains alert longer.
Of course, in fishing with girders there are many other important nuances relating, first of all, to the choice of place, the behavior of various live baits, the choice of the moment of hooking and the characteristics of fishing, but all these are topics for a separate discussion.
Catching predatory fish in winter with live bait is quite popular. Almost any predator that does not hibernate in winter can be caught using a zherlitsa. To ensure that fishing time is not wasted, it is important that the fishing rod equipment is made in accordance with all the rules of fishing art.
The choice of type of equipment for a winter girder is influenced by the following factors:
There are currently many designs of vents. But with all the variety of vents, the structure of the equipment is quite stereotypical. The equipment of a classic girder includes the following elements:
Coil
The design of the reel is extremely simple, since its task is only to store the required amount of fishing line. On a platform with a platform, the reel is attached to the stand using a bracket.
fishing line
In most cases, monofilament fishing line is used for winter fishing. Its diameter depends on the size of the intended prey.
It is recommended to tie the fishing line to the reel spool with an “arbor” knot.
Sinker
The sinker is usually used sliding, often in the shape of an olive, although in principle the shape of the sinker does not have any effect on the effectiveness of fishing. Its weight is determined by fishing conditions.
First of all, let's look at what conditions must be met so that after reeling the fisherman does not have any problems:
Equipment
Tips for a fisherman: How to make a pike girder with your own hands - How to best use
First of all, let's look at what conditions must be met so that after reeling the fisherman does not have any problems:
- If during casting the line is wound to the very end, so that it does not fly away along with the bait.
- It came off the spool easily while casting.
Beginning fishermen often do not use any fastenings or knots during reeling, arguing that once they have reeled in a full spool of fishing line, they will never unwind it in one cast.
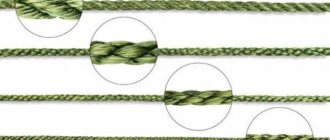
But we do not recommend doing this, and the reason is as follows. It doesn’t matter whether you use monofilament or braided cord, over time the working length deteriorates, becomes unreliable and must be cut.
For example, some spinning anglers cut off a meter of fishing line/braid each time they go fishing, thereby getting rid of the most worn and unreliable areas.
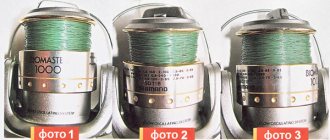
The correct winding looks like this:
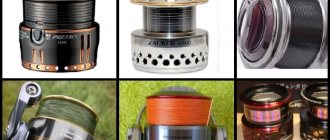
As you can see in the photo, there are only a few mm left to the side of the spool - this is the right option. In this case, the line easily comes off the reel and the casting is more accurate and longer-range.
Not all reels with fishing line go 150-300 meters, and to achieve the right result you can resort to several methods. One of them is to wrap the spool with electrical tape and then wind the fishing line on top of it. We recommend using another option, and it’s called backing.
Backing is a piece of fishing line or braid that is wound first onto the spool, after which comes the working part, 100-150 meters long.
For example, your cord is 100 meters long, and this is not enough to ensure that after winding there is 2-3 mm to the spool. In this case, you first wind some cheaper and simpler cord, and then, tying it in a knot, a section of 100 working meters.
- Photo installation instructions
- The best knot for tying fishing line to a reel
- Instructions in the video for attaching the fishing line to the spool
Photo installation instructions
Below is a photograph with two options for mounting the fishing line to the spool. Both are quite easy to learn, just practice a few times and everything will work out:
- Option 1 is self-tightening, repeating which you will have a reliable fastening.
- Option 2 is simpler and clearer, the important point here is that the knot does not stretch or diverge, therefore it suits our needs perfectly.
In any of these 3 listed options, attach the fishing line to the bottom of the spool - in this case, the knot will come into contact with the fishing line extremely rarely.
Let us repeat, it is necessary to wind the fishing line onto the reel until there is 2-3 mm left to the side of the spool. This is a very important point that many novice fishermen neglect, but in vain. After all, the quality of the winding will determine how the line falls off, the formation of beards, the casting distance and the quality of laying during winding.
To completely fill the spool container with fishing line, you can, if necessary, use backing, which is located under the main working fishing line.
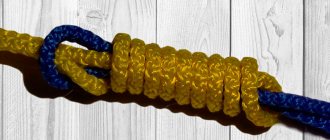
Arbor knot is the simplest knot for tying fishing line to a reel.
This knot is also self-tightening in nature. Sequencing:
Knot for tying fishing line similar to Clinch
- We wrap the end of the fishing line around the spool.
- At a short distance from the spool, we bend the end of the fishing line around the main part of the fishing line going to the reel.
- We make 4-6 turns with the end of the line around the section of the line going from the spool to the place where the main part of the line goes around. The main part of the line is in the loop.
- We thread the end of the fishing line into the resulting loop. The main part of the fishing line goes through the loop there.
- We wet the line and tighten the knot.
I recommend everyone to watch the video below.
On a winter fishing rod
Many anglers love to fish from ice, but not everyone understands how to tie a fishing line to a winter reel. And this is very important, because a reel for a winter fishing rod holds little fishing line and sometimes you have to remove all of it when fishing for large fish. And when the entire line is pulled out, the main load falls on the knot.
Despite all the simplicity and ease of knitting, this knot is particularly durable. Some fishermen, trying to increase the strength of this installation, recommend winding two loops from the fishing line around the reel.
But this trick will only work for reels with polished drums. For others it will be of no use.
As you can see from the diagram above, tying such a knot is quite simple. In addition, it is quite reliable. This is one of the most common methods of attaching thin winter fishing line to the reel of a winter fishing rod.
Such a knot is also used for tying fishing line to the spool of a fishing line.
Although such a knot has not become widespread among domestic fishermen, I think everyone will be able to understand for themselves all its advantages and adopt it. This is one of the best options for tying a fishing line to the reel of a winter fishing rod.
How to quickly and efficiently tie fishing line to a reel or spool
3. About live bait
What is a zherlitsa?
Zherlitsa
- fishing tackle for catching predatory fish, mainly pike, consisting of a fishing line (cord) wound crosswise on a small wooden flyer (forked knot), tied to a pole stuck obliquely to the water.
A hook, baited by a fish, is tied to the line on a leash and lowered into the water. The pike, having grabbed the bait, pulls the line, which gradually unwinds from the flyer; Having swallowed the hook at this time, the fish is caught and pulled out by the fishermen during periodic inspection of the girders they have set.
A good winter shelter must meet a number of different requirements. It should be easy to manufacture and convenient to handle, compact enough when folded and clearly visible from afar when charged. The rod should be quite sensitive, but not triggered by strong gusts of wind, be equally reliable and suitable for different fishing conditions - in still water and in the current, in frost and thaw, in holes and on shallows. Finally, the girder should simply please the eye with its appearance.
[THERE IS AN ANSWER] Which fishing line is better for the girder
Base
An “ideal” vent must have a foundation. It covers the hole from light, which is especially important in shallow water, and protects it from freezing, at least in moderate frosts. The only drawback of the design with a base is the “exposure” of the hole when playing: a predator may be frightened by the bright light. Therefore, some zherlichniks still sprinkle the hole under the base with snow, and additional insulation with snow on top of it prevents the lower, masking layer from freezing.
From the middle of one of the sides of the base, approximately 2/3 of its width, there is a slot a couple of millimeters wide. This slot is used to attach the stand.
It is better to place a larger flag on the spring so that it is visible from afar. The flag is hemmed to the spring or glued, for example, with waterproof “Moment”. It’s better to seal the edges of the flag somehow, otherwise you won’t be able to avoid snags later. The color of the flag should be clearly visible both on white snow and on “black” ice. If there are flags of “their” color on the girders, then they will stand out well among others, of which there are a lot of pike fishing sites.
Coil
A contrasting pattern can be applied to the outer surface of the coil. Then, even from a distance, it will be possible to determine what happens after a bite - the rotation of the painted reel is clearly visible from afar. Taking this into account, when installing the girders, it is better to orient the reels in the direction of their main location during fishing.
Equipment
Fishing
Having adjusted the depth of immersion of the live bait, the fishing line is clamped into the split of the slingshot in such a way that when jerking it is easily released and the pike freely begins to swallow the bait.
If the bait floats to the surface, use a sinker with a certain weight so that it does not allow the bait to float, but also does not tire it too much when moving.
It is very important to take fish from the same body of water as live bait. Experienced fishermen know that even a caddisfly brought from another body of water can be much worse as a bait than one caught here. So, pike will almost never touch live bait if it is a small fish not from a given river. Moreover, she even gives preference to the gudgeon from her river over the “imported” gudgeon. How she distinguishes them is difficult to say, but it is a fact.
All of the above applies to almost all types of fish that are caught with a girder.
Often the girder is used for fishing catfish. The technique for installing it in this case is somewhat different from installing it on a pike. The main differences are in the choice of location and strength of the girder reinforcement. You need to fasten it securely enough: suddenly luck smiles on you and a hundred-kilogram handsome one bites. In many reservoirs in Russia this is quite possible.
Nibble
The coiled wire is removed carefully; if a predator is felt at the other end, it is necessary to immediately make a short, strong hook.
It is not worth leading a large pike steeply, even if the tackle allows it, it is better to tire it by pulling it in when it weakens and releasing it when the fishing line is tensioned. When fishing, a landing net is advisable.
In addition to pike, you can catch perch, pike perch and catfish on the girders; burbot can be found in holes with cold springs. However, it is quite difficult to specialize in catching these fish (especially pike perch and burbot). For perch, it is better to place a single hook and small live bait on the girders. For catfish, larger ones are used, and in general all the tackle should be stronger. Catfish traps are placed exclusively in pits.
Experts' opinion
The common opinion that fishing for pike from ice on girders is quite primitive and unsportsmanlike, to put it mildly, is not entirely true and is based, most likely, on what we see from year to year in the bays: hundreds of stationary girders stupidly sticking out over the holes. Really, what is there to be able to do? In an hour or an hour and a half, I set up a dozen girders with baited crucian carp bought at the market, had lunch, spent the same amount of time getting ready, and with the result “fresh air” I went home. And at home I spent a good hour unraveling the gear.
With the appropriate approach, fishing with girders is a fairly effective and highly sporting method of fishing. Despite the fact that there is plenty of literature on this issue, not everything is covered.
2. How does fishing actually happen?
3. About live bait
As a live bait, perch is far superior to all other fish. Large pike take it more readily than others, and besides, it never tangles the tackle. Therefore, he should be given preference. Personally, I occasionally use roach and silver bream as live bait, but only, as they say, out of poverty.
4. The pike bites the fishing line. How to deal with this?
Indeed, even during hooking, with a successful combination of circumstances, everything can end badly for the fisherman. Conclusion: you should not cut at all, no matter how paradoxical it may seem. When the zherlitsa is triggered (by the way, there is nowhere to rush, you can easily finish your tea or finish your sandwich) proceed as follows.
But it is advisable to wind a regular cord around the spool of a small spinning reel.
To inertial
Fishermen use this type of reel very often, most likely because it holds so much line. In my opinion, it is worth devoting a separate place to this in our article and figuring out how to tie a fishing line to an inertial reel. The winding sequence is as follows:
- First open the reel line guide;
- Thread the line through each ring on the spinning rod or fishing rod. Once you get to the reel itself, tie the line on it using the knot described above (as in the diagram for a winter fishing rod);
- Now wind up a little line with your hands, then begin to lay it evenly and wind it using the reel drive mechanism.
How to strengthen a knot
To avoid the possibility of the loop slipping during reverse winding in the event of complete unwinding of the fishing line, it is necessary to use a special device. Especially for these purposes, fishing stores sell adhesive plates, the use of which does not cause difficulties. It is enough to glue the plate on top of the manufactured unit. An analogue of the device can be a patch.
Recommended reading: How to catch crayfish using crayfish traps
In some cases there is no need to tie a fishing line. Instead, the line is secured to the stopper and reeled in. This is possible if the reel by default has a clip or stopper that serves to attach the fishing line. In addition, you can avoid attaching the fishing line to the base of the reel by winding a large amount of fishing line.
To the inertialess
Before we begin to consider the question of how to tie a fishing line to a spinning reel, I would like to clarify one detail. The required line thickness is indicated on each reel of this type.
. This is very important; you cannot use fishing line of a smaller or larger diameter. The same applies to the required length of fishing line.
The most important point is not tying the fishing line, but the correct winding of it. If you wind the line incorrectly, the knots will be of little use. So this is worth paying special attention to. The line is wound as follows:
- Wind two turns of fishing line crosswise, leaving approximately 1.5 mm of free end and wind the fishing line.
- Be sure to adjust the coil (this is done using a pad of 4 - 6 washers)
- Typically, coils are set up at the factory for cylindrical winding, but you can change it to suit your needs.
How to properly set up the coil should be described in the instructions attached to it. Don't invent anything yourself.
To the multiplier
A baitcasting reel (many fishermen call it a marine reel) is one of the types of inertial reels. When equipping a multiplier spool, it is also very important to choose the diameter of the fishing line so that it matches the declared one.
The most common mistake among fishermen is threading a fishing line or braid through the outer eye of the spool on a multiplier reel, and correctly thread it into the near eye. Otherwise, your reel will lose its braking function.
Two main methods of how to tie a fishing line to a reel are shown in the photo ( the methods are universal and can be applied to inertial and inertia-free reels
):
- The higher knot looks a bit like a wedge, but it does not move and holds the line securely on the reel.
- And the knot below is self-tightening, which allows it to securely hold the fishing line, and it will never fly off the reel unless the fisherman himself wants it.
To minimize the contact of the knot with the fishing line during casting, tie it at the bottom of the spool.
It is worth winding a full spool of fishing line, right up to the sides. This is necessary to increase the casting distance and minimize resistance to the line when casting. For any reels except casting ones, you can use winding (electrical tape or cheap fishing line) to completely fill the spool.
Why tie a fishing line?
You can often hear the phrase from amateur fishermen or beginners: “Just reel it on the reel and that’s it, you have a hundred meters of it, it won’t all unwind.” But as you know, a lazy person works twice.
It is very important for us that on long casts with a spinning rod, the untied fishing line does not say goodbye to us, taking the bait, hook and other gear with it . In this case, all fishing will lead to winding down your arsenal and going to the market for fresh fish.
The second, no less important reason is that the knot, if you tie it, must be neat, ideally self-tightening . This approach to tying will minimize the chances of the fishing line being wound incorrectly and will eliminate the possibility of the formation of a “beard”, which can similarly send you to the market for fresh fish.
A self-tightening knot for a spool has always been and will be a priority when tying; it has a number of advantages that any other type does not have:
- Does not have burrs;
- Easy to tie;
- Does not create a beard;
- Has a high degree of tension;
- The higher the tension, the stronger the knot.
