Many fishermen claim that catching crucian carp with an elastic band is a real pleasure. This method does not require any expensive materials. The method allows you to catch fairly large specimens of fish by feeding the bait quietly and carefully. The simplicity of the technique allows you to get a large catch in a short time. However, first you need to choose the right fishing location, install the tackle correctly and accurately throw the bait.
Pros and cons of fishing with an elastic band
The method has its advantages and disadvantages. Knowing them, you can understand in which case it is better to use it.
Advantages:
- Possibility of fishing at a fairly large distance from the shore.
- The design of the tackle minimizes the fish falling off the hook and going into the reeds.
- All-weather - the quality of fishing is not affected by wind and rain, which cannot be said about float gear.
- Careful, quiet casting of the bait practically does not scare the fish.
- The bait is delivered exactly to the feeding area.
- The sensitivity of the method allows you to notice the bite of fish of different sizes. Donka with an elastic band has good sensitivity.
- The presence of several hooks on the tackle increases the likelihood of a good bite.
- The design of the gear minimizes the likelihood of entanglement.
- Compactness - the tackle easily fits into a regular backpack.
Flaws:
- Low applicability in overgrown areas
- High probability of getting caught in floating debris
- Difficulty of casting tackle from the shore for beginners
- Low catch in areas with strong currents.
Advantages and disadvantages of gear
It should be noted the main advantages of this type of equipment, such as an elastic band:
- — with the help of this equipment it is possible to fish a large area of the reservoir;
- — this equipment uses a large number of hooks, and therefore significantly increases the possibility of catching;
- - you can use a variety of baits;
- — all types of fish in the reservoir are caught;
- — the fishing process can be carried out both from the shore and from a boat;
- — small dimensions of the equipment itself, easily fits into a small bag.
Read: The best non-hooking hooks for pike and fishing techniques in grass and water lilies
But this equipment also has some disadvantages, such as:
- — a rather complex structure of this equipment, including many hooks;
- - with a fairly long elastic band and fishing line, you have to deliver it using a boat.
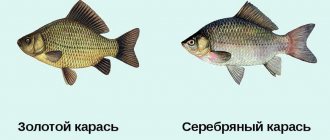
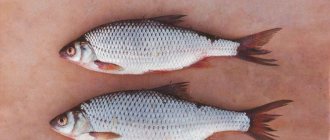
What kind of fish can you catch with this tackle?
With the help of such equipment as an elastic band, you can carry out fishing processes on any reservoirs, both in lake reservoirs and on rivers. This equipment allows you to catch any fish. Fish such as:
- - pike;
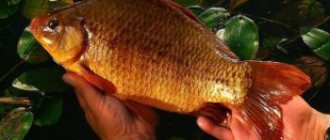
- - crucian carp;
- - perches;
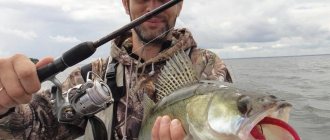
- - pike perch;
- - carps;
- - bream;
- - catfish and many other fish that live in the waters of our country.
But with all this, each type of fish should use its own type of bait.
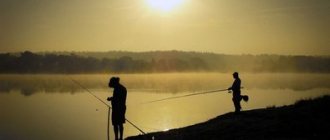
Choosing a place to fish with an elastic band
Arriving at a large body of water, many fishermen are faced with the problem of where to get the “elastic band”. It turns out that choosing a place is not so difficult. To do this, you just need to use three simple rules.
- Firstly, the location from the shore should be comfortable. These can be prepared sites or nickels of a flat bank. The main thing is without gullies or cliffs. The site must be cleared of tall grass and bushes. Usually a clearing 8-10 m in size from the water's edge is enough. If there is no site, prepare it yourself by crushing the grass and cutting down the bushes.
- Secondly, it is necessary to take into account the topography of the bottom of the reservoir. To fish with a rubber band, you need to choose a place with a smooth decline of the bottom from the coastline. Crucian carp, especially large ones, rarely go into shallow water, so the depth at the bait location should be 2-6 meters. If there are sharp dips at the bottom of the reservoir, they try to throw a “rubber band” sinker at the beginning of the rise of the bank from the opposite side of the hole. Thus, the rubber band route will be located above the gap. This option also allows you to catch crucian carp near the reeds.
- Thirdly, you should definitely take into account the presence of a current. Although the bait of the tackle itself, thanks to the heavy sinker, moves slightly from the casting point in strong currents, the feeding spot is washed out very much. Therefore, it is necessary to either choose areas with calm water, or often adjust the position of the sinker taking into account the blurring of the bait.
How to make
You can make an elastic band with your own hands from simple and inexpensive materials that can be easily purchased at any fishing or hardware store.
This gear has the following device:
- main line;
- rubber shock absorber;
- leashes with hooks;
- sinker tied on a nylon cord (allowed without it);
- reel or reel for storing and ;
- (bell).
So, monofilament with a diameter of 0.40–0.50 mm is used as the main fishing line. When catching small fish, such as crucian carp or perch, you can take a monofilament line 0.20–0.25 mm in diameter. The length of the working cord depends on the fishing range, but it is advisable to have several tens of meters in reserve.
Leashes are also knitted from monofilament. Only their diameter should be slightly smaller than the main line. This is done so that in the event of a possible snag, only this element breaks off, and the tackle itself survives.
The length of the leashes varies from 10 cm to a meter. It all depends on the mood of the fish, the bait used and the actual fishing conditions (spit or hole, with or without current). The hook is tied to the intended bait.
It is advisable to have equipment with different characteristics in stock, which will allow you to quickly adapt.
The elastic band is selected to have a round cross-section. The length of the shock absorber ranges from 5 to 20 meters, depending on the fishing distance. It usually stretches four to five times, which should be taken into account when choosing its length.
For loading, either a brick or stone, or a lead sinker is used. The weight of the sinker is determined by the presence of current, the hardness of the bottom and the fishing distance. A meter of thick fishing line or nylon cord is tied to the load, which is then connected to an elastic band.
A bell is usually used as a bite alarm. In “field” conditions, you can use an ordinary twig. If the donka is stationary for several days, and the fisherman comes to check it only periodically, then it would be correct to do without this element, so as not to attract unnecessary attention to the unattended gear.
To wind the tackle, you can use homemade wooden or foam reels, or you can buy factory ones made of plastic. Less commonly used is an inertial reel attached to a short fishing rod.
When fishing at long distances with a large load, when it is impossible to cast the tackle from the shore and you have to use a boat, it is also necessary to equip the elastic with a foam plastic float. It is tied to a load with a rope or thick fishing line. Such a buoy shows the location of the sinker so that you don’t have to look for it at the end of the fishing trip.
How to tie an elastic band with fishing line
There are several ways to connect the main line with an elastic band:
- ;
- tie the fishing line and shock absorber to the swivel;
- using fishing knots;
- using a rubber tube.
The last method is very original and is somewhat similar to a “loop-to-loop” connection:
- A silicone tube up to five cm long is placed on the end of the elastic band, and a loop is tied so that the tube is inside the loop.
- Then the main fishing line is threaded into the tube and a loop is also knitted.
That's it, the connection is ready. It is very simple, reliable and can withstand loads of up to a kilogram.
Which cargo is better
Of course, it is advisable to have a lead sinker. Its shape should allow the equipment to be securely fixed at one point. Most often, ring-shaped weights with notches along the perimeter are used. This type is great for currents and hard bottoms.
Other models can be used in calm waters. The main thing is that when removing the gear from the water, the elastic band cannot move this anchor from its place. If lead is not at hand, then ordinary brick or stone will do.
About leashes
When catching peaceful fish, leashes are made from monofilament. Their length is selected based on the mood of the fish and the presence of current. In passive fishing they are usually longer than in active fishing. They are made especially long when catching pelagic fish: sabrefish, blue bream and other species.
It is advisable to catch predatory fish with metal leashes. This way you can avoid cutting the bait. To do this, use thick monofilament fishing line, folded in half, or fluorocarbon.
How to throw (start) a donk with an elastic band
The easiest way to install gear is to cast a sinker from the shore. If the depth and temperature of the water in the reservoir allow, do this from small shallow water. Before casting, the first thing to check is the integrity of the equipment, the absence of tangled areas, damage, and the reliability of fixation of the sinker and hooks. The length of the leashes and the distance between them should be such that they cannot intertwine with each other. Then the tackle is carefully laid out on the shore so that when casting, the fishing line does not intertwine with each other and does not catch on the grass. There is no need to put on bait when casting. If the cast is successful, this can be done using an elastic band.
Having prepared the tackle, you should place the load in the right place. This is done by unwinding it or gradually swinging it on a rubber cord. An alternative method is to try throwing the sinker with a simple sharp throw with your hand. In this case, the flight range will depend on its mass, shape and throw force. To signal a bite at the end of the tackle, you need to attach a guard to the fishing line. Once the gear is installed, you can begin to attach the bait.
Making your own elastic band
Elastic bands can be bought ready for fishing, but on sale there are some average options for tackle, which are not always properly mounted. In order for the elastic to optimally suit the fishing conditions, it is better to assemble it yourself.
Let's look at how to make a rubber band for fishing with your own hands. To make it you need to have:
- sinker;
- a piece of nylon cord;
- rubber thread;
- main line;
- fishing line for leashes;
- hooks;
- swivels with clasps;
- reel or reel;
Hooks for elastic bands
Installation highlights
Installation of the gear is carried out in the following sequence:
- A piece of nylon cord 50–80 cm long is tied to the sinker.
- A carbine is attached to the free end of the cord.
- One of the ends of the elastic band is attached to the carabiner using the “loop-to-loop” method. The loop at the end of the elastic is knitted with a double knot, as when making leashes. Before tightening the knot, the rubber band must be wetted to protect it from damage.
- At the second end of the elastic band, a second swivel is attached in the same way.
- Often the main fishing line with leashes are attached to the elastic band, but it is more practical to add a “working” piece of fishing line on which the leashes will be mounted.
- The main line is tied to the reel and wound around it.
A few words about the length of the elastic band for the tackle
In order to calculate the required length of rubber thread for making gear, it is necessary to determine its stretch coefficient. This can be done quite simply using a long ruler or tape measure. We stretch the ten-centimeter segment along the ruler to the limit and note its length. We divide the length of the stretched section of fishing line by its free length and get the desired value. If the length of the segment is 63 cm, then the coefficient is 6.3.
DIY fishing rubber band
Using an elastic band with its constant maximum stretch will lead to rapid wear of the material, so the resulting coefficient is reduced by 15–20%. In our example – 6.3*0.8 = 5.04. For convenience, we round the calculation to whole numbers.
To determine the length of the elastic, divide the planned fishing distance by the coefficient:
40 m: 5 = 8 m.
For a fishing distance of 40 meters, the length of the elastic should be 8 meters
It is important to take into account that the sinker should be at a distance of about 50 meters from the coastal edge, i.e.
slightly more than the total length of the elastic and main line.
Nozzle for catching crucian carp
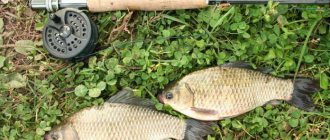
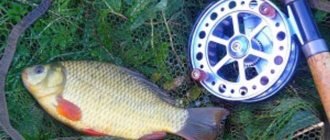
Rolls of bread crumb have proven to be a good bait for catching crucian carp. You can use white or black bread. Many fishermen note that the effectiveness of biting increases if you add butter and cheese. Also, crucian carp bite perfectly on balls of sour dough. Popular baits are boiled grains of corn, pearl barley, and wheat.
If the crucian carp is not too hungry, the fish may react sluggishly to baits. In this case, it is worth switching to bait. You can determine the moment when the fish begins to dig into the mud and air bubbles rise to the surface.
Features of equipment installation
The sinker is used weighing from 200 grams. It is best to use studded models that will cling to the bottom. A flat load can be pulled up and the rig will move. The rubber itself is tied to a thick rope, which in turn is fixed to the eye of the load. The intermediate part is necessary to prevent the rubber from rubbing against the metal. Its length is selected depending on the expected fishing distance. When casting by hand, use no more than 15 meters of elastic. If the fisherman has a boat, then it is better to bring in the cargo. This way you can accurately install the tackle without errors with the distance.
Leashes are attached to the other end of the rubber. Their length and distance between them depends on the local fish. If the main prey is crucian carp, then 15-centimeter leashes will be enough to catch it. When fishing for carp, you should increase not only their length, but also the distance between the hooks.
The components of the equipment are connected to each other using carabiners. The main line, which is wound on an inertial reel, is attached to the section with the leashes. The modern fishing market offers the use of special electronic alarms that have replaced outdated bells and bells. They record the slightest touches of the bait by the fish and accurately transmit them to the angler.
Read: Catching chub with a half-bottom
Feeding is carried out using unloaded springs, which are threaded onto the fishing line between the leashes. You can also deliver the bait by boat.
Bait and fishing technique
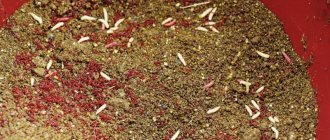
It is almost impossible to predict in advance what the fish will bite on. Crucian carp are often too capricious and completely refuse plant foods. In this case, the presence of bait will save the situation. Traditional baits of this kind are:
- worm (dung worm, earth worm, crawling worm)
- maggots
- bloodworm
- beetles
- larvae (butterflies, dragonflies)
For successful fishing, it is recommended to have 2-3 types of bait. Many anglers combine baits and baits, thereby increasing the chances of success.
The tactics for catching crucian carp are as follows. The bait is attached to the hooks, the fishing line is gradually released and the tackle returns to working condition. The moment the fish bites will be indicated by a guard and a slightly stretched fishing line. The nature of the crucian's bite is such that at first it takes a closer look at the bait and bites it lightly. During this time the signal will be weak. Then the fish takes the bait completely, the bell signal becomes noticeably stronger. At this moment it is necessary to hook the prey. The hook should be sharp and short. The fish is pulled ashore, the catch is removed and the bait is prepared for the next run.
When fishing for crucian carp, do not forget about the bait, periodically throwing it to the location of the sinker.
After successful fishing, you need to somehow get the rubber band back.
Often, when rolling up the tackle, it may turn out that the load has gone into the mud and gotten caught. A simple piece of advice will help you avoid losses. To pull out the tackle, collect the fishing line up to the elastic band on the reels. Then they raise the elastic band as high as possible, for example, by standing on a small ledge on the shore, and begin to pull the load. At first they pull slowly and carefully. As soon as it is felt that the load has come off the bottom, the tackle is pulled out faster so that the sinker floats rather than drags along the bottom. Article on the topic: Hooks for crucian carp
How to create tackle with your own hands
It is best to start manufacturing with a load. There are anglers who use a magnet from a transformer, although a regular lead weight weighing 200 grams or more would be an excellent option.
The most important thing is that this element weighs a lot. Otherwise, when replacing the nozzle, it will begin to move, which will indicate poor quality of the component.
At the same time, you need to make sure that the weight is not heavy, because somehow it will need to be pulled out from the shore.
Some fishermen use a railroad spike. It is good because when it sinks to the bottom, it clings to it with its “hat”. In addition, it is quite easy to hold in your hand. If this is how the load is used, then the elastic band in this case clings directly to the “hat”. If you cannot find anything suitable, do not despair, because there is a way out of the situation. You need to take a regular plastic bottle and fill it with pebbles or something similar to make the element a little heavier. Considering that there are plenty of these bottles everywhere, it will be possible to clean up nature a little and find a suitable part for yourself.
Read Fishing for pike in winter using a balance beamAfter the important component has been found, you can continue to make the tackle with your own hands.
Everything is done like this:
The elastic band should be tied to the load
As for the size, it is calculated based on the fact that the length will increase several times when stretched, so you should not take large elements, otherwise it will no longer be an elastic band, but a thread. It is important to make sure that the two components are well tied; if this is not the case, the weight will remain at the bottom and the elastic will return back. If the load has edges, it is recommended to tie the elastic band through ropes or something similar so that the main element does not fray, since then it will have to be changed regularly. At the other end of the elastic you need to make a loop and tie the main fishing line to it
As for its cross-section, it depends directly on the type of fish. If you plan to fish for small prey, then the diameter of the thread can be thin. With large specimens, the fishing line for crucian carp needs a denser one. After this, leashes and hooks are tied to the main line. If the fisherman knows for sure that there are big fish in the river, then it is better that the leashes are the same diameter as the main fish. In this case there is no point in taking a smaller line. We need to say a few words about hooks. They sometimes get stuck during work and transportation. And in order to avoid this, you need to attach pieces of insulation or cambrics to the fishing line (where the hooks are threaded). The free end of the line is tied to a reel or fishing rod.