Fly fishing gear components
Let's take a closer look at each of the components of fly fishing gear.
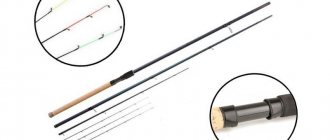
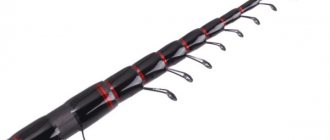
Fly fishing rod
Rods are made of bamboo, carbon fiber and fiberglass.
For beginner anglers, the best choice is a carbon-fiber rod, two-armed, class 6 or 7. It can withstand the weight of fish from 50 g to several kilograms. You need to make sure that the rod is not too flexible. Be sure to cover the handle with cork, leather or rubber.
The price of a fishing rod depends on the manufacturer and ranges from $60 and above. For 2000 rubles you can choose a very good option, which, if treated with care, will last a long time.
Coil selection
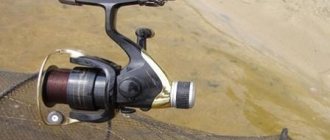
Inertial reel for fly fishing
There are several (three) types of reels: ordinary inertial, automatic and multiplier. For beginner fly fishers, a regular reel model is best suited. Be sure to ensure that the brake is adjusted. It can be equipped with a ratchet. An important thing in choosing a reel is that the class of the rod must match the class of the reel.
The price of a good reel will vary from 1500 rubles and above.
Cord and its features
The most expensive element of fly fishing gear is the line. Just like the reel, it must correspond to the class of the fishing rod. Everything must be in balance. For a beginner in this business, a floating model cord is best suited (it will be easier to cast). The best color to choose is white. It will be clearly visible on the water.
Additional cord (backing)
The additional cord is intended for training, as well as for catching large fish. For a beginner angler, it is best to have two sets: one for training, the other for fishing. The first option can be chosen from cheap models.
Leash (undergrowth)
An important part of the fly fishing equipment is the leader. Thanks to it, a smooth transition from the cord to the front sight is achieved
You can buy undergrowth or make it yourself at home. The length of the undergrowth depends on the place of fishing and casting. Usually it is 2 or 2.5 meters.
The leash is an equally important part of fly fishing. After all, it is to this that the hanging fly is tied. The first leash should be shorter (50-60 cm), and the second longer (100 cm). This is convenient, the leashes will not get tangled. If this happens, in order to untangle the fly faster, you need to make leashes of different colors.
Front sights
For novice fishermen, training should be carried out frequently, and tampons (cotton wool) should be tied on instead of flies. If the craft is mastered, then it is best to have two types of flies: wet and dry. Size is also important for beginners: you need to start with a size of 3.5 or more.
Remember: flies wear out very quickly. To extend their shelf life, you need to thoroughly dry the flies after each fishing trip.
The average price of one fly is from 30 to 60 rubles, but, of course, you can also find works of art with additional zeros in the price.
Fly fishing techniques and tactics
In places where effective fishing with a spinning rod or a classic fishing rod is difficult due to cramped conditions, for example, crowns of trees and bushes hanging over the water, rapid currents in shallow waters overgrown with underwater thickets, you can comfortably make a fly cast in the hope of a sure bite of a variety of fish species.
The technique itself consists of three main operations, where casting is considered the most complex manipulation, requiring some practice in presenting a weightless bait due to the inertial force of the cord. Retrieving the fly is carried out using the method of rafting, holding the bait in a stream of water, as well as basic pulling. The final operation of the fishing technique is reeling, the essence of which is the fatigue of the hooked fish, and its smooth and accurate insertion into the landing net prepared in advance.
Fly fishing gear and catching fish with it is a fascinating and interesting activity that is characterized by exciting emotions and excitement. Fly fishing is not difficult, but experienced fishermen consider it an art. Even in ancient times in England, aristocrats loved to fly fish, and today this type of fishing is popular in many countries around the world.
- Fly fishing gear components ↓
- Fly fishing rod ↓
- Coil selection ↓
- Cord and its features ↓
- Additional cord (backing) ↓
- Connector ↓
- Leash (undergrowth) ↓
- Front sights ↓
- Collecting fly fishing ↓
- Fishing technique ↓
- How to avoid mistakes as a beginner fly fisherman ↓
You can use fly fishing gear to catch fish:
- salmon;
- roach;
- carp;
- crucian carp;
- ide;
- dace;
- pike;
- grayling;
- perch and more.
Fly fishing tackle consists of the following components:
- Rod.
- Coil.
- Cord.
- Additional cord (backing).
- Connector.
- Undergrowth (leash).
- Front sight.
- Backing is simply a cord that is wound onto a reel in order to increase the level of line on the reel with something.
- The fly line is a heavy piece of structure that flies well.
- Leader piece of main line
- Leash made of thinner fishing line
Without looking for specific examples, let's watch a good video that eliminates ignorance regarding the composition of fly fishing gear.
Fly fishing and casting techniques video
Whenever you're learning something new, it's very helpful to combine written information with video. And since my goal is to teach my readers fly fishing, I have selected videos that will help you master this tackle. And just to see how experienced anglers fly fish, I think it will be interesting for you. Happy viewing and good fishing. No tail, no scales.
Fly fishing gear and casting technique, video
Fly fishing for pike
Fly fishing for chub part 1
Fly fishing for chub part 2
Fishing technique
When fly fishing, special attention is paid to the technique of casting and retrieving bait. Also, the fishing technique includes hooking a fish that has bitten and landing it.
As practice shows, it is quite difficult to master the correct casting on your own. It is better to do this under the guidance of an experienced fisherman.
Casting a line with a fly
Casting a line with bait is the most important element in fly fishing - it is best practiced in an open place.
Casting should begin with the correct grip of the fly rod handle. Then, swinging the rod back and forth, ensure that the cord with the reel is in the air all the time, after which it is given additional acceleration by pulling and releasing the cord.
This way you can cast over a distance of 20 meters or more.
Initial position
Mastering the basics of fly fishing should begin with taking the correct starting position. To do this, you need to raise the rod to the 09:00 position on the presented dial, and with your left hand fix the cord at the handle.
Lifting the cord
When fishing with a sinking line, one of the most critical moments is lifting the line out of the water. This is a rather difficult task that requires a certain dexterity and skill from the fisherman.
Lifting the cord must begin strictly from the surface of the water.
To do this, experienced fishermen advise touching the surface of the rod with the tip of the rod.
In this case, the “tulip” of the fishing rod should only move vertically upward.
This is required to ensure that the trajectory of movement is as long as possible. To do this, the arm is extended forward, and the hand at this time rises to shoulder level.
Once the rod reaches eye level, you can pull the line to the side or back
It is important when lifting the line to try to maximize the casting amplitude. In this way, the lifting force of the fly fishing rod increases
Back throw
First of all, you should learn the technique of throwing back, since it is precisely this that precedes the forward throw.
The throw back and up is simple, but it is important not to throw the rod over an imaginary vertical
Force should only be applied until the rod reaches a vertical position. Immediately after this, the brush should stop.
Forward Throw
The forward throw is almost automatic, provided the back throw is executed correctly. The forward throw itself begins after a short pause, with a movement of the elbow, after which the rod is moved with a wrist push to a position of approximately 30 degrees to the horizon.
Read Wobbler suspender description of bait selection and production
At the same time, the cord is pulled up with the left hand and additional energy is transferred to it. Before falling, the cord and leash are straightened. You need to aim the throw approximately 50 centimeters above the required point.
Typical beginner mistakes when casting
Among the most common mistakes of a beginning whip-wielder are the following:
- tilting the rod back.
- low throw.
- not too energetic actions when casting, as a result of which the line does not straighten completely and begins to fall at the back.
- asynchrony of movements.
Posting the bait
When fly fishing on a current, you can use the simplest wiring, which consists of delivering the fly to the required place, floating with the current.
When wiring, the bait can be held and submerged. To do this, the rod needs to be raised and lowered, and the cord periodically tightened.
Fishing
After the bite, you need to hook and land the fish. Fishing is a fairly important element of fishing.
It should be noted right away that if a large fish (from 1.5 kg) has bitten, then the rod must be held at an angle of 90 degrees, otherwise it may break.
When playing, the rings should also be tilted approximately 30 degrees to the right. This is necessary in order to prevent friction of the cord from the rod.
The most difficult and difficult moment of fishing is considered to be bringing the fish in for hooking or hooking. If fishing is carried out from the shore and without a partner, then hooking is performed after the fish is completely tired.
When fly fishing from a boat and in strong currents, it often happens that the fish cannot be brought to the side. In this case, you have to swim to the shore.
Where to start
The first steps in learning to cast should begin with mastering the simplest techniques:
For example, this: raise the cord above your head and rotate it, preventing it from falling to the ground. This exercise is called “holding the air.”
Another example: an important point when learning the “overhead cast” is to grasp the moment when the line is completely extended behind your head. You can only feel it, the form will pull back. You won't be able to see it. As soon as you turn your head, you will lose control of the cord.
Training must begin with learning techniques with one hand. Connect the second hand at later stages. Spey series casts are made with two-handed rods. These are more difficult casts. You can watch this on video:
First learn short-range fly casting. They move on to further, more complex ones later.
Let's say you have learned not only to cast a fly, but also to send it to the required distance. But that is not all. You must be able to present the fly, not slam it down onto the water as hard as you can, but gently lower it. The bite can occur when the fly splashes down or at the moment when it begins to sink. It happens. that the fish grabs the bait on the fly, jumping out of the water.
At the first stage of mastering fly fishing, be prepared for the fact that there will be a large loss of flies. The main reason is that flies will cling to coastal bushes and branches. At the first stage, you don’t have to hook a fly at all; one hook with a piece of foam rubber will be enough.
Fishing technique
As you already understand, casting a light bait would be impossible if not for the weight of the line.
Casting time is usually divided into three stages:
- swing back;
- increasing the length of the cord outside the rod blank;
- a swing followed by throwing the line in front of you to the fishing spot.
In order to give the cord an initial rise, you must:
- lift the cord with a wave and throw it back, using your forearm, and help with your hand at the last stage;
- It is necessary to finish lifting the cord with the body straightened and the rod raised vertically;
- stop and allow the cord to straighten completely;
- repeat the movement;
- lengthen the cord with your left hand before swinging forward near the reel drum;
- After the cord is completely straightened beyond the last ring, release the held cord with your left hand.
As practice shows, many who are at the first stage of training underestimate the initial swing of the rod, on which the accurate and successful casting of the bait depends. Also typical mistakes of a beginner are haste when casting and early release of slack line, inept use of the reel brakes, which leads to its tangling.
Posting of the bait is carried out depending on the following conditions:
- presence or absence of current;
- type of bait used (floating or sinking);
- places and directions of casting (with or against the current).
Advice: with any method of placing the bait, the cord must be constantly kept under tension without losing control of the fly.
Landing of the caught fish is carried out immediately after a sharp hook, without losing control of the trophy. It will be good if you force the fish to rise to the surface of the reservoir and take a breath of air. It is not recommended to force fishing. Only by tiring the clutch and rod with the work can you achieve successful fishing.
When playing, you should adhere to the following rules:
- do not allow the rod and cord to be positioned in the same plane;
- mandatory presence of a landing net;
- do not allow any slack between you and the fish; constant control;
- prevent fish from maneuvering;
- keep the rod in a vertical position (horizontal is also allowed, but provided that it is perpendicular to the cord).
Fly casting bait over the head
The main technique is a vertical cast (or normal cast). Throwing a bait over the head with a one-handed rod can be divided into three phases:
- swing the rod back,
- pause,
- swing the rod forward.
After a backswing of the rod, the line is fully straightened in the air behind the angler. The main options for this casting method are: over the shoulder, perpendicular, from the side with a reverse movement of the hand.
The force necessary to cast a line with bait is provided by a rod that acts like a spring. This “spring” is tensioned by the strength of the arm muscles and the relatively heavy wood. When swinging backwards, the resistance (viscosity) of the water also has a certain influence, which manifests itself when the line is torn off the surface of the water or pulled up along the surface of the water.
When the movement of the rod is stopped during the backswing, the tension in the rod tip is somewhat weakened and the line is given such a speed that should ensure its full straightening in the air. In addition, in many cases it is necessary that the part of the line being thrown can also pull up the slack. All stages of casting bait over the head are visible in Fig. 2.
In positions 1 to 4, thanks to the springing ability of the rod, the line is thrown back, flies over the rod, drawing an ever-lengthening loop with a more or less narrow bend, then it completely straightens. When swinging forward, the loop is repeated, but in the opposite direction (positions 4 to 7).
The basic rule for casting a bait over the head: if the chosen casting plane is not deliberately changed, then the line rushes forward in the same plane as back.
For example, if in position 4 (Fig. 2) the line behind the angler straightened out horizontally, then when swinging forward (position 5) it will also fly horizontally. If in position 1 (Fig. 3) the fisherman lowered the line behind him below the horizontal, then when he swings forward, the line will fly upward. In position 2, the line (Fig. 3) rose very high above the angler. During the forward swing, the line will fly sharply down and reach the water not far from the angler.
In order for the springing ability of the rod to manifest itself in full force. You need to learn how to hold the rod correctly and use your hand and wrist correctly. Hands need to be trained. If the wrist is weak, too flexible, this will negatively affect the casting.
The rod can be held in three ways (Fig. 4):
- Thumb at the top end of the handle. The direction of the thumb on the handle coincides with the direction of the rod axis (position 1). This finger position is considered the most suitable, but it requires special training of the wrist to achieve its flexibility. The advantage of this position of the hand is that during the forward swing it is very convenient to operate the handle with your thumb. During the backswing, the thumb prevents the wrist from bending too far.
- Index finger at the upper end of the handle (position 2). In this position, the index finger becomes more sensitive, and at the same time the accuracy of casting the bait increases. In the initial stage of mastering the casting technique, this hand position during the backswing helps to get used to accurately braking the movement of the rod handle. But on the other hand, the flexibility of the wrist is limited, which causes the hand to become overtired and cramps may appear. Therefore, intensive hand training is necessary.
- Handle between thumb and index finger (position 3). This position makes it possible to bend the wrist in the usual direction, but negatively affects the accuracy of the cast. In this case, there is a tendency of the rod to rotate somewhat around its axis. The described position of the fingers is more favorable for the forward swing than for the backward swing.
To prevent your fingers from getting too tired, you need to give them the opportunity to rest from time to time, that is, at the end of the backswing and during the pause, let go of your fingers, holding the handle only with your ring finger and little finger. You should also hold your guns loosely before any swing.
At the end of the cast, you need to stop squeezing the handle also because in this case, unwanted vibration of the rod tip, which causes casting errors, does not occur or is suspended.
Leg position only matters when casting long distances. At close and medium distances (up to 15-18 m), the angler does not move or moves slightly, so you should stand freely, with your legs slightly apart and your knees not tense.
For self-control, which is necessary to avoid mistakes from the very beginning, it is useful to know the mechanics of casting. If you mentally imagine a dial with a fishing rod moving along it instead of a needle, the picture will look like this. At the beginning of the backswing, the forearm, hand and rod form a straight line, parallel to the surface of the water and pointing to the number 9 (Fig. 5). In the segment from 9 to 11 they also form a straight line, only under the influence of the weight of the line the top of the rod tilts slightly. If at this time the wrist also bends, then only downwards. Therefore, the hand begins to lag behind the forearm. Between numbers 11 and 12, the forearm moves towards the shoulder, and meanwhile the wrist and hand tilt faster, and more - to number 1. This position represents the boundary of the backswing. When the movement of the handle suddenly stops, the tip of the rod tip, under the influence of the flying line, draws an arc that even reaches the number 2.
Thus, at the beginning of the forward swing, the top of the rod has a slope formed at the end of the back swing: the forearm goes forward with some lag of the hand - and so on until number 11 (Fig. 6). Now the brush is stopped abruptly, the tip of the rod bends. In this case, the wrist must act as a shock absorber, otherwise the tip of the rod begins to vibrate, as a result of which the line’s flight speed decreases.
When throwing over the head, the elbow should be kept close to the body, but without pressing it and giving more freedom to the forearm.
While the hand is not sufficiently trained and the wrist is strongly bent (Fig. 7), you can resort to a simple method - put the rod handle into the sleeve (Fig. 8). This gives the wrist some rigidity and makes casting easier.
It is advisable (especially at the beginning of mastering the casting technique) to carry out visual control of the flight of the line. To do this, the angler turns his right side 90°, and his left side is turned in the direction of the forward stroke (Fig. 9, see above).
You need to check the position of your forearm and hand, then see if the rod is tilted back more than necessary. At the same time, the scaffolding monitors its flight - it must fly upward and straighten correctly in a horizontal position.
It is very important to learn to pause for the proper length after the backswing and before the forward swing. Pause - the period of time during which the thrown back line is completely straightened in the air. During this period of time, which, depending on the length of the working part of the line, can last from a fraction of a second to several seconds, the fingers of the hand rest and prepare to swing forward.
The duration of the pause depends on the spring capacity of the rod and the length of the working part of the line. If the pause is too long, then the scaffold straightening from behind will fall low, catch on bushes or grass, and when it flies forward, the scaffold will fly too high. When the pause is too short, when you swing forward, you hear a click like the crack of a whip, and the leash breaks or the bait flies off. To learn how to pause not too long and not too short, you need to practice a lot. The technique of casting bait with fly fishing can be considered mastered only when the angler learns to pause.
The backswing will fail if it is not performed vigorously and weakly. To some extent, a too weak back swing is compensated by a stronger forward swing. When casting the bait correctly over the head, the force must be equally distributed between both strokes. And to achieve the required flight speed of the line, you need to make maximum use of the springing ability of the fishing rod. The more the rod bends during casting, the stronger and better it works.
When casting with a one-handed rod with the right hand, a very important role is assigned to the left hand: it holds the line taut while the right one swings back and forth. The left hand should move synchronously with the right, but be closer to the body. In some casting options (for example, when casting with a double pull line), the left hand is very actively involved.
A throw over the right shoulder differs from a throw over the head in that it is carried out in a plane that has a slight inclination to the right from the vertical (Fig. 10). It is used when there is not enough space above the angler for normal casting. Mastering this cast requires watching the line fly behind the angler.
Perpendicular casting is used when there are some obstacles behind (for example, bushes, steep bank, etc.), as well as in order to take advantage of the strong wind from the shore. The line is thrown almost perpendicularly overhead. In this case, it is necessary to monitor the flight of the scaffold every time. What the backswing looks like and how the arm works is shown in Figure 11.
The main disadvantage of perpendicular casting is that it eliminates the possibility of a correct and smooth landing of the bait. Therefore, in order to slightly change the casting plane, you should take a step forward at the beginning of the swing. This increases the accuracy of bait landing.
The wind from the shore can be successfully used to cast bait: making a strong upward swing with the rod, stop it between the numbers 11 and 12 on an imaginary dial and make a forward swing between the numbers 12 and 1. In this case, the bait will fly forward almost by itself (with the wind).
Side casting (Fig. 12) is used where tree crowns or other obstacles prevent vertical casting (position 1). This casting is also mastered by controlling the strokes. What a cast looks like when looking at the angler from the front can be seen in position 2 in Figure 12. Casting the bait from the side is very beneficial when fishing near your shore.
A throw with a reverse hand movement over the left shoulder is carried out when casting downstream from the right bank or upstream from the left bank. This type of casting is used when you want to get to hard-to-reach places, when wading fishing is excluded, when a strong wind is blowing from the right.
Casting with your left hand requires a lot of practice, but despite the difficulties, every angler should master it. The ability to cast a bait with your left hand gives you access to places that cannot be reached with your right hand. In addition, knowing the technique of this cast, you can periodically rest your right hand. When fishing on a river, the ability to cast bait with your left hand provides the opportunity to choose one bank or the other.
Throwing bait over the head with a two-handed rod. All principles of casting with a one-handed rod are fully valid for casting with a two-handed rod. At the same time, casting with both hands is much easier, and the casting quality is better.
The left hand covers the lower end of the handle, and the right hand covers the upper part. With this position of the hands, the right hand swings forward and back, and the left one makes it easier to control the rod. It is important that the casting force is not developed by swinging the hands in opposite directions - this negatively affects the quality of the cast.
The progress of casting a bait over the head with a two-handed rod is visible in Figure 15. Position 1 shows the swing of the cast back, when the rod begins to bend under the influence of the weight of the line and the resistance of the water. Here the right arm is almost straightened, and the left one rests slightly on the torso.
Position 2 shows how, during the backswing, the rod bends from the vertical, and the line is extended parallel to the surface of the water. The left hand touches the torso. Turning 90°, the angler follows the flight of the line in order to start the forward swing in time.
When swinging forward (position 3), the rod bends under the action of the line, the left hand again approaches the body.
We must try to swing forward and backward with equal force. In practice, anglers often make the back stroke too sluggish, and the forward stroke too sharp.
If the angler knows how to cast the bait with the other hand, that is, hold the rod handle at the upper end with the left hand, and the lower part with the right, this gives the same advantage as casting with the left hand with a one-handed rod.
Other options for casting a bait over the head (over the shoulder, from the side, perpendicular, with a reverse movement of the hand) with a two-handed rod are based on the same principles as casting with a one-handed rod.
Fly fishing techniques and tactics
In places where effective fishing with a spinning rod or a classic fishing rod is difficult due to cramped conditions, for example, crowns of trees and bushes hanging over the water, rapid currents in shallow waters overgrown with underwater thickets, you can comfortably make a fly cast in the hope of a sure bite of a variety of fish species.
The technique itself consists of three main operations, where casting is considered the most complex manipulation, requiring some practice in presenting a weightless bait due to the inertial force of the cord. Retrieving the fly is carried out using the method of rafting, holding the bait in a stream of water, as well as basic pulling. The final operation of the fishing technique is reeling, the essence of which is the fatigue of the hooked fish, and its smooth and accurate insertion into the landing net prepared in advance.
Fly fishing knots
Unlike float and spinning gear, the constituent elements of fly fishing are predominantly connected by knots. The only exception is the fastening of the fly and fishing line, where fasteners are used. Fly fishing knots are tested for strength not only during casting, but also when fishing for fish.
Connecting the backing to the coil. The ArborKnot knot is easy to make and the most common. This fastening method prevents the backing from rotating around the spool when the line is completely released.
A regular knot is tied at the end of the fly fishing line and pulled tight. Next, the cord is pulled through the reel, with the end with the knot at the bottom of the spool, and tied with the same end using a regular knot.
After tightening the second knot, the loop around the spool is also tightly tightened.
Connection of backing and cord. The AlbrightKnot is the most used knot when connecting backing and fly line. Typically, experienced fishermen knit it as follows:
To begin with, 1-2 m of cord is wrapped around a plastic spool. The end of the cord (5-7 cm) is doubled and the resulting loop is held with the index fingers. 30 cm of backing is threaded into the loop and also clamped with fingers. With the free end of the backing, 7-12 turns are made around the loop of the cord and backing. Movements should be made from the fingers to the end of the loop. The remaining part of the backing is re-threaded into the cord loop only in the opposite direction to the previous time. As a result, the two ends of the backing should be on the same side of the loop. The knot is clamped with the right hand, after which both ends of the cord are pulled. The procedure for tightening the backing is repeated only after changing hands
It is important to ensure that the backing winding does not fly out of place. Both ends of the cord are firmly attached with your fingers, and the backing is strongly tightened
It is better to tighten the knot after preliminary wetting.
Cord and undergrowth. In most cases, the ends of the cord and leader are equipped with special factory loops for fixation. If this privilege is missing, the Nail Knot node will always help out. For knitting you will need a tube, for example, a pen refill or a similar object.
- With two fingers of the right hand, the cord, the thick side of the undergrowth and the prepared tube are clamped. The undergrowth should have a free edge 5-7 cm long.
- The free end of the undergrowth is wrapped around all the components pressed with the fingers in five neat turns.
- The coils are pressed with your fingers, and the thick end of the undergrowth that was left earlier is threaded into the tube from right to left. The tube is carefully pulled out and the knot is tightened at the two ends of the undergrowth.
- For final fixation, the cord and undergrowth are pulled in different directions.
- Excess parts of the cord and undergrowth are carefully trimmed.
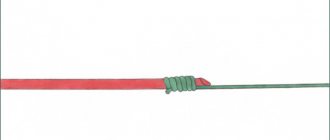
An alternative instruction in the form of a picture of a nail knot is presented below:
Leash and underbrush. To connect the leash and the leader, use the Double Surgeon's Knot or in Russian - “double surgical”.
- The ends of the leader and leash are aligned together with an overlap of 10-15 cm.
- Having made a regular knot, the leash with the thin end is pulled completely through the loop. The knot does not tighten.
- The above procedure is done twice.
- The knot is pre-tightened. And only after wetting does it tighten completely.
Read: Catching roach with a float rod
Tying a Double Surgeon's Knot for Fly Fishing
Learning to fly fish is a long and labor-intensive process, although many anglers are not at all intimidated by it. Previously, fly fishing was considered the privilege of aristocratic people; today the style remains held in high esteem among fishermen and is only accessible to those devoted to their hobby.
In conclusion, a video on how to assemble fly fishing gear. Enjoy watching and great catch!
Fly fishing, where it all began
Fly fishing is fishing with an artificial bait - a fly. At first, only trout and salmon were caught using this method. But today many other fish are caught this way. But even today this method is less popular than fishing with a spinning rod or a float rod. Because fly fishing gear is more expensive than other fishing methods. But if you want not just to fish, but to get beautiful and elegant fishing, then you need to choose only fly fishing.
This method of fishing has already existed for several centuries, so in 1496 the abbess of the monastery Juliana Bernes wrote her treatise on fly fishing. Which describes fishing methods and artificial flies similar to insects that fish feed on. They were then made from fur, feathers, and wool. These materials are still relevant for the use of flies. Rods were then made of wood, and cords were made of flax or horsehair, which were soaked in fat. Fly fishing was also considered a hobby for the nobility. Every nobleman had to be able to catch in this way. But in America, fly fishing has become a more common form of fishing, and it has been made available to everyone. Probably because the method of casting a fly rod is similar to the blows of a shepherd's whip. But this is probably just a version.
What kind of fish can you catch with fly fishing?
Traditionally, fly fishing is used for trout and salmon. After all, these are the fish that are best acclimatized in Europe and England itself. But in practice, the tackle expands its field of action many times over.
Using special flies and equipment, a fly fisherman can safely get:
• pike and perch,
• bleak and rudd,
• saberfish and chub,
• any other fish feeding near the surface.
Italian fly fishermen have completely turned this gear into an extreme one and learned to catch giant catfish with it, sitting in a single kayak in the middle of the river! So we can safely say that fly fishing has not yet revealed its capabilities in terms of catching fish that, it would seem, are completely unusual for it.
Rod
This is the basis of fly fishing gear. Depending on the power, fly fishing rods are divided into 14 classes.
This option is not for a beginner, so you should not consider class 1 and 2 rods as your first tool, even if you are a big fan of delicate gear.
Class 3 and 4 are analogous to light spinning rods. In general, drawing an analogy with spinning rods is not entirely correct (fly fishing is a completely different fishing), but for your better understanding, I decided to go this way.
Important! These rods are suitable for fishing with dry and wet flies, as well as nymphs. Length ranges from 2.4-2.7 meters
In principle, class 4 rods can be considered as the first gear if you plan to catch relatively small fish at short distances
The length ranges from 2.4-2.7 meters. In principle, class 4 rods can be considered as the first gear if you plan to catch relatively small fish at short distances.
They can be used for fishing with all types of flies; they can easily cope with nymphs and streamers measuring 4-7 cm. The average length of the rods is from 2.6 to 3.1 m.
With such tackle it is easy to make fairly long casts, it is pleasant to fish for small fish, but at the same time, with a 5-6 class rod, you will feel confident when fishing for large chub, ide or trout.
As for rods of class 8-14, these are powerful gear designed for catching large fish with heavy nymphs and large streamers.
In the conditions of our reservoirs, their use is impractical. Buying such gear only makes sense if you will be catching salmon, taimen, sea and ocean predators.
Fly fishing rods are also distinguished by their action. Let me make a reservation right away: do not try to choose a rod structure based on your spinning experience (especially if you fished heavily with jigs).
The structure of a fly fishing rod works exclusively for casting, and not for providing wiring and tracking bites.
Wiring in fly fishing is done with a cord. Through it, the fisherman determines when the bait is in the fish’s mouth. Therefore, fly fishing rods must have a whip action.
Buying an expensive fly rod as your first tool makes no sense
Pay attention to budget and mid-budget models of class 5-6, costing up to 100 USD
Learn how to handle such all-rounders first, and when you begin to understand some of the intricacies of fly fishing, you can think about buying an expensive fishing rod.
Of the specific models that are often found on sale, I can recommend the following fly fishing rods:
- SALMO Diamond FLY class 6/7 2.85 m Price: 1850-2000 rubles;
- Mikado FLY CAST 270 #5 Price: about 1500 rubles;
- DRAGON TEAM muchowka 2.90 m AFTMA 5-6 Price: 5200-5500 rubles;
- SALMO DAIMOND SKY FLY 5/6 class 2.70 m Price: about 2000 rubles;
- VISION CULT FIBER 5-6 class 2.28 m Price: 5500-6000 rubles.
Where to train
An experienced instructor or an experienced fly fisherman can help teach casting techniques, who will suggest the right actions and correct mistakes. If there are none, then you will have to study the technique yourself.
Many instructors prefer to train in a gym where there is plenty of space or on dry land. But there is an opinion that the technique is grasped only if you start training on the water. There is also a high probability of getting mechanical damage to the cord. But the cord is still an expensive component of the gear. Therefore, go straight to the pond, don’t be shy and try it.
The video shows a short master class on learning to cast:
You should not attach bait during training; if you catch fish, the process will distract from your training. your initial goal is to ensure that the cord lays flat on the water.
If you conduct training according to all the rules, then you need to start by honing individual elements.
Composition of fly fishing gear
The success of the entire fishing depends on how correctly the tackle is assembled.
It is important not only to choose the right components, but also to arrange them into a single ensemble. You should start by analyzing the list of elements required for fly fishing
So, the composition will include the following components:
- Blank (the rod itself). The basis for which the most demands are placed on power, strength, length and other qualities.
- Coil. It should be comfortable and functional.
- Cord. A responsible, albeit auxiliary, part that connects the different elements that will make up fly fishing tackle for beginners in finished form.
- Undergrowth with bait.
Additional components may also be required. They may be a hindrance for novice fishermen, but they should have some idea about this area. In particular, these can be carabiner connectors, floats and leashes. They simplify the fisherman’s task, although they require skillful handling.
Fly fishing gear
One of the most crucial moments is the choice of fly fishing gear. It consists of the following main elements:
- blank (rod)
- coil
- cord
- underbrush and bait
With this set of fishing accessories you can begin to get acquainted with fly fishing.
Additional details you will need later:
- floats and connectors
- carabiners and leashes
It is important to assemble such a fishing rod so that it is comfortable and obedient in the hands of a novice fisherman
Rod
Fly fishing rods or blanks are usually divided into classes.
As the class increases, the strength of the blank increases, and the rod is able to withstand greater loads. It is best to take your first steps in fly fishing with a 6-7 class fishing rod. Its strength is enough for both 200 gram grayling and 4 kilogram lenok.
Rods usually consist of 2 or 4 legs:
Two-piece models are more reliable because they have fewer connections, which reduces the number of breakdowns.
Four-piece fishing rods have the advantage of being longer. The form can be made from different materials:
- bamboo
- fiberglass
- carbon fiber
You can successfully fish with a rod made of any material, as long as it is not too flexible.
Particular attention must be paid to the handle. If the material used is leather or rubber, then it is better to refuse such a fishing rod
Only a cork handle is worthy of consideration for fly fishing.
Coil
Fly fishing reels are divided into three types:
- automatic
- cartoon
- ordinary
For a beginner fly fisherman, an ordinary model with an adjustable brake is suitable. The brake can be quiet or equipped with a ratchet
Read: Winter float rod
It is important that when the brake is in the tightened position, the cord does not come loose from the drum when tugging strongly on it. The weight of the reel should not exceed the weight of the rod
The reel drum should accommodate 30-60 m of 0.4 mm diameter extension line under the fly line. The optimal volume of fishing line will be such that the cord does not rub against the edges of the reel when wound.
Fly line
Along with the rod, fly line is the most expensive part of the tackle.
This is explained both by its special parameters and rapid wear even with careful use. During active fishing, you have to change the line twice during the season. The store may offer a sinking or floating option. With a floating model, it will be easier for a beginner to cast the equipment.
As for the class of the cord, it must correspond to the class of the fishing rod. Therefore, the optimal solution would be to purchase grade 6-7. Of all the colors, it is best to give preference to a white cord, which is most visible in the water.
After training on the shore or after fishing in dirty water, you should clean the cord with a special product, which is sometimes included in the box.
Leader or leash
A fishing line with a reducing diameter is used as a leader in fly fishing gear. For a beginner, the best option would be a taper of 0.5 mm to 0.2 mm. The thick end of the leash is tied to the cord, and the fly is mounted on the thin end of the fishing line.
The diameter of the undergrowth should be thinned as follows:
- 0.5 mm length 125 cm
- 0.45, 0.4, 0.35, 0.3 and 0.25 mm, 15 cm long
- 0.2 mm length 60 cm
The total length of the leash will be 2.6 m. If the length of the rod is less than this figure, then it is necessary to shorten the section with a thickness of 0.5 mm. In strong winds it is more convenient to use short undergrowth. Therefore, you should prepare several leashes of different lengths in advance.
It is imperative to check the condition of the fishing line on the leash after a series of casts for any knots. They reduce the strength of the fishing line, so such undergrowth must be replaced immediately.
Gear device
Rod
Fly fishing gear
Fishing rods are divided into one-handed and two-handed. The length of a standard one-handed fishing rod is 2 meters 70 centimeters, but there are also deviations from 2 meters to more than 3 meters. The length of two-handed fishing rods ranges from 4 to 6 meters. Both of them are much lighter than spinning rods; for example, many one-handed fishing rods weigh no more than 100-200 g.
Modern fishing rods are equipped with guides and a reel seat and have a cork handle. Historically, rod blanks were made from laminated bamboo and fiberglass. Modern fishing rods are mostly made of carbon fiber.
https://www.youtube.com/watch?v=mQQosTkpxgM
All rods are divided into classes, from 1 to 15. Each rod has a class that determines its power, ability to handle and cast a fly of a certain size. The combination of the power (class) of the rod with the weight of the line is what sends the fly to the fish. The class is determined by the weight of the working part of the cord. Classes of rods can be double, 1-2, 3-4, 5-6, 7-8, 9-10 and so on, and in high classes even triple.
Coil
A fly reel is a variation of the regular inertial reel. The reel in fly fishing gear is not involved in casting; it serves as a storage for line and backing, and for landing caught fish. Reels are classified according to rod classes, that is, for each rod you should select its reel class.
Otherwise, the tackle will not be balanced, which will lead to poor casting and rapid hand fatigue. Fly fishing reels come with two types of brakes. A ratchet brake is used in light class reels and for catching small fish; its function is only to slow down the drum from overrunning. Reels designed for catching large and strong trophies (salmon, tarpon) have a powerful friction brake that helps in fishing.
Fly line
The main difference between fly fishing and spinning is the principle of casting bait. When fishing with a spinning rod, the spoon flies forward and pulls the fishing line behind it, since it has considerable weight. In fly fishing, the mass of the fly is negligible, and casting it in this way would be impossible. Therefore, casting is carried out using a heavy and thick cord, which flies due to its own weight.
Cords are classified by class (weight of the first 9 meters of the front part of the cord), by buoyancy, by geometry (shape), by purpose
From a buoyancy point of view, cords can be:
- floating line, the cord floats entirely on the surface of the water. They are used for fishing on the surface of the water, under the surface or at shallow depths, when the depth is reached only by the weight of the fly.
- weakly sinking, or intermediate line, the cord slowly sinks into the water. They are used for fishing under the surface of the water or at shallow depths, when the weight of the fly alone is not enough to sink it to the desired depth.
- sinking line, full sinking line, the cord completely sinks. Used for fishing in deep horizons.
- combined: floating or intermediate with a sinking or slightly sinking end (sinktip line, floating/intermediate line). A combination line consisting of a main floating line and a short sinking part. They are used for fishing at different depths, depending on the speed of immersion of the sinking part. The floating part of the cord makes it easier to control the wiring (mending) during the current.
It also happens: Catching large crucian carp with a float rod: video on how to catch it with an asterisk
The geometry of the cord is usually indicated in Latin letters, the explanation is given below
- Cords type L, (level line, cylindrical) - uniform diameter along the entire length. Used as a running cord.
- Cord DT (Double Taper, double cone) - has symmetrical front and rear cones and a cylindrical part in the middle. They are used for accurate presentation of dry and wet flies, for teaching fly casting, and for casting with high precision over short distances.
- WF cord (Weight Forward, torpedo) - weight is concentrated in the front part of the cord (head). Makes it easier to cast over long distances, in windy weather, or to cast large and bulky flies. Presentation is generally inferior to DT cords.
- TT (Triangle Taper) cord - is half of a DT (front taper) cord that goes into the running line. Used in the same situations as the DT cord type.
- The SH (Shooting head) cord is a variation of the WF cord with an even shorter head, where the weight is shifted even closer to the front. Used for long distances and all types of casts with “shooting” the running line.
- Scandi cord (Scandinavian head, scandi). Shooting head for two-handed rods and spey-style casting, 2.5-3 rod lengths. It has a long front cone for a more or less delicate presentation in long-casting conditions.
- Skagit cord (skagit head, skagit). A very short shooting head designed for spey casting in tight spaces, or for casting large, heavy flies. Less than 2.5 rod lengths. Has a very short front taper and does not have good presentation.
According to their intended purpose, cords can be universal or highly specialized.
- Universal purpose - not designated in any way.
- Presentation type, for fishing with small dry and wet flies. They have a long front cone, DT, TT or WF geometry.
- For fishing with nymphs. Designated as nymph, indicator. They have a shorter and more aggressive front taper than general purpose lines and are designed for casting weighted or indicator nymphs.
- For fishing with a streamer. They are a type of WF cord with a short head.
- Pike, bass. They are a type of WF line with a short head, designed for casting large and heavy baits over long distances.
Backing
Backing, or extension cord, or extension line. It is used to lengthen the working length of the tackle in case of catching a large fish, because sometimes the fish can pull 150-200 meters from the reel, while the length of standard fly fishing cords is a little more than 30 meters. Backing is a thin twisted cord made of synthetic fibers.
Running
When using shooting heads, a running line, or “running line,” is added to the equipment. This is a thin extension of the fly line with a smooth sliding coating that makes it easier to shoot the head through the guides of the rod.
It also happens: Fishing for catfish on a quok
Shooting heads without running are never used separately. Connecting parts of equipment is usually done using the loop-to-loop method. Strictly speaking, ordinary (solid) WF cords also have a division into a head and a running line, but it is visually indistinguishable under the smooth shell.
Fly fishing flies
Dry fly fly Red Tag
The following types of flies are distinguished:
- dry - imitate aquatic insects in various stages of their life when they fall on the water surface, and terrestrial insects falling on the water surface under the influence of wind and other random factors.
- wet - imitate aquatic insects (for example, caddis flies) in the adult stage, laying eggs on plants immersed in water, and fish fry.
- nymphs - imitate aquatic invertebrates (amphipods, mayfly nymphs, caddisflies, stoneflies, mosquito larvae) living on the bottom or drawn by the flow in the water column.
- emergers - imitate insect larvae in the metamorphosis stage, floating to the surface of the water to transform into an adult insect.
- streamers - imitate small fish, leeches, shrimp, tadpoles, other inhabitants of the underwater world or small rodents swimming across the water flow on the surface.
According to the degree of imitation of living organisms, flies differ:
- realistic - depicting a simulated insect with a high degree of similarity.
- imitation (stencil) - imitating the most important proportions and shapes of an insect or group of insects.
- fantasy flies (attractors) - have no prototypes in living nature. They provoke the fish to grab out of curiosity, the instinct of protecting the territory, or aggression.
- decorative or frame flies. Flies knitted from rare or expensive materials and not intended for fishing. Making such flies is practiced as an independent art; work on a complex fly can take several days. “Frame” flies are demonstrated at exhibitions and knitting competitions, sold and made to order for collections.
In general, making fly fishing flies is an independent art form in fly fishing and one of the attractive aspects of this type of fishing.
Books by many famous fly fishermen are devoted to the art of making fly fishing, from the “Treatise on Fishing” (1496) by the legendary Abbess Juliana Berners, to modern authors, authorities and popularizers in the world of fly fishing, such as Oliver Edwards [2] . or Mikhail Shishkin[3].
Undergrowth
Undergrowth is an element of fly fishing gear located between the end of the cord and the leash or directly with the fly, which helps to correctly transfer the energy of the unfolding cord to the leash (fly), and the correct smooth landing of the fly on the surface of the water. This is especially important if fishing with dry flies or emergers.
https://www.youtube.com/watch?v=C1RPLhIO-F0
The length of the leader should be sufficient so that the cord does not frighten cautious fish, but, as a rule, does not exceed the length of the rod, so that when fishing for fish, the connection of the cord and the leader should not pass through the “tulip” (upper ring) of the rod, and the concomitant possibility of losing the catch if it jumps off from the tip of the cord there is a tube of a connecting loop with undergrowth and fish.
Traditionally, leaders were tied from several pieces of monofilament fishing line with different diameters - from a thicker one at the end, intended for attachment to the cord, to a thinner one, to which the leash or the fly itself is attached.
Fly fishing for pike
Despite the fact that specialized fishing stores offer a large selection of special cords for pike fishing, many casting methods do not allow the streamer to be delivered to the required distance due to insufficient mass.
Shooting heads are suitable for this situation. If you shorten the shooting head you can achieve the desired weight. After several trainings, after two or three swings, you can throw the streamer at a distance of about 30 meters.
Depending on the changes and fishing conditions, different options for the shooting head are possible (floating and quickly sinking line).
Cords of varying degrees of buoyancy are used, they are interconnected so that the shooting head lies in the water at approximately 45º, and there is direct contact with the front sight. Conventional sinking lines lie on the water in the form of an arc; the disadvantage is that you have to cope with the resistance of the line created by the current without immediately achieving direct contact.
In fly fishing, you need to be sure of the strength of the leash, since the teeth of a predatory fish will bite through a regular leash. You can use steel wire, Kevlar or super strong monofilament line. This line is good to use in clear waters, because... it is almost invisible in the water.
When choosing a streamer when fishing for pike, there are two options: imitating forage fish or relying on the hunting instinct of a predator.
In muddy water it is better to use bright baits, and in clear water - natural shades. Surface baits are also used. For indescribable sensations, it is best to fish with poppers!
Very often, the larger the bait, the better (can exceed 25cm).
Fly fishing for pike is an excellent replacement for spin fishing. More and more people are resorting to this method. Direct contact with fish and fly is an indescribable feeling for fishing enthusiasts.
Fly fishing for pike
Tips for fly fishing:
- When fly fishing, even the little things matter. A dry fly will float in the water for a long time only if it is covered with fat or flotation before fishing.
- If fishing takes place from a steep bank or the water requires a landing net, it is better if it is attached to the angler’s waist area. It will be difficult for an inexperienced fisherman to take the fish with his hand.
- A dry fly can get wet, so using a sponge is recommended. If you press the sponge against the fly, then all the moisture will be absorbed into the sponge, and the fly will be dry.
- The fisherman should always have a folding knife in his pocket, which will help cut the tackle if it gets tangled, or cut off an extra piece of fishing line when setting the bait.
- When fly fishing, the line may not glide well. Then it needs to be cleaned. You can purchase a special cleaner at any fishing store. It must be applied to a cloth and then cleaned along the entire length of the cord.
- If the bite occurs on one specific fly, then it is worth taking several flies of this type.
- If you are going to release the fish into the water after catching it, you need to do this as soon as possible. The fish should be held with its head against the current for some time, fresh water should pass through its gills. The fish must be held until it begins to spin in your hands and swims on its own.
- When fishing for fish, the undergrowth may break, so you need to take spare ones when fishing.
Fly fishing
Fly fishing
Fly fishing is a type of fishing using artificial bait, a fly. Initially, this method was intended only for hunting trout or salmon, but now other fish are also caught by fly fishing.
This beautiful and graceful method of fishing exists in fishing cultures of different peoples of the world. In 1496 in England, the abbess of the monastery Juliana Berners created a famous treatise on fishing. The book gave all kinds of instructions on fly fishing, a description of a dozen artificial flies simulating insects suitable for catching fish. In those days, feathers, fur and wool were used to crochet them. These materials are still used today along with many others. The first fishing rods were made of wood, and the cords were made of strands of flax or hair from the manes of horses, which were impregnated with fat or wax.
For a long time, this method of fishing was considered the prerogative of noble people; along with horse riding and dancing, it was included in the list of required skills for a gentleman. Fly fishing made a real splash in the USA. The Americans removed the aristocratic aura from it and made it accessible to everyone. By the beginning of the 20th century, more than 2 million fans of such fishing were registered in America. Today the country is a trendsetter in fly fishing.
Figuratively, fly casting can be compared to the work of a shepherd's whip, where, thanks to skillful actions, the whip, and in this case the bait, reaches a certain place that we need. Although fly fishing looks more delicate and beautiful, unlike working with a whip
Fly fishing gear includes a rod with rings, an inertial reel, a special cord and various baits.
Initiation into fly fishing
Fly fishing is considered the pinnacle of fishing skill and aesthetics. Experienced people say that fly fishing hooks once and for all. Once you catch a fish with this gear, all other types of fishing fade into the background.
Many anglers have a desire to fly fish. After watching videos about this method of fishing, some are inspired by the successes of their comrades who are already learning the intricacies of “aristocratic fishing”; others see fly fishing as a logical continuation of their spinning epic. Often, a desire remains a desire.
Anglers simply do not know how to choose the right rod and reel, what line a beginner should buy, where to start mastering fly casting, where to get flies, etc.
Not many articles have been written about fly fishing for beginners. Basically, materials in various types of fishing periodicals are designed for those who already fish this way.
Therefore, I decided to write a short thematic material for those who want to become a fly fisherman, but do not know where to start their journey. To start fly fishing, first of all, you need to acquire everything you need for fishing.
The main components of fly fishing gear are:
Let's look at each of them in more detail.
Fly fishing lures
There is a certain classification of types of flies:
- dry (exact imitation of an insect floating on the surface of a reservoir);
- wet (imitation of a dead insect immersed in water);
- nymphs (imitation of an invertebrate, these include worms, mosquito larvae, amphipods);
- streamers (imitation of small fish, as well as small inhabitants of the reservoir);
- fantasy or simply invented by a master fly models, without a prototype in nature;
- decorative (for aesthetic satisfaction, display at exhibitions, for private collections).
Like any other type of fishing, fly fishing is available to everyone who has a desire to master it and a body of water where, before fishing, they will have to devote some time to training to hone their casting skills. Taking the time to study the techniques and tactics of fly fishing, this method will reward you with an unforgettable experience of fighting for the coveted trophy.
