Breeding worms at home is possible not only for experts, but also for beginners. This activity is quite cost-effective, especially if you approach it responsibly and first analyze all the key points.
In general, to make your plan a reality, you do not need to prepare any special premises or have a large start-up capital, but rather purchase the necessary soil in advance and take maximum care to create the most favorable conditions for the reproduction of worms.
Types of worms, their benefits
There are many types of worms in nature, however, the following are suitable for breeding at home:
Rain, their bodies consist of a ring-shaped segment and have small bristles.
The main features of this type are:
- average length 12 – 29 centimeters;
- sliding body;
- dark color;
- average life expectancy 2.5 – 3.5 years;
- cylindrical shape.
Important: rain ones are considered the most unpretentious and are in greatest demand among buyers.
Californian, which are distinguished by their red color and short length.
Their features include:
- average length 6.5 – 8 centimeters;
- weight 0.8 – 1 gram;
- unpretentiousness;
- high fertility.
A prospector who is distinguished by high vitality and the presence of self-preservation instincts.
The primary features of this type include:
- avoiding low temperatures;
Note: if the soil becomes cold, it crawls as deep as possible or dies.
- average length 9 – 14 centimeters;
- high fertility.
Important: the prospector easily switches from one type of nutrition to another.
Many people are convinced that these individuals do not bring much benefit, but this is not true.
Thanks to them comes:
- Absorption of bacteria in soil.
- Saturation of soil with amino acids and biological substances.
- Increased productivity.
- Removing soil from rotting plants.
- Improving the quality of mail, in particular giving it more structure.
Important: it is also difficult to reduce soil acidity without them.
Breeding earthworms in the country. How to do it?
We know from school that earthworms are very useful living creatures. Their vital activity has a very beneficial effect on the quality of the soil. Its diet includes the remains of plant organic matter. Organic matter passed through the worm significantly increases soil fertility. By building tunnels in the soil, they promote soil aeration. It is for this property that gardeners are trying in every possible way to increase the population of worms on their property. Raincoats are also a coveted bait for any fisherman. In addition, worms are bred for sale. A kind of unique business. But the purpose of the article is the breeding of earthworms in terms of benefits for agriculture.
Breeding worms at home for beginners
Anyone can install worm hutches at home. The main thing for this is:
- Carefully consider the place where the mini-farm will stand.
- Using suitable tools, make a worm hole.
- Study all the requirements for the soil, and what conditions need to be maintained for the development and active reproduction of these individuals.
- Populate them correctly.
- Regularly feed and monitor the quality of water that enters the soil.
You should also think about how and to whom they will be implemented in the future.
How to choose a place?
In order for individuals to take root and begin to actively reproduce, you should choose the location wisely.
They feel comfortable if their mini-farms or worm hutches are located:
- warm;
Important: a comfortable temperature is considered to be 20 – 27 degrees Celsius.
- in silence;
- without any vibrations;
- where there are no specific and pungent odors.
An important point: if a person puts mini-farms in a room where the temperature is more than 35 degrees, then all the individuals will die.
Types of worms
The most comfortable, simple and popular worm traps are:
- carton boxes;
- wooden boxes;
- boxes made of food-grade plastic;
- old refrigerators;
- special vermicomposters.
Regardless of the type, each worm must be:
- dry:
- clean;
- on average 40 – 90 centimeters in length and width;
Advice: if a person plans to populate rain, red and other individuals in large quantities, then it is best to take old refrigerators.
- durable;
- with constant access of oxygen.
Important: without ventilation, all worms will die.
How to attract earthworms to your site
Recently, more and more gardeners and gardeners are striving for organic farming. This means that minimal mineral fertilizers are used on the site; many people refuse deep plowing. Instead, they are turning to natural ways to increase soil fertility.
The most important creator of humus in the soil on our planet is the earthworm. His whole life consists of passing masses of earth and plant debris through his digestive tract. The processed product is the most valuable vermicompost, a substrate rich in nutrients and vitamins. In addition to enriching the soil with nutrition, numerous holes - passages that the worm makes in the thickness of the soil - contribute to good water permeability and aeration. The activity of worms also helps eliminate excessive soil acidity.
Important! The digestive tract of the worm contains antibiotics and other active substances that can disinfect the processed soil. The worm is able to digest some types of bacteria, molds, and even nematodes.
Worms are of great importance in the process of ripening compost and manure.
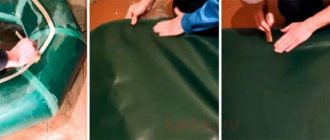
How to make a worm trap yourself?
To make your own worm cranks you will need:
- plastic boxes that are designed for transporting and storing vegetables (fruits);
Note: boxes are needed in quantities of 5 - 6 pieces and measuring 40 - 50 centimeters in length.
- drill;
- small wooden rods;
- sackcloth.
Manufacturing instructions:
- Take one box and use a drill to make holes on the sides.
Important: there is no need to drill the first drawer at the bottom.
- The remaining boxes are taken and small holes are drilled in each on the bottom side for ventilation.
- A single layer of rods is laid out at the bottom of each box.
- The top is covered with clean burlap.
Subsequently, prepared soil is poured on top of the laid burlap, the worms are moved into it, and the boxes are placed on top of each other.
Tip: it is recommended to cover the top drawer with a towel or light blanket to keep warm at all times.
Conditions for breeding worms: soil, temperature
No species of individuals will be able to take root if optimal conditions are not created for them.
For settlement it is important that the soil:
- It was wet.
Note: the ideal soil moisture for breeding and reproduction of each type of worm is 70%.
Advice: if a person finds it difficult to answer what moisture content the soil has, then you can test the mail yourself. To do this, it is recommended to take a handful of earth in your hand and squeeze it tightly. If a couple of drops of water are observed, the soil is sufficiently moist and suitable for use.
- Quite loose.
- Not sour.
It is noted that the best soil is taken next to a reservoir. In situations where the soil is highly acidic, it is recommended to add crushed chalk or sawdust.
In addition, the most important condition is maintaining a certain temperature. It is normal for the worms to stand at 19 – 28 degrees Celsius.
An important point: if the temperature in the room is below 18 degrees Celsius, this will lead to a decrease in the fertility of individuals by 5 to 7 times, and sub-zero temperatures and heat of more than 29 degrees will lead to their death.
In addition to optimal temperatures and suitable soil for cultivation, it is necessary to:
- lighting was in the range of 50 - 60 W;
- regular ventilation;
- absence of drafts and sudden temperature changes;
- complete isolation from pests, in particular rats;
Note: Rats and other rodents actively eat worms, especially earthworms.
- the water supplied to them did not contain chlorine or other chemical impurities.
An interesting point: it was noted that if the soil is moistened with rainwater, the fertility of the worms increases by 1.5 - 2 times.
How to check in?
Settling is allowed only 1.5 - 2 days after the soil has been prepared.
In general, this process goes through the following stages:
- Holes 3-4 centimeters deep are made manually in the soil.
If the box is 40-50 centimeters long, then it is enough to make 6-7 indentations.
- Rain, red and other species are taken, and then carefully moved into the prepared holes.
You need to move it gradually, first into one recess and then into another.
- The top of each hole is lightly sprinkled with earth.
- The box is covered with a blanket or lid, which provides the necessary air circulation.
An important point: you can feed only two days after successful settlement.
What to feed the worms?
When two days have passed since settlement, the individuals should be fed.
In general, they are unpretentious and are excellent food for them:
- White cabbage.
- Potato peel.
- Black bread.
- Straw.
- Banana peels.
- Rotting plant leaves.
The main thing to remember is that they are contraindicated for food:
- lemons, tangerines, oranges and other citrus fruits, including their peels;
- all types of meat;
- fish;
- canned food;
- sweets;
- eggs.
Note: It is also prohibited to feed these individuals with manure.
All food that will be used as feed should be:
- crushed;
- not cold;
- slightly damp.
Feeding needs to be done every 3-4 days, and the crushed food is laid out in an even layer on top of the soil.
An interesting point: they get used to any new food within 10–14 days.
Are you here
GL.
Zharikov, Research Center for Toxicology and Hygienic Regulation of Biological Products Humus is the most important component of soil, determining its fertility. The humus content in soddy-podzolic soil (usual for the Non-Chernozem zone of the Russian Federation) is 1.5 - 2%, on chernozems - up to 10%. According to scientists, in central Russia, 1 cm of fertile soil is formed in 125 - 400 years. Therefore, in garden plots, the processing of manure and plant residues using intensive technology using specially selected earthworms (vermiculture) is of great importance for artificially maintaining soil fertility. The most widely used worm in vermiculture is a worm bred in the USA and called the California red hybrid. It differs from “wild” earthworms in its high fecundity, omnivorousness and ability to live in captivity in small volumes of substrate. In the climatic conditions of central Russia, the “Obolensky hybrid” we created, which does not freeze in winter, is more suitable.
Organizing the production of vermicompost in a garden plot is simple and does not require special equipment.
Processing of organic waste is carried out in a compost box measuring 1 x 2 x 0.5 m, the walls of which can be made of boards, plywood, slate or any available material. You can simply form a waste pile 1.5 m high and 2.0 - 2.5 m wide. The length of the pile is unlimited. To carry out the work, you will also need a fork with rounded ends of the teeth, a shovel, a hose or watering can, indicator paper and an alcohol thermometer in a plastic shell.
Preparing food for earthworms Earthworms eat various organic substrates: manure, straw, grass, fallen leaves, sawdust, tops, vegetable and fruit peelings, paper, cardboard, kitchen and table waste, vegetable squeezes. Fresh cattle manure is unsuitable for earthworms - it must first be kept for 2 - 6 months. Rabbit and horse manure are pre-conditioned for up to 1 month.
The compost bin (storage) is installed on a flat area (preferably in a shaded place), preferably on a layer of sand or gravel. Branches of deciduous trees and wood debris are placed at the bottom of the box for better drainage of the substrate. Manure and plant residues are placed in layers in the storage tank. The resulting substrate is mixed and watered abundantly. Bacteria actively multiply in it, and the temperature rises to 40 - 60°C (stage of pre-composting or fermentation of the substrate). The process of microbial composting of waste continues for 14 - 20 days.
It is necessary to periodically moisten the waste and mix it if possible. After lowering the temperature and stopping fermentation, check the pH of the substrate. For normal life of earthworms, the pH value should be 6.5 - 7.5. The check is carried out using indicator paper. When the substrate is acidic (pH 7.5), high-moor peat is added. Then the substrate is watered abundantly and its pH is checked again. Within 1 - 2 days. control the temperature in the storage tank. If the temperature in it does not increase, then the substrate is suitable for colonization by earthworms. It is advisable to prepare the substrate for vermicomposting in the fall. When laying the storage tank in mid-April, the substrate will be ready by the beginning of May.
Colonization of the substrate with earthworms The mother culture of earthworms during the preparation of the substrate is kept in a warm, shaded place (barn, garage), periodically moistened. The worms along with the substrate are placed in a box or plastic bucket.
The prepared substrate (feed) in the storage tank is watered abundantly with water (up to 80 - 85% humidity). Externally, it should look like soil after heavy rain, but not soggy. Humidity is controlled by a simple technique: take the substrate from the drive into your fist and squeeze it. In this case, a few drops of water should appear between your fingers. If moisture runs down your fingers, then the substrate is over-moistened.
Earthworms are placed in the storage tank in early May, when there is no longer any danger of prolonged night frosts. In the evening, at sunset, worms along with their substrate are placed in the storage tank in small portions. This is due to the fact that the worms, adapting to the new substrate, do not leave their usual food for some time. After settlement with earthworms, the substrate must be moistened, which reduces stress in the worms associated with the transition to a new habitat. In the absence of sunlight, earthworms will move to a new substrate at dawn.
The worms are not disturbed for a month. They will have enough food. Caring for them will only consist of periodically moistening the substrate (once or twice a week, depending on the temperature and humidity). Watering is carried out using a hose with a divider or a watering can at the rate of 10 l/m2 per week. During the rainy season, watering is excluded. Excess moisture is filtered deep into the soil through the drainage layer.
It should be remembered that earthworms can only feed on wet food; dry food is unsuitable for them.
While feeding, the worms actively reproduce, laying weekly cocoons (pear-shaped capsules, half the size of a grain of rice, yellow in color). Each cocoon contains from 3 to 8 embryos. After 14 days, a daughter generation of white worms appears from the laid cocoons, which then acquire a pink color. After 3 months the worms reach sexual maturity. Adult worms are red in color, with transverse stripes, each weighing 0.6 - 0.8 g and 6.5 - 9 cm long.
Due to the vital activity of earthworms, the layer of substrate in the storage tank is significantly reduced. Therefore, fresh food must be added to the storage tank (from June to September) weekly. This can be a substrate based on manure and plant residues, fermented as described above, vegetable waste, chopped grass, etc. The food is placed in a layer 5-10 cm thick and watered abundantly.
During the summer season, when earthworms consume food within 1000 kg, approximately 600 kg turns into vermicompost.
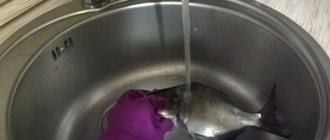
Excess earthworms from the storage tank can be used for fishing or as poultry feed.
Preparing earthworms for wintering At the end of September - early October, the storage tank with earthworms is prepared for wintering. To do this, stop watering and cover the top of the substrate with a 20-30 cm layer of manure with straw, then a layer of straw, hay or dry leaves. The top layer of sopoma is covered with plastic film to protect it from rain and snow. At the same time, to preserve the air cushion, the film should not fit tightly to the straw.
The storage tank prepared in this way will keep earthworms until spring. Although the top layer of the substrate in the storage tank freezes, heat is retained inside it due to the high thermal insulation properties of vermicompost. Therefore, the worms continue to live and feed, although less intensively compared to the summer season.
Separation of vermicompost and earthworms In the spring, at the beginning of April, the reservoir with earthworms is opened and the top layer of straw is removed. A new storage facility* is being prepared nearby in which preliminary fermentation of the waste is carried out. After this, the top layer of manure (10 cm), together with the earthworms in it, is transferred with a pitchfork to a new storage tank. The vermicompost remaining in the storage tank is ventilated and sifted through a metal mesh. Unprocessed food residues (together with the remaining worms) are transferred to a new storage facility for their final processing.
The resulting vermicompost is an environmentally friendly, highly effective fertilizer. It contains all the nutrients necessary for plants, is enriched with humus and beneficial soil microorganisms, and does not contain weed seeds or helminth eggs.
Vermicompost is used for growing vegetable seedlings. To do this, add 1 part of vermicompost to 3 parts of garden soil.
When planting vegetable and berry crops in spring, vermicompost is applied over the soil surface at the rate of 30 - 40 kg per 100 m2 (followed by digging) or into a hole under each plant (1 handful).
When planting fruit trees and shrubs, add 1 - 5 kg of vermicompost into 1 hole (depending on the age and size of the seedlings).
To whom and how to sell worms?
Breeding worms is a low-cost, but at the same time quite profitable business.
You can sell them, and in fairly large quantities:
- To fishing stores.
Due to the high life expectancy of these individuals, their unpretentiousness, and most importantly, the enormous demand for them among fishermen, specialized stores actively purchase worms for subsequent resale.
- Farmers. Since worms help improve soil quality and, as a result, help increase productivity, no farm can do without them.
- To pet stores. Many birds and fish prefer these individuals as food.
In addition, you can sell them to your friends and neighbors, especially those who are interested in fishing or have vegetable gardens, as well as fish farms.
An interesting point: according to statistics, the demand for worms has increased by 18% over the past two years.
They can be implemented in three ways:
- Whole worms.
- Worm tea, which is stored in clean plastic bottles.
- Vermicompost.
To make it you need:
- chop the worms with a knife;
- dry;
- mix with a little mail.
Vermicompost is stored in plastic containers and at temperatures from – 10 to + 20 degrees. Small plastic containers or plastic bags are excellent for packaging of any type. The main thing is that they constantly receive oxygen and have a sufficient amount of soil.
What to feed so that there are no odors in the home vermicontainer
Sometimes an unpleasant odor appears in the vermocontainer. It often occurs due to improper feeding of pets. You should not often feed them waste from fish, meat, or give them food high in salt. Some owners make a big mistake by giving the worms salted tomatoes and cucumbers. It is better to stick to a fruit and vegetable “diet”. From time to time, you can add tea leaves and coffee grounds to the food. You can also include eggshells, a little flour, leaves and fresh grass in your diet.
Pros and cons of worm farming
The occupation of settling, and subsequently creating optimal conditions for the reproduction of rain, red and other species, is a rather simple matter, characterized by a number of positive aspects:
- Profitability.
- In great demand, especially in regions where there are many fishing bases, farmlands and pet stores.
- Low financial costs for preparing for their breeding.
- The unpretentiousness of these individuals.
- Their high ability to reproduce.
- The absence of any additional financial investment after the worms are installed.
The only costs are for food and, if necessary, fertilizing the soil.
However, such breeding has some negative aspects:
- Chances are that demand will not be as high as expected.
An important point: low demand may be associated with the breeding of these individuals in regions where there are a small number of farms and an almost complete absence of fishing bases.
- High competition. Since breeding does not require large financial expenditures, in many regions a large number of people are engaged in this. Consequently, in the future, worms will be difficult to implement due to the large number of proposals.
- Psychological barrier.
Many people are afraid of worms, and it is important to understand that breeding them should only be done if a person does not feel disgust or fear of them.
Profitability calculation
According to estimates, a person gets 9,500 - 10,200 worms from one cubic meter of soil in one year. On average, the price per unit is within 1.5 - 2.5 rubles. Thus, if the average price of 2 rubles is multiplied by 10,000, then it turns out that a person can get 20,000 rubles from the sale of 1 cubic meter.
Important: due to low costs, this figure is quite high.
Breeding earthworms at the dacha for the garden
To be fair, it should be noted that breeding worms does not require any effort. And excellent results can be achieved with a minimum of work. If you need at least some kind of room to keep pets, then a simple hole of xx cm will be enough to breed the worm. Having dug a hole, you need to minimally “equip” it. The arrangement consists of filling it with various components of plant and animal origin. We put leaves, waste paper in the hole, you can add pieces of corrugated cardboard, etc., you can also add leftover food waste there. Having completed these simple steps, you can populate the worms. In a short time, their numbers will increase many times over. All that is needed is additional feeding.
The best feeding is food waste from the kitchen. For example, used tea leaves, peels of any vegetables and fruits. Banana peels are very suitable for these purposes. It is better to immediately chop waste vegetables and fruits into small pieces, so they will rot faster. By adding a little water to this mixture, we get a kind of cocktail for feeding raincoats. Next, you should let this substance brew for a week or so. After this time, the fertilizing should not emit any unpleasant odors. In appearance it should resemble manure or silage. To loosen the fertilizer and make it breathable, you can add dry components of grass and foliage to it. Adding peels from seeds, dry twigs, straw, etc. gives very good results.
The food for earthworms is ready, you can add it to the hole.
A video on this topic may interest you:
Here is another useful video closely related to this topic. Look.
Reviews
My wife and I have been breeding worms for 4 years now. We make worm chutes ourselves and place them in the basement of our house. There are no problems with sales; fishing bases willingly buy everything, and at a high price. Grade:
Nikolay, 45 years old, Podolsk
There are no difficulties with this matter. The main thing is to make the boxes correctly and prepare the mail. They multiply quickly, and you don’t have to look for buyers for long. Grade:
Vladimir, 59 years old, Volgograd
Last summer I made a worm hut, covered it with soil and moved the miners there. However, most of them died, and the rest did not reproduce well. This may be due to temperature changes and very dry soil. Grade:
Mikhail, 44, Vologda
I have been breeding the rain variety for 3.5 years. I deliver to the same fishing stores and have a stable income. Grade:
Alexander, 39 years old, Ulyanovsk
I breed prospectors at home for myself and my neighbors. They actively buy them for their greenhouses and for fishing. For me, this is a hobby that brings in a small income. Grade:
Peter, 59 years old, Tver
Breeding worms at home is not difficult and even beginners can do it. The main thing is to create optimal conditions, make the worm hutch correctly, and then find regular customers.
Blitz tips:
- It is worth remembering that low and high temperatures are detrimental to these individuals;
- it is better to study the demand in a particular region in advance, and then start breeding them;
- It is important to understand that if a person has a panicky fear of them or a feeling of disgust, then such an activity should be abandoned.
Technology for growing earthworms
A home-based worm breeding business requires minimal investment. Worms are grown in special devices called “worm houses”. Most often they are made by hand from cardboard boxes, plastic containers, aquariums and old refrigerators. Special equipment - a vermicomposter - costs about 6 thousand rubles.
In the first stages of work, you can save a lot by making do with improvised means. The income from the sale of several batches of worms can be used to expand production, for example, to purchase a professional vermicomposter.
Breeding worms at home is very easy and inexpensive
If we describe the technology in simple words, it looks like this:
- Choosing a location, preparing a mini-farm, making or purchasing a vermicomposter.
- Filling with soil, humus and moistened paper.
- Settling of individuals (2-3 days after soil preparation).
- Feeding and growing worms to the required size.
It's really easy to start breeding worms. No special skills are required; there is a lot of reference information on the Internet. Knowledge will come with practice. It is enough to create a favorable environment for life and be patient. The price of growing worms is much lower than their market value, so by growing and selling a large batch you can immediately make money.
Choosing a location and equipment for a worm hutch
Growing worms at home is convenient because the worm hutch for breeding can be installed anywhere. Suitable for a garage, apartment, yard, utility room. There are few requirements for the location: temperature from 15 to 25 degrees, quiet and no vibrations. In winter, the breeding site for worms must remain warm, at a level above 4 degrees, otherwise the animals will hibernate and will not reproduce. Therefore, unheated garages, hangars, and country houses are not suitable for such a business. The upper temperature limit is 36 degrees.
Humidity matters too. It is impossible for its level to rise above 80%. Such humidity does not occur in domestic and country premises, but monitor the condition of the soil and the abundance of watering. The habitat should not be waterlogged, otherwise the individuals will die.
Contrary to popular belief, worms do not have an unpleasant odor or dirt. The only problem can be the unpleasant smell of the food. It can be easily eliminated by covering the feed layer with a layer of humus. When properly organized, raising worms is not a dirty job at all. Even the collection of worm tea (fertilizer formed as a result of the vital activity of worms) is easy to organize without the use of manual labor.
A finished worm machine costs about 6 thousand rubles
Making a worm with your own hands
A worm house is a container in which the livestock will grow. The optimal materials for it will be plastic and glass. They are durable and suitable for repeated use. Cardboard boxes have another advantage: they get wet, becoming an additional source of food for the worms. True, they will have to be changed regularly.
The minimum height of a worm cage is 30-40 cm. Some craftsmen who grow worms at home claim that sealed containers are necessary. This is not entirely true. Animals need air to develop, so holes are drilled around the entire perimeter of the container.
Options for making a worm:
- From a cardboard box. The cheapest and easiest way to get a worm trap. Soil mixed with vermicompost is poured into the boxes and worms are placed there. An added benefit is that the cardboard will provide a food source for the worms. Soaked and half-eaten boxes must be replaced promptly.
- From plastic containers. The principle is the same as with cardboard boxes - fill the soil and feed the “livestock”. Plastic will last much longer than cardboard. This material makes it difficult for air circulation and collection of vermicelli, so it is necessary to drill holes in the walls and bottom of the containers.
- From an old refrigerator. A broken or unusable unit is turned over with the door up and fixed at an angle to simplify the collection of vermicha. All contents are removed, holes are drilled in the side walls for ventilation.
Roundworms, like other types of these animals, depend not so much on the location of their detention, but on the comfortable conditions. It doesn’t matter what the worm is made of - plastic, cardboard or glass. The quality of the soil and the composition of the feed are much more important.
Equipment
The cultivation and reproduction of earthworms occurs in the worm house. We discussed the options for its manufacture in the previous section. any other specialized equipment. The soil where the individuals are kept must be regularly loosened and watered, so purchase a garden ripper, a hoe and a watering can.
Worm food is stored in a separate container where food waste is collected. In addition to the worm trap, a vessel is installed to collect fertilizer. A glass or plastic container is suitable for this. To store all the equipment compactly and conveniently, use a rack. A sieve and scale will make collecting worms easier. A thermometer and a device for measuring acidity will help to control the conditions of detention. In total they will cost 2 thousand rubles.
A cottage, garage, basement, attic, or any utility room is suitable for growing worms.
Soil preparation
The life and reproduction of livestock depends on soil preparation. The soil is divided into 3 layers: the upper nutritious layer, the middle layer for life and the bottom. Humus and worm tea will accumulate at the bottom. Soil preparation includes the following steps:
- Soil mixed with shredded paper is poured into the container. The mixture is slightly moistened to a level of no more than 80%.
- After 2-3 days, the soil is loosened, several holes are made and worms are introduced. It is necessary to transfer part of the humus in which the individuals previously lived to a new habitat. This way they adapt to their environment without any problems.
- The soil is leveled, moistened (to a level of 80%) and covered with cardboard.
- After 2-3 days you can lay the first layer of feed.
Soil is purchased from gardening stores. Such compositions have a suitable level of acidity and humidity. You can also use self-dug soil, but it is better to prepare it first. There is a high probability of high acidity. To find out the exact acidity value, use an acidity sensor. Its average cost is 800 rubles. Normal level is 6.5-7.5 Ph. If the value is lower, add tops or sawdust to the soil. When the level is exceeded, chalk, limestone and crushed eggshells will help.
Types and their features
There are 2,000 species of earthworm, which are distributed throughout the globe. Our most famous varieties are the earthworm (crawl) and the dung beetle (red dung).
The crawl can reach 30 cm in length. The color of its body is grayish or light brown. Lives in forests, fields, orchards and vegetable gardens. It digs an extensive network of tunnels in the soil, up to 3 m deep. Its peculiarity is its crawling (hence the second name - crawling) to the surface of the earth after rain. For example, after heavy rain, they can be found under currant bushes.
The dung worm reaches a length of no more than 14 cm, and has a bright red or yellow-orange color. The individual lives in manure and compost heaps; it can be found in fields where livestock is often grazed and the soil is rich in organic matter. Cultivated dung beetle is used on vermifarms to process manure into valuable vermicompost.
The importance of worms for maintaining and increasing soil fertility is difficult to overestimate. Plus, he is a sanitation worker who disposes of animal waste products and plant debris.