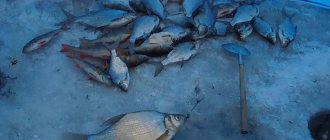
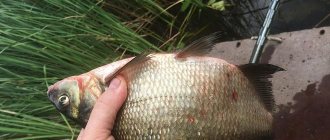
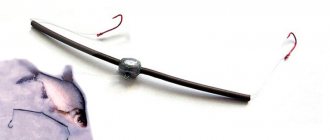
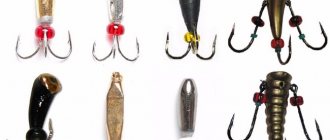
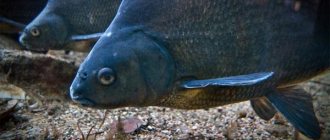
Winter fishing usually brings fishermen small fish, but there are exceptions to this rule - this is the capture of trophy bream. If you get to a “fishy” place, you can get specimens up to 3 kg. But sometimes you can’t catch bream and other peaceful fish with a classic jig. In this case, fishermen use various gear and techniques. A simple but quite effective fishing method is considered to be a yoke (“whisker”) for winter fishing.
The rocker tackle is a double or triple leash that slides along the base in the form of a tube or wire and is intended mainly for catching bream, although it is also used for catching other peaceful fish.
You can fish throughout the winter, starting with the first ice. It is recommended to choose gear for zone fishing, although running fishing also allows you to use the equipment. Nodding and float rods are equipped with a rocker arm; installation of the tackle does not cause any difficulties.
On sale you can find ready-made “bream rocker” equipment
What can you catch with a mustache?
Fishing in winter with a rocker has one important advantage - there are 2 hooks on the tackle, that is, you can attach several different baits. Fishermen know how difficult it is to choose the right bait for catching fish on an unfamiliar body of water. The rocker makes it possible to significantly increase the chances of a good bite.
Bream, white bream, carp, roach, and crucian carp bite well on the tackle. Due to the special design, the fish does not feel the tension of the line when it swallows the bait, so the hook goes as deep as possible and reliably detects the fish.
Basic equipment elements
The design of the rocker tackle consists of the following elements:
- two arms with rings at the ends 3-5 cm long;
- suspension – a ring measuring 3-6 mm, located between two hangers;
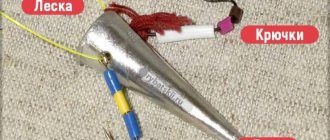
- weight - an “olive” mounted at the bottom of the suspension weighing 3-15 g;
- two leashes measuring 3-6 cm from fishing line with a diameter of 0.11-0.15 mm or winter cord with a cross-section of 0.04 mm;
- on leashes there are hooks No. 12-16.
To prevent the line from twisting, a small swivel with a carabiner is attached to the suspension. Fix the rocker on the main fishing line with a diameter of 0.12-0.22 mm. It is wound on a reel. A float or nod is used as a bite alarm.
Various rocker mounting options
Tackle for fishing with a rocker
The main task is to properly equip the equipment. Elements of tackle that are used when fishing with a rocker:
- A short winter fishing rod with a handle, a whip, a nod and a stand . The most commonly chosen rods are “balalaika” and “filly”. The nod is lavsan, which is not afraid of low temperatures and is the most sensitive, unlike other products.
- Monofilament line with a cross section of 0.12-0.22 mm . Some people recommend installing a cord, but in the cold it quickly “dumbs” and freezes.
- Lead olives or strips are selected by weight, taking into account the presence of current and depth.
Recommendation: when installing the rocker arm to the main line, it is best to use a “palomar” type knot.
Palomar knot
Equipment with sliding feeder
This popular equipment is easy to manufacture and has several modifications.
The second option is preferable as it makes it possible to replace the feeder. When using leashes longer than 50 cm, with such installation, there is a high probability of them getting tangled.
We reviewed the basic installation methods. On the Internet you can find many more modifications of equipment for the feeder, but in my opinion, the main ones are the paternoster and the asymmetrical loop. The advantage of the first is simplicity, the second is sensitivity.
Variations on the theme of the winter rocker
Triple rocker helicopter
You can find a version of the equipment in which the rocker arm consists of three arms. This option is not the most popular, due to the fact that it is bulky and overly complicates fishing in practice.
Triple mustache
With retractable leash for summer fishing
If they talk about a rocker with a retractable leash, then they mean Moscow equipment. For installation, a triple swivel is attached to the tip of the monofilament, and a fishing line approximately 30 cm longer is fixed at the bottom.
Cheburashkas or other spinning weights weighing 20-35 g are used as weights. A fishing line about 1 m long is attached to the middle part of the swivel. At its end there is an offset machine No. 12-16.
Moscow equipment
Elements of equipment and subtleties of installation greatly depend on fishing conditions. You can read more about how to install the diverting leash tackle in the article about summer perch fishing with Moscow rigs.
Feeder installation Paternoster
The first loop is tied to the end of the main line where the bait is located. The second one is knitted about 1 meter higher.
The main advantage of this equipment is the speed and ease of installation, which makes it possible to build the equipment directly on the reservoir.
Installation of tangle-free tackle
In this case, a triple swivel is not required; instead, a rocker arm is installed on the bream. It is attached to the middle loop, to the main fishing line.
A weight is attached to one shoulder using a clasp. For the second - a leash with an attachment. This option is convenient to use because it hardly gets tangled and can be used when fishing from the bottom.
Storage of feeder equipment
- feeder rod with quivertip;
- reel with spool diameter 4000–5000;
- main line (monofilament or braided) with a cross-section of 0.18-0.28;
- shock leader;
- ledcore;
- feeders;
- leash with hook.
Elements of equipment are interchangeable and are selected depending on fishing conditions.
Main line or cord
A special high-strength monofilament line or braided cord is used as the main line. The feeder tackle must be sensitive, which is why a low-stretch fishing line is chosen. If fishing takes place over a long distance, it is important for the fisherman to quickly react to the bite and hook the fish.
Lines with high elongation are rarely used and are used exclusively when hunting for large fish, which actively resist and break off delicate equipment.
Advice! To increase the casting distance, choose thin fishing lines, but not less than 0.16 mm.
Leash
The leash is knitted from:
- monofilament leader material;
- mono fishing line of small diameters;
- fluorocarbon fishing line;
- fluorocarbon leader material;
- soft braided leash material.
The choice of material for the leash depends on the type of feeder equipment. The length of the leash is selected depending on:
- fishing conditions;
- type of equipment;
- the presence of a current in a body of water.
It varies from 10 cm to 100 cm and more.
Important! If the bite is inactive or has stopped altogether, it is recommended to lengthen the leashes; this will lull the vigilance of the cautious fish. The leash on a classic feeder rig can be 120–150 cm long.
Hooks
Hooks for the feeder are selected depending on the size of the nozzle, but it is advisable to use smaller hooks. For a classic feeder, hooks number 12–18 are used; for method and flat method equipment, hooks number 6–12 according to the European classification are used.
The undoubted advantage of the feeder is that when fishing, several types of equipment are used, which are selected depending on:
- expected size of fish;
- casting distance;
- the presence or absence of current in a body of water;
- bottom topography and the presence of silt.
For feeder fishing the following are used:
- installation with anti-twist;
- paternoster;
- Steve Gardner loop;
- inline;
- asymmetrical loop;
- running feeder, or running equipment;
- symmetrical loop;
- helicopter;
- method;
- flat method.
Modifications of these rigs are also used, and fishermen make certain adjustments to the classic versions.
The choice of this or that equipment must be conscious, taking into account all relevant circumstances. There is no point in catching carp 10 on a paternoster with monofilament leads 0.12–0.14, as well as using the flat method in the current, when the bait is quickly washed out of an open-type feeder.
As the fisherman masters feeder fishing, his horizons expand, and he understands the advantages and disadvantages of each equipment. Only through practical experience can the results of feeder fishing improve significantly, but beginners also need perseverance in achieving their goals.
Important! Don’t rush to learn how to knit all the feeder rigs at once. Start with simple options and gradually increase your skill level.
Blind equipment
Blind equipment for the feeder, this is a general designation implying that the feeder is rigidly connected to the main fishing line, and the leash is in “free flight.” This type of installation is knitted on the main fishing line and has both advantages and disadvantages.
The advantages of blind rigs are that you can use feeders of different weights, up to the heaviest ones. When biting at depth or to the side, these rigs are very sensitive and the angler can clearly see when to hook the fish.
The disadvantage is that when the fish, having taken the bait, goes towards the shore, it is necessary for the feeder to move, only then the quiver tip of the rod shows that it is hooked.
In difficult conditions, with strong wind and low fish activity, such equipment is ineffective, and it is much more convenient to use sliding rigs.
Options for blind rigging that work effectively even in strong winds are the blind mounting method and the flat method.
Sliding equipment
The main feature of the sliding equipment is that the feeder moves freely along the fishing line and the sensitivity of such installation is very high. Even with light touches to the bait on the hook, information about this immediately comes to the fisherman in the form of a clearly pronounced bend of the quiver tip.
Sliding rigs are recommended for use on low-active fish in the most difficult conditions.
Self-cutting and non-self-cutting equipment
Thanks to the sensitive tip of the feeder rod, the bite of a very small fish is immediately visible and the feeder can only hook it. However, some types of feeder rigs involve self-hooking, which makes catching fish much easier.
Self-cutting occurs due to the weight of the feeder, and as an example, consider the blind installation of the flat method.
The fish greedily absorbs food from the open feeder and, along with it, a hook with a nozzle flies into its mouth, after which, due to the gravity of the feeder, self-hatching occurs. In such cases, there is no need to additionally hook the fish, it is already on the hook and all that remains is to carefully lead it into the landing net.
Non-self-hooking equipment requires the close attention of the fisherman, because he must not miss the moment of the bite and hook the trophy in a timely manner.
The choice of a specific type of installation depends on:
- conditions in which fishing is carried out;
- expected fish in the catch;
- fishing distances;
- the type of reservoir and the presence of current in it.
In strong winds or currents, it is much more difficult to notice a bite and preference is given to self-hooking equipment.
If the fish bites reluctantly, it is wiser to use non-self-hooking rigs; the fisherman will definitely notice even a cautious bite.
Steve Gardner Rigging
To ensure that feeder rigs are always in working order and ready for fishing, after use or manufacture, they should be wound on a reel for float fishing and stored in fishing boxes.
They also use foam plastic, from which a reel of the desired shape and size is cut. In addition, you can insert a hook into the foam reel.
The rigs should be stored in a dark and dry place, because ultraviolet rays negatively affect the condition of the fishing line from which the rigs are knitted.
After use, you should thoroughly dry the assembly and then reel it on the reel, otherwise wet hooks will quickly rust.
If it is not possible to use a reel, take small ziplock bags, they are also convenient for these purposes.
Feeder tackle is widely available, and learning how to tie it is not that difficult. By gradually improving your skills in feeder fishing, you can achieve outstanding results.
Not every angler has the opportunity to regularly go on long fishing sessions and spend several days on a reservoir. Feeder rigs allow you to catch decent trophies even during short fishing trips, and this is their undoubted advantage over other gear.
There is a useful article on the website dedicated to feeder leashes, we recommend that you read the material ▶
How to make a rocker tackle with your own hands: instructions and video tips
Before you make a rocker for fishing, you need to understand the main task of this equipment, namely, the distribution of leashes on both sides of the equipment. This is the simplest gear, so it is not advisable to purchase it. As for making the rocker arm, there shouldn’t be any difficulties with this either.
Insulation option
It is very easy to make a winter rocker out of insulation. Step-by-step instruction:
- For installation you will need a piece of wire insulation with a cross section of 15 cm.
- A monofilament line is threaded through the hole, where hooks are tied on both sides of the leashes (4-6 cm).
- The tube is clamped with a lead strip, which is the shipment.
- Then the tackle is fixed to the main fishing line with a carabiner.
Plastic rocker for fishing
If you assemble the rocker at home, then it makes sense to prepare several pieces, with different shipments.
Wire based
How to make a mustache from wire, step-by-step instructions:
- You will need a piece of thin and rigid wire with a cross section of 1-2 mm. You can use a template for installation.
- To make a template, you will need a piece of board on which 3 points of future bends are marked with a marker. Then nails 2-4 mm thick are driven into this place.
- The next stage is the creation of tackle according to the template. The hinges are bent onto the nails. Next, the tackle is removed and given the required shape.
- Afterwards you need to equip. The monofilament is threaded through 3 loops so that on the outermost loops the fishing line protrudes by about 5-6 cm, where the hooks are tied. Moreover, the fishing line must pass freely through the loops.
Before tying the rocker arm to the main line using the middle loop, you need to select weights for shipping; they are attached to the top of the rig.
Production and shipment of rocker arms for winter fishing:
How to make a rocker arm from a leash
To do this, you will need a main weight with an eyelet for fixation and a longitudinal hole. Driver material is used as the shoulders of the rocker arm, where cambrics are installed at the ends.
Manufacturing process:
- A cambric is installed in the hole of the weight and fixed with superglue.
- A fishing line and a Kevlar leash are threaded through the cambric.
- Cambrics are also put on the ends, which must be securely on the leash.
- We put the line into the cambrics and install the stoppers.
- We attach the hooks.
The tackle is suspended from the main line using a ring on a weight.
Sliding leashes
We make equipment according to the template. The leads should easily pass through the 3 rings. They are then attached loop to loop with a swivel and main line. The length of the leashes should be limited by stoppers (otherwise the yoke will slide onto the hooks). A stopper is also installed in front of the swivel.
When making a rocker arm, it is necessary to process all the metal parts through which the fishing line is passed.
Sliding leashes
Baits and baits
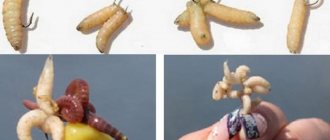
When winter fishing for bream and other peaceful fish on a rocker, the use of both plant and animal baits is allowed. Among the latter, bloodworms are usually chosen. In addition to it, fish also bite on:
- moth and caddis larva;
- maggot;
- worm
The following herbal attachments are used:
- semolina;
- Hercules;
- pearl barley;
- pasta.
For better effect, the bait is flavored with anise or vanilla spray.
Catching bream on a rocker: search and technique
In order for the rocker to work effectively (as, indeed, any other equipment), you need to choose the right fishing location depending on the conditions, winter periods and other factors:
- With the establishment of the first strong ice, the fish is at a depth of 3-5 meters. To find a bream site, you need to make several holes. It is recommended to do them on edges, depth changes, and holes.
- With the onset of severe frosts, the fish go to a depth of 7-12 meters.
- After the freeze-up begins, there is not enough oxygen in the water for the fish, so it tries to find appropriate places. These are underground springs, areas into which non-freezing small rivers flow.
- At night, bream often bites at a depth of 2-4 meters.
Lure
Feeding for catching bream using the “whisker” can be prepared at home; there are several ways to do this:
- Boiled peas are passed through a meat grinder and mixed with ground breadcrumbs.
- Bait made from crackers (0.6 kg), millet (0.5 kg), ground seeds (0.2 kg), rolled oats (0.3 kg) is universal. You can also add 0.5 tsp to it. vanilla, and before immersing in the bloodworm hole.
- The simplest recipe is mixing breadcrumbs (0.5 kg) and semolina (0.3 kg). This mixture is already ready for use.
Fishing tactics
Fishing occurs according to the following scheme:
- Having selected a place for fishing, you need to make 5-10 holes in a checkerboard pattern, where the feeding is placed.
- After half an hour, you can start fishing, starting from the first rested hole.
- A bunch of bloodworms is used as bait. It is recommended to crush one larva, so the smell will quickly attract bream.
- When biting, the fish lifts the arm of the rocker arm, as a result of which the float rises. It is at this time that you should do the hooking.
Attention: If you need to sit on one hole for a long time, it is recommended to have a tent with you; it can protect you from frost and other troubles.
A visual video about catching bream in winter on a rocker: search, presentation, tactics and fishing technique:
Installation using anti-twist tubes
Well, experienced feeders don’t like these tubes and that’s that. This opinion may be formed after reading articles devoted to this topic. And of course it has its justification. But for novice fishermen, who may find other equipment too complicated, we can recommend using anti-twist tubes as a simple and quick way to get started with feeder fishing.
Some models even provide for the installation of two hooks. This is understandable. A fisherman who has been fishing with bottom gear for a long time knows very well what no bite is, and the more hooks with bait, the correspondingly greater the likelihood of catching at least something. But feeder rigs were invented to enhance this bite significantly! Fishermen, even fish inspectors, often come up to me and wonder: why do you have one hook? But believe me, if you feed correctly and choose the biting point, you won’t be bored; the bites will come one after another, literally a few seconds after casting. Usually 3-4 hours after feeding the catch rate is reached. So why two hooks? Or even three? They will only interfere with each other and get confused. And if the bite is weak or absent, then it is better not to add hooks, but to look for new places for fishing, experiment with bait, with groundbait, and you will definitely find your fish.
The main advantage of the anti-twist is the ease of installation, which is really important for a novice fisherman. Thread a cord through it, install stop beads on both sides, attach a swivel with a carabiner on one side, and just a loop for attaching a hook on the other. That's all. When biting, the cord slides freely through the anti-twist, signaling a bite.
Video about equipment with an anti-twist tube:
But still, experienced feeders do not like these “rocker arms”. And there is a reason for it. The sensitivity of the gear when using these tubes is minimal; on a muddy bottom, dirt gets into the anti-twist, which leads to it clogging and the cord getting stuck. Flight performance when casting the feeder is reduced. It was repeatedly noticed that when biting carefully, the fish took the bait with an anti-twist much more reluctantly than when using other equipment.
Fishing for roach with a yoke
The same rocker that is used for fishing for bream is also used for roach. In this case, on the outlet, the length of the leash is made such that the hook does not catch on the main fishing line when lowering the rig to the bottom. A small hook is required for roach; this fish has a small mouth; as a rule, number 12-18 is used.
The float is also chosen to be small, and it is selected so that the weight and hooks can confidently sink it to a certain depth. The tackle is also adjusted so that the float is slightly submerged in the hole, otherwise it will freeze into the ice crust when frozen.
Worms, maggots, and bloodworms are used as bait for roaches, but the latter is the most promising.
Bottom or feeder installation of the “yoke” type
As already mentioned, at first glance, a bottom or feeder rig of the “yoke” type seems like some kind of not entirely successful design, and this is primarily due to the well-established stereotype that, with short leashes, the tackle will scare away the fish. I had similar doubts when I was once preparing for fishing in the city’s dug reservoir, dug in the bed of the Malaya Kokshaga River. Depths there can be found up to eleven meters, and the drop to depth begins right from the shore. There is a small coastal line of relatively shallow water with a depth of one to three meters, and then there is a real hole of six meters, a little further - eight meters. These measurements were made on the ice, at first, when there was ice under the shore and perch were biting here. Then, as the ice formed, we moved further and further towards the conditional strip along which we usually place winter girders. This is how an approximate depth map was compiled, at least in this particular place.
When I was getting ready to go fishing in open water to the same place, I mentally played out situations related to the equipment in my head. Then he finally decided and set about equipping ready-made “rocker arms” made of spring wire with fishing line, hooks and relatively light feeder spring feeders weighing up to 20 grams. And I made no mistake in choosing the equipment.
Sergei and I fished literally side by side on a cramped patch of shore. And they cast at approximately the same distance, because after several casts something like a faintly defined edge was found. In addition, this small edge was also given away by chains of air bubbles, which floated to the top every now and then. There was a fish feeding on the edge. In short, the conditions were approximately the same. But our equipment was different. Sergey threw a rectangular cage feeder with a leash about 50 cm long tied above. I used the “yoke” feeder installation, which was discussed above. The bait and bait were also the same - a kernel of Bonduelle corn with a couple of planted red maggots. This bait was also found to be effective during this fishing trip. But my result on the bream caught during the morning turned out to be more significant than Sergei’s. He caught three jokes, and I had a dozen bream splashing around in my fish tank, one of which clearly claimed the right to be called a bream. It contained at least eight hundred grams. And in this albeit small advantage in catch, I saw the role of the bottom feeder installation “yoke”.
Carp fishing
The equipment is also used for carp fishing. To do this, choose a jig rod with a nod, which is equipped with a heavy sinker fixed in the middle to the main fishing line. A wire measuring 12-15 cm runs across the weight. At the ends there are small leashes with hooks.
This equipment works effectively with any type of bottom sediments. The main line is constantly tensioned, and the entire load from the weight falls on the nod. The carp calmly swallows the hooked bait. All further actions can be clearly seen on the nod.
Installation with rocker arm
To make a feeder tackle with a rocker, we pass the main fishing line through a feeder, tube or sinker. We tie the end to the eye of the wire with any knot - a clinch, a palomar or a fishing self-tightening loop. It can be knitted as a separate bundle on a piece of fishing line, braid or fluorocarbon with a carabiner and swivel at the other end for attaching to the warp. You can also do this directly on the main cord, fishing line or shock leader. Accordingly, we tie leashes with hooks on the shoulders. The connection points with the base and leads can be covered with heat-shrinkable tubes. The thickness of the leashes and hooks are selected based on the size of the bait and the intended trophy. This equipment works both in still water and in currents. When fishing in the current, stickier plasticine-like bait is clogged into the feeder.
A feeder with a rocker is usually used according to the tactics of conventional bottom fishing, with the equipment installed for a long time. The bait is stuffed into the feeder and the bottom is thrown into a promising point in the reservoir until it bites. If there is no bite for a long time, we transfer it to another place. If the angler likes to fish using tempo tactics, then most likely the installation with a rocker arm will not be useful. In proper tempo feeder fishing, classic rigs with one hook are used.
Inline feeders
For installation using the inline principle for feeder equipment with a rocker arm, weighted springs and watermelons of any design are suitable. The weight of the load is selected depending on the fishing conditions so that the equipment is not carried away by the current. Both store-bought feeders and homemade options are suitable. This rig can also use method feeders and inline nets, although real fans of a pure feeder will call this approach blasphemy.
Secrets of the experienced - how to increase efficiency when fishing with a rocker in winter
In order to constantly have a catch, you need to follow a number of recommendations from experienced fishermen:
- It is advisable to plant bloodworms in a bunch.
- Bait on the current is delivered using a feeder directly on the equipment, or through “dump trucks” lowered into special holes that are located upstream.
Feeder dump truck in the form of a pyramid - There is no need to fuss over the hole, otherwise the fish will get scared and leave. Silence in the fishing area increases the chances of catching large specimens.
- The bream are usually the first to bite, then the large fish come up.
- Taking into account the fastidiousness of bream in winter, you should have several bait options in your arsenal.
- When fishing at night, it makes sense to use hooks with phosphorus beads.
Another video that talks about catching bream on a rocker:
Catching even neat peaceful fish with whiskers will not be difficult. This is a very affordable tackle suitable for catching the most wary fish. All you need to do is choose the right place, feed the hole and persistently wait for a bite. The reward for this will be an excellent catch of large bream, roach, and carp.
