How to cast a feeder correctly - casting technique
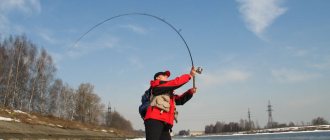
The overall effectiveness of fishing greatly depends on the accuracy and casting distance. The more accurately you cast the feeder, the denser the feeding spot will form, concentrating more fish in one spot. Before performing a power cast with a feeder rod, you need to tighten the clutch, otherwise you can injure your finger. Well, the casting technique itself is as follows:
- We take the feeder rod with both hands. Right-handed: hold the end of the rod with your left hand, and grab the place at the level of the reel with your right hand.
- Using the index finger of your right hand, fix the fishing line or braid
- Press the line or braid with your index finger to the rod
- With your left hand, remove the line guide arc of the reel.
- We pull the feeder back over the shoulder (right), the overhang of the feeder should be from 20 to 50 centimeters.
- The left arm straightens at the same time.
- We make a smooth acceleration, bending the left and straightening the right arm. When the rod reaches the “2 o’clock” position, we make the maximum acceleration of the feeder.
- Release your finger from the cord pressed to the feeder. The feeder is flying.
- If you have fixed the clip, then before the feeder falls into the water, you need to set the feeder vertically. This will allow the rod to absorb excess load while tensioning the fishing line or cord. When using the cord, be especially careful and precise.
Try not to overdo it, because an excessively strong cast when using braided fishing line can lead to the shooting of the feeder, or even breakage of the rod.
How to make an accurate cast
After you have mastered the initial stage of sending the rig into the water, you need to learn how to throw accurately. But two conditions will help us exactly:
- This is a clearly visible landmark on the opposite bank, which will remain motionless throughout the entire fishing trip, for example: a tree, building, power pole, etc. You should not target people or vehicles, as they may move during fishing.
- This is the so-called “clipping”, when, after casting to the fishing point of your choice, the line is wound behind a clip on the reel spool, thereby limiting the flight range of the equipment. And you will no longer cross the intended point, but will end up in one place.
- It is worth paying attention to the fact that casting with a feeder must be carried out constantly from the same point, be it a chair, a feeder platform, or simply your footprints on the shore. In this way, we reduce the likelihood of large deviations in accuracy.
Where to throw feeder equipment?
To successfully fish in a certain place, you need to have fish there. And in order to find the target fish, you need to know its promising locations.
Promising places for fishing primarily include areas of the bottom with a significant difference in depth: holes, edges, riffles, stones.
The fisherman’s task, at the initial stage of fishing in an unfamiliar body of water, is to study the bottom and find interesting places. Moreover, this can be done even without the use of a technological echo sounder.
Feeder fishing technique: correct casting.
Feeder for beginners: casting technique.
Feeder fishing
- First you need to properly assemble the feeder. In such a way that all the access rings lined up in one line. If the rings fall out of this line at the time of casting, the fishing line or braided cord may become tangled.
- We reel our feeder or weight at a distance of approximately 1-1.5 meters from the quiver tip for a rod 3.6 meters long (but not more than half the length of the rod). A very large or small plumb of the feeder will negatively affect casting. Sometimes, when the vegetation does not allow this, you have to abandon it with some inconvenience.
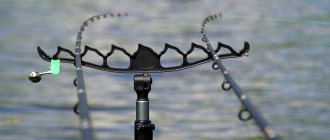
- When casting, we take the blank with our right hand so that the reel leg passes between our middle and ring fingers. In this position, it will be convenient for you not only to hold the form itself, but also to hold the fishing line after retracting the line handler.
- With the index finger of your right hand, grab the line without pressing it to the rod, and with your left hand we move the bow away.
- With a smooth movement we place the rod behind the head, checking that our equipment does not get caught. When you master this, everything will work out automatically for you.
- Then we cast. Casting is carried out with a movement from smooth to sharp. At the same time, when the angle of the rod with the horizon is 45-50 degrees, we release our fishing line. This angle is determined by the physics of the process. From physics lessons we know that a load thrown at an angle flies a greater distance if this angle is exactly 45 degrees.
- After casting, but before the feeder enters the water, the feeder returns to the vertical position. This is done to compensate for the jerk if you put the fishing line into the clip.
- We close the line guide handle and place the feeder on the stand. We are watching for future bites!
Tips from experienced anglers
To the recommendations on the feeder casting technique, I would like to add some practical advice from experienced fishermen.
They have already tried many ways to cast a feeder and know exactly what will be useful for a beginner. • When you first see the tip of the feeder, it becomes scary to cast. Believe me, everyone has been through this, but there is nothing to be afraid of. • Casting the feeder, as already mentioned, is done smoothly, without sudden jerks. But for a heavy feeder, you can make a weak jerk at the end of the cast, especially with a light feeder weight. • A typical mistake when casting is a deviation from the reference point by 10-15 cm. The casting accuracy in this case decreases several times. • When the feeder is already behind your back, it is recommended to wait until the feeder stops swinging. Then the cast will be more accurate. • For long distances, of course, casting from behind the head will be effective. But if you are casting a feeder a short distance, especially with a heavy feeder, some anglers advise using a side cast. • When casting a feeder on a current, casting accuracy does not play a special role. The feeder, and along with it the bait, will still be carried away by the current. The main thing is that the trail of food remains tasty, the fish will find the feeder itself. Source
We fix the casting distance
Before casting the equipment, we need to identify promising points. This could be a dump, an area behind the edge, a shell rock, or an exit from a hole. We will learn how to determine such points in a separate article.
After determining the point, you need to fix the line at the required distance so that it does not unwind from the spool more than necessary. This is done in order not to throw the equipment over the point. There are several ways to fix the line. The simplest is to put the fishing line in the clip, as shown in the figure:
The disadvantage of this method is that there may be problems when biting serious specimens. In such cases, there may be misalignments, since the clutch is not an assistant in this case. It will start working if we manage to reel in the fishing line at least 10 meters. If the fish starts to tear the tackle from the start, then breaking the leader is very possible.
To protect yourself from such annoying moments, it is better to use a rubber band. It is put on as follows:
If the fish pulls strongly, the line will come off and the clutch will work. After fixing the fishing line, you need to take a marker that is different in color from the fishing line and mark the place of fixation. This way, even if the line moves, we can easily restore the fishing distance.
Sequence of actions when casting
It is very important to check how freely the line comes off the reel before each cast. First, we throw the bow off the reel and clamp the line to the blank, as shown in the figure:
We press down the line with our index finger and see how freely it moves. If we feel a tight move, be sure to inspect the line in the area of the tip. It often happens that it overlaps with the top and needs to be corrected. If this is not done, then when casting, shooting will occur and we will lose the feeder. This is still a light version. It will be worse when the top breaks.
If there are no overlaps, then place the rod behind your back and make sure that the distance from the tip of the rod to the feeder is about a meter by a meter. The picture shows the moment of winding the rod behind your back:
We see that the right hand holds the reel and is above the head. The left one holds the end of the rod and is in an extended position. Thus, when casting, the rod is located almost parallel to the ground. This is how medium and long casts are performed. When casting at close distances, the rod can be held almost perpendicular to the shore.
After this, we make a sharp cast towards the previously planned landmark. After casting, hold the rod parallel to the shore, strictly in the direction of the flying loop. As soon as the feeder reaches the surface of the water, we lift the rod up, perpendicular to the shore. Thus, we absorb the load that falls on the clip or elastic band. After the line is unwinded to the place where it is fixed with a clip or elastic band, a characteristic sound will follow. With such casts, no large arc is formed and there is practically no need to reel in the fishing line; two or three turns of the reel are enough. It is very important to cast accurately so that there are no deviations to the side.
The main mistakes fishermen make when casting
In order to avoid mistakes when casting, you need to take into account certain conditions that allow the feeder equipment to remain intact and reduce the cost of consumables:
- Raise the rod to the top and loosen your hand slightly when completing the cast. This will prevent the tackle from being shot. This is especially important if the fishing line is wound behind a clip.
- Before any casting you need to tighten the clutch. If this is not done, then during casting the spool, not being under load, will turn. Flying fishing line can severely cut your fingers.
- You need to check all the time that the line passes freely through the rings. This will help both to preserve the tackle and to avoid breakage of the feeder tip during overlaps.
- When learning the casting technique, you don’t need to be very zealous. It must be remembered that an excessively strong swing with the cord installed can provoke the shooting of the tackle. Often under these conditions it is possible to break the feeder altogether.
- Always look back and look for branches and other fishermen behind you.
- Do not fish with any carbon rod under power lines or during thunderstorms. Carbon has the ability to conduct current.
How to properly cast a feeder with a feeder, video for beginners:
With the help of these simple recommendations, you can successfully learn how to make the correct feeder cast, while the equipment will fly to the same fishing spot and the equipment will last a long time, and trophy specimens will bite much more often.
How to learn to throw accurately?
To throw accurately, you need to practice as much as possible. The more casts you make, the faster you will learn this business. Alternatively, you can use the Stadium method. It’s not true, many fishermen, when making their first casts, heard a lot of “compliments” addressed to them from the fishermen sitting next to them. And among these phrases there was a proposal to go to the stadium and practice throwing there.
There is a rational grain in this seemingly joke. If near your house there is a playground or stadium, or a clearing at least 60 meters in size, then why not try throwing. You can take, for example, a meter-long hoop and place it first at a distance of 30 meters, then 40, then 50, and so on. By throwing from various distances into this hoop, you can train your throws and gain confidence that it turns out that it is not so difficult for the feeder to throw the feeder with an accuracy of up to a meter. We do everything the same way as on a pond: we clip on and select a landmark and throw until all the feeders fall exactly into the hoop.
On the pond we only consolidate the acquired skill. On the river it will be easier to determine the casting distance by eye. By fixing the fishing line and throwing at the same landmark, we will cast our feeder with an accuracy of 20-30 centimeters.
How to make ultra-long casts?
To make ultra-long casts, you need to use the carp fishing technique. When casting, move the rod slightly lower than in the figure shown above. Arms must be extended to their full length. We make a power throw, so we need to take a short run-up, 3-4 steps, and accelerate in the last phase of the swing, when we bring the rod parallel to the shore. In this case, we shift the center of gravity from one leg to the other. It looks like this:
Let us add that the casting distance is largely influenced by the test of the rod. It is much easier to make ultra-long casts with rigid rods such as heavy and extra-heavy. Such fishing rods can be thrown a hundred meters away. However, in this case, sometimes it still makes sense to think about another place. It is not always comfortable to fish at such a distance. In some cases, this distance is the only promising one. Therefore, you need to be able to throw 100 meters.
It is important that there is space on the shore and that there are no plants or trees behind. If there is a minimal area for a short run, then this is very good. It is advisable to wear sneakers or other tight-fitting shoes on your feet. This way you can avoid unpleasant surprises when casting.
The casting distance depends on how full the spool is with fishing line. Ideally, the distance from the fishing line to the edge of the side is 2-3 mm, as we see in the figure:
The line will come off the spool easily, and it will not get tangled when casting.
Follow us on social networks
— through them we publish a lot of interesting information, photos and videos.
Popular sections of the site:
The fisherman's calendar will allow you to understand how all the fish bite depending on the time of year and month.
The fishing gear page will tell you about many popular gear and devices for fishing.
Fishing baits - we describe in detail live, plant, artificial and unusual ones.
In the bait article you will get acquainted with the main types, as well as tactics for using them.
Learn all the fishing lures to become a real fisherman and learn how to choose the right one.
Feeder for long casting
HomeArticlesAll articlesArticle
Fedorov
Such gear is necessary when the fish, for some reason, is far from the shore. “Far” is an elastic concept. For one person, say, 70m is an extraordinary result, for another it is ordinary. However, the concept of “long casting” exists and it is only possible if all elements of the tackle are adjusted to each other, and the characteristics of the tackle as a system correspond to the goal and our physical capabilities. There are plenty of good and different materials about the choice of such elements of gear as equipment, feeders and cords, and I will not dwell on them. I’ll just express some thoughts about the rod and reel.
First of all, you need to decide on the rod test. To do this, you need to understand: what information does this number on the form contain? It’s funny to see when on the same website in the first video they say that the test cannot be exceeded - the rod may break. In the second video, a picker with a 40g test is throwing a 300-gram load as hard as they can and for the hell of it. In the third video, rods are broken under load and a rod with more test breaks under less load than a rod with less test. In general, it’s a leapfrog, which, however, requires an explanation.
I have my own thoughts on this matter, which in a simplified form are as follows. The manufacturer makes a pilot batch of rods and conducts bench tests with them in order to determine the weight of the load at which the rod blank works most effectively. Let's assume the weight of the load is 70g. This is the weight that can be cast at the maximum distance with this rod. Then, according to the “golden ratio” rule, the maximum test of the rod, at which it still retains more or less acceptable efficiency, will be 70g: 0.62 = 113g.
If this rod is put into production, the maximum test calculated in this way is marked on the form either in non-standard form “110g”, or the nearest standard one – “120g”. In other words, no one tests the strength of the rod. And therefore his test on the form has a tangential relationship with his strength. Thus, having bought a rod with a 120g test and multiplying this test by 0.62, we will get an approximate (~) optimal load weight (in this case ~75g), at which the rod blank will work most efficiently.
For example, on spinning rods, as a rule, a lower test is indicated (when the form is already switched on) and an upper test (when the form is almost switched off from work). To calculate the optimal weight of the bait, the maximum and minimum tests are summed up and the sum is divided in half. Let's say (5g + 25g) : 2 = 15g. If we calculate according to the “golden ratio” rule, we get: 25g x 0.62 = 15.5g. Let's take a rod with a test of 10-35g, calculate it this way and that way - we get 22.5g and ~22g, respectively. As you can see, the rule works if the tests are specified correctly by the manufacturer.
Then, for a rod with a test of 150g, the approximate optimal load weight for the longest cast is ~95g, and with a test of 180g, ~110g. This means that a rod with a 120g test as a long-range one is better suited for fishing in shallow waters without a current, because the own weight of the feeder without bait is too small (up to 30-40g) to cope with even a weak current over a long distance and for too long she will sink. A rod with 150g test is suitable for long distances in deep water bodies without current. And a rod with 180g test will cope with a very noticeable current. There are also rods with larger test weights (up to 300g) for fishing in truly extreme conditions. The optimal weight of a loaded feeder for such a rod is 300g x 0.62 ≈ 180g.
It is known that the longer the rod and the faster its action, the potentially longer-range it is. Simply because, other things being equal, according to the laws of physics, a fast and long rod can provide a higher initial speed of the feeder. The rationale for this fact is given here: .
But there is also such a thing as the optimal length of a fishing rod, which directly depends on the anthropometry and physical development of the fisherman. Thanks Archimedes. He proved that the longer the rod, the longer its handle should be. And the longer the handle, the longer the angler’s arms should be for a comfortable grip and, therefore, the higher his height should be. That is, by taking the necessary anthropometric measurements and knowing the multiplication table, you can calculate your personal optimal rod length.
If you consider laziness, then you can use the empirical formula, according to which the effective length of the feeder rod should not exceed the angler’s height by more than 2.5 times. That is, for an angler with a height of 170 cm - no more than 4.25 m, and for an angler with a height of 180 cm - no more than 4.5 m. What do the real pros in long-distance casting – carp anglers – think about this? They believe that for long casting a 3.6m long rod is optimal for an angler 170cm tall, and a 3.9m rod for an angler 180cm tall. But when casting, the whole rod works, and on the feeder only the blank works (without a nod). Feeders 4.2-4.5 m are usually equipped with nods 50 cm long. Consequently, the length of the forms is 3.7 m and 4.0 m, respectively. Almost the same as that of carp fishermen. This is encouraging - theory coincides with practice.
The longer the rod, the more difficult it is to balance it and the greater the demands placed on the fisherman’s physical training in order to realize the potential capabilities of the rod. As a result, feeder rods with a length of 4.5 m and above are not yet particularly popular and, perhaps, that is why their assortment in stores is very poor - there is nothing to choose from. But then there is nothing to write about - take what you have. Let us reassure ourselves that just a dozen years ago the range of 4.2m rods was also poor. Therefore, for now we will focus on 4.2m rods, as they are the most popular for long-distance casting. But everything that has been said fully applies to all feeder rods without exception.
The next parameter that is worth paying attention to is the length of the handle (from the butt to the reel seat). Typically the length of the handle of such rods is about 50cm. But there may be options. Then, we take the first leg of the rod with one hand in the area of the reel seat, with the other - by the butt where it is convenient for us, and make several smooth (we are in the store after all) swings and casts. We select the rod whose handle length is more comfortable for us. If in doubt, like Buridan’s donkey, we choose the one with the longer handle.
We assemble the rod and find its center of gravity - the point on the form at which it (the rod), located horizontally, is in balance. The same Archimedes taught that the closer this point is to the reel seat, the easier it is to cast.
Now you can pay attention to the weight of the rod. If there is still plenty to choose from, choose what is easier.
If we have a need to have a long-range fishing rod, then most likely we already have some experience and it is not our first. Therefore, it will be very good if its transport length corresponds to the length of the case we have, so as not to buy a new one.
Rice. 1
We look at the rings of the assembled rod from the butt side. The first three rings should form concentric circles (shown in red in Figure 1), and the rest should smoothly move towards the upper border of the third (and sometimes second) ring (shown in black).
The turns of the cord, coming off the spool, form a spiral in the air. This spiral arises. This force is proportional to the square of the angular velocity of rotation of the spiral. That is, the further the cast, the greater the speed of the line, the more turns come off the spool per unit time, the more the spiral inflates (photo on the left). As it passes the first ring, the cord slows down due to friction in the ring, the spiral in front of the ring swells even more, and at some point the cord may begin to knock on the form, knocking off the varnish coating (photo 1 below). (Photo borrowed here).
In general, the lion's share of the total friction of the line during casting (on the spool, on the rings and on the air) occurs precisely on the first ring. There are not many ways to reduce this friction - only two. The first is to increase the diameter of the spool in order to reduce the number of descending turns per unit length of the cord. Therefore, it is worth paying attention to the size of the first ring from the reel, which determines the maximum permissible diameter of the spool bead. So, for example, for ring #30 (according to Fuji classification) on feeder rods it is allowed to install a reel with a spool side diameter of up to ~60mm, and for ring #25 – up to ~50mm. For a 4.2m rod, a #30 guide is considered optimal.
Photo 1
The second way out is to increase the length of the spool, then the laying height (its radius) will decrease more slowly, which means there will be fewer turns per unit time. In addition, the weighted average angle between the running cord and the spool board increases - friction on the spool board decreases. Or better yet, both together. Conclusion: the reel spool should be as long as possible with a maximum bead diameter corresponding to the first ring. Dedicated is the main and uncompromising condition for a reel on a “long-range” rod.
When the speed of translational movement of the line along the side of the spool increases (that is, when the casting distance increases), the friction force on the board increases in proportion to the speed, regardless of the diameter of the spool. Let's say the speed doubles, therefore, the friction on board will double. But the cord, in addition, moves in a circle and at the same time, as was said, a centrifugal force arises, tearing it away from the side. In this case, the centrifugal force, which reduces friction on board, grows faster (since it is proportional to the square of the speed) than the linear friction force. And theoretically, when a certain speed is reached (at least in the initial part of the flight), the cord can come off the spool without touching the board exactly at the moment when the friction on the board could be maximum. It's great. This is what straight-taper spools are designed for.
But the cord laying must be perfect. Otherwise, due to interturn friction (and the cord has more friction than the fishing line), several turns of the cord can simultaneously come off. As a result, a “beard” is formed, followed by the shooting of the feeder. Therefore, if a cord is used, it is recommended to reduce the laying height, that is, to place the cord again on the side of the spool. Then what is the point of using a straight-tapered spool if all its advantages are neutralized by us? It’s better not to take risks and abandon these reels.
For this reason, it is worth paying attention to reels with a baitrunner. They are, of course, somewhat heavier on average, but we can’t jig with them. The main force acting on the feeder when casting is the centrifugal force resulting from the rotation of the rod around the reel seat. That is, the reel is, in fact, in the center of rotation and its weight has virtually no effect on the speed of rotation of the rod. For this reason, a baitrunner can be useful when catching large fish with some kind of “crucian carp killer”.
Conditions on the shore may differ significantly from the greenhouse conditions we considered. The required weight of feeders can be significantly greater. Therefore, the coil must be a power coil with a gear ratio of no more than (4.6-4.7):1.
Rice. 2
Having chosen a reel that suits our requirements, it doesn’t hurt to check it for alignment with the rings of our rod, just in case. This can be done as follows. Remove the first bend and install the reel without a spool. We look at it from the side of the first ring. If the height of the coil leg and the tilt of its axis are suitable, then when the coil rod is in the center of the ring, it should be directed directly into our eye. It’s even better if you take two legs of the rod and look at the reel through the first three rings, but this is not always convenient, since it depends on the location of the fourth and subsequent rings. But with the help of a mirror this is possible.
If there is no horizontal alignment, then the coil is either “left-handed” or defective. If it is not vertical, then most likely the rings on the rod are installed incorrectly.
In conclusion, I would like to note that the most ideal tackle does not throw itself and does not fly on its own. But there is a lot about the technique of force-throwing materials. Again, good and different.
Tags: feeder
4
Register or log in to comment.
Distetc
-> Article
Feeder for long casting
30.11.2019 14:28:45
In the second video, a picker with a 40g test is thrown at a 300-gram load as hard as they can and for the hell of it. Can I watch this video? Well, picker's mobile
O2xygeN
-> Article
Feeder for long casting
02.12.2019 11:48:32
Look for “Hello Gear” on the YouTube channel.
