Types of sinkers
Types of sinkers The sinker, along with the float, hook and line, is an important element of equipment not only for a fishing rod, but also for a spinning rod.
Let's talk a little about what types of sinkers there are and how they differ from each other. There are the following types of sinkers:
- Sliding
. A sinker of this type slides freely along the fishing line up to a certain point (knot, stop bead, etc.). Such sinkers are ideal for reservoirs with a hard bottom. The center of gravity of the sinker is shifted towards the base, so when the fish grabs the bait and pulls it up, there is a greater chance that the fish will catch the hook. When, when casting the tackle, the sinker touches the surface of the water, the noise effect is minimal. - Fusiform
. For a long time these sinkers were considered champions in casting distance, until they were replaced by remote sinkers. Nowadays, such sinkers still remain popular due to their streamlined shape, in which the sinker does not catch the algae when pulling the tackle out of the water. In addition, no one has canceled the casting range. - Remote.
As stated above, these are sinkers for the most distant requests. Thanks to their streamlined shape, such sinkers behave much more stable during flight, thereby reducing the likelihood of entanglement, making fishing a pleasure. - Pear-shaped.
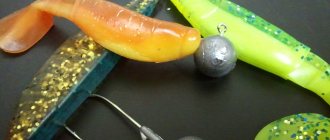
This sinker symbolizes, first of all, the accuracy of casting and the self-cutting effect. Hitting the soft muddy bottom (for which the sinker was created), it becomes enveloped in silt and the fish sits tightly on the hook. - Ball-shaped.
If you love the self-cutting effect, then this type of sinker is just for you. Thanks to its simple shape, the sinker “falls” into the bottom of the reservoir and becomes heavier, so hooking is practically not required. A significant disadvantage can be called its “not tenacity”. It will not be able to stay on a flat bottom or slope. Therefore, these sinkers are used much less frequently than others, although in some cases it is not replaceable. - Tenacious.
Sinkers, which, due to unevenness on their surface, cling to the bottom of the reservoir. Sinkers are very effective in reservoirs with large currents or uneven bottoms. Such sinkers are used by professionals for fishing on edges and slopes. - Drobinka
. One of the simplest sinkers is the so-called pellet. If your float has feedback, then you will need another pellet. Typically, a pellet-type fishing sinker is used when fishing in calm bodies of water (ponds, lakes, reservoirs). With a strong current, it is not capable of performing a high-quality dive; it will constantly be carried away and lifted. In this case, the size must be increased, which entails negative consequences. The large size of the sinkers will alert the fish, as the standard bait does not match its resistance when biting. In this case, it is necessary to use sliding sinkers. - End sinker
. Fishermen should also have an end sinker. If anyone doesn’t know, they are used mainly in river areas with collapsed soil. It is behind such blocks that fish like to be. Here the bottom surface is characterized by thickets of silt, the bottom is soft, and above all this there is a current. That’s why sliding sinkers here may simply sink or not allow the line to pass through. As a result, the float does not always respond to a bite; in addition, the silt can drag in the bait, which is why the fish simply will not see it. In this case, the end sinker will come to the rescue, which is a heavy buckshot that is placed below the hook with a leash. For such a sinker, separate leashes are created, which should be no longer than the leash with a hook. Fishing with such a sinker allows you to easily transfer bites to the float.
Montages
There is no special gear for fishing on the line, so try different options and select the size of the leash and the number of hooks. Classic feeder installations are suitable for active flow. But because of the loop that forms on the main line in the current, you need to get used to it in order to detect a bite.
Paternoster
It is easy to make even for a novice feeder. The installation provides a sufficient level of sensitivity and effectiveness in fishing conditions. At the moment of biting, the action is carried out from the leash directly to the main fishing line. The load is not involved in any way at this moment.
Asymmetrical loop
It is assembled on a separate monofilament line and attached to the main one or with a cord using a swivel. Such equipment will delight you with its catchability in the current: it is sensitive to bites and excellently self-hooks. Please note that the feeder should move from the knot to the twist itself.
Helicopter and two knots
Its peculiarity is that the leash with the hook rotates around the fishing line without any obstacles. This active bait attracts fish very well. This rig has a lot in common with the paternoster: there is a blind sinker, a feeder at the end of the main line and a leash. The difference lies in the attachment of the leash directly to the base: here the leash is mounted to the main line with a noose.
With anti-twist
This rig is designed for casting over impressive distances. The tackle proved to be excellent when paired with heavy feeders for active currents. Its main element is an anti-twist. This is a strong plastic tube, on the bend of which there is a carabiner with a clasp for the feeder. The main disadvantages of the gear: large windage, stands out on the bottom topography, low sensitivity.
Material
Different manufacturers of fishing sinkers have different material compositions. The basis of most sinkers used today is lead, to which antimony or bismuth is added in small quantities for rigidity. But with the selection of sinkers according to the hardness of the material, anglers have difficulties.
Shot that is too hard damages the line at the clamping point and during movement. A material that is too soft, on the contrary, does not adhere well to the fishing line; the pellet constantly slips, becomes deformed, and wears out. Selecting hardness is not so easy; as stated, there are no standards for the material. Only your own experience of bending and unbending pellets and tracking how the fishing line behaves will help.
Soft pellets include those that can be pinched with your fingers or small tweezers, but not with pliers. After clamping, the weight should move with effort along the fishing line, while the fishing line should not be damaged or twisted. Thus, for very thin lines of float rods, shot made of a very soft material should be used.
Classification
The entire variety of fishing sinkers can be classified into two categories:
- Stationary sinkers are fixed in a stationary position on the main fishing line of the fishing tackle. Their appearance is associated with the shape of a ball. Stationary models have weight in accordance with the accepted standardization, which is presented in special tables.
- Sliding weights move freely along the fishing line. The most common form is olive. On the fishing line, the weights can be separated from each other either by rubber stoppers or by beads.
The selection of these elements takes place in full compliance with the weight of the float, fishing conditions and the bait on the hook. It is more advisable to choose high-quality sinkers to eliminate possible troubles. Thus, poor quality models may have sharp cuts that damage the fishing line at the time of attachment. However, this can be corrected by sanding down the rough edges.
To securely fix the sinker to the fishing line, you will need pliers. Just first you need to thread the fishing thread through the slot, and then with a little effort crimp the ring. If you clamp tightly, there is a high probability of damage to the fishing line.
The optimal distance between the hook and the first sinker should be at least 20 cm.
To store cargo, a special plastic container is used with certain sections that have weight restrictions.
As a rule, all fishing sinkers are metallic in color. However, today analogs are produced that are painted to resemble natural stones and the bottom surface. This is an excellent camouflage option.
Shape and dimensions of sinkers
Sinkers can weigh from several grams to several hundred grams, depending on the nature of the gear and the conditions of its use.
When fishing at sea or in a body of water with a strong current, the same float fishing rod is equipped with a sinker that is significantly heavier in weight. This could be, for example, not only a lead “olive”, but also a lead “pyramid” weighing up to 100g (and sometimes more).
Sinkers of large sizes and masses are widely used not only in fast currents. They are an indispensable attribute of many amateur bottom tackles.
On rocky ridges
August is one of the best months for catching bream, when the bite of this fish improves in lakes, reservoirs, canals, and rivers, where it is traditionally caught with float, side, and bottom fishing rods, mainly in pits or in deep-water areas associated with shallow water. But today we will look at a somewhat unusual bream fishing area - rocky ridges, where the depth often does not exceed two meters.
Search for schools of bream
Just two years ago, I successfully caught bream and bream on Pakhra, where the emergence of this fish often occurs in areas of awash stones, i.e. where after fast water the current weakens somewhat. In such places, unique conditions for fattening are created for the fish - quieter water and an abundance of food: it, drawn by the current, lingers on underwater obstacles. When numerous summer residents began to regularly set up nets at my favorite fishing spots, the large bream left and I moved to the Oka.
Here, bream also sticks to places with prominent bottom topography. Suffice it to say that on the river in the Tsimlyanka area near the railway bridge, almost all fishermen cast their bottoms to the border of the rocky slopes of the fairway. At the same time, the presence of huge blocks and reinforcement at the bottom greatly complicates fishing, since a strong current pulls sinkers under them and the tackle often has to be torn off.
Traditional hatching of bream is not quite for me, and when the fishermen of Tsimlyanka happened to wait for days for the fish to approach on the river-bed dumps, I tried out new fishing areas. It is clear that it was not so easy to collect bite statistics due to the characteristic selectivity of bream appetite. However, I noticed bream outcrops on coastal, shallow-water terraces of shell rock with ridges of stones. The best bite occurred in the morning hours before sunrise, when the usual breeze for that time rippled the surface of the water, enriching the shallow water with oxygen. If August was hot, there was practically no bream at night at shallow depths. Ichthyologists have long known that at high daytime temperatures in shallow waters with not very fast currents, death occurs - naturally, if there is no wind at night, so fish usually do not stay in such places.
Expanding the search for areas where schools of bream come out to feed, I soon chose for myself several optimal places in the Tarusa area. Their difference from traditional bream estates is that there is a very fast current, shallow depths and a rocky bottom with the presence of underwater ridges. It must be said that Oka is higher than Serpukhov, has a large width, but is shallow. During the dry summer of 2002, I forded the river in many places. The sandy bottom stretches for many kilometers, and holes are extremely rare. This causes bream and many other fish to concentrate in areas with a rocky bottom. It should be noted that if on small and medium-sized rivers ridges attractive to bream can be located both near the shore and at a considerable distance from it, then on large fast-flowing rivers bream, as a rule, chooses those that are located closer to the shore. It's easy to explain. As we have already said, food lingers on the ridges - mainly various larvae and plant particles, which are washed away by rain from the shore or washed out of coastal algae by the current. On small and medium-sized rivers, the proximity of the banks allows the current to carry this food to the middle of the river, but on large rivers the coastal flow deposits it mostly near the shore, and does not carry it to distant ridges.
It must be said that bream stays on shallow ridges only from the beginning of the post-spawning feast until the September cold snap. Then it rolls downstream, choosing deeper places for parking. Among other reasons, this is due to the fact that the shores that provide food become poor in living creatures and plant food.
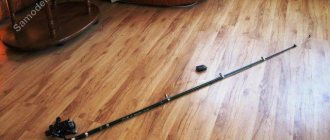
Gear selection
Practice has proven that it is best to catch bream on shallow ridges from the shore using bottom gear. Fishing from a boat is noisier and more noticeable to fish; besides, fishermen, as a rule, use not one tackle, but two, three, sometimes more, so it is more convenient to place them on the shore.
I have in my arsenal feeder tackle 2.8–3 m long. On strong currents and ridges, where the tackle takes on heavy loads, it is better to use a Heavy feeder. The upper test of my rods is 120–180 g, while the sensitive tip reacts to any bream bites, and they are usually energetic in the current.
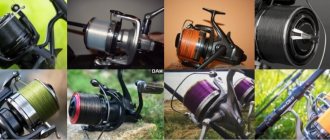
Reels should be installed inertia-free, carp, of appropriate power, and also with a change in speed for fast reeling. The last point is very important, since on the ridges you constantly need to monitor so that the feeder or sinker does not get under the stones, otherwise in many cases a dead hook occurs. For heavy feeder reels, I would recommend the 400-500g TWIN POWER MG from SHIMANO.
The main line is monofilament, with a diameter of 0.35 mm. The use of braided fishing line does not justify itself - it is less elastic, and still does not save you from those snags that occur on the ridges. As for the leashes, most of them are made of high-quality monofilament fishing line with a diameter of 0.23-0.27 mm, while the other part is made of black “Maxilon” braid with a diameter of 0.10 mm. During periods of poor bite, the use of thinner leashes justifies itself - there are more bites, and, moreover, when using some baits, for example, maggots, in the current, monofilament leashes are twisted into a spiral, and sometimes in such a way that it becomes impossible to fish with them. The length of this part of the equipment is 30–40 cm, sometimes more. Connection to the main line is either loop-to-loop or through a reliable carabiner with a swivel. To fasten the leashes, I often use a cambric from a telephone cable, which is crimped with pellet weights on the sides of the leash attachment point. This installation allows, if necessary, to adjust the distance between the leads and their distance from the sinker. In principle, a store-bought anti-twist tube can also be used for these purposes, although it is somewhat more cumbersome. If the leash is installed below the sinker, it can be up to 60–70 cm long - then the bait will be more attractive to play in the current, moving from side to side. I store a set of leashes on a special reel - opposite each leash there is an inscription indicating the diameter and length of the fishing line.
Hooks for fishing in rocky areas need to be especially strong, made of thick wire with a tip bent inward and a ring for attaching the fishing line. A hook of this shape is less dull on rocks and holds more securely on the leash when hooked. Forged carp hooks of dark color, No. 6–8, have proven themselves well.
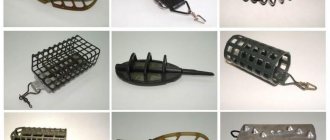
The feeder is mounted either on the main line or on a leash. If the latter is made of braided material of appropriate strength, then the feeder's carabiner must be of such strength that it unbends, preventing the main line from breaking. For plant food, I use open spiral feeders or baskets, and for maggots and small worms, closed containers. There are many options for equipment. The fastening of the feeder is movable or blind, which is done if the leashes are installed above the feeder. In stock, you need to have various ready-made options for equipment and, if necessary, change them from one to another using a reliable carabiner, which snaps onto the winding ring or loop located at the end of the main fishing line.
Since each rig is quite bulky and includes a piece of fishing line equal in diameter to the main fishing line, as well as a feeder, leashes, an additional sinker (if necessary) and hooks, the question of compact storage of rigs arises. It is most convenient to keep each of them in a separate plastic bag, having previously wound the fishing line and leads onto a small reel. It is clear that before casting, the winding ring or connecting loop should not go into the tulip of the rod, therefore, for the convenience of sending the gear, the length of the equipment is made no more than 1 m. Before putting the equipment in a bag, it must be thoroughly dried.
On such fast-flowing rivers as the Oka, Kama, and Don, fishermen use a feeder in combination with a heavy sinker, which prevents it from drifting along the current. On basket-type pockets, the sinker can be attached to a metal mesh by means of a lead whisker, a flexible plate or wire passed through the weight body, and on sliding spring feeders, the sinker with an eye is fastened to the reinforcement using a carabiner or installed in a sliding position in the same way as the feeder.
On regulated rivers like the Pakhra, you have to fish at different currents. When going fishing, you can never say for sure whether the floodgates are open today and whether the current is strong or, on the contrary, slow. In these conditions, either easily replaceable hanging feeders are used, or in the case of a sliding structure, the equipment is completely changed from one to another. Of the hanging basket feeders, those that are open on both sides are suitable for moderate currents, and those with one open side are suitable for strong currents. Regarding spring feeders, we can say the following: the larger the step between the turns of the wire, the better the bait is washed out by the current.
Bait and baits
The bait I prepare is quite simple. The main thing is that it contains small and large particles. The former attract fish from afar, the latter, washing out and lingering on the ground in the near zone, give a tip to the hooks with bait. The basis of the bait is steamed millet. To it I add a little wheat bran, breadcrumbs, fried sunflower and hemp seeds (or cake), and for the binder - a calculated dose of baby oatmeal. For scent I usually use natural flavorings, such as mint infusion or vegetable oil (burdock, sunflower, corn). Sometimes I take vanillin, roasted crushed peanuts, and milk powder as additives. The selected components are thoroughly mixed and brought to a viscous consistency by adding river water. It is important that the bait is completely washed out of the feeder no faster than 30–40 minutes, but not longer, so its density depends on the speed of the flow. If you exceed the water content in the feed, it will wash out faster and will not give the desired effect, and bait that is too viscous will not create a sufficient feed trail. Sometimes I mix maggots into a slightly more viscous bait than usual, intended for an open-type feeder - in the water it begins to move, destroying the feed lump, and together with plant particles attracts fish.
During the fishing process, if the bite weakens and the rig uses an open feeder with plant food, I replace it with a closed plastic container for maggots. It happens that bream approaches clean maggots faster. A small worm also works well. I use it to fill a container with wider holes than for maggots so that it can be washed out by the current. In general, the consumption of bait when fishing in fast currents is high. Suffice it to say that during a fishing trip I use up to 5–8 liters of ready-made vegetable mixture.
The most popular baits for fishing on ridges are steamed pearl barley or wheat grains, maggots placed on a hook of 4-8 pieces, a bunch of dung worms, a small crawl, star pasta, which are fixed with pearl barley or wheat grains mounted on a sting. It has been noticed that when maggots are replaced with pupae, larger bream, which had previously been cautious, begin to take.
Fishing tactics
Bream especially likes to go to rocky areas with a noticeable drop in the bottom. These can be quite wide coastal depressions. First, in order to determine in which part of the ridges the bream feed, you need to make casts at different distances from the shore. As a stand for a fishing rod, it is most convenient to use a telescopic aluminum tripod flyer, which has at least three sections. The tripod is placed under the third ring from the tip (the butt is simply placed on the ground) and allows you to set any angle of inclination of the rod, which depends on the current. With a longer rod and a more vertical position, a significant part of the line is above the water and less is blown out by the stream. When placing two or three rods side by side, take into account the speed at which the sinker drifts when removing the tackle. On rocky ridges, re-casting the tackle is carried out as follows: a sharp separation of the sinker from the bottom and a quick reeling.
So, after we have found out at what distance from the shore the bream bites occurred, we need to start pre-feeding the area. Using easily changeable equipment, this is very simple to do: you need to attach only one large feeder to the fishing line and, with two or three throws, “bomb” your favorite area. It must be said that, having felt the food, the bream ceases to be afraid of the impact of the feeder on the water, and sometimes it even follows the sound. A certain reflex is developed - a blow, and here it is food.
However, when feeding bait, it is important not to overfeed the bream. It should be taken into account that bream does not constantly stand on the ridges - after eating, it rolls back to places with a calmer current.
The time when bream comes out to feed varies in different rivers. For example, on the Oka, bream activity is usually observed from 21.30 to 1 o’clock, from 6 to 9 o’clock, then outbreaks of short-term biting occur around 11 and 15 o’clock. Zhora time on Pakhra most often falls on the period from 19 to 22 hours and from 5 to 10 hours. But on regulated rivers, much depends on the flow: during the opening of the dams, the bite becomes more active even outside the schedule. By the way, on Pakhra, when the current suddenly intensified, bream caught well even on a hot day, and on ridges located only 30–50 m from the noisy beach. And another pattern was noticed: after the dam was opened, roach and other small fish pecked for about an hour, and only then did the bream approach.
When fishing at night on ridges, a gas lamp of the “gas camping” type is most suitable as a lighting device. If you use another lamp that does not provide sufficient illumination, or you leave the gear unattended, then in this case, attach a signaling rattle or a compact bell near the tulip.
Both at night and at other times of the day, fishing on a rocky dump is most effective. On rivers there are also underwater cliffs with sheer outcrops of rocks, to which bream stands close, feeding on fouling and living organisms living on these walls. In such places, a clear hit under a dump or wall is the key to success.
Hooking in areas with a rocky bottom and strong currents is carried out by raising the rod high. This makes it possible to quickly feel whether the fish is hooked or not. In any case, you need to quickly select the tackle, while continuing to hold the rod high above your head.
Alexey GORYAYNOV August 3, 2005 at 00:00
Securing weights
Sinkers can be sliding or tightly fixed. Blind fastening is carried out by crimping on a fishing line, or by tying in a certain place. The sinker will injure the fishing line less if you place a cambric under the crimp area or protect the vein by wrapping it with woolen thread. We must always remember that lead is poison. There is no need to use your own teeth as pliers. To crimp such sinkers, you must have small pliers or tongs with you.
Sliding fastening is carried out by putting a sinker on the fishing line. Its movement is limited by stoppers, which allows it to move and slide within specified limits. In some varieties of bottom fishing rods, the sinker is tied to a leash, and the leash moves along the main line on a ring between the stoppers.
Fishing with a fishing rod and float
We can say that for fishing with a float the lightest and smallest sinkers are used, which can be divided into the following types:
- Pellet.
It looks like a round weight with a tiny slit in it. These sinkers are made from lead. Basically, they are sold in sets, each of which contains several weights of different weights. For equipment, you can use all the pellets, or just one. It is important to ensure reliable fixation on the fishing line: if the sinker moves, it can be damaged. - Olive.
The sinker got its name due to its shape, reminiscent of an olive. Has a small through hole. Such devices are most often purchased for fishing in bodies of water with a current or at depth. On the positive side, you can throw an olive further than a pellet. But they are often used in sets, placing light pellets below the “olives”. - Sheet lead
. It is a thinly rolled lead sheet. Available in various thicknesses. Moreover, the thinner the sheet, the easier it is to put it on the fishing line. Its disadvantage: it is quite difficult to select the weight of such a sinker. Among the advantages: you can completely make such weights yourself by flattening the material and cutting it into strips.
Read:
How to choose an echo sounder
This is interesting: How to choose a sinker for a float
Features of using sinkers
Equipping with a sinker To equip thin fishing lines, you will need whole sets of weights, with pellet weights from 0.05 to 0.5 grams.
Such ready-made sets are sold in fishing stores, and each shot number is stored separately. The marking of the shot must be applied to the compartment in which it is stored, and in grams, since the shot is matched to the known (in grams) buoyancy of the float. If this is not done by the manufacturer, then it is better to write a lot of weights on the boxes yourself with a marker. This allows you to accurately and quickly select a load for a specific float and quickly design equipment, and is very convenient, especially if you don’t have “extra” time while fishing.
Installing 5 or more weights on a fishing line increases the likelihood of tangling the equipment; such a fly fishing rod is difficult to control, which means fishing becomes tense and ineffective. But such a number of weights is not always justified.
Well, why would a carp, which has its snout pressed against the bottom and doesn’t think about looking back, need a slowly sinking and tangled rig? It is much more effective to use one weighty sliding sinker-olive and a small sub-sink, which will act as an anchor at the bottom. (Of course, it happens that carp take it “on the fly” - you need to navigate...)
If the equipment still gets tangled, then preliminary removal of the weights from it helps to untangle the fishing line. This technique saves a lot of time. After unraveling, you can very quickly install the weights in their places.
Many fishermen surround a float rod the old fashioned way. Having obtained lead from somewhere (from an old battery, various devices, from cable braiding), it is splashed into plates 0.2 - 1.0 mm thick, then pieces are cut out from the plates, usually of a larger mass than necessary. These pieces of lead are bent and clamped around the fishing line. Then, near a bucket of water, check the weight of the equipment and bite the lead with wire cutters until the float is loaded as required.
The good thing about such a load is that you got the lead for free. But this technology has several significant disadvantages:
- redoing or replacing equipment is problematic. Loading the float accurately takes a very long time and is inconvenient, especially in camping conditions; this requires a special specialist. tool, and gnawing lead with your teeth is very harmful.
- plate weights do not stick well to the fishing line, so they have to be clamped with force, and the fishing line wrinkles uncontrollably.
- the fishing line clings to the charcoal lead plates and is more likely to get tangled.
- plate weights, even of small mass, create decent resistance in the water when moving and quickly twist the fishing line; they are not applicable in the current.
So, surround it with cut out pieces of lead, which is called more expensive. It is better to use the recommendations given above.
Sinker storage
Storing sinkers You only need a small amount of sinkers.
First of all, you need a pair of sliding “olive” sinkers. Secondly, it is good to have with you a set of lead weights of each size weighing from 0.5 to 1.5 grams. They are convenient for creating simple equipment, as well as for catching carp and crucian carp at shallow depths. Such cargoes are often the main ones and make up more than half of the total weight of the shipment. For carp fishing, a good rig with one “olive” and a small pad, which can be moved to the locking knot in shallow water. For precise loading, small pellets are used. Before creating a stockpile, you need to determine what and how many pellets you need.
It is best to store sinkers separately in special cases indicating the markings and weight, then creating new equipment will be much easier. Sliding weights are best stored with pieces of fishing line or wire stretched through them. This will prevent the channels from closing when the weights hit each other during transportation.
“Olives” and pellets are used not only in float equipment. Depending on the situation during fishing, you can change the load of the equipment, and installing or removing the sinker from the fishing line is an instant matter. Tungsten “olive” sinkers have also proven themselves well in bottom and spinning rigs.
Method of making sinkers
Well-molten lead is poured into an aluminum tablespoon slightly sunk into the sand.
After cooling, the cast sinker is freely removed from the spoon. The casting is smooth, with rounded edges and does not require further processing. To attach it to the line, a hole is drilled in the narrowed part of the sinker with a drill or a hole is punched with a nail. Depending on the degree of filling of the spoon, the weight of the sinker ranges from 70 to 200 g. Lighter sinkers - from 20 to 50 g - can be cast in an aluminum teaspoon.