Fishing in winter with a jig
A good bite on warm days is observed in the early morning for an hour, in cold cloudy weather - even during the day. You need to prepare for fishing in the dark and prepare your fishing spot in advance. Fishing begins before sunrise.
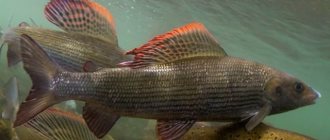
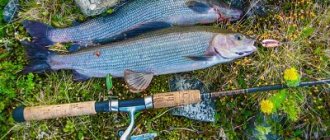
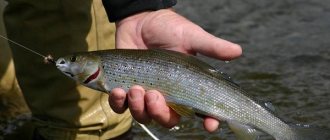
Grayling is very shy, so you need to be as quiet as possible so as not to scare away the prey.
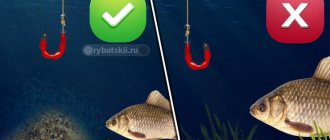
In winter, it bites best on a jig. Heavy but small tungsten ones are popular - 1-1.5 g. You can use copper, aluminum or tin. The most catchy shiny jigs are in the form of shot.
It is important that the external appearance of the bait is attractive to fish. You can make it more appetizing by painting it in different colors. Natural colors are preferable: shades of yellow (sand, wheat, gold), red (red, dark red, red), gray or green.
If the water is cloudy, choose light shades; if it is clear, then experiments with darker colors are possible. For reliability, it is better to acquire several different colored models of jigs.
Where to fish
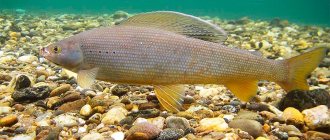
Grayling loves clean water. It makes no sense to look for it in reservoirs with a dirty bottom, where there are large stones covered with moss.
In summer and autumn, when the fish begins to actively feed, it can be found near rifts or waterfalls, where there is a lot of prey.
The tactics for searching for grayling from the ice are as follows:
- Drill 2-3 holes at the beginning of the pool. Then three - in the middle, two - at the end of the pool. The more holes, the greater the likelihood of a good catch. Place them at least 30 cm apart.
- Check for fish, cast into each hole in turn for a short time starting from the first. If there is no bite, then there is no potential prey in these places. If there is a catch, but not a big one, remember this place and return to it in the evening or the next morning.
The holes are located in the depressions where grayling likes to stand. If you can see an unfrozen riffle, look for it near the edge of the ice.
Preparing winter gear
When fishing for grayling in winter, it is much more important to choose the right gear than the size and shape of the fishing rod.
- Fishing line. Having noticed a thick fishing line, the fish may get scared and swim away. Professionals choose fluorocarbon fishing line (0.14-0.18 mm, it can withstand weight up to 1.5 kg).
- Nozzle. For live bait, take maggots, bloodworms, pieces of worms or burdock larvae. Use a bait that is found in the selected reservoir, because the fish will not show interest in bait that it has not previously encountered.
- Nod. Choose one with a large vibration amplitude. This will allow you to quickly respond to the signal about the start of the bite.
- Hook. The optimal size is No. 3-6, depending on the size of the catch.
- The leash is equipped with an artificial front sight, which increases efficiency.
- Spoon. A small spoon is enough; oscillating or spinning fly spoons are suitable. A large individual that has reached the age when the predator instinct wakes up bites on the spoon.
Grayling fishing technique
It is vain to hope for a catch; if you simply lower the bait, the underwater inhabitants will not be interested in it.
There are several ways to play with a jig to attract fish:
- Slowly pull up 5-7 cm and lower.
- Lower the rod, move it smoothly, lift it a little (about 5 cm) and lower it again.
- Lower, slowly lift with smooth swaying by 40-50 cm and lower.
Any technique must be performed smoothly, shaking the bait for credibility and pausing. It is worth checking all layers of water for greater efficiency.
To carry out such maneuvers, it is important to know the exact length of the fishing line in order to calculate how deep the bait is at a particular moment in time.
How to tie a jig with an eye?
A jig, like any other tackle, has several ways of tying it to a fishing line.
Let's consider the method of tying a jig with an eye:
The first thing to do is thread the line from above into the eye of the jig. For further ease of installation, make the end of the fishing line long, about 10-15 cm;
Now you need to make a loop of fishing line along the entire hook, and wrap the other end of the fishing line tightly around the shank;
When you have made a sufficient number of turns, take the remaining end of the fishing line and, threading it through the loop along the hook, tighten it on both sides;
Next, the remaining tip of the fishing line is cut off.
It is important that before tightening, be sure to moisten this section of the fishing line with water so that it becomes softer and more elastic. It is also advisable to tighten it slowly so as not to burn the line due to friction.
Some fishermen, in order to prevent the line from breaking, thread a cambric into the eye of the jig, thereby installing the equipment lasts longer.
How to properly tie a rewinder and a nozzle (video)
What bait to use
The methods of hunting grayling in the summer and winter seasons are different.
In the cold season, you can use jigs without attachments, giving preference to the universal wheat color.
To make bait, a feather painted in a bright color is tied to the shank of the hook with a nylon thread. The handguard is completely wrapped in feathers to resemble an insect. Self-made bait is much more attractive to predators, thanks to its non-standard shape and color.
Mormysh or cottage cheese, adored by the predator, are used as complementary foods. It is lowered into the feeder, and a piece of foam plastic is placed on the hook, which the fish mistakes for cottage cheese.
DIY jig for crucian carp
Crucian carp eats almost the same as roach or perch. Consequently, jigs for all three types of fish are the same, or at least very similar. Making a jig for crucian carp at home is quite simple, and after the first time it is still very fast.
If desired, artificial bait can be easily made at home. In this process you cannot do without the following materials:
- vice;
- pen holder;
- scissors;
- knotweed;
- a set of needles;
- bobbin thread holder;
- threader;
- tweezers;
- brushes for painting with paints or varnish base;
- hooks;
- mortars;
- lamps;
- mirrors;
- magnifying glasses;
- mounting thread;
- feathers (preferably rooster);
- dabbing;
- wool and lurex
Making a dry type fly
For DIY production, it is recommended to use bright orange and black hairs about 5-6 cm long.
Workflow steps:
- Remove the hook from the spoon.
- We thread the bright hairs through the ring. You can securely fix the material using a cambric. To do this, we put it on the hook ring that will be used.
- Using an ordinary needle, we fluff the fly.
- The product is ready for use.
Knitting a nymph
- Having previously prepared a size 5 hook, we secure it with a vice.
- We wind the mounting thread in a dark tone.
- Using dark brown dabbing we form the body of the insect, constructing the head and thorax.
- After wrapping the abdominal area, we leave a free part of the fur to copy the tail appendages.
- The tip of the gray feather is fixed by tying a thread near the ring. After making a few turns, we secure the mounting thread.
- We cut off the excess part of the winding using scissors.
Making a cargo front sight
- We prepare hooks numbered 6 and 7 (their shape should be curved as much as possible).
- Galvanized steel wire (0.35 mm) is placed on the shank of the hook (along the curved edge).
- The long part of the tip should hang freely near the bend of the hook, and the other end should protrude slightly beyond the eye.
- The wire wound around the hook is firmly wound with cotton type thread. Winding is carried out in one layer to the middle part of the forend. From the beginning of the ear you should make an indent of about 1 mm.
- To avoid loosening the thread, it is recommended to press it firmly against the hook.
- The short part of the tip of the wire must be bent in the opposite direction and fixed as firmly as possible to the forend.
- After this, be sure to check for free space near the eyelet on the forend. This area will become part of the structure of the insect's small head.
- After attaching the wire folded in half, we wrap the tip of the product from which the bait will be made on top of the material.
- After knitting the body of the insect, we construct a hook-hook. For these purposes, the long part of the steel wire is bent at an angle of 45 degrees. During this stage of work, it is imperative to maintain a 2 mm indent from the bottom of the insect’s body.
- Using scissors, carefully cut off the remaining wire, leaving a couple of millimeters for the tail area.
A catchable version of the Sayan type fly
- Having bent the shank of the hook, we slightly unbend the hook. These manipulations will make the hook as similar as possible to the Japanese look.
- Stepping back 2 mm from the shoulder blade, we tie the leash.
- We wrap the nodal area with thread and glue it with an adhesive base (BF-2).
- It is very important to observe the direction of the leash towards the location of the sting (perpendicular to the fore-end).
- We wrap the end part of the hook with the spatula with black thread.
- The top of the thread is coated with a varnish base. The insect head is ready!
- Let's start winding the body. To do this, a bright yellow or orange thread is wound around the forend, which will serve as the belly.
- Let's start tying the plumage (should be on the side where the sting is located). This feature allows the fly to remain very stable in the reservoir, despite the speed of the current and gusts of wind.
- When choosing artificial bait in a specialized store, you should not opt for very cheap options. Undoubtedly, you want to save money everywhere and in any situation. However, it is worth considering the fact that cheap products are made on the basis of rubber, polyethylene and plastic. Such bait has absolutely no resemblance to a real insect and the fish reacts to such obvious deception with a complete lack of interest in the product.
- You can knit insects, imitating not only a fly, but also a grasshopper, bloodworm, water beetle or dragonfly. Grayling is interested in any of the above types of prey. This is especially true for fishing in the cold season, when the fish tries to absorb everything that catches its eye.
- When making your own bait, it is very important not to forget to tie the tail. This detail is a kind of guide for bites. Pieces of woolen threads are ideal for the tail part.
- You should carefully select the shades of the front sight. Under no circumstances should a plain white palette be used in knitting. It is recommended to use knitting threads of different colors and feathers of various birds. If the feathers are plain, they can be re-dyed using aniline dyes.
- Flies with shiny threads have maximum catchability.
What to use to catch grayling in summer
In summer, grayling is spoiled by live insects that live near the surface of the water. Therefore, you can catch it by choosing something no less attractive: live bait, worm, maggot.
To make the maggot look more attractive to a predator, it is painted in bright colors with natural dyes. It is recommended to boil mormysh in salted water.
You can get a good catch by taking caught insects as bait.
The choice of bait largely depends on the terrain and body of water; a local earthworm on a jig is considered a popular option.
Jig (fly) for grayling
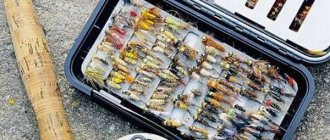
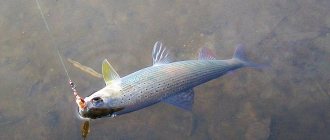
Grayling bites well on nymph-type flies. There are a huge variety of them.
This DIY jig for grayling will require a decent amount of materials:
- Hook No. 10.
- Super glue.
- Fishing line.
- Scud back 1/8.
- Wax.
- Dabbing thread.
- Copper wire.
- Lead wire.
- Mounting thread.
- Permanent marker.
Manufacturing sequence:
- Attach the hook to the machine. Wind the mounting thread from the ring along the fore-end. This is done so that the lead wire does not spin on the forend.
- Wrap the lead wire and secure it with glue.
- Smooth out the transition from the forearm to the wire with mounting thread. Then leave the thread at the bend of the hook.
- Secure the line.
- Trim the Scud Back strip to make it easier to attach.
- Secure the trimmed strip to the hook.
- Use dabbing thread and wax to form the body.
- Make legs from copper wire and attach them to the body.
- Secure the bait with mounting film near the ring.
- Divide the body into segments using fishing line, then secure it to the ring and cut off the excess.
- Shorten and bend the legs.
- Use a permanent marker to color the finished bait.
In practice, it is considered a universal bait; in our video you will learn the main stages of making a wet fly of the Nymph type.
The following types of flies are actively used in grayling fishing:
- Wet type - considered a classic type of bait, vaguely reminiscent of a water insect, larva or water beetle. Distinctive features of the product are:
- a small amount of plumage;
Possibility of tying on heavy type hooks;
- the use of metal wire to provide additional weight;
- maximum effectiveness of bait when fishing in deep areas of the reservoir;
- Can be used for fly fishing.
- Dry type - imitates a bumblebee, wasp or dragonfly that has fallen into the water. The bait is quite light and is used for fishing from the surface of a reservoir. Manufacturers produce flies made from feathers, fur or bristles. The presence of voluminous fluff allows the flies not to get wet and remain on the surface of the water even in the presence of a strong current. The distinctive features of the dry product include:
- realism of the front sight (such characteristics can be achieved by using a large number of materials in production);
the use of thin hooks when knitting, which ensures the lightness of the product;
- The high level of effectiveness of the bait is explained by the fact that grayling often floats to the surface in search of food.
- Nymph is no less popular type of bait than previous varieties. The fly most accurately copies the image of a small insect at the stage of underwater development. The main features of the product include:
- the use of lead wire to weigh the bait to the required degree, which ensures high-quality diving;
the use of rudimentary wings in the image (bird feathers are used for these purposes);
- knitting the legs of a nymph from the neck feathers of a chicken (it is very important not to build them very tightly, but to fasten them with glue).
You can achieve maximum effectiveness of the fly when fishing in deep water areas. The most popular among fishermen is the gray-brown palette of products, which provides an increased level of bite.
The dry type of flies brings maximum effectiveness in the autumn. Fishermen noted the greatest effectiveness of bait made from duck feathers.
According to a survey conducted among fishermen, the nymph made in a gray palette showed the greatest efficiency. It is recommended to use bait in late summer and late fall.
Which fishing rod to choose
A float rod is good in reservoirs where the water does not freeze for fishing from the shore. Use hooks or artificial flies with worms or larvae.
Nodding fishing rod. The basis is a strong rod, 30-40 cm long. Choose a hard nod to give a signal about the beginning of a bite in strong currents. The diameter of the fishing line is increased to 0.2-0.25 mm. The attachments for fishing with a nodding rod are bloodworms, maggots, and worms.
Spinning. You can fish for grayling in the summer using a spinning rod. You will need an ultralight rod up to 2.5 meters long. Give preference to fishing line with a diameter of 0.10 mm. You should choose a spinner or wobbler.
Basic fishing methods
- Balda . If grayling lives in deep water, then this fishing method can be effective. Here the tackle must be equipped with a strong float that can withstand the weight of the fish and heavy bait. If the float floats with the current, it will attract the attention of the fish.
- Fly fishing is the most common and effective way to catch grayling. The tackle includes:
- Light rod , the length of which is from 2 to 5 m;
- Leash 0.2 mm thick.
Cord , which is selected depending on the type of fly. If a dry fly is used, a floating line is used; if a wet fly is used, a floating line with a sinking tip is used. The fly is selected depending on where the grayling is feeding.