The quality of the selected glue can be assessed quite well by applying a thin layer of it to any surface. The better the adhesive composition , the less it will stick to your fingers after complete drying.
The presence of rubber water transport provides significant freedom for lovers of fishing and hunting.
Comfortable and efficient crossing of water obstacles, delivery of hunters or fishermen and their equipment directly to the place itself makes rubber boats very popular and in demand.
The material from which they are made is characterized by increased stability , reliability and ductility.
a collision with the shore , repeated use, contact with the ground, sand, gravel and stones without any problems
However, the possibility of rubber damage due to exposure to various sharp objects .
An abundance of metal fittings, glass fragments, or simply sharp stones can have an extremely negative impact on the durability of a rubber boat. As a result, the owners of such a vehicle are faced with the question of the need to repair it.
Although today the market is simply replete with a wide variety of special adhesives for joining rubber and rubber products, not all of them are reliable and efficient enough to be trusted with repairing a rubber boat.
It's always worth considering that every patch you install should last at least years. It is with this calculation that it is necessary to select special adhesives , the strength of which will be comparable to the strength of the rubber itself.
7.If the puncture or tear was extensive, you can glue another additional patch on top of the patch.
The answer immediately suggests itself - seal the rubber boat
This is exactly what many people do, but it doesn’t work out for them. In this article I will try to briefly give some recommendations on how to apply your knowledge as correctly and systematically as possible in order to correctly seal a rubber boat and continue fishing in the future.
These are the two main points that you need to pay attention to. And then, the actual repair of the boat. It is customary to distinguish between ordinary small punctures, large punctures and torn coating violations, and material divergence along the seam. The simplest, and as practice shows, reliable and durable, is to seal small and medium punctures.
The main advantage of liquid patching is its ease of use. In addition, this substance allows for high-quality repairs of an inflatable boat. The connection that is formed at the puncture site is monolithic, and only a new puncture or burning can destroy it.
Avoiding mistakes when repairing a PVC boat yourself
In general, simple repairs to a PVC boat, such as patching a hole, are not such a difficult task.
But even here, it is necessary to follow some rules so as not to make things worse.
Remember that you do not need to clean the damaged area with rough material (sandpaper, scraper), use glue that is not suitable for polyurethane, or try to heat the glue, trying to set it on fire.
And it’s better not to undertake repairs if you don’t have invisible tools or self-confidence at hand.
The best decision is to trust the professionals and be calm about your safety while fishing.
Repairing a PVC boat with liquid patching
A simple but effective way to repair a boat involves using a liquid patch. It is a suspension with a liquid solvent and allows you to carry out repairs as quickly and efficiently as possible (Figure 5).
The principle of operation of such a patch is very simple. It contains a special solvent that corrodes the PVC structure, and the active reagent restores the ductility of the material. After drying, the connection is very strong and durable.
The main advantage of liquid patching is its ease of use. In addition, this substance allows for high-quality repairs of an inflatable boat. The connection that is formed at the puncture site is monolithic, and only a new puncture or burning can destroy it.
Repairing a PVC boat with liquid patching is practically no different from repairing it using a special kit. The area with the puncture is degreased, a generous layer of adhesive is applied to it, and a weight is simply placed on top. After a day, a strong monolithic connection is formed in place of the hole.
When degreasing, contact with the plane should not exceed two seconds, otherwise this product can affect the structure of the rubber.
Before starting work, you need to determine how many damaged places on the rubber product require repair. This can be checked by lowering the inflated boat into the water and marking the places where bubbles appear. You can also check this by applying a soap solution to the surface.
It's even better to conduct a thorough inspection of the entire surface. If there are worn areas or peeling, it is better to fix it immediately to avoid any unpleasant moments in the future.
After determining the place of repair, you need to start repairing the boat yourself.
Cutting patches
For the patch, a material is selected that is identical to the repair plane. If there is a repair kit, which should usually be in the package with the boat, then it is better to use it.
Tips for fisherman: Spoons for vertical trolling from a boat - Detailed review
The patch is cut 5 cm longer on each side than the size of the damage. The shape should be rectangular, but with rounded ends to prevent the repair area from snagging in the future.
Surface treatment
The area to be sealed must be cleaned of dirt and treated with fine sandpaper. Since roughness provides better adhesion. After sanding, the surface is cleared of dust.
The patch itself is prepared for work in the same way.
Sew up the incisions
When stitching a cut, you must use nylon threads. The seam must be dense and strong so that it can withstand high loads.
Degreasing
After sanding and stitching, the joints are degreased. Acetone and gasoline are suitable for this procedure.
When degreasing, contact with the plane should not exceed two seconds, otherwise this product can affect the structure of the rubber.
This procedure is mandatory, as it promotes better adhesion of the two surfaces to be bonded.
Applying glue
How to use the glue is written in the instructions. Typically, glue is not applied to the patch material, only to the boat itself. It is better to apply evenly with a brush. Covered with two layers. After the first one, wait the required time for complete drying and only then apply the second one.
Attaching patches
After applying the second layer, a patch is applied. Afterwards, the patch material is smoothed out, expelling the formed air; wrinkling is not allowed.
Alignment of the patch is carried out immediately, since after time, corrections are no longer made.
If the gluing is bad, it is better to immediately remove the patch and prepare a new one.
There are still quite a lot of old rubber inflatable boats in use. They also have to be repaired; the order of work will not change in this case. Only for a rubber boat you will need to select a patch made of a material other than PVC, and also use suitable glue.
How to repair a boat with your own hands?
If damage to a PVC boat is detected, it is necessary to conduct an inspection and, if necessary, prepare for repairs in the field.
To carry out repairs, it is necessary to carry out the following operations:
- Bleed the boat.
- Wash the damaged area well and dry.
- Degrease the body at the gluing site and the patch fabric using solvent, acetone or gasoline.
- Make a patch template and try it on the damaged area on the boat hull. If the damage is small in size, the patch is placed on one side, and if it has a large area, then on both sides.
- A patch is cut out of PVC fabric according to the size of the template, degreased, and dried.
- Using a brush, glue is applied to the body and the patch and left for 10-15 minutes. for setting.
- The gluing areas are treated with glue again and left for 5 minutes. and are applied to each other, rolled with a hard roller to remove air bubbles.
- The boat is slightly inflated with air and left for 2-3 hours. for the glue to dry.
It must be remembered that it is advisable to carry out repair work only at ambient temperatures above +15*C. For better gluing of the fabric, it is advisable to warm the place where the PVC is being glued with hot air at a temperature of +70-80*C.
Repairing rips and cuts
When repairing damage over a large area, it is first necessary to sew up the fabric with threads, and then gluing it using patches on both sides.
Repair and replacement of valves
If the valves installed on the boat malfunction, it is necessary to inspect them and check their functionality. To do this, using a special wrench, the valves are unscrewed, cleaned of dirt and washed in gasoline.
Lubricate with oil and reassemble in reverse order. They are checked for leaks; if performance is not restored, then they are replaced with new ones.
It is also necessary to remember that after the end of the fishing season, when storing a PVC boat, it must be thoroughly washed to remove the smell of fish, which attracts rodents that can damage the hull.
Let's celebrate! Compliance with the technology of carrying out repair work using high-quality materials allows us to carry out high-quality repairs of a PVC boat with the elimination of all faults. In case of major damage to the boat hull, it is better to contact a specialized workshop that has extensive experience in such work.
Accessories
Fastenings, eyelets, handles, rail washers, oarlocks - all of the above is included in the concept of fittings. These are auxiliary elements of the boat's design, but without them it is simply inconvenient to use it. Not often, but sometimes it is necessary to replace damaged fittings or install additional ones. It won’t take much effort, but how quickly you can do it is up to you. Everything is done in the same way as when applying patches.
You just need to first outline the locations of the elements, and you can start working. Everything is as usual - cleaning, degreasing, applying the first layer of glue, curing, applying the second layer and gluing.
An abundance of metal fittings, glass fragments, or simply sharp stones can have an extremely negative impact on the durability of a rubber boat. As a result, the owners of such a vehicle are faced with the question of the need to repair it.
Features of choosing glue
In addition, durable and high-quality boat repairs do not require the use of cyanoacrylate-based .
All types of superglues, which are so easy to use at home and harden extremely quickly, are completely unsuitable for a rubber boat.
They are designed exclusively for instant gluing of hard surfaces that will not be subject to powerful mechanical stress in the future.
As for a rubber boat, here the material not only constantly experiences air pressure from the inside, mechanical and hydrodynamic influences from the outside, but also expands and deflates on its own depending on how full it is with air.
The quality of the selected glue can be assessed quite well by applying a thin layer of it to any surface. The better the adhesive composition , the less it will stick to your fingers after complete drying.
Tackier adhesives do not have good final strength because their structure is too fluid to create strong, long-lasting bonds.
This applies to a greater extent to polyurethane-based adhesives . As for polychloroprene adhesive, separate additional resins are responsible for the stickiness.
In addition, when choosing a durable and reliable adhesive for gluing, it is a good idea to pay attention to its heat resistance .
The higher the limit range of a given composition, the better for the result. It is worth immediately preventing boat owners from using universal adhesives.
Any universal compounds will always be worse in their final result than specialized options designed for connecting rubber components.
Until the adhesive film has completely dried and formed stable bonds, any humidity , and especially open water, is completely contraindicated for the repair site.
In such a situation, polyurethane glue simply loses its properties, and chloroprene glue greatly reduces its effectiveness. If you are striving to create a truly high-quality and reliable seam and have already chosen a good glue for this, there will be nothing wrong with additionally heating the surfaces to be joined.
In particular, it is for this purpose that glue with high thermal stability is selected. Joining hot rubber, even with glue, is much more effective and reliable than trying to glue cold pieces together.
Always remember what material your boat is made of. Today, along with classic rubber products, there are also PVC boats.
Fishing Tips: How to Use a Fish Finder for Boat Fishing - Detailed Review
It is necessary to glue them with completely different types of glue. A high-quality and durable patch on a PVC boat will stick if polyurethane glue is used.
If your boat is made of rubber, neoprene and hypalon, then it is better to use polychloroprene glue , which bonds much better to similar material structures.
There are certain differences when preparing for repairs. Rubber boats coated with Hypalon should be cleaned at the point of damage, ideally to the point where all Hypalon has been removed.
At the same time, the rubber itself is cleaned, which significantly increases adhesion . When repairing PVC boats, such cleaning is not carried out.
After thorough degreasing with acetone and alcohol, the glue is applied to both surfaces to be glued, after which it is necessary to wait up to 20 minutes for the formation of a connecting layer.
After this, the patch is connected to the damaged area and compressed tightly. It would be a good idea to warm them up to 50 degrees Celsius for the best effect.
Before the gluing process, it is necessary to completely tear the bottom off the boat, then heat it with a hairdryer and clean it well with sandpaper. Then you need to glue the sealing tape. Only after this should you start gluing the bottom.
FAQ
Repairing rubber boats can be accompanied by certain difficulties, depending on the nature of the damage, as well as the personal capabilities of the owner. Some take the process very seriously, while others try to “cover up” the damaged area with whatever is necessary. In this regard, some owners of rubber boats turn to professionals for advice or look for answers to their questions on the Internet.
- gluing speed;
- ease of use.
Despite this, you need to be prepared for the fact that the bonded surfaces will not last long. This glue is sensitive to elevated temperatures and it is unknown how it will behave after warming up in the sun.
Moment glue is a good option for a quick solution to the problem. For example, you can take it with you fishing or on a trip, and if something happens, you can quickly and reliably seal the hole. The advantage is that you do not need to wait for the connection to gain its strength, since it can be used immediately. The glued surface can serve throughout the entire trip, but upon arrival home, it is advisable to re-glue the damaged area with another glue, adhering to all the technology.
This is why experienced owners refuse to use Moment glue: why glue it twice if you can do it once and for all.
How to get rid of old rubber glue?
Repairing a rubber boat using shoe glue
Some owners use shoe (nairite) glue to repair their boats, as it has excellent water-repellent properties. In addition, the adhesive connection has a certain flexibility and strength. In addition to rubber, it also glues other materials, such as leather, wood, fabric, and so on. Naturally, gluing must be done strictly according to technology.
It is better to have large holes repaired in a workshop; they have equipment, materials and craftsmen there.
PVC boat puncture repair
To repair a puncture in a PVC boat, you need to put a small patch or simply use a “Liquid Patch”. Repairing a puncture with Liquid Patch will be much easier, but you will have to wait at least 12 hours for it to dissolve the top layer of PVC and form a flexible and durable connection. The essence of the puncture is that the integrity of the PVC layer is damaged, but the reinforced layer (cord) itself does not suffer, therefore, the liquid patch perfectly tightens the PVC, and an undamaged reinforced layer will give you a guarantee that it will no longer be etched in this place.
If you need to quickly repair the boat, then you need to install a patch; the technology for installing the patch is described in the next section.
What glue to use
The most important thing in repairing punctures is to know exactly how to seal a rubber boat and how to connect the patch to the boat material. The reliability of the repair depends on the quality of the adhesive mixture. What kind of glue can you use if the repair kit contains low quality or has run out? The popular composition “Secunda” is not capable of sealing a hole in a PVC product efficiently. The patch will stick, but will soon fall off. The composition of this glue is cyanoacrylate, which widens the hole.
Experienced fishermen know well what glue to use to glue a PVC boat at home. It is better to use a polyurethane-based adhesive; such a tube is included in the repair kit. This may be “Professional” glue, but it is selected specifically for PVC products. The quality of the glue is determined by the following criterion: a good composition does not stick to your hands when it dries. Once dry, excess cannot be removed from surfaces. Heat resistance is also of great importance; the boat gets very hot in the sun.
Tips for a fisherman: How to choose a boat for fishing, subtleties of choice - Tips for a beginner
When choosing the right composition, you should consider the following:
- special glue is better than universal glue;
- cheap composition is of low quality;
- superglue is not suitable for working with PVC;
- polyurethane composition requires heating to 70 °C.
If the listed factors are taken into account, the gluing will be of high quality.
Gluing methods
The trick to the job is heating the repair area. If it is done at home, it is better to use a hairdryer. In nature, a mug of heated water is used. After heating, the repair area cools and dries. You can use the boat after 2-3 hours, but even better - after 2-3 days. By this time the glue is gaining strength.
In this way, it is easy to repair cuts or punctures up to 5 cm. Sometimes an underwater snag pulls out a large piece from the bottom, then it is easier to turn to specialists for help. Such repairs are carried out in workshops that carry out tire fitting. You can also seal a puncture in a swimming mattress there.
It is necessary to ensure that the adhesive is distributed evenly over the entire area. Next, the surfaces are pressed tightly against each other and fixed with fingers or a press for several minutes. To fully achieve the effect, the boat, with taped seams, is left in an inflated state for the time specified in the instructions.
Repair instructions for individual components
Gluing a rubber boat along the seam
Fishermen and hunters who use rubber boats are well aware that elements such as seams are the first to fail. What does it look like? The special tape that protects the seam begins to peel off over time, allows water to pass through and can contribute to rotting of the suture material.
Boat seam repairs should be carried out in a dry, ventilated and warm room. At the beginning, the boat should be inflated, but not too much. Then, determine the location of the detachment or damage. Lightly sand it, degrease it and apply the glue itself directly.
It is necessary to ensure that the adhesive is distributed evenly over the entire area. Next, the surfaces are pressed tightly against each other and fixed with fingers or a press for several minutes. To fully achieve the effect, the boat, with taped seams, is left in an inflated state for the time specified in the instructions.
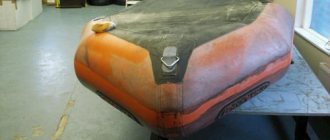
Gluing the transom
The transom of a boat is a special area that can withstand the highest loads, since the motor is attached to it. Under the pressure of the weight of the motor, this element often fails and requires constant repair.
Rubber rubber adhesive is a popular rubber adhesive that contains natural rubber, urethanes, and various specific additives. It has proven itself well as a means for repairing various surfaces and materials, including rubber.
Due to its increased viscosity and increased elasticity, this adhesive has the following positive effects:
- corrosion resistance;
- vibration resistance;
- resistance to mechanical damage;
- resistance to abrasive materials;
- resistance to deformation.
Before you start repairing a PVC boat at home, you need to carefully inspect the entire surface and identify any damage, even superficial ones. Any scratch, even a superficial one, can crack over time, and small damage after filling with air can turn into an impressive hole.
Standard PVC boat repair kit
Glue for patching PVC fabric
So, the factory repair kit for a PVC boat includes the following: patches of various shapes and sizes and special glue.
This will be enough to make minor repairs and patch a hole in the boat.
Additionally, you may need a lighter, alcohol and a clean bandage, which an experienced fisherman will always have.
In addition, you can use glue not only that included in the original repair kit, but also have your own personal, camping kit for repairing the boat. This will be much more convenient and reliable.
Adviсe
To ensure that the repaired boat does not let you down at the most crucial moment and serves you for a long time, you need to follow a few simple recommendations:
- Most often, the boat is pierced with a hook, so you need to be extremely careful when throwing bait into the water.
- When moving through a body of water, try to avoid any underwater obstacles.
- Be sure to examine the shore where the boat is launched for the presence of objects that could damage the bottom. Most often, the inattention of fishermen when descending causes a cut on the bottom.
- In order for a boat to serve you for many years, it must be properly stored and constantly looked after.
Recommendations for proper repair
- Sometimes you have to dry the boat material or patches during repairs; this is easy to do with a regular hair dryer;
- Carry out all operations with glue outdoors or in a well-ventilated room.
The air humidity in the room should not be higher than 60%.
If you ignore all the tips given above, then you may not expect the most pleasant outcome - the patch coming off or a repeated breakdown. Also, you should not repair the boat at temperatures above 18 degrees.
.
And in general, it is better to avoid cuts and holes, so as not to waste your time on repairing the boat, but rather direct it in a different direction. Over time, you will still have to glue scuffs and scratches, but this will happen after a long time.
Safety precautions when repairing a PVC boat
Preparing the Patch
Undoubtedly, when carrying out repairs, some safety precautions should be observed.
Namely:
- handle fire carefully, because PVC material is very sensitive to high temperatures;
- After the repair, you should not touch or bend the damaged area of the boat, so as not to damage it again (you need to wait about a day for the glue to dry completely);
- Holes that are too large (more than 15 cm) should not be attempted to be repaired yourself in order to avoid a possible accident when fishing.