Overseas, it is generally accepted that everything related to GPS navigation and electronics for wireless distance measurement is necessarily somehow connected with. The manufacturer, which has been producing navigation equipment for two decades, has gained worldwide fame and recognition. This article focuses on Garmin echo sounders - devices that are very popular among people who prefer an active lifestyle and fishing. A review of popular models is made, instructions and reviews of devices among professionals are described.
Sensitivity adjustment
The next point in the settings is sensitivity adjustment. Like some other settings, this parameter will most likely initially be set to “Auto” mode. But you are free to change the sonar sensitivity level yourself, and you should start with 75%. In the future, try increasing or decreasing the sensitivity setting, focusing on the quality of the screen image. In different bodies of water and at different times, sensitivity may need to be re-adjusted.
Also read a useful article: which echo sounder to choose
Noise suppression
And one more important parameter, which no less than others affects the quality of the picture on the echo sounder display, is the noise reduction setting.
As a rule, most models have 3 levels of noise reduction. However, this function can be completely disabled if desired, but noise filtering will also allow you to achieve a clearer picture, which, of course, can only be a plus.
Remember that there are no universal settings, and the echo sounder parameters must be adjusted manually, taking into account the characteristics of a particular body of water and the speed of your boat. You will learn more about boat echo sounders in the review - “Choosing an echo sounder for a boat.”
Review of Garmin Echo fish finders
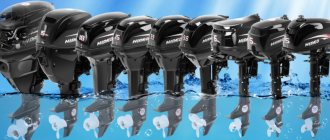
Thanks to the use of unique HD-ID technology, Garmin has been able to provide consistently high-quality, high-definition images in the Echo series fish finders. Echo 100 devices are equipped with monochrome displays, the Echo 300c and 500c are equipped with color displays.
The dimensions of the devices also differ (the Echo 200 and 500c models are more massive, with a wide screen), but all Garmin echo sounders are characterized by efficient sonar operation and fast updating of the image on the screen.
Echo sounders are not always sold on the market or in a simple fishing store, and a specific model of echo sounder is even more difficult to find, so it is better to order echo sounders on official websites. In terms of price/quality ratio, the top three companies in echo sounders are: Lowrance , Hummindird and Garmin .
The transmitter power in different models ranges from 100 W to 500 W. The working depth ranges from 180-580 m in fresh water bodies. The Echo 100 has a single beam, while all other devices have dual beams.
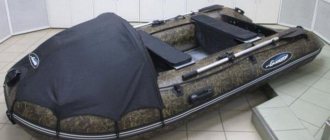
Garmin Echo fish finders are simple and easy to use. Regardless of the features of a particular model, installation of devices takes 3-4 minutes. All models are equipped with a hinged mount and universal branded transducers.
Basic functions of echo sounders
Depth scale- Sensitivity
- Noise suppression
- Frequency
- Scaling
- Image
- Fish symbols
- Fish Detection
- Warning Signals
- Fish depth
- White and gray lines.
Read more about the capabilities of echo sounders in the article “Functions of echo sounders.”
Sooner or later, most professional fishermen come to the idea of purchasing an echo sounder. Such a device will be especially relevant for boat owners and those who like to fish in large and deep bodies of water. In such cases, an echo sounder will help to study the lake in detail - the bottom topography, the location of the fish, its habitats, aggregations, parking areas, etc. The presence of an echo sounder allows you to come to a pond and start fishing almost immediately, without spending additional time observing the reservoir, as well as the behavior of the fish in it (this sometimes takes more than one day).
Let's look at the nuances of getting started with an echo sounder, connecting it and setting it up using the example of a popular entry-level model - Fishfinder 561x from the well-known manufacturer of navigation equipment Garmin. In addition to the device itself, we need 3 more important elements:
- power supply;
- Charger;
- sensor mounting.
The power source is a necessary component, without which autonomous operation of the echo sounder is not possible. For fishing, special models are produced that have a completely waterproof body, compact dimensions and low weight. Accordingly, the greater the capacity of such a power source, the heavier and larger it will be.
Voltage is supplied from the battery terminals to the input terminals of the echo sounder using conventional alligator clips. If it is possible to connect the device to the on-board system, then a power source and charger are not required. An extreme option is to use ordinary batteries connected in series, which together produce 12 V. However, in the latter case it is necessary to provide a “container” for the batteries.
Charger . The optimal solution for this echo sounder model would be a Sonar charger, either with or without a current regulator. These memory devices are compact and time-tested. Such chargers are available in two versions - from a household network (220V) and from a cigarette lighter (12 V). Which model to choose depends on the operating conditions. On average, a 7Ah battery lasts for several days of active use. If you are planning longer trips, then it is better to choose a car charger.
Accessories for Garmin fish finders
Sometimes fishing can last for several days, so the lack of necessary little things can turn into a serious problem. A portable charger with terminals is useful if fishing occurs from a boat that has a starter battery. This will ensure uninterrupted operation of the echo sounder and will save all collected data.
If the boat does not have a stationary power source, it is better to buy an additional battery for the device. Chargers powered by solar batteries are very popular. At the output, such batteries provide up to 5 volts, which is enough to recharge several mobile devices at once, which is very important in conditions of multi-day fishing.
Connection
We start by connecting the power. To do this, the echo sounder usually comes with a cable or cable consisting of a connector for connecting the device screen and 2 (in some cases more) wires bare at the end. Thus, you can connect them to the terminals of the on-board system or simply solder the terminals going to the battery to them.
Next, we connect the echo sounder connector to the display and connect the wires to the battery terminals according to the following diagram: red wire to the red terminal, black wire to the black terminal. To ensure better contact, you can solder the wires to the terminals. After that, turn on the echo sounder.
Sonar Garmin Striker Plus 7cv (Garmin Strike Plus 7 sv)
The practical Garmin Striker Plus 7cv fish finder features built-in standard CHIRP ClearVü sonar and comes with Garmin Quickdraw Contours mapping software that not only creates maps, but also stores them with one-inch contours of two million acres of information.
The Garmin Striker Plus 7cv model has built-in WI-FI, by connecting to which you can use the “ActiveCaptain” application. Here you can receive notifications, view and share waypoints, and activate software updates.
The seven-inch display and practical, intuitive user interface with built-in GPS and functions for creating waypoints, routes and speed information provide everything you need for serious fishing.
Settings
Before you get started, you need to set up your echo sounder. All devices supplied to the Russian market have factory settings. First of all, users usually set their native language: MENU button - SETTING - SYSTEM - LANGUAGE. Settings for any device is an individual matter. Here is just a standard configuration option for this device:
- Russian language;
- Contrast – choose “to taste”;
- Beeper – ON;
- Simulator - ON. This will allow you to see how different elements are displayed on the sonar display. After studying the main images, be sure to select the value of this item OFF, so as not to catch fish using the stimulator.
Next, in the MENU menu item, select in order:
- Sensitivity – it is better to leave it on AUTO;
- Depth – set meters instead of feet;
- Zoom – leave it OFF;
- Scrolling – select the middle position.
- Depth – value OFF;
- Fish – set to ON;
- Battery – set the low battery alarm level (2A);
- Shallow – most often, when fishing in shallow water, set it to OFF or 1.0M.
- White line – set to ON;
- Fish icons – place an icon with a number on a white background and a fish;
- Auto gain – select medium;
- The beam is narrow;
- Water temperature – leave it on AUTO. In this mode, the water temperature will be displayed on the screen only when the echo sounder sensor is in the water;
- Battery – show;
- Size – small.
- Temperature – set degrees Celsius (°C);
- Depth – select meters (M).
Popular Garmin sonar models
Living in a world of money, everyone realizes that the pricing policy of Garmin is important. By and large, their price is not high enough , but the benefits from them are enormous.
You can't argue with that. There are top models that are most popular among both professional fishermen and beginners.
These include the Garmin Echo 100. Its main advantages are its low price, black and white screen, the diagonal of which is 4″. It “sees” the target well, even at a depth of 200 meters. Good screen resolution, fast image change and update, simple design. All this allows you to receive information on the screen about bottom hardness and water temperature. It can also be used for ice fishing.
Garmin Echo 150
The Garmin Echo 150 is also quite popular and its features are listed below.
- The Garmin echo sounder “sees” the target very well, even at a depth of 400 meters.
- The maximum viewing angle of 120 degrees is quite informative.
- The kit includes a convenient tilting, quick-release stand.
- Easy to attach.
- There is a sound alarm.
- A fish is displayed when it moves at high speed.
- It is possible to determine the hardness of the bottom.
Garmin Fishfinder 140
Garmin Fishfinder 140 is a fairly simple device that is in great demand in our market. It is also not without many advantages. There is a backlight, small overall dimensions, which is quite convenient, a contrast screen, good screen resolution, quick image change and update. This model has a function for automatically saving settings , determining the properties of the bottom and its features, and a sound alarm. Good value for money. It can be easily used even in sunny weather, and can also be used up to a bottom depth of 450 meters.
Boat installation
Once all the basic settings have been selected, you can begin installing the echo sounder in the boat. When determining the location for mounting the head part (screen), remember that it should be located at arm's length from you, so that it is convenient to observe the readings of the device without being distracted from other matters. The most important thing when installing is to choose a flat area and securely fasten the monitor holder. First of all, we fasten the stationary part with screws, and to it, using a clamping screw, we mount the counter part of the rotating mechanism.
Next, we connect the cable to the screen and connect it to the cable coming from the echo sounder sensor. We fix the latter on a holder and install it on the transom of the boat using a clamp and adjust it in height so that it does not extend beyond the bottom edge. At the very end, we connect the power to the echo sounder. For convenience and safety, it is better to place the battery and all wires compactly so that all this does not interfere with the movement of fishermen around the boat.
Now you can turn on the device and check its operation. On site, the device is already adjusted to specific environmental and weather conditions, the backlight and other parameters are adjusted. With this our “torment” is over, all that remains is to catch a big fish. Have a good catch and good luck on the waters!
As my practice shows, most fishermen use it this way: turn it on while on the water and simply turn it off after fishing. All! Of course, you can also use it this way, but it didn’t hurt to read the instructions for the device at least once. I assure you that you will learn a lot of interesting things about your echo sounder, and even more so about your chartplotter. After the first turn on, at least in an elementary way, you need to adjust the “language”, “sensitivity”, and switch to the “metric” system. It is highly advisable to increase the “pulse frequency” to the maximum and slightly increase the “screen scrolling speed”. The rest that is not clear should be set to “Auto” or as set by default. But still, even with such simplicity, several important, elementary rules must be followed. Take the time to study the operation of the device on the ground. The device may have errors. This applies to the determined density of the soil and the presence of objects that can be mistaken for fish. Therefore, it is advisable to analyze the image on the monitor, including by adjusting the sensitivity of the sensor. Do not forget that the device constantly displays a dynamic picture on the screen, the earliest results of its operation are shown on the screen on the left, and the latest data on the right. The device works even while parked. And always remember - if a horizontal line is constantly reflected on the screen, it means a constant depth, and not at all that there is a flat bottom below you.
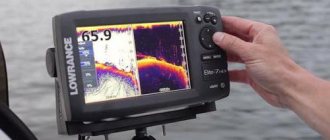
⛵ Adjust the sensitivity and depth scale
The main factor ensuring an accurate determination of the size of a fish by an echo sounder is its correctly selected sensitivity and set depth range. In general, the larger the fish, the stronger the echo signal from it and the larger the signal mark on the screen. The echo sounder settings are very important here, because excessively increasing the sensitivity can make a half-kilogram perch appear on the screen as a three-kilogram whitefish. On the other hand, reducing the sensitivity too much can cause the whitefish to look like a 300g roach on the screen. Switching the depth range from 0−10 meters to the range from 0 to 20 meters reduces the fish mark on the screen by almost half. So, firstly, you need to manually set the range of viewing depths so that you can see the bottom of the lake near the bottom edge of the screen at the deepest point to which you plan to fish. Then we raise the sensitivity to such an extent that dots randomly appear and disappear all over the screen, and then reduce the sensitivity so much that these random dots simply stop appearing on the screen. You should note the sensitivity setting found, and try to repeat it in all other cases at the same depth of the reservoir.
Garmin Striker Plus 5CV
One of the latest fish finders from Garmin. Striker Plus 5CV has all the necessary characteristics - GPS for on-site orientation, fish display, strong operating temperature range, simple, intuitive interface, reasonable price, clear picture. It is all these characteristics that have earned positive reviews about this echo sounder. The durable structure protects against moisture, allowing for excellent fishing from a boat.
Echo sounder characteristics:
- Display size: 5´´;
- Screen resolution: 800 x 480 pixels;
- Display type: WVGA color;
- Waterproof: yes (IPX7);
- CHIRP sonar technology: yes (built-in);
- DownVü: yes, with CHIRP (built-in);
- Radiation power: 500 W (rms);
- Dimensions: 18.8 x 11.6 x 5.4 cm;
- Weight: 0.5 kg.
Contents: fish finder, power cable, swivel mount, hardware, Garmin bumper sticker.
Where can I buy? You can purchase it on the official website.