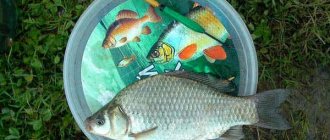
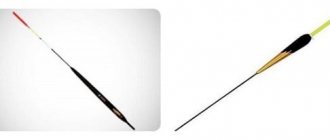
Properties of a quality float
A float made from bird feathers has a number of significant advantages over many modern designs. This is why the goose float has become so popular among avid fishermen.
His positive qualities:
- Demonstrates a high level of sensitivity to bites at the slightest touch of the fish.
- Guarantees maximum stability in a vertical position regardless of weather conditions.
- It is resistant to temperature changes, does not get wet in water, and is easy to attach to a fishing line.
- Almost invisible to fish in the water, but visible to anglers at any time of the year.
- Does not require funds to purchase, easy to do yourself.
Very often, experienced anglers note another property of such a float: it has almost zero resistance when trying to hook a fish, which has a positive effect on the comfort of fishing. And the vertical, elongated shape will always signal the fisherman about a bite, even in a noticeably strong wind.
Correct loading
You will need to place 2 weights on the fishing line:
- basic;
- lighter undercut (located closer to the hook).
This allows you to correctly distribute the weight and load, which has a positive effect on the sensitivity of the float as a whole. In some cases, experienced anglers load it themselves, leaving 3-4 centimeters of length on the surface.
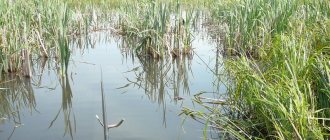
In the Urals, the described method of loading with under-plowing has long been used, using a wooden whip as a fishing rod. In this case, the goose feather was suitable for fishing in rivers and reservoirs, even with a fairly strong current.
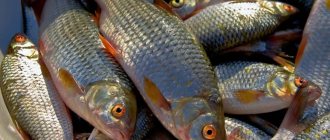
Thanks to the phenomenal sensitivity of the latter, it was possible to timely hook the finicky crucian carp, which loves to savor the bait from the bottom of the lake.
My fishing tips
I wish you good health. From my experience of fishing with a goose float - this classic float tackle has been known since ancient times, where an ordinary goose feather was used. Also, many survivalists on a trip necessarily take with them a goose feather as a float, lead pellets and a set of fish hooks in order to feed themselves with freshly caught fish on an extreme trip.
photo - I ASSEMBLE A LIGHT FISHING ROCK FROM A GOOSE FEATHER, MANY GRAMS YOU NEED - https://moisovetyorybalke.ru/
On the shelves of fishing stores you can find goose feathers for sale - floats with one attachment point
Fishing store - goose float - 10 rubles, a set of lead pellets 40 rubles to 75 rubles, a set of fishing hooks for crucian carp from 70 rubles to 150 rubles.
photo - I ASSEMBLE A LIGHT FISHING ROCK FROM A GOOSE FEATHER, MANY GRAMS YOU NEED - https://moisovetyorybalke.ru/
- The main line is 0.2 mm, the lead line is used if desired, since you can use the main line to tie a fishing hook.
photo - I ASSEMBLE A LIGHT FISHING ROD FROM A GOOSE FEATHER, HOW MANY GRAMS DO YOU NEED - https://moisovetyorybalke.ru/
How to set up a fishing rod with a goose float and how many grams do you need to load the float?
photo - I ASSEMBLE A LIGHT FISHING ROCK FROM A GOOSE FEATHER, MANY GRAMS YOU NEED - https://moisovetyorybalke.ru/
- The goose float has the disadvantage of being very light and the load is enough for a lead pellet weighing from 1 gram to 2 grams.
- Additionally, goose feathers for floats add weight and create balance in the shape of the body of the float. In this option, the load is adjusted for fishing at depth in the water column.
photo - I ASSEMBLE A LIGHT FISHING ROCK FROM A GOOSE FEATHER, MANY GRAMS YOU NEED - https://moisovetyorybalke.ru/
- When using a standard goose feather purchased in a store, we attach it through the eyelet or tie it using the method suggested by the manufacturer.
photo - I ASSEMBLE A LIGHT FISHING ROCK FROM A GOOSE FEATHER, MANY GRAMS YOU NEED - https://moisovetyorybalke.ru/
- At the end of the main line we tie a loop using a figure eight fishing knot and secure two fishing hooks tied together on one line and secured loop to loop.
- All that remains is to attach a lead pellet for fishing from the bottom of the reservoir. The average fishing depth of a reservoir is from 1 meter to 3 meters, which allows you to fish with a rod from 3 meters to 5 meters on a fly rod.
photo - I ASSEMBLE A EASY FISHING ROCK FROM A GOOSE FEATHER, AS MANY GRAMS NEEDED - https://moisovetyorybalke.ru/
Donate for development - give for Christ's sake!
https://money.yandex.ru/to/41001136019007
Was the fishing information useful? Put ??????
??? Share a recent article??
My fishing tips:
Making a float
Choose a sample of medium length, avoiding feathers that are too large or small. It is imperative to pay attention to the integrity of the rod: it must exclude chips, cracks or any holes into which moisture can penetrate. The best option would be a fresh feather obtained from a country goose. First, you should clean the rod from fluff using a sharp knife or blade. Next, you need to start processing the surface using sandpaper with a minimum level of sanding.
The process must be carried out as carefully as possible to prevent damage to the waterproof layer. Afterwards, you will need a nipple elastic band, from which two tightly fitting segments are created: a fishing line is subsequently threaded through them. Finally, you need to paint the 2-4 cm long tip in a bright color for visibility, usually red.
Now it’s clear how to make a feather float yourself. But what should it be in the end? Many avid anglers agree that such a specimen is ideal for hunting crucian carp. Due to its lightness, even the slightest touch of the fish on the hook will instantly notify the fisherman of a bite.
The level of sensitivity depends on a number of factors:
- elongated and thinner core of the rod;
- smaller cross-sectional area of the upper part;
- load capacity - the smaller, the more sensitive.
It turns out that the ideal specimen for catching crucian carp is:
- vertically elongated shape;
- as thin as possible at the top;
- should not be massive.
No wonder crucian carp fishing enthusiasts often use this option. Of course, there are many analogues made from other materials. But is there any point in overpaying if the classic method continues to work effectively?
Similar articles
Source: orybalke.com
Simple DIY floats
Winter this year turned out to be warm, to the great regret of ice fishing lovers. In addition, the new year has already passed, which means spring is not far away. It makes sense to prepare for float fishing.
In this article, we'll look at simple ways to make cool floats.
Let's start with probably the most ancient, classic and many-loved technology, making goose feather floats! It was on these floats that our grandfathers and fathers caught fish, and some of us have probably already experienced this miracle of technology.
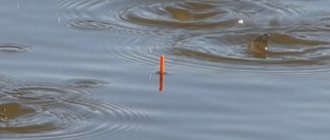
Fishing with such a float is much more interesting than with store-bought ones; it’s a completely different psychological mood. It’s one thing to stare for hours at a plastic pin sticking out of the water, and another thing if it’s a goose feather, painted and made by hand. The feather float is very sensitive, it shudders at the slightest touch of the fish, as it is thin, long and has low bite resistance. In addition, when you cast a fishing rod, the slave is not afraid of the sound of the float falling on the water, plus the fish perceives this float as something natural.
Materials and tools for making a goose feather float: - goose feathers (large, from the wings); - scissors; - blade; - cambrics or rubber band from the nipple; — varnish or paint (waterproof); - sandpaper.
The process of making a feather float:
Step one. Cutting off excess plumage
To make the float, you will only need the central part of the feather, so you can immediately cut off all the “fluff” with scissors or a blade. Do not rip it off as this risks damaging the air chamber.
The pen shaft consists of two parts, a white part and also a chamber. Due to the chamber, the float floats, since there is air in it. When making a float, try not to damage the chamber, as water will fill into the float and it will sink.
Cut the float to the required length, only cut off the white part!
Step two. Float processing
When you cut off the fluff, sand the central part with fine sandpaper so that nothing sticks out. You can also carefully burn the remaining parts.
Step three. Float mount
To secure the float to the fishing line, it is enough to cut two rings from a nipple elastic band or from another suitable one. We put the rings on the fishing line and insert the float.
Some hobbyists also make a hinged mount, which can be made from thin copper wire.
It is important to take care to protect the float from water. With prolonged use, the float will sooner or later begin to absorb water if no measures are taken. It is advisable to paint or varnish the entire float. You can also coat it with epoxy glue; this will generally be a strong and durable coating.
That's all, the feather float is ready, now let's look at how to make a foam float!
The float is made from foam plastic a little more complicated, but it turns out to be more massive, such tackle can be thrown further and catch larger fish. These floats also look quite interesting. You can use wine corks as the starting material. By the way, goose feather floats are sometimes combined with foam plastic.
Materials and tools for making foam floats:
- hacksaw; - stationery knife; - Styrofoam; - round nose pliers; - drill; - sandpaper; - wooden skewers; - Super glue; - baby powder and emulsion; - paint and varnish; - wire or thin spring.
Float manufacturing process:
Step one. Cut off the required pieces of foam
Decide on the size of the float and use a hacksaw to cut the pieces to the required size.
You will need to process not only the foam part, but also the wooden skewer.
Step six. Preparing for painting
Before painting, the author rubs baby powder into the foam, for what purpose, I personally don’t understand. Then the float is dipped into a jar of emulsion paint, which is diluted with water. Wait until the whole thing is completely dry.
Step seven. Painting
What color to paint the float is up to everyone to decide for themselves. The author paints the lower part of the float, which will be under water, light brown. Simply dip the float into the paint to the desired level.
As for the mast, it can also be painted. The author here alternates three colors, yellow, blue and white.
If you want to put stripes on the float, this will allow you to clearly see the degree of immersion, clamp the float back into the drill chuck and turn it on at low speed. Using a thin brush, apply paint in the right places and you will get excellent, even rings.
When the paint is completely dry, be sure to apply a layer of varnish on top. It will protect the paint and also prevent the wooden skewer from absorbing water. With varnish, the float will last much longer and retain its original appearance.
Step eight. Fastener
The varnish should dry within 24 hours, after which you can begin making the fastener. Thanks to it, the float can be hung on a fishing line. You will need to secure the ring at the bottom of the float on a skewer; for this purpose the author uses a small steel spring. We make a loop at the end, cut it to the desired length and put it on a skewer.
But finding such a spring will be quite problematic; it is best to find a piece of copper wire; it can be obtained from the cable by removing the insulation. We form a ring in the same way, and wrap the remaining edges around the tip of a skewer. Finally, we cover this place with varnish or impregnate it with “super glue”.
To secure the fishing line, you will need to make another piece on which the cambric is put. It can also be made from wire. In principle, the cambric can be put on the top of the skewer and the fishing line can be pulled through two points.
If desired, the float can be made sliding, this will allow you to conveniently fish over a long distance. This float works especially well when you need to break through duckweed. That's all, the floats are ready, they look beautiful, they are easy to make, if you wish, you can “rivet” as many of them as you like. No tail, no scales! Source
Receive a selection of new homemade products by email. No spam, only useful ideas!
*By filling out the form you agree to the processing of personal data
Finishing up the float
Despite its long history in the fishing world, the technology for making floats from bird feathers has not made much progress. If earlier the feathers were cut off from the feather, the edges were sanded, painted and supplied with a wire eyelet and a crimping tube from the wire insulation for attaching the fishing line, now they do the same. The only innovation: insulation and wire were replaced by cambrics and needles with a ring eye. This is the weak point of the floats. Therefore, if you decide to try to “touch the origins,” Pike.by advises strengthening the most important float nodes.
The lower part of the feather is quite thin and the eyelet does not hold securely in it (the one who made this float even regretted adding a drop of glue ). It's not difficult to fix this. Carefully remove the needle from the float. It happens that this part already has a crack, so without sparing we cut off the tip 0.5-1 cm. We dip the needle in glue and install it in its original place. For reliability, we put a bandage of nylon threads on top, which we also glue. By the way, it would not be superfluous to coat the entire float with a thin layer of glue or transparent varnish - this will prevent it from drinking water through the cracks.
An important feature: the bandage must be applied not only to the feather, but also to the eye of the needle. If you don't do this, you may break the line and get stuck in the wire crevice.
Instead of the thin cambric with which the float is sold, we install a model elastic band. We make 2 turns under tension, tie it in a knot and glue it. How to thread a fishing line under it? A toothpick will help! Carefully push it under the elastic band and pass the fishing line into the resulting gap. The float is now ready for loading.
Disadvantages of a feather float
Not suitable for plug fishing and long-distance casting with Bolognese tackle. There is a limited number of weight categories of such floats, so it will be difficult to select individual models for different conditions. At the same time, you will never find two bird feather floats the same - they will all have a unique shape and weight, which creates problems when loading accurately. Author: Pike.Pinsk©
Source: pike.by
We all love to do something with our own hands, but it’s even better to make useful things that we will use in the future. Today we will make a float for fishing, because they get lost very, very often.
How to make a float with your own hands?
There are many ways to make a float, it’s not a tricky thing, having some knowledge and abilities, we can keep ourselves busy for several hours.
First of all, we need to decide what type of float we want, and what it will be made from.
In our article, we will consider two options:
1. How to make a goose feather float?
2. How to make a float from foam plastic?
How to make a goose feather float?
For such a float we need a goose feather, which is not so difficult to find these days.
1. We only need the feather shaft, so we remove excess fluff from it.
2. Now let's trim the feather a little using sandpaper (zero). This process should be done very carefully so as not to damage the waterproof layer.
3. We take a nipple elastic band and put two small pieces on the feather, and the fishing line will pass through them.
You can color part of the feather red for better observation. That's all! The feather float is ready.
Homemade goose feather float
- VK
As children, many of us made very sensitive, but, alas, equally short-lived goose feather floats. For several centuries, goose feathers have been an indispensable material for their manufacture. And only with the advent of modern technologies and polymer materials, goose feather floats began to lose their once wide popularity. But many fishermen still prefer only them.
There is no need to throw away the plastic tubes on which gift balloons were placed - this is an excellent material for a future float. All materials that may be needed for its manufacture (photo 1).
It will take only a few minutes to make such a float, because the main element - the strongest body of the float - is already ready. Thanks to this remarkable quality, you can even accidentally step on such a float - it will not suffer at all. Its antenna or fin will not break off, because there are none. It will not pick up oxen like a goose feather.
Tube floats are truly universal; they can be used for fishing both in still water and in the current, in windy weather and in complete calm, close to the shore or with long casting.
When biting carefully, when the fish takes it carefully, slightly touching, or when fishing in a retrieve, lower it like a Stick so that only 3-4 mm rises above the water, and if you need a long cast, you can leave 2-3 cm above the water - and be sure , the bite will be clearly visible.
The arrow-shaped body of the float during flight has less resistance than the teardrop-shaped one, so it flies further than, for example, a waggler of the same carrying capacity, and it is seen better.
Making a float
I cut the plastic tube from the balloon with a knife into several pieces of suitable length. Let one float be longer and the other shorter: when fishing, floats of different lengths and different carrying capacities (from 0.8 to 5 g) are useful. I make plugs from a wooden stick (photo 2).
It is better to choose light, soft wood, for example, use a piece of balsa window cornice (photo 3).
I clamp the end of the stick in the chuck of an electric drill, take a piece of fairly large emery cloth in my other hand, lightly squeeze the stick with it (so that it doesn’t catch when rotating) and turn on the drill (photo 4).
After 3-4 minutes I get a perfectly round stick of the required diameter for corks. With the top plug everything is simple: after lubricating the stick with Superglue, I stick it into the tube about 2 cm - this will be the top of the float.
I assemble the lower part of the float a little differently - first, cut off a centimeter plug from the stick, and, smeared with glue, push it about 4 cm inside the tube. Then we place 1 or 2 lead “pellets” inside and only then, after smearing it with glue, insert the bottom plug (photo 5).
The lower part does not need to be painted, the fish is not afraid of white, and can be caught even in shallow waters.
The finished floats are marked (photo 6): one “pellet” - one strip, two “pellets” - two strips, no pellets - no stripes.
An unloaded float, even with two “pellets,” should lie horizontally on the water, then the “rising” bite will be clearly visible.
When the glue dries after a few minutes, you can glue a piece of a pin with a ring into the bottom plug. After the glue has completely dried, in order for the paint to adhere well, you need to lightly “sand” the glossy surface at the top of the float.
A rig with two “shots” in the float and a catch near the hook is used for fishing in calm conditions; with one “pellet” in the float and a sinker with a catch - in a light breeze, with a float without “pellets” and with all the weight on the main line - for fishing in windy weather. In any case, I try to use the lightest equipment that can be fished in specific conditions.
When fishing in a current, you need two attachment points for the float; to do this, just put a rubber (silicone) ring of a suitable diameter on the main line and insert the upper part of the float into it. The thin body of the float provides minimal resistance to the flow of water and is very reminiscent of that same goose feather, only its quality is higher and its strength is much greater. This is how a float for blind equipment is made.
For sliding equipment, I don’t put any “pellets” inside, but insert a fastener into the float ring. In this case, the entire weight should be located on the main line to make it easier for the sinkers to pull the line through the fastener ring. All floats are equipped with fasteners so that they can be easily and quickly changed in accordance with fishing conditions, or removed when transporting the rods. An ordinary standard fastener needs to be slightly bent so that the fishing line does not come out of the ring of the fastener.
Related articles:
Daiwa spinning reel maintenance
Refinement of rotating spinners
Homemade feeder for feeder
Homemade balancer