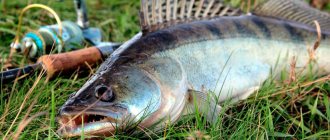
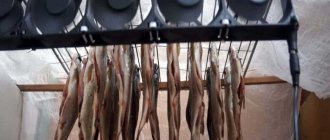
On a large river, catching bream with a can from a boat (slipping) is more comfortable and effective in the current than using standard donks with springs, especially on choppy waves. Light tackle gets blown away and twitches in the wind. In such conditions, special side donks with large feeders and heavy loading work better. Spinning casting is not required - the tackle is lowered under the boat by hand. In this article we will look at what fishing with a can from a boat is and how to mount such gear.
Sheer donk from a boat
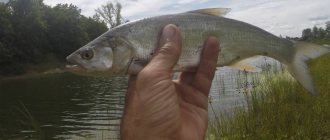
In the current, fishing for bream from a boat with bank tackle is a healthy alternative to conventional spinning donks. A heavier load and no need to mount long rods in the boat makes it easier to manage the gear. Bream likes to approach a fairly massive feeding table. The can holds much more bait, and besides, fishing is usually carried out with several tackles lowered from the side. In the current below the boat, a powerful trail of rushing food particles is created, to which fish approach - bream, silver bream, blue bream, any river whitefish. But this method works better for bream, since the feeding is voluminous and constant.
Tackle ring diagram
Fishing with a can is similar in principle to fishing with a ring - the equipment also has a volumetric feeder, and the leashes are pulled downstream by the flow. The bream rises along the feed stream and finds the bait on the hook. The egg rig is a continuation of the development of the ring. Instead of a lead ring running pivotally along the cable, two weights on a wire are used. When a large fish bites, this device flies off the feeder cable, and fishing takes place without the working equipment coming into contact with the feed. Read more about side donks.
Inline access scheme
Inline principle
Advantages and disadvantages of the jar fishing technique
Fishing with a can also has its pros and cons. Not all fishermen like and use this technique, because they consider it pointless and ineffective. For example, you may simply not notice that a fish has swam into your jar, it will swim away from there and leave you with nothing. Therefore, this technology requires increased attention and patience.
The advantages of fishing with a jar are that it is very simple and accessible. Every person has all the available materials needed to make gear at home, especially plastic bottles.
The only difficulty may be that you need to carefully tie the bottle so that it becomes in the desired position. Also make sure that all the bait is not quickly washed out of the bottle and always replenish its reserves.
Once you understand the intricacies of jar fishing, you can safely take plastic bottles and go fishing. There are many varieties of this type of fishing, but it is best to fish from a boat, so you can catch some really good and big bream. Fishing with a can from a boat will definitely bear fruit if you select all the gear correctly and get out to a good place where a lot of trophy fish live.
Bank for bream (submission)
A can for catching bream is essentially a bottom bottom, in which the feeder is located on the main line according to the inline sliding principle. This is the ancestor of the ring and egg rig. In this form, the tackle is thrown in and taken out along with the feeder. On the ring and eggs, the equipment is thrown in and selected separately, sliding along the feeder cable, and the heavy feeder itself is not taken out (only occasionally, to replenish food). A jar is a space in which the feeder itself is made from the appropriate container. The most commonly used are coffee cans, but there may be others. Any jars with a volume of 300-500 milliliters will do. Read more about catching.
The bank donk is something average in caliber between ordinary donks with a spring and a ring. The bottoms have light weights that allow you to cast the rig with a fishing rod. The can is larger and heavier; it is lowered into the water by hand or with a rod without casting, just into the water from the side. The ring and eggs contain even more massive feeders, into which kilograms of food are stuffed. Therefore, they are installed for a long time. Each time the bank tackle is pulled out along with the feed, which is filled with bait. The principle is the same as in a regular spring, only the volume is much larger. And this is just good for luring bream.
Inline feeder diagram
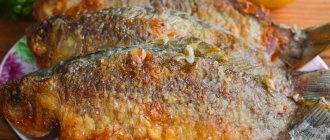
The bait is filled into the jar, the consistency of which is selected individually depending on the strength of the current, the number and diameter of the holes in the feeder. It is necessary to achieve such a ratio of the holes in the jars, the stickiness of the food and the strength of the current so that the bait is completely washed out in about 30-40 minutes. The bait is prepared depending on the preferences of the bream in a given reservoir. It can be porridge, store-bought mixtures - it doesn’t matter. Traditionally, jar makers mix millet or pea porridge with dry mixtures, ground cake, and breadcrumbs. Read more about proper bait for bream.
Curler feeder
You can make effective equipment from ordinary plastic hair curling accessories. Thanks to the variety of ready-made, available options, such a do-it-yourself fishing feeder can be made in any color and shape. To change the size of the product, you only need to apply a minimum of effort. It is convenient to carry out the work with pliers and wire cutters.
When choosing a suitable base for making the desired design, you should not give preference to curlers made of unreliable material, as well as options with a pronounced, repulsive odor.
To make the product heavier and stronger, as in previous cases, the edges are crimped with a piece of lead plate.
Can design
Any solution will do - a metal can, a coupling from a plumbing pipe with two plugs, plastic jars of the required volume (up to 0.5 kg of bait - otherwise it will be difficult to lift the tackle). No need for a larger one. Larger containers are suitable for rings or eggs. The weight of the feeder from a can is attached to the fishing line in a sliding version. The main line should pass through the feeder structure freely. A swivel or ring with a bumper bead is tied from below - the usual inline principle, as in a bottom spring. A line passing system can be made in any way - anglers try as hard as they can:
- Punch holes in the center of the bottom and lid, process them so as not to injure the fishing line. You can pass a plastic tube through the holes - even better.
- Attach wire rings to the outer surface and pass the fishing line through them.
- Attach the anti-twist tube to the cormak.
The lid must open so that you can fill it with food. At the same time, the lid should not open on its own so that the bait does not spill out in vain. A sinker is attached to the can, usually 100-300 grams, depending on the current. You can rivet it directly to the jar, put it inside, or tie it to the outside in any reliable way. The weight of the load is selected so that after immersion the feeder lies on the bottom, but not tightly, but with some effort it rises and moves a little further. This is necessary to fish with a can according to the rolling principle, launching the tackle further from the boat - bream is sometimes afraid to come close and stands lower in the stern stream, 10-20 meters away.
Baits and baits
When choosing bait, you should follow two simple rules. What's in the food is on the hook.
If you use a cut worm in bait, then place the same on the hook. This also applies to corn, pearl barley, and bloodworms.
Choose bait depending on the food supply of the reservoir. If mormysh live in large numbers in a reservoir, then this bait will be preferable.
And here's what you need to know: Everything for fishing: online store of tackle, clothing, shoes and goods for fishing
You can catch bream using: worms, maggots, bloodworms, jigs, corn, polystyrene foam, peas, pasta.
Bait should be selected depending on the fish you plan to catch. It should also be a bait that holds well on bottom hooks.
How to catch more fish? I have been active fishing for quite some time and have found many ways to improve the bite. And here are the most effective ones: Bite activator.
Attracts fish in cold and warm water with the help of pheromones included in the composition and stimulates its appetite. It is a pity that Rosprirodnadzor wants to impose a ban on its sale. More sensitive gear.
Reviews and instructions for other types of gear can be found on the pages of my website. Lures using pheromones.
You can get the rest of the secrets of successful fishing for free by reading my other materials on the site.
Some effective baits you can use are:
- worms;
- hominy;
- leeches;
- boilies;
- canned corn;
- mask;
- boiled hemp;
- steamed pearl barley;
- pearl barley shell.
For greater productivity, you can take several baits from this list when fishing.
Tackle
The main line is regular strong monofilament 0.4-0.6 mm. You don't need a special fishing rod - simple reels will do. However, for ease of storage and fishing, it is better to mount the jar on the lower butt part with one elbow and a ring of a Chinese telescopic bottom fishing rod, or on the side bottom. The lower part of any broken spinning rod will do. You can fish like a fishing rod, if its power allows you to reel in a bulky can. If there are small reels, we select and lower the tackle by hand.
At the top of the fishing rod we mount a long elastic nod with a bell. Firstly, it will serve as a bite alarm. Secondly, its up-and-down movements on the wave when rocking compensate for the difference in distance, and the can, even with strong rocking, stands securely on the bottom without rising. The nods sway in time with the wave, and a failure in these identical movements means a bite. You can also place the can rig on a wire reel with a nod - the main thing is to securely attach the entire structure to the boat.
Where and for what fish is it used?
Each type of gear must be used in certain conditions of the reservoir. Only then can you achieve your goal and catch the desired fish.
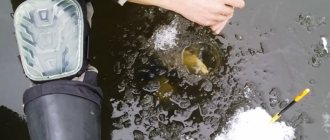
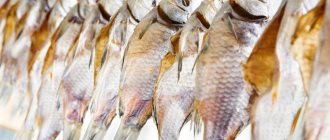
- Catching small fish with a can is best done in small rivers or in shallow coastal areas of ponds or lakes. It is in such places that such representatives of the ichthyofauna live as bleak, gudgeon, minnow, perch, roach, and crucian carp. In addition, at a shallow depth, you can notice what is happening inside the jar and promptly remove the prey from the water.
Photo 1. Small top from a plastic jar.
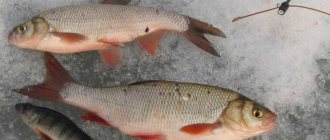
- If you need a can for catching bream from a boat, then the best option would be fishing on a medium and large river. Only during the current will the food be slowly washed out of the feeder, forming an attractive trail. Not only bream, but also roach, silver bream, and ide can be suitable for it. Species diversity will depend on the correct preparation of bait. It should be viscous and heavy enough to form a feeding path on the bottom without attracting hordes of bleak and perch.
- Catching catfish using can tackle is most often carried out in large reservoirs. Since this predator comes out of pits to feed, jars are installed at the entrances and exits of deep pools, as well as next to snags or thickets of grass. In addition to catfish, you can catch pike, pike-perch and perch with this tackle. If instead of live bait you attach peas, corn or boilies, then a large carp may also be hooked.
Photo 2. Equipment for a catfish can.
Rigging a can for bream
The equipment of the can is exactly the same as for any access or winter drain. This is the same approach in inline equipment. You can attach short leashes or a rocker to the lower swivel if the fish is not afraid to approach the boat. A can with short leads can also be used in still water if the fish does not mind coming so close to the boat.
However, initially the passes were designed for fishing in the current, mainly for bream. And this fish often does not rise up the feed stream close to the feeder. Therefore, long tails with leashes are used. In still water, such equipment is difficult to cast correctly - the tail is not stretched by the current and sinks directly onto the stern under the boat. During the current, the tail with leashes descends into the water, after pulling it out, the cormak is carefully immersed.
The tail is a piece of 0.3 mm monofilament; leashes are tied on it using any branch knots or on swivels (if the current is able to straighten the tail with pieces of metal in it).
Leashes are made from fishing line 0.12-0.3 mm. The diameter is selected based on the activity of the fish and its size. Thick leashes are more reliable, but bream do not always take them. The general equipment is quite rough, so thin leaders may not support large fish. And in rivers, such gear, in addition to bream, can attract large ide, chub, carp or catfish. Between the end swivel and the leash, you can make an insert from several pieces of feedergam or rubber band (more details in the video). In this option, you can put thinner leashes on the jar - this technique significantly increases the number of bites.
Rubber insert
It turns out that the leashes with hooks are pulled further downstream from the feeder by the flow. Usually the length of the tail is up to 3 meters, the number of leashes is 3 or more. In a strong current, a shot is attached to the tip of the tail so that the equipment lies on the bottom and does not dangle. In terms of its operating technique, this rig is similar to a helicopter rig, in which a blade is attached to the end of the tail. In this form, the tail does not lie on the bottom, but wobbles in the stream along with the hooks. The helicopter is excellent at catching sabrefish, bluegill and bream, which bite not from the bottom, but in the depths.
The technique of fishing with a can is choosing the fishing distance, that is, the length of the tail. You can also move the can downwards, fishing the feeding area downstream. This is often necessary, especially when fishing for large, wary bream. To shift, the can is raised from the bottom so that the current carries it along with the equipment a little further. And so on several times, step by step, until the area where the bream bites is found. After finding the distance, you can begin to reduce the distance by one step with each cast, as if luring the fish closer.
Subscribe to the channel:
YouTube channel RYBAFAN
We are VKontakte
Fishing technique
Choose a promising fishing spot. Prepare your gear and mix some complementary foods. Explore the bottom topography using an echo sounder or other available means. If you use tackle without a feeder, then feed the intended fishing area in advance. To do this, roll five or six balls of bait, aim, try to get them to fall into the water a little closer than the tackle will be.
This is explained by the fact that the bottom topography has the shape of a slide, and the lure is in the shape of a ball and rolls a little lower. Set the bait. Throw the tackle into the water and set the pecking indicator. Remember that under any conditions, you must throw one ball of bait every twenty minutes, regardless of whether you are biting or not. This is necessary to keep fish in the fishing area and attract new schools.
If you use tackle with a feeder, then preliminary feeding is not required. Place the bait in the feeder, adjusting the compression force depending on the speed of the current. The stronger the current, the more you need to compress the bait. You should check the availability of complementary foods every twenty to thirty minutes.
Attach the bait, cast, set the bite indicator. Next, when the indicator is triggered, hook immediately, do not wait for the fish to sit on your hook, this happens extremely rarely.
Hook with the rod, with a sharp, strong movement. Start catching fish.
Don't pull too fast or too slow. When reeling in quickly, the load on the rod and reel increases, the depreciation of the gear worsens, and with the next blow, the fish may break off.
If it’s slow, the fish can go into the grass, hide behind a snag, dive deeper into the hole, and most likely it will end in death. Always keep a landing net in a visible place; you should be able to reach it without difficulty; most landings occur just under the shore.
When the fish is on the shore, put it in the cage or release it. Check the presence of complementary food in the feeders, adjust the bait, and re-throw the tackle.
Fishing for bream on the “Ring”
- VK
This ancient and effective method of fishing used to be called “Florentine”. It got its name thanks to the city where it was invented - Florence. The essence of fishing is as follows: on a river with a fairly powerful current, a boat is placed at anchors perpendicular to the shore. The tackle is lowered into the water from the downstream side. Content:
- RING WITH SECRET
- RODS AND EQUIPMENT
- FEEDER
- LURE
- FISHING TECHNIQUE
- TIME AND PLACE OF FISHING
- USEFUL TIPS
Its main part is a short side rod, usually no more than a meter long, equipped with guide rings and a reel with a supply of fishing line with a diameter of 0.3-0.4 mm. A metal detachable ring with a diameter of 40-60 mm is attached to the fishing line, from which there are two leashes of 0.2-0.3 mm with hooks tied at some distance from each other.
The second component of the gear is a feeder made of fine mesh with a weight (kryg), to which a long cord is tied. An ordinary stone was used as a load, the mass of which was determined by the strength of the current: the stronger the flow, the heavier the stone. It was all set up in this way: crackers or bread were stuffed into the feeder net and lowered to the bottom. The end of the rope was secured in the boat. Next, a sliding metal ring with leashes was put on this rope through a connector and lowered to the feeder.
I do not recommend tightly tying the leashes directly to the ring (Fig. 1), as the tackle becomes insensitive.
For example, I do it this way: I put a stopper bead on the end of the main line and tie a carabiner, and then attach a leash to it. Thanks to this fastening, you can notice even very careful bites and easily change leashes.
The principle of operation of the gear is simple: the current washes the food out of the net, creating an odorous food trail. The fish, climbing along it, inevitably stumbles upon hooks with nozzles.
RING WITH SECRET
The use of gear when fishing from a boat is effective at depths of 4 m. If you fish in shallower places, then bream (the priority object of fishing) in fairly clear water will be afraid of the shadow of the boat and the noise that accompanies working with the gear. In addition, at greater depths, the chances of catching a trophy specimen increase, rather than dragging small bream and roach. One of the main elements of the equipment, from which its name comes, is a lead ring (Fig. 2 a, b). It can be cast in a mold made of earth and then processed with a file. A hole is made in the ring to allow the main line to pass through. The hole can be made in different ways.
In Fig. 2, and it runs in one plane - from top to bottom. And in Fig. 2b, the hole from above falls into the side plane, due to which when lowering the ring onto the mesh feeder, the hooks will be less likely to catch. Then they make a cut to make the feeder cord.
At one time, I found another solution (Fig. 3), which, in my opinion, is devoid of the disadvantages of the “classics”. Through a copper tube 16-18 cm long and 7-10 mm in diameter I pass steel wire with a diameter of 1 mm (nichrome can be used). I bend the workpiece into a horseshoe shape, and leave the ends of the wire so that after crossing they have a length of no more than 8-10 mm. Then I fill the cavity of the tube with lead and drill a hole for the main line.
The “ring” in the shape of a horseshoe is devoid of the disadvantages of the “classic” one. Firstly, it has a sliding leash attachment, not a blind one, and secondly, when a large bream weighing 3-4 kg is caught, when fishing, it quickly swims away from the boat and breaks off the leash, because the “ring” slides along the fishing line - feeder cord up or down, but not to the side. The modernized “ring” behaves differently: when biting, the crossed wire antennae do not prevent the fish, even with a slight effort, from pulling the “ring” off the cord, and then free fishing begins.
RODS AND EQUIPMENT
The rod is an ordinary one, onboard, you can buy it at any store. But I did it myself at one time. I took a solid fiberglass whip 1 m long and glued it with epoxy resin into a neoprene handle about 30 cm long. I installed the rings and reel seat, and mounted a guard on the tip. I still use a wire reel. Of the modern ones, I think a small multiplier would be perfect. The main fishing line 0.3-0.4 mm is passed through the rings, the guard spring and the “ring” hole. Leashes - with a diameter of 0.18-0.2 mm, hooks - No. 4-8 according to the domestic classification.
FEEDER
I have several feeders in my arsenal, which I use depending on the fishing location. If the current is small, then you can take a simple mesh one, made from a shopping bag or a fine-mesh nylon onion bag. Inside I place a lead blank or a simple stone weighing 1-3 kg, and on top I make a tightening loop from which the cord goes to the boat.
In case of strong currents, I use a feeder made from a transparent plastic jar with a volume of 1-2 liters. Coffee or cocoa containers are great for this purpose. Because the fish is not afraid of it. The wide screw-on lid makes it easy to fill the jar with food.
The weight is a lead “puck” weighing 2-2.5 kg, cast either in a mold-lid (from another can) or in damp sand. Having made a hole in the weight, I screw it to the lid from the outside using two wide washers and a bolt. Thanks to the heavy load, the feeding jar stands vertically on the river bottom like a tumbler toy. It is good because strong currents do not wash out food as quickly as from a net.
Since I fish in places with different currents and use bait of varying degrees of viscosity, I have several of these cans with holes of different diameters. feeders for ring fishing. I burn holes up to 25 mm with a soldering iron, and small ones, about 4-6 mm, with a hot nail. As practice has shown, bait is not washed out of such feeding jars for 2-4 hours, even in very strong currents. It is better to tie the feeder on a fishing line of 0.8-1 mm, since it, unlike a cord (rope), does not sail, and it can be pulled strictly vertically from the bottom to the boat.
The fishing line is wound on a short rod (an old broken fishing rod, etc.) with a “Neva” reel and passed through a nod spring at the end. This design allows you to quickly remove the feeder from the water, and the nod dampens the vibrations of the boat from waves and various movements of the angler, which is important when catching bream.
LURE
I choose the composition of the bait depending on the type of fish I am going to catch. Any commercial bait for a specific fish, including Unikorm, can be mixed with hard-cooked millet porridge. Immediately before “charging” the feeder, I recommend adding a little local soil to the bait. This composition is washed away in 2-3 hours as it flows. A mixture of sunflower seeds, black bread and breadcrumbs minced through a meat grinder with the addition of unrefined sunflower oil with a strong odor also works well.
FISHING TECHNIQUE
After anchoring the boat across the current (Fig. 4) (if the current is very strong, you can put it parallel to the current - Fig. 5), I lower the feeder to the bottom. I pull the fishing line vertically between the boat and the feeder, and then unclench the steel tendrils of the ring (Fig. 3). I put the feeders on the fishing line carefully and slowly so that the current pulls out the leash with the hook, and I lower the ring along the fishing line until it touches the feeder. Thus, the ring will lie on the feeder, and the hook with the nozzle will be at the beginning of the feeding path.
Bream bites are classic: one or two pokes (sometimes without them), and the guard slowly creeps up. The main thing here is not to miss and make an energetic hook, picking up the slack in the fishing line lifted by the fish. The principle of operation of the gear is simple: the current washes the food out of the net, creating an odorous path. The fish, climbing along it, inevitably stumbles upon hooks with nozzles. If the biting has stopped, you can try to resume it. To do this, it is enough to raise and lower the feeder several times by 0.5-1 m. A “delicious” trail will again stretch from it, along which the fish will return to the boat.
TIME AND PLACE OF FISHING
Bream and other “white” fish are taken from April until the cold weather (usually until the end of September). In the spring, fishing is successful during the pre-spawning run of “white” fish; most often at this time, the catches are dominated by roach, which, gathering in large schools, moves along the first coastal dumps at depths of 3 to 5 m. Baits - pearl barley, dough, red worm.
With the onset of heat in the middle of summer, when it is impossible to be on the water during the day, and the fish almost stop feeding during daylight hours, the most exciting night fishing on the riverbed begins. At night, “white” fish come out to feed at depths of 5-6 m, very often in places below the rifts. As the daytime air temperature drops and the water cools below +18...+20°C (usually in early September), the bite of “white” fish intensifies – the autumn feeding season begins. The fish feed throughout the day; crucian carp and carp begin to actively feed. The usual autumn depths for fishing are 6-8 m. The best bait at this time is a red worm, and if we are looking for carp, then we should not forget about canned corn and boilies. In all cases, in moderate currents, the boat must be placed in a stretch across the current, perpendicular to the shore. In very strong currents, I recommend placing the boat parallel to the current, thereby reducing drag.
USEFUL TIPS
| 1. The fishing is over, it’s time to go home, but the load does not want to come off the bottom - it is “sucked” into the silt. In such cases, it is necessary to “pump it out”. To do this, throw the anchor rope over the side and, rocking the boat up and down, push the load out of the silt. 2. Try to occasionally shake the feeder under water to increase the area of distribution of bait particles. 3. When fishing for a large specimen, take your time; be prepared for the fact that in order to avoid breaking the fishing line, you will have to fish it out. When fishing from a depth of more than 10 m, the caught fish experiences decompression due to a sharp rise, so you can remove it from the water by hand. 4. While fishing, periodically lift the feeder to check if there is food in it. If the bite is active, then the main task is to prevent the fish from moving away from the boat, and this requires a constant presence of the mixture in the feeder. 5. In determining where to catch “white” fish, an echo sounder is of great help, as it perfectly records its accumulations. If there is no echo sounder, do not be afraid to change the location. Usually one hour is enough to find a school of fish. 6. Don't get carried away with long leashes. A length of 30-50 cm is enough not to scare away the fish, and the tackle remains sensitive. A long leash allows the fish to eat the bait with impunity. 7. It is convenient to store spare leashes of various lengths and with different hooks for certain attachments wound on a piece of foam mat. 8. Even if the fish bite is uncertain, it is not advisable to use a “yoke” (Fig. 6) or tackle with several leads, since hooks and overlaps increase many times over. It is better to put another onboard fishing rod with a “ring”. |
Sergey Fedin
Related articles:
Feeder feeding tactics
Catching perch with light bait. Microjig
Casting (cap) net - “Parachute”
Silver carp fishing