Fishing line is one of the most important fishing tools. But connecting it is not very easy due to the characteristics of this material. Simple fishing knots can slide along it and become untied, and not carefully connecting the ends can interfere with casting and tangle the line on the reel. In addition, an incorrect connection can fail at the most inopportune moment when hooking or fishing for fish.
But simply connecting two identical ends of a fishing line is not such a difficult task. And having mastered one or two special knots, even a beginner can cope with this task. But such a connection is rare. More often you have to connect fishing lines of different thicknesses and structures. Different types of units and connections help fishermen cope with this task. In this article we will take a closer look at how to tie a fishing line to a reel, as well as other fishing knots and loops.
There are universal fishing knots for hooks and leashes that help out in almost any situation, and there are more exotic ones that are used only in a certain situation. For example, the Flemish knot is best used only on thick fishing line, because thin fishing line requires making additional loops, and this in turn increases the time for tying the knot. Continuing the topic of time. If you have an active bite and the line breaks, tie the two ends with an oak knot. This knot will allow you to continue fishing within a few seconds and not miss a passing school of fish. Now let's look at some types of fishing knots and the features of their use.
Marine surgical node
In fishing, it is often necessary to connect fishing line of different thicknesses. Most often this is required for tying leashes, feeders, and other types of gear. In such cases, fishermen use a marine surgical knot. But this is not its only use. It can be used to connect fishing lines of the same diameter, as well as for connecting fishing lines of different types, for example monofilament and braided. This knot is not too difficult to knit, but it will require some skill.
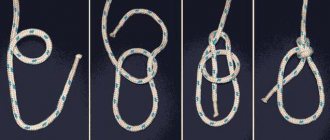
To tie a surgical knot, place both ends of the fishing line together. If possible, move a little further away from the edge, so it will be easier to tie the knot. Now we make a loop and pull both ends through it. Then we pull both ends through the loop again. Now carefully tighten the knot, making sure it is tightened evenly. To make the knot stronger, wet the line before fully tightening it. Cut off the ends.
Oak knot
As mentioned above, an oak knot is knitted very quickly. But its reliability is rather weak. Firstly, the oak knot, especially on monofilament fishing line, slips and unties due to jerks. The protruding ends catch mud and small algae in the pond. It usually does not interfere with casting, but due to its shape on non-energy reels it can snag the line.
It can be used to tie two ends together in case of a break; in principle, due to its low efficiency, this is the only application.
It is knitted simply, both ends of the fishing line are folded together. A loop is made from them. Then the ends of the fishing line are inserted into the loop together and the knot is tightened. It is easier to tie if the tip is long.
Blood knot
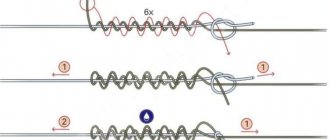
The bloody knot also has a second name: snake knot. This knot is almost universal. It can be used for tying together identical types of fishing line and also for combining different ones. The knot can even be used to connect fishing lines of different diameters, with the difference that a smaller diameter fishing line will require more turns.
Tying a knot is not difficult, but if you have a little skill, it won’t take much time. Cross the two ends and bring the ends back to the main thread so that they are hooked onto each other. Now we take one of the ends and make several turns around the main thread. It is imperative to ensure that the turns lie side by side, otherwise when tightening the knot will not be neat and will lose strength. For strength you need to do at least six turns. Then the remaining end is inserted between the threads. You also need to do the same on the other side, then pull the protruding ends and tighten the knot.
Single and double clew knot
Another one, quite reliable and easy to repeat, is the clew knot, which can be either single or double. It can also be used to tie fishing lines of different diameters without compromising the strength of the connection. It can be used for various knitting options: you can tie a fishing line to a fishing line, tie a leash to the main fishing line, etc. The knitting method is so simple that after repeating the knot once, the knitting technique is completely mastered.
Video tutorial: Clew knot
Leader knot
In common parlance, this leader knot is called a carrot, because of its shape, narrowed to one side. And he was called the leader because this node has a huge number of applications. They attach the feeder reel, leashes and feeders. This node can be used to connect a break. The leader perfectly holds even the connection of different types of fishing line, and even a rigid fluorocarbon fishing line tied with this knot can easily withstand jerking loads and does not come undone.
And this knot is not so difficult to tie. To begin, we make a loop on the main line and tie it like a simple knot, but do not tighten it. We pull the other end of the fishing line through this loop, now we make at least six turns; if the fishing line is thinner than the base, more turns need to be made. Now we do the same number of turns in the opposite direction. Then we insert the end of the thread into the knot of the main thread again. We tighten the warp thread, after which we tighten it carefully and evenly, do not forget that the wet line is tightened more tightly.
How to tie a leash to the main line
The most popular way to tie a leash to the main fishing line is a bloody (or blood) knot, which some also call a snake knot. This method received such an unusual name thanks to an old legend about punishing the guilty.
1048; a bloody knot is used to tie together threads with different diameters (no more than 2 times). This is a very reliable, proven option for connecting braided and monofilament to each other. The end result will have a neat appearance and low thickness. 1043; main characteristics of this method, how you can tie two fishing lines together:
- tensile strength – 80%;
- good for braided line and monofilament;
- The main use is to connect the edges together, you can tie a leash.
How to tie a bloody knot
- Place the lines parallel. Wrap one 2-3 times around the other, remember the rule: the thinner the thread, the more turns you should make.
- Wrap the free end of the line and pass it between the threads to the turns.
- Take the edge of the other thread, repeat the same steps as performed earlier.
- Moisten the formed knot and tighten it carefully.
Triple fisherman's knot
The triple fisherman's knot is very strong, but not functional. In fact, its only use is for attaching the leader line and the main line. It is impossible to connect different diameters with this knot; the knot will not be tight and will come undone. It is also not recommended to fasten a break in the middle web, since the knot is bulky and will interfere with the passage through the rod rings, as well as with the line coming off the reel.
This knot is easy to knit. Take the two ends and fold them together. Make the ends longer, it makes knitting easier. Let's start by making a regular knot with one overlap. But don't delay. Now we pass the ends through the resulting loop several more times, in total there should be four overlaps. Now we wet the line and tighten it. If the knot is made correctly, when tightened it will twist in a figure eight.
Knitting knots
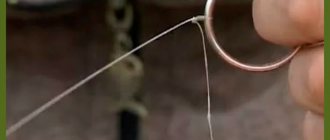
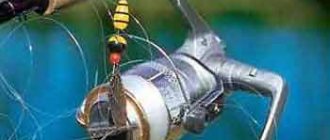
A self-tightening loop has a serious advantage compared to others - it simply stretches under the load and the larger it is, the tighter the loop itself is tightened. Let's touch on some interesting ways to properly tie a fishing line to a spool.
Photo 1. Self-tightening knot.
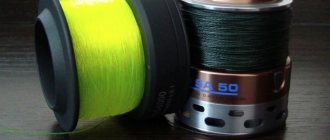
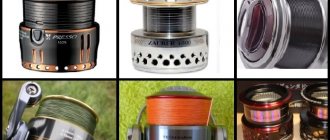
First, let's touch on the popular method using a large reel (for bottom fishing). Such a reel is quite convenient for working over long distances, but, unfortunately, it requires a lot of fishing line for winding.
In this case, if the reel is suitable, it is better to start winding with a cheap one and gradually switch to a higher quality one - braid or monofilament.
But it is advisable to wind a regular cord around the spool of a small spinning reel.
First method
We begin to act as follows:
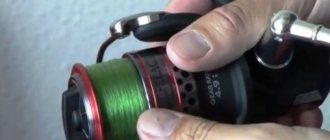
- We take the fishing line and wrap it around the reel spool, while it is advisable to leave a small piece necessary for making a loop.
- We first wrap the loop with the main fishing line and thread it into the loop at the base of the twisting point.
- We wet the knot with water, and then carefully tighten it.
- Place the resulting ring on the reel spool and, pulling the leading line, pull the knot.
- We cut off the remaining excess ends with a sharp object.
We have a good slip knot that can be removed from the reel at any time.
- Next we wind the line, but try to leave a few millimeters to the side, this allows you to cast the bait as far as possible and prevents the line from spontaneously falling off.
A self-tightening loop is a strong spinning knot, one of the most successful solutions, which does not require any special skills or special tools. The advantage of this knot is that you need to untie it yourself if you want to remove it, because the stronger the load on the leading line, the tighter the loop is tightened. However, there is one caveat: it is desirable that the load be constant so that the running end remains in place.
Second method
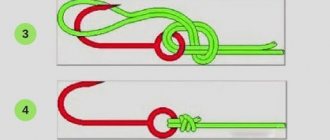
Another good option for tying a fishing line to a spool is the Grinner knot.
- Remove the remaining long piece with a sharp object.
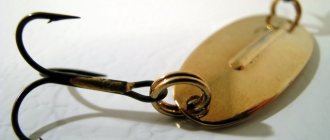
The “Grinner” knot is almost impossible to untangle; if you decide to change fishing line, it’s easier to cut off the loop. This knot is well suited for equipping spinners and hooks; it also connects cord and regular fishing line well.
Photo 2. “Grinner” knot.
Third method
In this case, you can use the Bloody Knot, but it may not be suitable for long-term use.
The name “Bloody Knot” originates from the navy, when offending sailors were punished with whips. This knot was tied to the tip of the weapon, after which it was painted bloody.
Tying the fishing line to the reel spool should be done as follows:
- Wrap the leading side around the spool 2-3 times, then align the resulting ends of the fishing line parallel to each other.
- We wrap the remaining tip of the fishing line several times around the leading one in the direction away from it (we make turns towards the reel), after which we wet the fishing line and tighten the knot.
We have a very compact loop that holds the line on the spool quite well.
To make the knot stronger, we recommend making a loop at the very tip and threading the remaining piece through it, so we get a locking knot (just in case).
- The remaining end can be cut off with a sharp object.
After this, the question of how to make a “Bloody Knot” is exhausted.
This loop is also used as a securing addition to larger knots.
Photo 3. Other knots suitable for tying to a spool.
This weaving knot is used for lines that vary greatly in diameter. The fishing line is usually tied to a fishing elastic band using it. Strength is fixed within 90-95%:
Water node
The water knot is versatile and strong. Suitable for different diameters of fishing line and for tying different types of fishing line. Due to its shape, the knot does not unravel, does not interfere with casting, and does not tangle the line on the reel.
It is a little more difficult to knit than regular knots. We begin to knit the same way as an oak knot. We do not tighten the loop. Once again we bring the ends into the loop, the knot now resembles tying a triple knot, but not quite. Now separate the ends and insert one end into the loop. The loose ends now point in different directions. We wet the knot and tighten it by the open ends. The node is ready for use.
Flemish knot
The Flemish knot is simply called a counter figure eight; thanks to its shape, the knot holds the load well, both static and jerking. In addition to the load, the Flemish knot does not deform the direction of the fishing line, which is quite important in fishing. But they should not connect different diameters of fishing line.
We begin to knit a regular figure eight at one end of the fishing line. Do not tighten the knot, and for convenience, make the loop a little larger. Now we take the other end and begin to insert it parallel to the turns of the previous knot, but in the opposite direction. Having finished tightening the knot, the ends of the fishing line should point in opposite directions. For strength and complete confidence that the knot will not unravel, you can tie a slip knot at the ends.
How to tie two fishing lines of different diameters
Academic knot for tying fishing lines of different diameters
The academic knot actually consists of two mirror-like semi-knots and is intended for tying two fishing lines of different diameters together.
He fully answers the question of how to tie two fishing lines of different diameters. Can be used for knitting on all types of monofilament and braids. The academic knot holds a large load well, does not tighten too much, and damages the fishing line less. Its positive properties include easier untying after getting wet and heavy loads.
The sequence of tying an academic knot of two fishing lines of different diameters
- Fold the running end of the fishing line into an open loop.
- Bring the running end of line 1 to the closed side of the loop and make two full turns around the running end of line 2.
- Bring the running end of fishing line 1 to the second side of the loop and again make two hoses around fishing line 2 in the opposite direction.
- Moisten and tighten the knot, carefully pulling all ends of the fishing line.
Water knot for tying lines of different diameters
A reliable simple water knot, used in fishing for quite a long time (mention of it is found in the English “Treatise on Fishing with a Hook” of 1425). The main task of a water knot is to tie two fishing lines and tie a leash to the fishing line. How to tie two fishing lines of different diameters - water!
Sequence of tying a water knot
- Place the scaffolding to be tied parallel to each other. Make a loop with the running end of the first line and the root end of the second and 3-4 loops around the other ends of the line.
- Pull all four ends and carefully tighten the knot.
Oak knot for tying fishing lines of different diameters
The oak knot is one of the simplest. Designed for quick tying of fishing lines made of natural materials of different diameters. However, despite its ease of tying, it is gradually falling out of use. This is due to its rather serious disadvantages: when knitting any synthetic cord, the knot allows slipping and can come undone; after getting wet and loaded, the knot unties very poorly, and at the site where the oak knot is formed, the cord significantly loses strength, but still this knot was used quite often for tying two lines of different diameters.
Sequence of tying an oak knot
- Fold the running ends of the two lines parallel and form a simple knot.
- Moisten with water and tighten the knot.
These methods of tying fishing lines are taken from an open source literary source. Author: V.A. Demus "The Big Book of Knots".
Herbal knot
The grass knot is a universal type of knot. Suitable for tying fishing lines of different types, but they should not be knitted with different diameters. The ends of this knot look at an angle of 90 degrees, so the knot can interfere with the line coming off the reel, but the knot is perfect for attaching gear. The grass knot has a good margin of safety, and is not afraid of even jerking loads, although it looks quite weak.
You can knit it in two ways. The first method is simple, fold the two ends parallel to each other, and so that they face each other. Now bend the ends at right angles and place them on top of the adjacent end. Then, we bring the tip of each fishing line under the lying one and insert it into the resulting loop. We tighten the knot, making sure that the ends lie perpendicular to each other.
There is a second, more complex version of this knot. It starts in exactly the same way, after we have made loops on both sides, we cross the ends of the fishing line and insert them into the bottom of the loops. Now the knot turns out to be self-tightening, and plus it will hold the ends itself.
Other ways to tie knots
Of course, there are a lot of tying methods and each option can “boast” of its advantages or exclusivity. However, the most popular methods are those that are distinguished not only by a high degree of reliability, but also by the simplicity of the process itself . There are several options to consider that are popular with experienced fishermen under various conditions:
- The Grapevine method involves making several turns around the main core and pulling the end of the line through the turns. This method is widely used when tying a hook. In addition, this method is used to tie leashes or monofilaments, but only of the same diameter. The knot is quite strong and neat, but in terms of its quality characteristics it is inferior to the Centaur.
- The “Nail” option has also found its application and is characterized by a high degree of reliability. To create such a knot, a nail is used, around which several turns are made. The free end of the scaffolding is threaded between the turns and the nail, after which it is tightened. However, for all its versatility, this method is not always convenient in practical terms - it can be difficult to find a nail when fishing. Tying with this method is very convenient and simple.
- The “water” method is a “veteran” in the field of equipment for fishing gear, but is still used by fishermen in the event that a break occurs while fishing, where every minute counts. The essence of the method is that the fisherman creates a loop, the lower part of which is wrapped with two or three turns of another line. After this, the free end penetrates the loop and tightening occurs. This method is not particularly reliable, but it is extremely easy to use and does not take much time.
