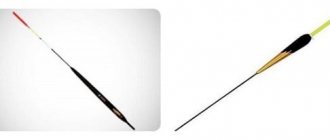
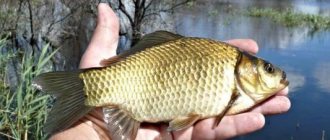
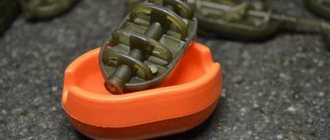
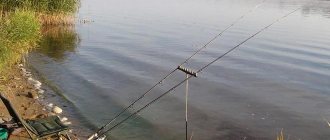
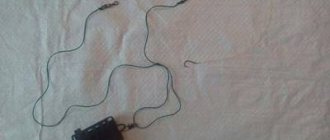
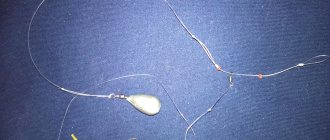
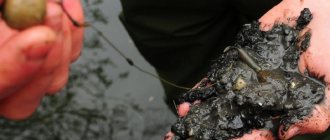
Feeder tackle is also called English donkey. It consistently shows good results on a wide variety of reservoirs. Its distinctive feature is the presence of a feeder located near the hook with bait.
Feeder filled with bait
Some people think that feeder gear is difficult to install and use on a pond, but in fact, you can master the correct feeder gear with regular practice. It is hardly possible to choose a universal tackle that is suitable for any fishing conditions. Nevertheless, the variety of types of feeder installation allows you to achieve confident success in most cases.
Sliding installation of feeder equipment with feedergam
What is feeder installation and why is it necessary to master the principles of creation
This gear uses not only bait, but also a special feeder to attract fish. The feeder is thrown several tens of meters, making sure that the gear does not get tangled during the fishing process.
The fish, attracted by tasty food, comes to the casting point and swallows the hook with bait. The use of feeder gear based on a feeder allows you to offer the fish a large amount of food, but not enough for complete saturation, which increases the chances of getting prey.
This type of gear is used for bottom fishing. When casting, the feeder is located at the bottom, and its contents gradually dissolve in the water, attracting prey closer to the baited hook.
Feeder fishing for beginners - what you need for a feeder, how to assemble and how to fish
What is needed for feeder installation, what elements are needed for different types of equipment
Feeder equipment generally contains the following elements:
- A rod equipped with a quivertip.
Feeder tips - quivertips - Main line with a diameter of up to 0.28 mm.
- Feeder reel with a spool with a diameter of 4000-5000.
- Shock leader.
- Feeder.
- Leadcore.
Leadcore coloring is important - The feedergum is a piece of feeder rubber that is installed between the leash and the main line.
Feeder installation online with feedergam - Leash with hook.
Carp installation with leadcore
Since the feeder tackle needs to be cast far, it is desirable that it be as thin as possible, but without losing strength. It is important that the strength is sufficient to prevent tearing when thrown. Most often, a main line with a diameter of 0.18-0.28 mm is used.
For the feeder, fishing lines with low elongation are used. They will allow you to feel the bite faster. Elastic fishing lines are used only for catching large fish, which otherwise are capable of falling off the hook.
For the leash, monofilament or fluorocarbon fishing line can be used. The length of the leash is selected depending on the fishing conditions. It can range from 10 cm to 2 meters. Usually, in cases where the bite is not active enough, the leash is chosen to be longer.
Fluorocarbon line is invisible in water, less stretchable than monofilament, but costs more
When fishing on a feeder, try to use smaller hooks. When choosing them, take into account the size of the nozzle. In most cases, hooks of size 12-18 are used for feeder tackle. When catching crucian carp or bream, the use of colored hooks shows good effectiveness. When using a feeder you need to use very sharp hooks. Therefore, it is customary to change them after several caught fish.
Hook numbering
Sinkers are usually not used for feeder fishing. Since the feeder is quite heavy, there is no urgent need for it.
Feeders are made of plastic or metal. They are made heavier using special inserts. For this purpose, for example, lead plates can be used. For long casts, feeders weighing 50-120 grams are used; for short casts, 10-40 is enough.
For attachment to the main line or leadcore, a swivel with a carabiner is used. Crimping tubes are sometimes used to attach a fluorocarbon leader. The swivel with the feeder can move along the fishing line. To limit its movement, a restrictive stopper is used, which is made of rubber or plastic.
The use of anti-twist tubes prevents tangling of the gear. Feedergam is designed to soften the jerking of fish. It prevents the possibility of the leash breaking.
How to knit a feeder installation with an anti-twist
Leadcore is a thick braided cord with a metal core. He makes sure that the rig is pressed to the bottom while fishing. Leadcore prevents damage to fish when playing.
When fishing at long distances, you need to use a shock leader. It is located between the main line and the leadcore. This design prevents the risk of line breakage during long casts. A shock leader made of monofilament fishing line with a thickness of 0.28-0.30 mm is often used. When using fluorocarbon, a thickness of 0.31 mm is sufficient.
Installation of the flat method used when fishing for carp
Feeder inline equipment
As already mentioned, inline feeder installation is not a specific equipment option, but the principle of attaching a feeder in a sliding version. By inline feeder equipment, many amateur fishermen often understand the installation of a running feeder, however, there may be other equipment options. Inline editing options:
- Running Feeder Rig. The main line, cord or shock leader of the feeder is passed through the eye of the swivel on which the feeder hangs.
- Sliding feeders with a line passing through a specially provided channel - method, flat method (the blind version is more often used), watermelons and springs with rocker arms.
- Equipment with anti-twist.
1 - method, 2 - running, 3 - running on a bend
Through sliding feeder accessories
In traditional inline installations, the line runs through the entire feeder - these are good old springs, watermelons and the like. Despite the variety of special feeder installations, these familiar bottom rigs also work. You can use them if there are simply no special feeders for feeder fishing. Sometimes you can find on sale purely feeder feeders with a through channel for inline equipment. However, such models are rare - ordinary feeders are more often used, which cling to the tackle in the running version (via a swivel). The flat and the sliding method also work on this principle, however, these are, in principle, slightly different methods of fishing - we’ll talk about them separately later.
The production of such inline feeder equipment with a sliding feeder is standard - the fishing line is passed through the channel, and a swivel is tied to it. Or the feeder is limited at the bottom by a knot of the main fishing line with a twist (a rocker arm in the version with a spring and two hooks). In long feeder casts, the problem of the leash overlapping is acute. Therefore, on inline installations (if this is not a flat method), it is better to make a twist on the lead outlet from fluorocarbon or rigid fishing line with a diameter of 0.28-0.32 mm. All end-to-end inline equipment is formed in the same way as in running (more on this below), the line is simply passed not through the swivel, but through the channel of the feeder itself. Twisting should be done using monofilament or fluor. That is, if a fishing line is used as the base (or on a shock leader), you can knit such a montage directly on it.
If we use a cord, we simply tie a piece of hard fluorocarbon to it with a loop at the end for a leash using a carrot knot. Flur has the same function as twist - due to its rigidity, it prevents the leash from getting tangled when casting or reeling. Don’t forget to thread the feeder onto the base before mating. You can place a stopper or a bead between the knot and the feeder to protect the knot from contact. More details about this can be found in A. Fadeev’s video later in the article on installing a running feeder on a cord.
Running feeder
More often, the classic feeder still uses the Running Feeder Rig sliding equipment. The principle of this inline installation for the feeder is the same, it’s just that not special rare feeders are used, but ordinary ones, such as a “cage”, curlers or bullets. The line is passed through the feeder's swivel. The eye on the swivel is tightened with pliers so that the cormak does not jump off onto the twist (or place a bead). The free play in such an inline feeder rig at the bottom is limited by a twisting unit (possibly with a bead or stopper). Also, free movement can be limited from above by moving silicone stoppers - you get a universal, customizable tackle. A prerequisite is the presence of a twist slightly longer than the feeder with a branch to it (a swivel with a carabiner or a special longer branch). The twist with the loop for the leash should be below the overhang of the feeder - this will protect the leash line from getting tangled.
This type of inline installation is done on fishing line and braid. The rules are the same. If the main line or shock leader is monofilament, then we knit directly onto them. When using a cord, tie a piece of fluorocarbon with a carrot knot - this will be the outlet to the leash.
On a twisted line
The main line can be passed directly through the swivel - we get a regular running feeder. When fishing on silt or a cluttered bottom, it is better to use an inline feeder installation with an outlet under the feeder - so that the articulated assembly of the fishing line does not get stuck in bottom sediments or grass. The outlet can be made of various designs - from braid, fishing line or in the form of a twist. Thick fluorocarbon will also work. The outlet elements for the feeder feeder can be formed with knots or crimp tubes, as in leashes for a spinning rod. As a hinge unit through which the fishing line passes, we use the eye of a swivel, special fasteners with a plastic bead or sewing beads. Read more in the article about installing the Running Feeder Rig
How to knit an inline installation for a feeder
If we knit a running ring on a monofilament or a shock leader made of fluorocarbon.
- We pass the main line through the swivel, put on a stopper or a bead (optional) or crimp the eye of the swivel (so that it does not slip through the future knot for twisting). If we want to limit sliding, we also put a stopper in front of the feeder.
- Fold the monofilament in half and form a loop at the end for the leash (a figure eight or surgical knot).
Figure eight knot - We twist the twister so that it is longer than the feeder (along with the outlet, if used). We tie it in a figure eight. We cut off the excess end.
- You get a sliding feeder on the base, then a knot, a twist and a loop for the leash.
The principle of tying on a fence is similar - only instead of a twisting operation, we tie a piece of fluorocarbon with a diameter of 0.3 mm with a carrot knot. We make a loop at its end for a leash. The length of the fluor outlet should be longer than the feeder.
On a braided line with a fluorocarbon leash outlet
You can make a branch to the feeder - this will make it overhang and, accordingly, the length of the leash arm longer. This option works better on muddy and cluttered bottoms.
Retraction
Method and flat
Method and Flat-Method are designed for fishing in still water or in very weak currents (otherwise food will be carried away from the feeder) for carp, bream, crucian carp and other bottom-feeding fish. The method is an English version of our usual spring. Flat feeders have a thick, flat bottom, which allows them to fall to the bottom in one position, with the nozzle and feed facing up. More often in flat fishing, blind equipment is used, in which the leash is tightly fixed to the structure through a swivel or through a special connector. The leashes are used short, 7-10 cm. When the fish bites, it catches itself on the load.
However, the inline feeder method in flat rigs is also used for catching low-active or cautious fish that take the bait carefully and do not quickly move away from the feeder (does not self-hook). In this case, naturally, constant monitoring of the tackle and identification of the moment of hooking is required. You can make it from a regular flat feeder or using the feeder method with a swivel fixation, simply placing a bead on the fishing line in front of it so that it cannot drive into the nest. The inline equipment in the flat feeder is also made completely sliding or limited by a silicone stopper on top. Read more about fishing with a flat feeder.
Sliding flat
Inline with anti-twist
The inline principle also works in variants of feeder installations with an anti-twist. Everything works exactly the same - the main line is passed through the entire tube, starting from the short arm. Long shoulder - on a leash. At the end of the fishing line we tie a swivel, perhaps through a bead or a stopper, so as not to injure the knot with the anti-twist. This inline can also be made completely sliding or limited by a stopper. The anti-twist tube works the same way as a twist - it moves the leader away from the main line, ensuring the absence of tangles and twists. In addition, this design also ensures the inline principle in equipping the feeder. This option is suitable for beginner feeders who do not know how to knit real rigs. There is a bulky plastic tube at the bottom of the feeder - this can scare away cautious fish. However, where the fish are not afraid of anything, the use of such tubes in the feeder is justified by the ease of installation. Read more about installing a feeder with an anti-twist.
How to make a feeder montage - all known popular methods with photos from simple to complex
It is impossible to come up with a universal installation option. There are several types of feeder equipment, which depend on the skill level of the fisherman and fishing conditions. In each situation, choose the most suitable option.
Using an anti-twist
This option will be convenient for beginners. For its installation, a plastic tube with two elbows is used. The shorter one is located on the main line side, and the longer one on the leash side. A feeder is attached between them. If necessary, clamps can be used to limit the movement of the tube along the fishing line. Where the long elbow of the tube ends there is a loop for attaching a leash.
Universal feeder installation with anti-twist
Inline installation - the simplest feeder installation
This equipment is easy to make and is suitable for both beginners and experienced fishermen. It is structured as follows. A swivel with a feeder is put on the main line. Next is the stopper.
After it there is a twist 10-15 cm long or a plastic tube of the same length. Next is a loop for attaching a leash with a hook. In this equipment, the feeder has the ability to move freely along the fishing line. If the gear breaks, the feeder will easily detach.
The photo shows an Inline feeder installation
Symmetrical and asymmetrical loop - installation of a feeder for the current
This installation consists of the following parts. A large loop is attached to the end of the main line by a small loop. A twist of at least 10 cm in length is attached to its second edge. This is done in such a way that both arms of the large loop are of equal length. A feeder is attached to one of them using a swivel. The free end of the twist has a small loop for attaching a leash.
A symmetrical loop is one of the best types of installation for standing water
An asymmetrical loop is made similarly to a symmetrical one. The difference is that in this rig the arm of the large loop to which the feeder is attached is larger than the other. This asymmetry leads to higher sensitivity when biting. This tackle is made on the basis of monofilament or fluorocarbon fishing line.
Due to the fact that the feeder arm is longer, the second one is well tensioned. Thanks to this feature, the bite signal will be more clear.
Classic and popular installation for Paternoster feeder
This type of feeder equipment is considered classic. A paternoster is created as follows. The basis for the tackle is monofilament or fluorocarbon fishing line. On one side there is a small loop for attaching to the main fishing line, on the other, the same for attaching a leash with a hook. Approximately from the middle of this fishing line, a branch is made to attach the feeder. The dimensions are chosen in such a way that the lead to the leash should be longer than the one made for the feeder.
The Gardner loop is similar to the paternoster, except for one detail. The outlet to the feeder is made here in the form of a loop, to which it is attached using a swivel. It is generally accepted that this tackle is more effective in the current. However, some people use it to achieve good results when fishing in still water. An important condition for the effectiveness of such equipment is that the lead to the leash should be longer than to the feeder.
Helicopter
The feeder is mounted at the end of the main fishing line. At a short distance from it, two stoppers are placed close to each other (a distance of several centimeters is sufficient). This is where the leash loop is attached.
Helicopter installation
It is attached in such a way that it can easily turn in different directions from the main flattery. This property was the reason for choosing the name of the equipment.
Sliding installation for a feeder with a feeder - the feeder moves freely along the line
How to make a feeder table with your own hands
For feeders who have to be in a chair throughout the entire fishing session, it is important that everything necessary for fishing - bait, nozzles, accessories for mounting gear - is at arm's length. Therefore, you can’t do without a table.
Small tables mounted on chair mounts have a small area and are not very convenient to use. This means that it is desirable to have a large feeder table, and it is more profitable to make it yourself from scrap materials. This table is stored and transported in a bag for transporting feeder equipment and, when folded, takes up little space.
The main difficulty with using standard fishing tables is that they are installed on a flat surface. Only chairs are equipped with independent adjustable legs, so the primary question is how to make the table stable on an inclined surface.
The solution to this problem is simple; you need to adjust the tabletop so that it is always in a horizontal plane. For this purpose, a hinged connection between the stand and the tabletop is used, thanks to which, even when installed on an inclined base, a horizontal position will be ensured.
- As a result, a homemade feeder table consists of:
- duralumin tube - stand (pointed or on a tripod);
- plastic table top;
- hinged connection between the table top and the stand.
Universal stand – a pointed duralumin tube (for soft ground) and a welded tripod for installation on a hard surface.
The tabletop is cut from a piece of plastic 3–4 mm thick, which is sold in hardware stores. The hinge joint is attached to the tabletop with screws, and the stand is screwed on while fishing and stuck into the ground. It turns out that the table rotates in vertical and horizontal planes, and no matter what position the leg is in, the tabletop is always fixed level.
Jars and containers with attachments are conveniently placed on the table, and to prevent them from slipping, edges made of plastic corners are glued to three sides of the tabletop. The fourth side remains open so that any water that accidentally gets on the table flows freely to the ground. A strip of porous rubber is glued to the end part of the side, into which hooks with ready-made leashes are stuck during knitting.
You have to fish on the feeder both in the sun and in the rain, and it is advisable to equip the table with a homemade awning or canopy. It is also mounted on a hinge and rotates in the desired direction as the sun moves.
The table is not rigidly attached to the feeder chair and this is its undoubted advantage, because with a rigid connection, every movement of the fisherman in the chair leads to the table wobbling and the cans with nozzles risk falling to the ground.
When disassembled, the table with hinged mounts is compact and easy to transport, and making it at home, with simple tools, is not at all difficult.
How to install on a pond
It is best to make the equipment in advance in several versions. This will help you avoid wasting time preparing them. In order to carry out installation at a fishing spot, you need to take with you everything you need for this: fishing lines, hooks, bait, feeder, additional and connecting elements. Next, assembly is carried out in accordance with the selected type of equipment.
Spring feeder - often used for feeder fishing for crucian carp
Feeder installations for catching different fish
When catching different types of fish, you need to take into account their characteristics. The following describes what needs to be taken into account when choosing feeder tackle in specific cases.
For carp
Since carp is an active and agile fish, the tackle needs to be made reliable. A rod 2-4 meters long is suitable. For fishing, a fishing line with a tensile strength of 8-12 kg is used. A monofilament thread with a thickness of 0.28-0.35 mm is used as a shock leader. When making a leash, models with a sufficient level of rigidity are used.
In calm water, open feeders are used, while in currents, closed feeders are used. Most often, a paternoster, a symmetrical loop or an asymmetrical loop are used for fishing.
Adjustable Zig Rig - The pinnacle of carp fishing
For crucian carp
For small bodies of water, a rod 3 meters long and with a test weight of 30-60 grams is suitable. On large lakes they use a 4 meter long fishing rod with 80-120 grams of dough. On currents, a 3.6-3.9 meter rod is better suited.
Monofilament thread with a thickness of 0.2-0.3 mm is used as the main fishing line. At long distances it is better to use 0.10-0.16 mm.
The paternoster is effective when catching crucian carp in calm water. It is better to use it in places with complex bottom topography. Also, equipment with anti-twist and Inline are often used for catching crucian carp.
For catching bream
Of all the methods of catching bream, using feeder gear is considered the most effective. It is believed that it is necessary to stock up on spare feeders and pliers for removing the hook.
When fishing in strong currents, you need to use heavy feeders and strong fishing line. Complementary foods are selected that are dense and viscous. When fishing in the spring, animal feed is used, and in the summer, vegetable food is used.
In still water this is a particularly cautious fish. Thin fishing line, light feeders and small hooks are suitable for it. For catching bream, the Gardner loop rig is most often used.
Gardner's loop
To the roach
For this purpose, a rod 3.6 meters long is most often used. The Inline feeder rig allows you to count on a big catch. For the feeder, a branch is made from thick fishing line or fluorocarbon. It is recommended to use a rubber insert to attach the leash.
Monofilament line is better suited for short casts. For distant ones it is better to use a braided cord. Feeders with a small feed capacity are better suited.
Feeder rigs for catching bream, carp, crucian carp
Fishing cage with feeder
A cage for feeder fishing is not just a metal frame covered with a fine mesh. With the desire to preserve the ichthyofauna of water bodies and ensure that future generations also have a place to fish, many fishermen adhere to the “catch and release” principle.
In amateur fishing, you can, of course, immediately release every trophy you catch into its native element, but what is still interesting is the overall result of the fishing or the weight of the catch. It is determined at the end of the session, and until this time it is necessary to keep the caught fish alive and the fishing cage is responsible for this.
When choosing a cage, consider:
- length;
- shape;
- size;
- fastening method;
- mesh quality.
If fishing is carried out in a reservoir where the depth begins immediately near the shore, then a cage that is too long does not seem to be needed. But there are few such reservoirs, so you need a universal product that can ensure the safety of caught trophies in any conditions.
Expert opinion
Evgeny Zhirkov
Feeder fishing expert
Sports feeder cages are made 4–10 meters long, and for recreational fishing, fish storage facilities 3–7 meters long are suitable. A long fish tank is also needed because its neck should be at arm's length from the angler. This makes it more convenient to fold trophies and the length should be appropriate.
The longer the cage, the higher its cost, and amateur fishermen prefer to save money by buying products 2–5 meters long. If when fishing, the cage is mounted on a stand in the water, then this length is enough, it will simply be inconvenient to get up from the chair after each fish and put it in the net.
The shapes of feeder cages are:
- round;
- rectangular;
- triangular;
- semicircular.
The shape of the cage affects its drift in water and stability. In addition, during the current, the cages with fish spin and this causes the death of the catch. Therefore, a rectangular or square shape of the cage is the most preferable; it is better located in the water and provides the fish with complete freedom.
After installation on the stand, the cage must be straightened along its entire length, so a weight is tied to its bottom, or a stone is placed inside.
To catch small fish, you don’t need a very large cage, but if you plan to fish for grass carp, silver carp or carp, which reach significant sizes, then the storage facility is selected in accordance with the tasks set.
That is, the size of the cage is selected depending on the size of the expected catch , although a supply would not hurt. Large feeder cages for carp, with a wide neck and durable mesh, cost a lot, but every feeder who hunts for large fish should have one.
For those who go to reservoirs without a car, the compactness and weight of the cage when folded are also important. When carrying gear by hand, every extra pound creates a problem, so be sure to pay attention to these characteristics when purchasing.
The netting of the cage is necessary to prevent the fish from escaping, but at the same time it should not cause injury to aquatic inhabitants. Even if you do not release the fish, you need to keep it fresh and therefore alive until the end of fishing.
A rigid mesh cage made from monofilament, and even tied with knots, should not even be considered when purchasing feeder equipment. Only a soft mesh with a fine mesh (0.5-1.0 cm), woven without knots, will cope with the task of preserving the catch over a long fishing session.
After fishing, you need to thoroughly dry the fish tank and transport it in your bag only in a separate plastic bag so that it does not smell of fish.
When fishing using a feeder station, the cage is rigidly mounted on a rod and the angler spends very little time removing the fish from the hook and sending it into the net.
Homemade feeder cages and their storage
A fish tank is an element of equipment that, if desired, you can make with your own hands. To make the frame, rigid steel wire is used, joined by cold welding or soldering. Bend the wire into a rectangle shape and make several ribs, as well as covering them with mesh.
To attach the mesh to the ribs, plastic “noose” clamps are used, which hold the material well and are cheap. By spending a couple of hours making a homemade feeder cage, you will not only save money, but also customize an important piece of equipment to your own specifications.
The same applies to making a cover for a homemade fish tank, which is sewn from an old raincoat or oilcloth. The shape of the cover matches the shape of the fish tank, and the zipper will help maintain compact dimensions during transportation.
