- Design and use of cartoons
- Disassembling the baitcasting reel
- Do-it-yourself cartoon tuning
- Possible problems with multipliers
Multiplier coil - it is possible to make repairs yourself.
In principle, individual issues can be treated on their own, but it is better to avoid such circumstances. So, experts say that after several fishing trips it is necessary to carry out maintenance. However, there is also a cardinal opinion, according to which you should not poke into the reel again if it has not been in a pond or sand. It is much more important to remove excess grease after purchase by wiping all the insides with a rag soaked in kerosene.
Design and use of cartoons
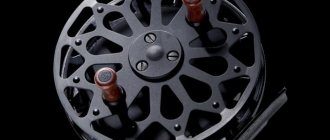
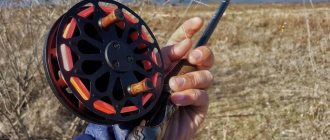
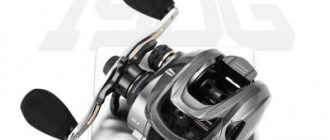
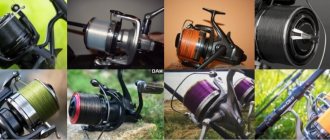
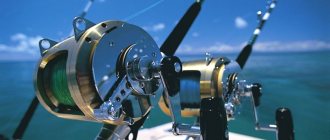
All multipliers are divided into two types - classic and low-profile, which we wrote about in the article “Multiplier reel: design and principle of operation.” The classic ones are more used in sea fishing and trolling and are noticeably larger than their low-profile counterparts, whose purpose is casting.
There are multipliers for catching large fish that do not have a forest distributor, since it would be easy for the same catfish to disable it. At the same time, a ratchet is installed on such coils. Direct gear transmission gives the winding acceleration.
Since the scaffolding is laid directly on the drum, axial overloads are avoided. That is why such cartoons are appropriate for sea fishing, since they can easily withstand significant loads.
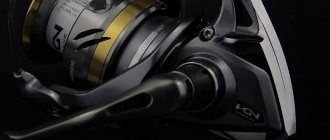
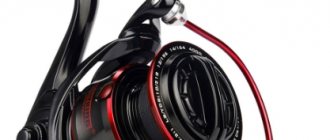
The main components of all multipliers are braking systems, which, depending on the type of reel, can be either centrifugal or magnetic. They work somewhat differently than in inertia-free ones. The magnetic brake adjustment is located on the side of the housing, and the axial brake adjustment is on the other side.
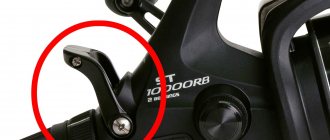
The multiplier clutch is located directly under the handle and resembles an asterisk. This convenient location allows you to adjust it directly during fishing if a large trophy is sitting on the hook, unwinding the thread from the spool. There is also a drum lock on the body.
As for the use of multis in various types of fishing, low-profile reels were developed as an alternative to classic spinning reels for small blanks for common baits:
- wobblers;
- spinners;
- small jig baits.
Due to its low weight and compact size, the angler can cast for a long time without getting tired. The cartoon classic is more used for jerk fishing and heavy jigs, not to mention trolling, since both the bait and the fish being caught are very massive. You can also note backtrolling, when the craft moves stern first, and the reservoir is fished in a vertical plane.
Among the disadvantages, although they can hardly be called such, there may be slight difficulties for those anglers who fish with different weights. Changing one bait to another with a difference of only five grams forces you to reconfigure the braking system. With the necessary skills, the operation goes very quickly.
Disassembling the coil
To properly lubricate a fishing reel, it must be disassembled.
It is recommended to put all dismantled parts in order to make it easier to assemble the coil later.
1. First of all, unscrew the clutch adjuster and remove the spool. Then you need to unscrew the handle screw and remove it from the reel.
2. Underneath it on the rod there are washers that also need to be removed.
3. Next, remove the coil rotor, which is secured to the bushing with a nut with a reverse thread. This operation can be conveniently performed using a socket head of a suitable size. The tightening force of the nut is usually small, so you can unscrew it even while holding the head in your hand.
4. Under the protective cover, which is secured with a screw on the rotor, there is a pusher that returns the line layer to its original state when the line begins to rewind. For smoother operation and to protect against corrosion, it is also recommended to lubricate it together with the spring and put the cover in place.
5. Unscrew the line guide screw installed on the rotor and disassemble the roller. It can be assembled on bushings or bearings. Lubricate the rollers, bushings, bearings and assemble the roller.
6. The reverse control mechanism is located under the rotor. Unscrew the lever securing screw and the bearing fixing screws.
7. Remove the plastic roller with the spring, the lever and the bushing with the bearing.
8. To get to the elements of the main mechanism, remove the housing cover by unscrewing the screws
9. Carefully remove the movable rod and main gear from the housing, then the driven gear and the handle bearing.
Disassembling the baitcasting reel
Let's look at how to disassemble a multiplier reel. First you need to unscrew or snap off the side wall lock and remove the drum from the housing. On some cartoons the wall can be removable, on others the mount is designed as a movable fixation. Let's start dismantling the elements.
- We free the central shaft from all attached parts.
- We remove the handle by unscrewing the screw holding the nut cover, then rotate the cover itself clockwise.
- We unscrew the friction sprocket, under which the friction brake device is located - a plate and two pressure springs. It is necessary to remember the correct location of the plates, otherwise the clutch will work incorrectly.
- After dismantling the device, you can observe the support bearing, if present, and the roller bearing sleeve. It is important to remember that there is a marking on one side of the bushing, which should face outward during assembly.
- We open the gearbox. In most cases, the transmission side panel is held in place by three screws, but there may be more.
- When removing the coil, the cover must lie with the drive shaft facing up, otherwise the elements of the mechanism may fall out.
- After opening the box, it is necessary to continue dismantling the elements, placing them in groups depending on the unit being disassembled.
- Remove the wood distributor eye drive. The drive wheel with pinion is quite easy to disassemble, unlike the central shaft and eye. It is important to be especially vigilant when removing the retaining plate - screws vary in length, pitch and diameter.
- Removal of the endless structure and the timber distributor structure is possible after removing the decorative trim.
- Then the screw directly under the eye is unscrewed, and the tooth is removed from the carrier.
- The thrust washer securing the endless end is removed, it is removed along with the cover and bushing.
We complete the dismantling by disassembling the freewheel with a pusher. Mounting varies from manufacturer to manufacturer. The main thing is not to forget how the torsion springs are located, having different hook lengths. We remove all the remaining bearings, remembering that some of them will have to be applied force.
Consider the unprotected areas of your coil
But photo 1 shows an “endless screw”, also known as a line guide drive. Yes, anything can get here - and very easily.
Visible accumulated dirt indicates the need for careful maintenance of at least this unit, which includes partial disassembly of the coil.
However, more often the picture is different: “infinity” is dry, although with remnants of a blackened, very thick mass in the cut (usually these are lubricant components preserved there). Let's add fresh lubricant to this unit. If the “eye” runs when casting, then it is liquid, but not much, because Due to its high fluidity, its excess will end up in the inside of the mechanism. If the “eye” is motionless, then apply a thick lubricant, it will last longer.
I can advise aesthetes to remove, wash and lubricate the ring latch of the line guide. To do this, just unscrew the glass located below or, in rare models, on the side. To tell the truth, I myself only do this when conducting a comprehensive T.O.
Photo 2: the spool shut-off key—or rather, the traction window. Wow! All you have to do is press and the elements have access to the main working pair.
As you understand, there is nothing to lubricate here, all that remains is to adapt.
Firstly, when turning off the spool, try to press the key away from the window. It's wide enough, it should work.
Secondly, after releasing the spool while casting, move your finger a little to the side as far as is comfortable. This is necessary because when casting, water flies from the “braid” and by removing your finger, you thereby reduce the area of the “moisture catcher”, which, it turns out, is the key.
Thirdly, when winding, do not rest your big wet finger on the body of the “mult” above the location of the window (many people like to do this, I’ve seen it myself).
These measures, of course, are not complete, but they will prevent moisture and, accordingly, abrasive from entering the coil through this unit.
Photo 3: the gap between the clutch sprocket skirt and the reel body.
Many people simply don’t notice it, believing that moisture can only get there in heavy rain or when you drop the reel into water. And, I assure you, they are wrong to think so.
Most models have a very important and delicate unit located here - the roller bearing of the instantaneous reverse stop, or, as they also say, the overrunning clutch.
Protecting it is quite simple: add 2-3 drops of liquid lubricant to the gap, preferably from different sides around the perimeter, accelerating the process of spreading the lubricant by rotating the handle. If there was a creaking in the unit, and it did not go away, then we repeat the process, but do not get carried away - remember about the overrunning clutch: it does not like excess lubrication.
Photo 4: This is nothing more than a gap between the spool and the body.
Well, let’s throw up our hands, we have nothing to do here. However, if suddenly the spool begins to make an unpleasant grinding noise, stop fishing immediately. You urgently need to remove the spool (on almost all models this is quite easy to do) and wipe it with a dry cloth - or at least blow out the contact surfaces of the gap.
If you still had to do the procedure described above, then know that sand could get there from your thumb. That's it!
What does the manufacturer do for us? It reduces all kinds of gaps, achieving high precision of the mechanism. Installs seals, ARB bearings, everything and…. drills drainage (photo 5) holes! They are literally designed to drain water from the mechanism. But they perform their direct duties only in the working fishing position, i.e. The “mult” is located on top of the rod, and the drainage holes face down - then the water flows out. As soon as you put the rod (for example, on the side of a boat), the picture changes dramatically - the “multiplier” is below, and the holes are on top. And, accordingly, under certain conditions, water can get there.
It would be at least ridiculous to advise covering holes with plasticine while moving through a body of water, but keep in mind that they are a potential route for contamination to enter.
Finishing this chapter, I foresee the question: why mention all these grains of sand, microscopic ones at that? After all, even if you take a completely sealed mechanism, it is not without problems. Any mating pair has wear. Its consequence is particles of materials from which the constituent pairs are made. Roughly speaking, shavings, or more precisely, powder, dust. I will answer: there are things that are inevitable, and there are those that you can and simply must prevent, at least partially. Prevention of open, unprotected places is a guarantee of full operation of the mechanism up to full maintenance, which we are gradually approaching.
The latter must be done depending on the intensity and quality of operation. For some - every week, for others - once every five years. I won’t give intrusive advice, because the product is sometimes in use, sometimes in the closet...
Do-it-yourself cartoon tuning
Abu Garcia Ambassadeur multipliers have received well-deserved recognition throughout the globe, which we wrote about in the article “Why the multiplier reel was created as a miracle of engineering.” If you wish, you can choose an inexpensive option that will be distinguished by its reliability and simplicity of the mechanism.
Any keen angler has a great desire to hold the most advanced device in his hands. And doing it with your own hands with some skill will not be particularly difficult, without investing in expensive models. A little tuning will get you what you want.
Tuning refers to the replacement of individual multiplier units with better ones, after which the reel will become, if not top-end, then close to it. The mechanism of classic barrels allows this to be done quite easily. Let's say more, if desired, an angler can make such tuning that a wide variety of fishing for a wide variety of fish will become possible.
By the way, there are a lot of campaigns that specialize in tuning fishing reels. Let's look at how you can change the jerk multiplier AG 5601 C4 beyond recognition.
- first you need to replace all the drive elements of the line laying machine;
- The worm shaft with one bearing must also be replaced with the same one, but with two;
- Next, the plastic gear located in the side cover is changed. The new one must have a ball bearing;
- it is possible to replace the wood distributor with one made of plastic, but with a titanium nitride insert;
- When complementing the overrunning clutch, it would not hurt to install a ratchet, which is not initially there.
What else can be tuned are the most important elements of the mechanism - the drum axis bearings. Not only the reliability of the reel’s operation, but also its range depends on them. It is even possible to mount hybrids from metal ceramics, when the balls with a steel cage are made of ceramics.
If the “cartoon” suddenly turned out to be...
I hope you can disassemble and reassemble the coil. I believe that after assembly there will be no extra washers, retaining rings, etc. left. Otherwise, carefully study the assembly drawing that comes with the coil.
We take a large blank sheet of paper and carefully, in order, lay out on it what your mechanism consisted of. At the same time, I don’t recommend bothering yourself with preliminary installation of marks on the gears for their subsequent alignment. I would like to especially note that most modern reels have a so-called “floating pitch”. This means that when the drive gear rotates completely, its tooth, which was previously in contact with a known tooth of the driven gear, does not fall on it, but, in a simplified approximation, on the next adjacent one, or jumps further. In other words, one of the gears has an even number of teeth, but the other has an even number!
During disassembly, special attention should be paid to the direction of rotation of the support bearings of the spool axis, which must be preserved during further assembly!
We wash all parts (except the bearings) in purified gasoline, using an artist's brush, a soft, lint-free rag for wiping, and a wooden spatula to remove large accumulations of old grease.
Some advise using all kinds of washes for car carburetors and other chemical innovations. How this can help, I cannot say, nor can I guarantee that for plastic and rubber parts such procedures will be painless.
By the way, I remember a long time ago I had a “cartoon” - ABU Garcia. Not a bad device for those times, with such flat rubberized handles. One fine day I was fishing. There was fish, but also mosquitoes. Lots of mosquitoes. And the repellent was powerful, Soviet - I think it was called DETA-20. I smeared myself with it mercilessly, and the mosquitoes did not bite me. They just flew around and buzzed in sadness. Everything seems to be fine, but the rubber handles on the “multi” are corroded... So, the short excursion into history is over, let’s move on to our bearings.
The overrunning clutch, if it is not rolled in the housing, should be placed separately, without an internal race, in a container of comparable size with clean gasoline. After some time, the part must be removed from there, and after inserting the clip, rotate it. Then change the gasoline in the container and repeat the operation.
When the gasoline in the container remains clean after immersing the coupling there, the part should be placed on clean paper to dry. And under no circumstances should you wipe it off.
We do the same with power bearings. To scroll them, you need to insert a wooden stick of a suitable diameter. A tapered wash brush handle is often suitable.
We subject express trains to the same procedure, i.e. spool support bearings (photo 6). Everything is the same, only more carefully.
We do not wipe the parts and remember the direction of rotation.
After washing, we proceed to lubrication. We do this when assembling an already installed part. The basic rule is that lubrication should be everywhere where it is needed.
The principle for choosing a lubricant is the usual:
- in speed connections - liquid;
- in traction (low-speed) - thick;
- low-speed, but not traction - optional. However, the smaller the gap in the parts, the preferable it is to use liquid lubricant.
Pour some liquid lubricant into the overrunning clutch. It is more convenient to lubricate ball bearings by inserting a stick into the internal mounting hole and rotating them until they are completely saturated (you will determine this by the change in sound at the moment of spinning).
Don't forget about the friction washers. There is a peculiarity here: by lubricating them with liquid oil, you will get an incomparably softer operation of the unit, but the force to break will be reduced. What is more important is, of course, up to you to decide.
Apply a thin, even layer of lubricant to mating parts only. Each node is able to take as much of it as it can. The excess forms a semi-liquid mess, which will inevitably end up where it shouldn’t be. For example, in the spool support bearings and the centrifuge of the centrifugal brake (photo 7).
In the first case, the speed will drop and the bearing life will be reduced. In the second case, the operation of the brake will be paralyzed.