Silicone fish baits have long enjoyed well-deserved popularity among many fishermen. But given their high price, not everyone can purchase such bait. And there is no need to spend money on branded analogues, if it is not so difficult to make silicone baits with your own hands under the existing conditions.
Making silicone baits: advantages
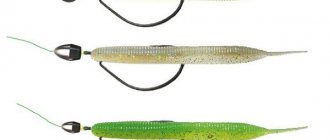
- The main thing is to choose an arbitrary shape of the bait. This gives free rein to action if the angler is confident that such gear can be improved, the bait can be supplemented with decorative elements and detailing
- Despite the large selection of colors of finished products, many spinning anglers say that some of them are still missing, and casting silicone baits provides an opportunity to get a bait of the desired color.
- It also happens that in the line of branded attachments there are no products of the required sizes at all. Both trophy fishing enthusiasts and many fans of the ultralight version often deal with this problem. Many manufacturers do not take the wishes of small groups of fishermen as a basis.
- In addition, self-production of silicone baits of the desired shapes, colors and sizes allows you to acquire a collection of various attractants, or options with a high salt content, which has a positive effect on the attractiveness of the bait. Anglers who prefer nanojig often notice that baits made of silicone, which smells like garlic (which is very attractive to crucian carp), are very difficult to get. Because they are practically not on sale.
How to choose silicone
To make your own fishing baits from a polymer such as silicone, it is better to take materials offered in fishing stores. Construction silicone can also be used as a test casting. It is denser and more durable, but I do not recommend using construction silicone for purposes other than its intended purpose. Construction silicone is a product of pure chemicals and when fishing, a small piece of torn off silicone in the stomach of a fish can lead to its death. In silicones, for casting baits, mostly those components are used that do not harm fish and the environment. You can also add attractants to it, which will improve its catching properties. You can also use thermoplastic, the positive side of injection molding machines is the density of the material itself, and the disadvantages are high price and excessive rigidity. In addition to expensive ones, there are also materials at an average price from which silicone baits can be cast. These, for example, include the two-component non-shrinking “Elastolux TV 25”, characterized by low mass viscosity. This property makes it possible in the production of bait to fill in any matrices, even small ones, and then give them the desired color with your own hands. I note that after setting, the volume of the material does not change. This property applies to Elastolux TV 25 in analogues, such as Pentalast 710 and Pentalast 718, which are also often used for the production of silicone nozzles, but shrink by 1.5% of the size of the mold used.
How to make a mold for silicone baits?
Making bait forms with your own hands has its own subtleties. At the very beginning, you need to correctly determine the correct proportion of gypsum and water. The correct ratio is 100 g of gypsum to 25 ml of water. It is also necessary to take into account that all components must have a temperature of at least 20 degrees.
Then you will need to mix the plaster so that it becomes close to the consistency of liquid sour cream. In order for the gypsum to dissolve well in water without forming lumps, it must be mixed into the water very carefully and slowly for 1 minute. If bubbles have formed in the gypsum mass, they must be removed immediately by tapping.
Problems that arise when independently producing plaster molds for silicone baits:
- significant time for drying the plaster;
- difficulties when imprinting small parts of the nozzle on a plaster mold;
- fragility of the material.
To ensure that the mold for silicone baits meets your expectations, you need to use epoxy resin. Using a brush, coat the plaster mold with a very thin layer. After this, the plaster container must be dried thoroughly. The use of epoxy resin allows you to smooth out the sharp corners of the matrix, solves the problem with the appearance of air bubbles and facilitates the process of removing the finished bait from the plaster mold.
Method of making molds
To make a plaster mold for pouring polymer baits you will need:
- gypsum (medical or construction);
- dishes and spatula for mixing plaster;
- liquid soap;
- bait layout;
- scales;
- water.
It is important to choose the right ratio of water and gypsum. The optimal ratio is 150 grams of gypsum per 100 ml of water. The temperature of water and plaster during mixing should be at least 20 degrees. A more uniform dissolution of gypsum occurs when it is slowly mixed in water for at least a minute. If bubbles form, they should be removed by tapping.
There are 2 types of matrices: one-sided and two-sided.
Manufacturing of one-sided matrices
To create such a matrix, a ready-made bait layout is required. It is usually made from clay or wood.
Manufacturing sequence:
- dilute the plaster with water to the desired consistency;
- pour the resulting mixture into a plastic container;
- Place the mock-up of the bait in plaster;
- After hardening, remove the simulator sample (usually about 2 hours);
- It takes at least 10 hours for complete hardening.
Manufacturing of double-sided matrices
The manufacturing process of such matrices is more complex:
- a double-sided matrix is made using containers that have a rectangular or square shape. It needs to be half filled with gypsum mixture;
- lower the mock-up bait halfway into the mixture. Complete hardening usually occurs in 11-12 hours;
- apply a lubricating liquid to the surface of the first part of the matrix so that after hardening of the second part of the matrix, it can be easily separated from the first;
- make the second half of the matrix. Allow time to harden;
- separate the molds and, if there are burrs, remove them;
- wait a couple of days for all parts of the matrix to harden and grip tightly.
- Using a knife or other sharp object, an air vent is made - a groove from the sample to the edge of the matrix. It would be useful to process the resulting groove with a drill. To make bulk baits there must be at least 8 air vents.
Lures made in such matrices are very similar to living representatives of the underwater world. It is almost impossible to achieve such similarity in one-sided matrices.
Molds for casting silicone baits: main types
Making homemade silicone baits is impossible without using molds or matrices for casting. There are 2 main types of such containers:
- one-sided;
- double sided
To make a one-sided matrix, you need a sample nozzle. They are made mainly from clay or wood. A thin layer of Vaseline, silicone grease or grease must be applied to the existing layout so that the source material can subsequently be separated without problems. Then you need to fill the container with gypsum (the thickness of the fill should be twice the thickness of the sample). The model must be dipped into plaster to a depth of slightly more than half of it. Next, wait until the plaster is completely dry (this will take about 10 minutes) and remove the sample. Construction sealant must be applied to the matrix, and it will be completely ready.
Double-sided molds for casting silicone baits are made as follows. You need to take a rectangular or square container. Half the container should be filled with plaster and half of the nozzle sample should be immersed in it. Then the model must be left in the container until it hardens completely. On average, this takes about 10-12 hours. Only after this time has elapsed is it recommended to fill the next part of the matrix. The matrices should be lubricated with Vaseline or grease so that they can be easily divided into two halves. This time the solution will have to be made more liquid so that you can get rid of the bubbles without any problems.
After placing the second part of the matrix in the container, you must wait until it dries completely. To do this, you need to leave it alone for about a day. Then you need to separate the matrices, get rid of the burrs and pull out the source. The matrix fragments will dry for about several days. Construction sealant needs to be applied to only one part of the matrix.
Then you need to form the sprues and air vents. Through the first cavities, prepared molten material is poured into the cavity. To make them, you should scratch a groove from the beginning of the sample to the edge of the mold with any sharp tool, which then needs to be processed with a drill. In most cases, one sprue is made per mold.
Air vents are required as a way for air to escape when it is squeezed out by the material being poured. They can be made using a thin knife. There can be about 8 of them in total. The required number of air outlets is determined in accordance with the complexity of the bait.
Such molds for casting silicone baits provide the ability to produce voluminous baits that are as similar as possible to live bait. Using a one-sided form will not achieve this effect. There are also certain disadvantages. For example, when making more complex models, there is a high probability of introducing an insufficient amount of silicone into some of the cavities of the prepared mold.
Remelting spoiled silicone baits
The topic of self-casting silicone baits is especially relevant for those fishermen who have a lot of silicone baits left with various defects from previous fishing trips. In this case, you can significantly save on silicone by melting such damaged baits.
Before heating, chop the bait into small pieces. When placing silicone in a microwave oven, it is important not to overheat it, as it can change color and smell sharply, releasing substances harmful to humans. In this regard, it is extremely important not to forget to ventilate the room.
How to melt silicone for fishing lures
There are a number of ways that you can use to melt silicone at home. This can be done with minimal loss of time by heating it on a gas stove. For this method you need to use an ordinary tin can (any tin can will do). But it should be borne in mind that this method has a number of significant disadvantages:
- appearance of smoke;
- rapid burning;
- change in color of silicone up to its blackening.
To avoid this, you can use another method, which requires a microwave oven. You need to place the silicone in a suitable container in the microwave, having previously set a temperature that is safe for this polymer. When melting a material in a microwave oven, it is important that it has a liquid consistency for as long as possible. You need to not only wait for the moment when it completely melts, but after melting, keep it in the microwave for about 1.5-2 minutes. The container in which the material was melted must be heated as much as possible. This will help keep it molten longer.
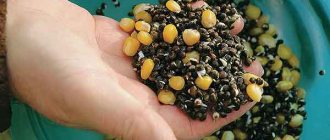
During heating, the necessary components are added to the silicone for fishing lures - flavors, glitter, salt and fish oil, pigments for coloring the desired color, substances that allow the material used to become harder or softer.
When pouring silicone nozzles with your own hands, you need to consider the following. If you saturate the bait with flavor after casting it, it will lose its useful qualities after the next fishing trip. Be sure to lubricate the bait with flavoring after fishing. This must be done as follows: the used nozzle should be washed, dried, put in a bag, dropping a few drops of flavoring inside. The bait will have to be left in this bag for three days in a dry and dark place.
Pouring the molten material into a homemade mold is done with a glass syringe; a plastic syringe may not withstand the temperature of the molten silicone. Silicone is poured into it and then turned upside down. The syringe plunger needs to be pulled back 1-2 centimeters and lightly pressed on it so that the material appears a little from the spout. This will push out excess air. If you ignore this point, the bait will eject along with the air, which will negatively affect its quality.
Then the mold should be turned over to the other side, the sprue of the syringe should be inserted into the sprue and the material should be slowly poured in until it appears from the air vents. After this, the form will need to be turned down. The syringe should be carefully pulled out of the mold, without ceasing to squeeze out the silicone for the nozzle. This will help prevent the bait from developing voids in the nose. Before removing the resulting bait from the container, you must wait for it to cool completely. After removing the nozzle, it is recommended to place it in a container with cold water for some time to increase its elasticity.
Useful tips
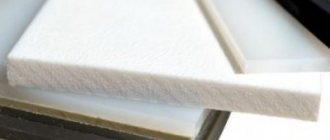
- Any ceramic or glass containers are suitable for heating the polymer. But the most preferable option is with frotoplast, because it has increased strength and excellent temperature retention.
- to avoid burns, remove heated dishes with silicone from the microwave using a cloth or wearing gloves;
- To fill silicone, it is recommended to use a fluoroplastic syringe. If this is not possible, a glass syringe will also work. But you need to be extremely careful with it due to its fragility. The use of ordinary plastic syringes is categorically unacceptable, as they lose their shape from heated silicone.
Casting silicone baits at home is an activity that really requires a huge investment of time. Nevertheless, it is worth it, because this way you can not only significantly diversify the fishing process, but also save a lot.
- Vibrating tails for pike
- Catching pike with a twister
- Salapinskaya porridge
- Wobbler Megabass Flap Slap
Making silicone baits from existing and damaged ones
Over time, after numerous fishing trips, many fans of spinning and jig fishing accumulate a variety of damaged silicone baits. It will not be difficult to provide them with a “second catchable life” by using them to produce new ones. To do this, the remains of damaged baits made from this polymer will have to be cut into small pieces and melted in any convenient way. The smaller the pieces, the faster the material will melt. The resulting liquid composition can then be used to cast new baits.
You can make new baits from leftovers used directly while fishing (provided that you have a suitable container for low tide). To do this, finely chopped old baits should be placed in a small tin can. For convenience, you can clamp the jar with pliers and hold it over an open fire, stirring from time to time until the silicone is completely melted. After this, you need to pour it into the mold, greasing it with any available fat before doing so. It is better to remove the material remaining on the walls of the jar, as it will be quite useful for future meltings. After the product has completely hardened, you need to take it out and trim off the excess protruding pieces of material with scissors. To increase elasticity, homemade bait should be placed in cold water for 10 minutes.
Step-by-step production of silicone baits
- You need to prepare a container for pouring gypsum, place pre-prepared baits that will be cast in the future, carefully pour the gypsum into the container, and leave until the plaster hardens completely.
- After complete hardening, it is necessary to remove the silicone baits from the plaster, and carefully remove the stuck parts of the silicone.
- Old damaged silicone baits should be cut into small pieces and melted in hot water or in the microwave.
- Pour the resulting molten liquid into a mold previously greased with liquid soap.
- Cool the silicone and remove excess silicone using a sharp knife.
- Due to its elastic properties, the homemade silicone bait is easily removed from the mold and is ready for use.