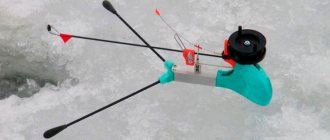
A bite alarm on a feeder is a fairly common thing today. Most fishermen prefer the “alarm” because of its instant response to the catch. If you plan to go fishing alone, then you can’t do without an additional “assistant”; The alarm will quickly warn the fisherman about a possible bite, and even at night the fish will not jump off the fishing line. Now there are several types of bite alarms, many criteria for their selection, and some “experienced” fishermen already know how to make a bite alarm themselves. This and much more is worth talking about separately.
Types of alarms and their advantages
An alarm is a thing that requires close attention when choosing. If the bells are loud enough, then they can scare away all the fish, and if there are few bells, the alarm is not effective when biting.
It is precisely because of the large number of nuances and individual preferences of anglers that there are several types of alarms:
- Visual. A distinctive feature of this device is that it eliminates a large number of wasted cuts. For signaling devices of this type, the following are suitable: standard floats, luminous pendulums on a fishing rod, and so on. But it is worth noting that such a simple visual signal on the feeder has a rather significant drawback: there is a possibility of not noticing the signal and missing the catch. Visual notification requires experience and skill.
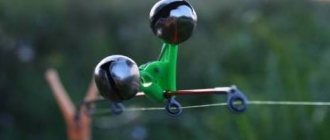
- Sound. The sound accompaniment of the bite is more convenient than the visual one. The sound will 100% accurately and timely notify the fisherman that he needs to prepare for hooking. The principle of operation is quite simple: the rod is placed on a stand to which bells are attached, during the bite the rod begins to move from side to side and touches the bells, which are triggered in the form of a ringing and at this moment you can hook. But you can’t do without a negative side, as mentioned earlier, the sound of bells can scare away the baited fish.
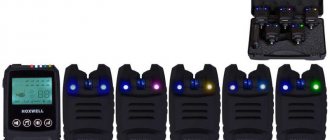
- Electronic. A modern way to save your time and nerves on fishing. With an electronic feeder bite alarm, the fisherman will see a flashing or subtle sound (audible only by humans) coming from the alarm and will respond quickly. Even in fog, rain, snow and frost, the sensor will not fail: it will definitely show that it is time to take out the fishing rod. There are no disadvantages to such a mechanism, but self-assembly will take quite a lot of time: an electronic bite alarm for a feeder requires good knowledge of physics and electronics.
If you go after a predator, a perch, with a visual alarm, then a cork or a homemade float would be best. For crucian carp, roach and bream, the ideal option would be a feather structure or a branch float.
Save on purchases
There are a number of items that are used for fishing, and which are purchased in stores not for fishing, but in hardware stores.
- Buckets. It has already been said about their ability to be used as a seat. At the fishing store, the bucket says “sensas” on the bucket and costs five dollars. You can buy it at the hardware store for one or two dollars. If you wish, for two and a half, a milk bucket for food products. There is almost no difference in manufacturing quality. And if so, why pay more?
- Fishing suitcases. They are sold in fishing stores in the form of a box with a handle, which has a couple of compartments inside and small compartments on top where you can put hooks, clasps and feeders. This again can be bought at a hardware store at a price three times lower. By the way, it is very comfortable to sit on it if the shore is flat and the suitcase is large enough.
- Sectional boxes. These are boxes with a lid with a latch, with several compartments. Usually they store hooks, feeders, and other small accessories. In a fishing store, this will cost from three dollars and more. In a sewing store, these same boxes are sold for sewing supplies and cost two to three times less. You can give a lot more examples when you can simply buy the same thing cheaper and use it for fishing. However, the list is far from accurate, because sellers can change prices for their goods. The main thing that can be advised to fishermen is to look and you will find. You need to have a creative view of things and imagination, and you can always find a replacement for something that turns out to be unaffordable.
Making a visual
We need to start with the fact that you can prepare all the fishing equipment yourself, especially the bite alarm. You just need to have patience. Let's start, how to make a visual bite alarm?
Can be made: float, nod, firefly. For a do-it-yourself feeder, it will be enough to find: any bottle cap or polystyrene foam, a feather from any bird and a tree twig. Secure the feather on top of the cork, and the branch parallel to the feather on the side of the cork.
Making a side nod for the feeder is even easier. You will need: metal spring wire and electrical tape. A small tip is made from wire and attached to the top of the rod.
Thus, an oscillatory movement of the tip occurs at the moment of biting. If you decide to make a guard for the feeder, then keep in mind that the wire must be flexible and not rusty, otherwise there is a high probability of ruining the fishing process by unexpectedly breaking the nod.
Firefly is more suitable for night fishing. You will need: a polymer elastic tube and fastening. A tube is attached to the end of the fishing tool, and a luminous indicator is attached to the other side.
Making a nod
A side nod can be purchased at any specialized store or made by yourself.
Option 1
In this variation, you will need to prepare spring material. The most affordable in this case will be a plastic clamp, the length and thickness of which will allow you to easily adjust the sensitivity of the nod.
Before production you should prepare:
Step by step process:
Option 2
No less popular is the method of making a nod based on a plastic bottle.
When manufacturing a product, you cannot do without the following materials:
Step by step process:
Experienced fishermen recommend making 2-33 nods with varying lengths and base widths. This will be the key to success in fishing. Hard nods are usually used in conjunction with a heavy jig, and the soft version of the product is equipped with a light nozzle.
Option 3
If desired, you can make a side type of summer jig using broken tackle. In this case, the product will be universal, meeting all requirements.
Step by step guide:
Sound "announcer"
The question of how to make a bite alarm at no cost has already been answered, now let’s talk about a more complex manufacturing option.
Signals that were prepared independently usually “live” longer, and they are also the most cost-effective. If there are sudden movements when lifting the catch, expensive alarms may fail, but nothing will happen to alarms made independently.
For the sound “annunciator” you will need:
- rubber band;
- fastening;
- bell with wire hook;
- rubber.
The rubber band should be secured 20 cm from the feeder stand, then a bell with a hook should be placed on the band. After the tackle is thrown and the fishing rod is placed on the stand, you need to take the hook of the bell and hook it to the thread not far from the reel (the thread that is in action). The attached elastic band with a hook should tension the thread by 2-3 cm.
This design works due to the fact that during a bite, the thread stretches and pulls the bells, which notify the fisherman about the start of hooking. A convenient mechanism for regular gudgeon fishing.
For elastic bands (regular money ones), it is better to use dark colors, since light ones quickly fade in the sun.
Making your own visual bite alarms
A visual alarm helps the fisherman visually notice a fish bite. Eye alarms come in the form of a nod, float, firefly or foil tube.
Nod
The nod is a spring with a length of 10 to 15 cm. On one side, the spring is attached to the tip of the feeder, and on the other side there is a ring into which the fishing line is threaded. To assemble a feeder nod with your own hands, you will need a rigid steel wire or a ready-made spring element. The nod can be made movable. To do this, attach a rubber or plastic tube to the tip of the feeder. When changing the length of the tube, the rigidity of the nodding mechanism is adjusted.
Float
The float can be made from a thick piece of foam or purchased ready-made in the store. When creating, it is important to maintain the proportions of the weight of the feeder and the alarm, otherwise the float will either sink immediately or float on its side. During the process of assembling the tackle, a locking ring is attached to the fishing line, which helps to select and adjust the immersion depth of the feeder. It is best to make the ring tight so that the length of the fishing line is adjusted only when necessary.
Firefly
There are several ways to create a light bite indicator for donkey.
In addition to homemade bite alarms, there are factory-made fireflies. They consist of a plastic capsule with a chemical liquid , inside which there is a thin glass tube with another liquid. When such a flask is broken, the internal capsule bursts, the liquids mix and the glow effect is activated.
Foil tube
To make it you will need a tube 15–20 cm long and aluminum foil. The diameter of the tube should be slightly larger than the diameter of the first feeder ring. Several layers of foil are wrapped around the tube, and the edge is secured with electrical tape or tape. A fishing line is passed through the hole, which is then passed through the rest of the feeder equipment. As a result, the tube should sag slightly between the first ring and the coil. If there is a bite, the sagging decreases and the tube begins to bounce. The reflections and rustling of the foil are the indicator of a bite.
Electronic
Not many people know how to make an electronic bite alarm for a feeder, but we’ll look at this case now. When making an electronic alarm, it is worth considering that without special knowledge and skills, a good result is unlikely. To prepare it, it is better to consult with a specialist electrician or read additional literature about the internal structure.
After preparation, you can begin production itself, you will need:
- The battery is three-volt.
- Without magnetic reed switch.
- LED (can be taken from an old mobile phone).
- Plastic nod.
- Contacts from an old alarm clock.
- Clamps.
We begin to assemble: we attach the nod to the end of the fishing rod with any clamp, we stretch the fishing line through the nod inclined towards the rod, the tweeter and LED are built into the reed switch, a magnet is mounted at the end of the arc, batteries are attached to the rod. The principle of this assembly is clear: during a bite, the reed switch is connected to a magnet, the circuit closes and the current begins to send a signal to the LED or tweeter.
Thus, an angler can independently make a bite alarm and personalize it to make handling more convenient. You also need to understand that alarms should assist when fishing, and not cause additional trouble, so you need to check the functionality of all mechanisms in advance. If a fisherman has used, say, a visual alarm all his life and decided to change it, then we will ask a reasonable question: “Will the result of changing the usual device be positive or will it ruin the whole fishing business?” Remember, if you used one type of alarm for years and were completely satisfied with it, is it worth changing it to a new, untested one?
Happy fishing and choosing the right alarm!
Similar articles
Source: orybalke.com
Fishing rod equipment
To make summer fishing enjoyable, the fisherman’s equipment must be not only catchy, but also comfortable. Therefore, it is recommended to choose a fishing rod with the following parameters:
Weight. You will have to work with the fishing rod all day, so its weight should be as small as possible. When purchasing, it is better to hold each rod and understand how comfortably it fits in your hand. Rigidity. By choosing the optimal rod stiffness option, you can easily feel the tackle and control the jig when retrieving. Length. This parameter is selected based on the location where the fishing will take place. A rod 350–450 cm long will be sufficient when fishing from a boat in a place with a depth of 1.5–3 meters. If hunting will be carried out from the shore, then the length of the fishing rod should be at least 5–6 meters. Rings
Read Salmon Fishing
This element does not play an important role when fishing with a jig in summer. Some fishermen use a simple Bolognese fishing rod, equipping it with pins
Rods for side nodding should be non-separable or have well-locking knees. Otherwise, they may simply fold or fly out when casting.
How to properly tie a jig to a fishing line Diagram of how to learn how to tie a hook to a fishing line Tourist knots - types and methods of tying Gardner's loop for a feeder: how to tie
It is recommended to choose a plastic, small, inertial or spinning reel with a spool size of 2500–3000 and a friction brake. The line can be monofilament 0.2 mm thick or braided 0.15 mm thick. It is better to choose dark brown color. It will allow you to control the wiring and will not scare away the prey. At least thirty meters of fishing line must be wound on the reel.
Selection of jigs
Summer jigs should have an elongated shape. Their width should be about 3 mm and their length up to 6 mm. It is best to choose models with a darkened body.
You can use baitless jigs or tackle on which you can attach natural bait. Attaching maggots or bloodworms simplifies vertical retrieving, while using mothless baits on long rods will require some skill from the angler.
What should the nod be like?
The side nod is selected more carefully. It must match the rod. For fishing rods of 6 meters, the guard should be 20 cm long. If the rod is shorter, then the nod may not be so long. The bait must have elasticity, match the weight of the jig and be sufficiently elastic. In this case, even the most cautious bites will be felt. Also, the side nod for summer fishing should have a bright color so that it is easily visible in the water.
All anglers place the guard on the rod in their own way. The side mount is considered the best for visual perception, and with a direct position it is better to hook and fish out prey.
Specifics of nods and their types
The same thing is a guard for a bottom fishing rod; there are no fundamental differences in its operation. It is a plate (or wire) made of flexible material, with a ring for fishing line at the end. Sometimes elastic components are not required. They are also made from coiled springs of varying stiffness. The nods are painted with a bright reflective varnish of green, red or yellow so that the angler can see the fact of the bite from afar. Sometimes additional sound alarms are hung on them, for example, small bells. This is a good help for those fishermen who cannot constantly look at the gear.
Lodges are used for both winter and summer fishing. They have four types:
- soft nods;
- intermediate (medium hardness);
- hard alarms;
- heavy guards.
The first type is used on lakes, ponds, backwaters and other bodies of water where there is no current. Suitable for catching any type of fish. The second type should be used on quiet rivers. The rigid nod copes with its task both in places with strong currents and during windy conditions. The latter type of alarms is used for deep (from five meters) fishing, including with live bait.
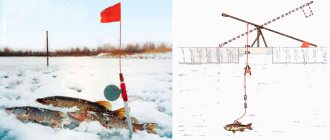
It is best to place a hard or heavy plate guard on the bottom (depending on the depth and the target fish). For the feeder, spring devices are needed, because they do not imitate a bite during waves or wind. They are used mainly for winter fishing.
Experienced fishermen advise bending the feeder nod spring down slightly so that the alarm does not react even to increased water vibrations.
Based on functionality, nods can be divided into the following groups:
- bendable;
- rotating (inflexible);
- sound;
- with automatic cutting;
- combined (when one device includes several characteristics).
Bendable guards bend when signaling a bite down, rotating guards rotate, and sound guards ring. Self-hooking alarms work like this: the fish pulls the bait towards itself, the mechanism is triggered, sharply pulling the line towards the fisherman.
Fishing with a rod with a side nod
This type of fishing refers to simple active types of fishing. You can fish from the shore, boat or wade. The best option for fishing with a nod in the summer is to wade, since a fisherman moving along the shore can scare the fish more than one moving slowly in the water.
Tactics
Wiring the jig is carried out with the flow and in different ways:
- free fall and stepwise rise: the jig falls freely to the bottom, after which it is raised 10–15 cm in short jerks until it is returned to the surface of the reservoir;
- bottom game: the bait is lowered 10-15 cm from the bottom and the game begins for 1-2 minutes, then the jig is lowered to the bottom;
- tapping with a finger: the jig is lowered to the bottom, raised ten centimeters and the tempo of the game is set by tapping the rod with a finger;
- during the current - tension: the nozzle is lowered to the bottom, then the tension of the fishing line is raised a certain distance to the surface of the reservoir;
- playing in jerks: the jig is stopped at the bottom and with a sharp jerk is raised to a height of 35-40 cm;
- movement along the bottom using a nod;
- dragging the bait along the bottom using a fishing rod;
- stopping before the bite: the jig is lowered to the desired depth and left in a calm state.
Nozzles
The side nod on a summer fishing rod can be with or without bait. Bloodworms, maggots, and worms are attached to the hook. You can attach a bunch of colored threads; the color of the bait does not affect the success of fishing. Fishermen also use multi-colored beads and beads, cambrics.
Read Tackle for catching grass carp
Advantages
The gear is used for fishing in reeds and reed thickets. Vertical wiring protects the hook and jig from snagging. A do-it-yourself nod is made from readily available materials. The tackle allows you to deliver the bait to a precisely chosen place. The lightness and mobility of the fishing rod is used by anglers to catch fish in different places and conditions. It expands the possibilities of searching for fishing spots.
Flaws
The gear has few disadvantages. Blind and running rigs are used in different fishing conditions, so you need to have both types of fishing rods with a side guard. A long side nod for a summer fishing rod does not resist gusts of wind well and exhibits its own vibrations more strongly. The length of the device is determined based on the fishing results.
We make a simple signaling device for a donut from a cable tie
To make it yourself, you first need to prepare the items:
- moderately hard cable clamp;
- high-quality electrical tape;
- one small bell;
- multi-colored varnishes.
White cable ties cost no more than 8-10 rubles. a piece
We will use a piece of thick cable clamp as the main material. If there is one, then you can take a whole, but short fastener (the shorter, the stiffer it will be), no longer than 15 centimeters. The second option is better; we’ll explain why later.
Electrical installation stores sell black, blue, and dark green ties. You should use white ones: the varnish will stand out more on them.
So, simple instructions for making a guard from a clamp:
- Take the cable tie and cut it. We need the part with the “head”. There is a pointed latch inside the lock; we knock it out with a flat-head screwdriver. The vacated space will serve as a free passage for the fishing line.
- We clean the surface of the workpiece, degrease it, carefully apply varnish and wait for it to dry. If there are no paints, then you can wrap small strips of bright electrical tape, for example, yellow or blue, in different places.
- We tie a bell to the “head” of our guard. It will ring when there is a bite and will lower the plate down.
- We press the flat end to the desired part of the rod and forcefully wrap the tie with electrical tape so that the tape is stretched but does not tear. That's it, let's run the fishing line and go fishing.
Why short ones are better. Firstly, you won’t have to cut anything, and secondly, each clamp at the end has another place with a ribbed surface. These “ribs” will allow the insulating tape to better fix the nod on the fishing rod. But long ties have another advantage.
Choosing the right fishing rod
For fishing in summer, it is recommended to use a 4 or 5 m rod with a rigid action. A regular telescopic fishing rod will also work. Fishing with a longer tackle will be inconvenient - your hands will quickly get tired.
Replacing the float with a nod, the tip becomes the main part of the rod. It should be quite rigid and reliable so that it does not bend under the weight of the nod with the jig.Read Fishing for pike with spoons
The rod is equipped with a small inertial reel. The fishing line is taken as thin as possible with a diameter of 0.1–0.25 mm and must be transparent.
The side attachment of the nod is due to the convenience of observing bites, since the tackle can be located at a great distance from the fisherman.
Mount the nod on the side of the tip of the rod on a special elastic band - a coupling.
The nod to the summer fishing rod should be brightly colored so that it stands out against the background of the water surface and surrounding vegetation.
If you decide to hunt a predator, do not forget about the use of vertical spinners and balancers.
At the preparation stage, it is necessary to unwind the rod. Then rotate the line around the blank several times. Thread the end of the fishing line through the signaling ring, and attach the jig to the same tip.
Manufacturing of adjustable nods
The order is:
- We take a long clamp and put a piece (3-4 cm) of a durable rubber tube or insulator on it.
- We knock out the latch, as we have already described.
- We paint and wait for the varnish to dry. We hang a bell.
- We also attach the clamp together with the attached tube to the fishing rod.
- We melt the back of the guard a little with a lighter and bend it so that it does not fly forward.
- Let's check. The nod should not move freely back and forth.
The signaling device with adjustable hardness is ready. Its cost will not even be 15 rubles, it looks beautiful and works well!
Using non-flexible material
The rotating guard has a slightly different operating principle and is considered one of the simplest. You will need any oblong object that resembles a pencil, two purlin rings, varnish and some kind of tool for making small holes. You can use bells in the same way.
We take this object, make holes in both ends so that the purlin rings can be secured. Then we will attach one of them to the guide ring of the rod, and insert the fishing line into the second (we also attach the bell here). If what we made the nod from looks bright initially, then painting is not necessary.
From old fountain pens
Such products belong to rotating signaling devices. Old or new (if you don’t mind) stationery pens or markers will be used. They are usually made of bright plastic, which eliminates the need for varnish. We will need:
- any inexpensive ballpoint or gel pen;
- insulating tape;
- awl;
- good glue.
Using an awl, we pierce the tip of the cap (remove the second one) where there is a fastening to clothing. We put the cap itself back on, smearing glue on its junction with the base. We wrap a little insulating tape at the output end - this will be the sinker. We run the fishing line through the pen, and attach the clamp to the guide ring of the rod.
Eye Alarms
Operating principle
The principle of operation of visual alarms is that, with the help of various devices (nods, beacons, fireflies), they make the bite more noticeable and obvious to the fisherman, relieving him of empty doubts about the bite and unnecessary casting of the gear. This, in turn, saves effort, time, as well as bait, which is consumed with each cast.
Among these visual indicators are the following:
- Float;
- Nod;
- Firefly;
- Foil tube;
Let's consider the principles of operation and manufacturing of each of them separately:
Float
Manufacturing instructions
To make this type of alarm, you will need a regular float, you can take a factory-made one, or you can make it yourself from a piece of dense foam. In this case, it is important to correctly select the calculated weight of the float and the weight of the feeder gear.
They must match, otherwise the tackle will either sink immediately, or vice versa, the float will uselessly lie on its side in the water. In both cases, you won’t see the coveted bite. After this, when assembling the tackle, you must first attach a locking ring to the fishing line, which will limit the movement of the float and determine the depth to which the feeding weight with hooks will be immersed.
It is advisable to make this ring heavy-moving in order to change the depth of the tackle if necessary. With this type of alarm, the vole can be seen as with conventional float fishing.
Nod
Manufacturing instructions
This type of bite alarm is an element of spring material about 10-15 cm long, one end of which is attached to the tip of the feeder, and on the other there is a ring through which the fishing line is passed.
The material for making the nod will be steel spring wire or a thin metal twisted spring itself. The nod must be attached firmly enough so as not to fly off when casting the tackle.
At the same time, it is desirable to make it adjustable, i.e. When making an attachment to the tip of the feeder, use polymer or rubber tubes so that you can change the length, and therefore the rigidity - the sensitivity of the nod.
After making the nod, we attach it to the top of the feeder, thread the fishing line through it and attach the tackle. Here it is important to check the free movement of the line through the nod hole. This way you can avoid breaking the tip of the feeder when casting or shooting off the feeder.
Firefly
Manufacturing instructions
To make this type of alarm with your own hands, we will need a clothespin or a “frog” office clip. The latter is preferable, because it is more firmly attached to the top of the feeder, and the holes in its ears allow you to attach a firefly to them.
You will also need a regular fishing firefly, used for night fishing with regular float tackle. The variety of these fireflies in fishing stores today is quite large.
This could be a chemical fracture firefly, which begins to phosphoresce when its internal capsule is fractured and liquids are mixed, or an LED firefly, powered by an ordinary small battery. This firefly is attached to the ears of the previously described office clip.
It is worth noting that it is still recommended to remove this alarm before each cast and reattach it after casting, since even with the most successful design in the dark, there is a possibility of the line twisting through the firefly, and as a result, the tip of the feeder will break or the tackle will be shot off.
Foil tube
Manufacturing instructions
This type of signaling device is probably the most primitive, both in terms of manufacturing method and method of application.
To make it, we need aluminum foil and a tube, which will be taken as a basis.
It is worth noting here that the diameter of the tube should be thicker than the first ring on the feeder equipment.
Taking the described tube, we wrap aluminum foil on it in three to four layers, press it tightly, and then fix the tip with a piece of adhesive tape or tape, preventing it from unrolling.
The length of the tube should be about 15-20 cm. The excess can be cut off on the base tube.
After this, we pass the fishing line through the resulting foil tube and then thread it through the rest of the feeder equipment, so that the manufactured tube is located between the reel and the first ring of the feeder. After casting and installing the feeder, the tube moves towards the reel and lies on it, slightly sagging.
You can lighten it up a little more. In case of a bite, the line is pulled tight and the tube stands parallel to the feeder form.
Side bite alarm (side quivertip)
The side quivertype is used when it is necessary to position the feeder tackle not parallel to the shore, but perpendicularly.
This can happen if there are many obstacles in the fishing area (for example, snags, stones, coastal vegetation). Using a feeder side alarm also solves the problem of strong winds and waves. To create a side bite alarm you will need:
- steel wire no more than 1 mm thick and 15–20 cm long;
- fastening clamp for PVC pipe;
- a metal tube or rod about 10 cm long. The diameter should match the side hole of the clamp;
- threads and waterproof glue.
A hole is made in the rod through which the wire is threaded. The edge of the wire is bent at an angle of 90 degrees and tied with threads to the rod. The thread is coated with glue. For reliability, you can put a rubber tube on top or simply paint it with varnish.
At the opposite end of the wire, a hook is bent, used as a holder for the main fishing line. On this side, the wire is painted with bright paint or covered with film at a distance of 5 cm from the hook . The guide tube must be tightly fixed into the hole in the clamp; it is advisable to use glue.
The design is fixed on the rod handle between the reel and the first ring. The quivertype arc should be on the side. The fishing line must be hooked. When biting, the arc bends, the line tightens, and the bright tip begins to bounce rhythmically.
Simple sound alarms
Operating principle
Simple sound bite alarm devices for the feeder are a combination of a mount in which the device is attached to the top of the feeder, and a direct sound alarm itself. It could be a bell, or it could be a rattle, and so on.
In the event of a bite, the top of the feeder to which such a device is attached begins to vibrate, and, consequently, the bell or rattle begins to make a corresponding sound. Let's take a closer look at the bell.
The right bell
Manufacturing instructions
To make the right bell for the feeder, let’s immediately make a reservation that it will not be the bell itself that will be made, since there are a lot of them on sale and there is no point in spending time and effort on making it. Here we will talk about the method of attaching it and stopping it on the feeder.
The simplest and most classic way is to attach the bell using any clip to the top of the feeder, but this is not entirely correct or practical. Another method seems to be the most correct. To do this, take a small piece of rubber band and attach it to the feeder stand at a distance of about 20 cm from the top.
We attach a bell to this harness, to which we also attach a small wire hook. After casting the feeder and installing it on the stand, take the bell hook and attach it to the fishing line next to the reel so that the elastic pulls the fishing line back a few centimeters.
If there is a bite, the line will begin to tighten and the bell will ring. In this case, you will not have to remove the bell from the top of the feeder every time you cast, and it will not interfere with landing fish.
Rod selection
When choosing a fishing rod, you should pay attention to its lightness and length. At the same time, you need to remember that it will not have a classic bite alarm (in the form of a float). Instead, bites will be transmitted to the nod (as in a winter fishing rod). But there are some nuances here, because the nod will be located at a considerable distance and its work is not so easy to see. To make it more noticeable, it is attached to the side of the rod. Thus, the main element of such a fishing rod is its tip, which must have a certain rigidity and strength. It must support its own weight and the weight of the nod along with the jig without bending. The nod is attached to the side of the tip using a special coupling. The design of the nod can be any, but the most important thing is that while watching it (and it will take a long time to watch) your eyes do not get tired, and at the same time, it is clearly visible against the background of the sky and water, as well as the surrounding vegetation. A good option is the dark green color of the nod itself with a bright designation at the end. It is perfectly visible and after long-term observation of it, your eyes do not get tired.
Side bite alarm for feeder
Device
The side bite alarm is a device that is partially structurally reminiscent of a nod, since it also consists of a main spring part, which is also made of metal or plastic, as well as an attachment to the feeder form. The difference is that this type of alarm is placed between the coil and the first ring of the feeder.
The length of the working part is about 10-15 cm. At the end opposite the feeder, a hook is made into which the fishing line is placed after casting. The signaling device is installed at an angle of 90 degrees to the feeder form. In the event of a bite, the line tension “puts” the alarm almost parallel to the feeder.
Making a bite alarm with your own hands
To make a side bite alarm, you will need a metal tube about 5 cm long and about 2-3 mm in diameter.
It is tightly fixed on the feeder form at a distance of about 10-15 cm from the coil. Next, take a metal spring wire about 20 cm long.
At one end we bend it 90 degrees to attach it to the previously indicated tube, at the other end we make a Z-shaped hook with a bend length of 1 cm.
After installing it on the feeder and casting it, we pull the fishing line and insert it into the hook of the alarm.
It is worth paying attention to the fact that choosing too hard a material may make the alarm insufficiently sensitive. It is also a good idea to attach some bright, noticeable colored ball to the end of the hook for better information content of the device.
Do-it-yourself side nod for donkey or feeder
Currently, bottom tackle with a bottom feeder is used quite successfully for fishing. Some people popularly call it a feeder, although this is a little incorrect, but it seems. Therefore, in the future I will call it that. Many “budget” fishermen use these as bite alarms:
They work well, but have one significant drawback. In the wind, even not very strong, especially from the side, this alarm sways, and it is almost impossible to see a careful bite when using a donkey.
To eliminate this drawback, the side signaling device is used. Making such a signaling device for donkey turned out to be quite simple. We buy a signaling device like this from a fishing store, which is attached to the tip of the rod, and carry out reconstruction.
To begin with, at the end of the nod we remove the ball of smaller diameter, the spring and the fastening unit. It turns out this is the preparation
Then we will need a piece of rigid foam measuring approximately 2.5 by 2.5 centimeters,
.On one of the faces, use a large round file to select a notch
so that the side nod design fits well on the rod. The next stage is selecting grooves for the elastic band that will secure this entire system. To do this, we make such a cutout with our own hands
We continue our work on improvement. Using sandpaper, give the product the shape shown in
We saw off a small piece of plastic from an old toothbrush or other
The main thing is that it melts when heated. We heat the end of our nod free from the ball and insert it into the plastic rod
At the end of the foam holder we make a hole the size of our plastic rod. Lubricate the rod with “Moment” type glue and insert tightly
Now we bend the nod with our hands perpendicular to the direction of the rod
Pay attention to the location of the nod depending on whether you are right-handed or left-handed, although the design is thought out so that it can be used in both cases.
At the end of the nod, where the big red ball is, we attach a fishing line holding knot. To do this, glue a piece of copper wire with a diameter of 1 millimeter, having previously spilled its end about 2 centimeters long, to the nod, wrap it with a nylon thread with sizing, and get the result
