How to repair a spinning rod with your own hands?
10.05.2020
Spinning is one of the most common sports equipment. This is an ideal option for catching different types of fish at long and short distances, as well as from a boat. The design easily functions with baits of natural and artificial origin, but the disadvantage of the device is its high cost. Therefore, in the event of a breakdown, the fisherman must know how to repair the spinning rod, spending a minimum amount of time and money on it.
How to repair a broken spinning rod?
When a misfortune occurs in the form of a breakdown of a fishing device, the question immediately arises: “How to repair a spinning rod with your own hands?” There are several options for performing this process.
The user can:
- replace the knee by purchasing a new design;
- entrust repairs to professionals;
- try to repair the spinning rod yourself;
- buy a new product.
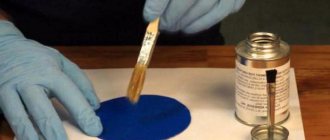
To carry out independent repairs of the spinning rod, you should replace the outer coupling and the inner insert. Tackle elements can be purchased at the store or used from old models lying in the closet. When looking for options for gluing a spinning rod together, we recommend choosing epoxy resin. In order for the work to go well and end in success, it is necessary to sand all the parts and glue them using the chosen product.
One of the most common sports equipment is spinning.
At the first stage of repairing spinning rods, you should carefully place the inner insert into the knee located below. It is very important to apply the adhesive correctly. Since the internal hole is too small, it is better to apply resin to the protruding part and gradually turn the part, recessing it deeper and deeper.
The coupling should be put on the broken part, after which the structure should be placed on the prepared insert. All joints and crevices must be generously lubricated with adhesive. The product dries within 24 hours.
Spinning rod repair
Repairing a fishing rod with your own hands is quite possible. The following elements are required as basic materials:
- a tube of the required diameter (this part should be approximately twice as long as the crack that has formed);
- Kevlar cord (it is possible to use a flat spinning cord);
- waterproof epoxy resin;
- in case of increased loads at the site of failure, you should stock up on glass or carbon fiber;
- scotch;
- film or other film.
Spinning rod Major Craft: pros and cons
Repair of spinning rods begins with the preparation of materials. The tube must be sanded and lubricated with resin, after which it is ready to be installed in the elbow. The fishing device must be restored to the same condition as it was before the breakdown. The selected fabric material is cut out in the form of a rectangle and lubricated with adhesive, then it is wound around the crack site. The film strip along with the tape will help remove excess resin. To increase the strength of the structure, a purchased cord is wound around the fabric.
The repair of spinning rods begins with the preparation of materials.
After completing all the steps, it is recommended to place the tackle vertically and let the glue dry for 24 hours. Repairs to the spinning rod blank should be carried out in a timely manner. As soon as the smallest crack has formed, it urgently needs to be eliminated, otherwise the entire structure may break.
Spinning rod tip repair
The end of the rod is fragile and thin, so it is very easy to damage and break. Let's figure out how to repair the tip of a spinning rod.
There are several options to resolve the problem:
- Completely replace the tip of the tackle.
- Carry out the work manually with partial replacement.
The procedure will be successful only when the action plan is correctly developed. At the very beginning, you should find out the model of the device, the diameter of the tip and, ideally, get advice from a specialist.
If the tip of a spinning rod breaks, it is better to select a similar product without rings and pay attention to the correct selection of the action. The insertion must be clearly thought out. The fisherman is required to visually determine the length of the insert (this can be done by calculating which ring the crack is coming from). The attachment point must be cleaned and degreased, after which super glue is poured into the carbon part. Fiberglass fabric is coated with adhesive resin and inserted into the damaged area. To make the structure more durable, it is recommended to wrap the broken area with black thread and strengthen everything with glue. The product must dry thoroughly before use.
Many people cannot choose how to repair the tip of a spinning rod - with their own hands or go to a workshop. It's actually very easy to do the job yourself. In addition, for repairs you will need available materials that are found in every home.
The end of the rod is fragile and thin
Spinning rod handle repair
To make a quality repair, you need to know how to disassemble a spinning rod. The procedure must be carried out as carefully as possible so as not to damage the structural parts.
Let's look at an example of how to disassemble the handle of a spinning rod. First, you need to remove the guide rings, then the front part of the handle must be dismantled. To perform this process, it is recommended to use a telescopic elbow, from which a tube 30 cm long is cut out. This element should be put on the form and, rotating clockwise, separate the plug from the form.
How to catch grayling using a spinning rod?
Do-it-yourself spinning rod handle repair:
- You need to start by removing the damaged product and thoroughly cleaning the surface of the structure. Cork panel is used as the main material. It must be cut into pieces of 20 mm.
- The resulting strips should be soaked in water and boiled (the material should be in hot water for about 15 minutes).
- The basic process of repairing a cork spinning rod handle begins with winding the panel onto the desired surface and fastening it with strong threads. The material can be secured using moisture-resistant glue and the fixation can be improved using PVA electrical tape.
- The resulting product must dry; if the result does not satisfy the owner of the equipment, it is recommended to repeat the procedure. Quite often it is necessary to apply two layers.
At the same time, no one canceled the replacement of the spinning rod handle with a new one. The work can be entrusted to professionals.
DIY spinning rod cork handle repair
Repair of access rings
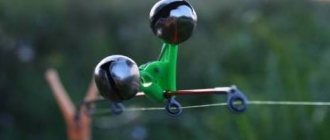
Repairing rings on a spinning rod begins with removing the old winding of the part. The obligatory material is nylon thread. It can be selected according to the color of the gear. The process should begin by applying hot melt adhesive to the feet of the guide rings. Next, you should warm it up (you can use the flame of a lighter). Installation of the ring on a spinning rod should be carried out coaxially with respect to other rings.
At the final stage, it is necessary to secure the nylon thread and wrap the desired area not completely, leaving 5-10 mm free. At this point you should thread a loop of thread and seal the running end. After winding is completed, the nylon material is tucked into the loop made and pulled out. At the end of the repair, the result must be secured with varnish. Using this technology, anyone can repair a broken spinning rod.
Top repair
Ignoring test data, using equipment that is heavier than required, and improperly fishing for fish are the most common causes of breakage and fracture of the tip in the middle or at the tulip. Repairing the tip of a spinning rod can be an alternative to purchasing a new tip, while the repaired part will not lose its main characteristics, including sensitivity.
Breakage of the hollow tip
The hollow tip will require reinforcement of the structure from the inside.
| Materials | Tools |
| sewing needle or stiff wire | fine sandpaper |
| epoxy resin | needle file |
| nylon thread | |
| waterproof varnish |
Repair stages:
Using a needle file, it is necessary to process the ends of the broken parts
It is important that there is no longitudinal damage of more than 3 mm on the surface. Roll a small narrow piece of sandpaper into a tube and sand the insides of the hollow tip halves to improve adhesion.
A sewing needle that is suitable in size (diameter) and can be firmly fixed in a thicker part also needs to be sanded. Lubricate the needle with epoxy and insert it tightly into the thick part of the tip. We put the thinner part on top. It is important that the size of the needle (or thick wire) is at least 10 cm. After connecting the broken parts, check the evenness of their installation and, placing the fishing rod in a vertical position, leave it for a day until the resin has completely dried. After a day, apply waterproof varnish to the joint and around it and tightly wrap a nylon thread over the top. After drying, coat the repaired area with varnish again.
This method is suitable if the top is damaged between the winding rings - approximately in the center.
If the damage is very close to the ring, it must be removed before repair. Important! In some cases it is easier to replace the tip completely. Some brands, for example, Shimano, offer separate components for repairing fishing rods
Breakage of the monolithic tip
A monolithic top will require reinforcement of the structure from the outside.
| Materials | Tools |
| thin-walled metal tube | fine sandpaper |
| epoxy resin | needle file |
| nylon thread | |
| waterproof varnish |
Repair stages:
Sand the inside of a thin-walled metal tube (ideally a piece of antenna from an old radio). Finish the ends of the broken parts of the top with a file. Sand the ends that will be inserted into the tube, removing the layer of factory varnish. Place the tube on the thicker part and generously fill it with epoxy resin or glue based on it. Insert the second part from the other end and also treat with epoxy
Please note that the presence of cavities at the joint may lead to another failure in the same place. Try to completely fill the joint (inside the tube) with resin/glue
Level both parts and leave until the epoxy has completely dried/cured - about a day. Leave the rod in a vertical position. Cover the joint with waterproof varnish and wrap tightly with nylon thread. After this, varnish the winding again.
If a part close to the winding ring breaks, it will need to be removed first. To do this, heat the joint with a gas torch or a hair dryer - after the factory varnish has melted, you can easily remove the ring.
Passage rings for spinning rods: how to remove, change and attach them to the spinning rod with your own hands
Spinning rings are an important element that is equipped on almost all modern fishing rods. its function is to maintain the balance of the tackle and create a pass for the fishing line. These elements simplify the use of the fishing rod, prevent the line from sagging and tangling, and increase the casting distance of the tackle. But, despite all their advantages, they sometimes break. We invite fishing enthusiasts to get acquainted with the characteristics of this part, the features of installation and replacement of guide rings.
Characteristics of fishing rod rings
Good rings for spinning rods should be resistant to adverse environmental conditions (high humidity, dirt, mechanical factors), combine high strength and lightness.
These elements, regardless of their type and size, consist of 2 parts:
Most manufacturers create rings from resistant materials that resist corrosion well and have a low specific gravity.
If we talk about the characteristics of the ring frame, then these include the following parameters:
- length;
- diameter;
- height;
- number of legs.
The inserts that are included in all the rings on the spinning rod are made of metal-ceramics or ceramics.
A special feature of spinning fishing rods is the presence of the smallest ring at the top, called a “tulip”. It consists of a piece with a sharp end, which is connected to the frame by welding, and then fixed to the top of the fishing tackle.
Passage rings intended for spinning rods must meet the following requirements:
- well polished, smooth surface without chips or cracks;
- solid base with a good margin of safety;
- absence of roughness and unevenness on the surface.
If this is your first time choosing rings for your spinning rod, pay attention to their diameter, weight and size.
The success of fishing depends on the number of rings on the rod. These elements affect the uniform distribution of the load along the entire length of the gear. For example, with a smaller number of them, the casting range of a fishing line with bait increases, but the risk of breaking the form (“stick” on which the reel, fishing line and other fishing equipment is attached) increases.
Replacing the ring on a spinning rod
Breakage of the ring on a spinning rod is a common problem that experienced and novice fishermen have had to deal with. In such a situation, the question becomes relevant: how to replace the ring on a spinning rod and is it always necessary to resort to this procedure?
Replacement of the element is necessary in the following cases:
- if the tip of the spinning rod is broken;
- if, after prolonged use, cuts from the fishing line appear on the frames;
- the frame is deformed;
- The leg connecting the ring and the insert broke.
If a defect (chip, crack) appears on the pass element, you can replace it yourself by preparing the necessary tools. Follow these simple instructions to change the ring on your fishing rod yourself.
What tools and materials will be needed?
To replace the ring on a fishing rod with your own hands, prepare a set of tools and materials from the following list.
- New access element. You can find a new fishing rod ring at any fishing store. Such products are presented in a large assortment. We recommend giving preference to products with ceramic inserts.
- Synthetic fishing line and thread made of the same material (without lint).
- A large cardboard box that will serve as a stand for the spinning rod. In the side parts of the box, located parallel to each other, it is necessary to make triangular grooves for fishing gear.
- Parquet varnish with a polyurethane base, which covers the winding part of the structure.
- Hair dryer.
- Wire of small thickness.
- A lighter or candle with a burning wick.
- Magnifier.
- Epoxy adhesive.
- Sharp knife.
- Silicone tube.
- Masking tape or electrical tape.
- Bowl for mixing epoxy glue.
- A brush with which the adhesive composition is evenly distributed over the surface of the pass ring.
To make the turns of the sealing synthetic thread (or monofilament line) more dense, use a small and strong twig. Instead, you can take a popsicle stick or from a counting set.
Correct placement of rings
Attaching guide rings to a fishing rod has its own characteristics. According to the rules, these elements are placed along the line of the inner seam on the whip.
You can install them on the rod in the following ways:
- Traditional. You need to take several ring elements and use them to create a cone-shaped tunnel for the fishing line. The largest ring is located at the base, near the coil, and the element with the smallest diameter is at the top of the structure.
- New. The part at the base is moved closer to the center of the structure, reducing the length of the cone. Then the main part of the fishing line is passed through small rings.
The rings can be placed on the rod in 3 positions:
- Below or above in relation to the whip. This spinning rod assembly is ideal and has the greatest rigidity.
- From the side, at an angle of 90 °C (left or right). This placement indicates the installation of pass elements along the soft line of the whip. This may indicate poor quality assembly or that the tackle is designed for slow action.
- A chaotic arrangement of ring elements on a fishing rod is considered incorrect. With such an arrangement, the fisherman will not be able to cast the tackle over a long distance without making mistakes. The twisting forces at the time of landing the fish will deform the rod, and after 1-1.5 months of active fishing the tackle will break.
If you have the desire and free time, you can make a spinning ring with your own hands.
To do this, prepare:
- hard insert;
- electric drill;
- paste.
It is necessary to attach the insert using paste at the base of the frame. Using an electric drill, you should polish the surface to make the fixation as stable as possible. To complete the work, secure the ring to the whip.
Replacing the tulip and guide rings when repairing a fishing rod
When repairing fishing rods, it is very often necessary to replace guide rings, mostly “tulip” rings. The need for such repairs arises due to the fact that the braid saws through the hard insert of the ring, and chips of the insert and cracks can occur due to an impact during transportation of the rod or when the ring accidentally hits a stone or the side of the boat.
Replacing the guide rings of a fishing rod can be done independently, having at hand a simple set of tools and the necessary materials for repairs.
To detect a chip on the pass ring insert, you must carefully inspect all the rings and the “tulip” using a magnifying glass. A crack in the ring is a little more difficult to notice. Such a defect can be detected using a thin, sharp tip of a knife. To do this, you need to carefully run it along the inside of the insert of each ring: the blade of the knife will definitely catch on a crack or cut from the fishing line. After inspection and identification of defects, repairs can begin.
Repair (replacement) of guide rings and rod “tulip”
A defective tulip end ring can be removed without damaging the decorative winding. To replace the “tulip”, its tube must be carefully and slightly heated with a lighter or an electric soldering iron and removed from the form by pulling the straightened paper clip (see Fig. 1) inserted into the ring frame (not into the insert!).
To replace the wound guide rings, you have to cut them off with a sharp knife, removing the winding along with the varnish. In this case, the blade should move along the ring tab, and not along the blank (2), otherwise you can “cut” the carbon fiber and damage the blank.
The easiest way to glue a new “tulip” is with “superglue”. In this case, you need to align the passage hole of the new “tulip” strictly along the axis of the remaining rings on the knee.
To temporarily fix the ring with the tab, which will later be covered with winding, you should use a piece of paper adhesive tape (see Fig. 3), which is then removed. You need to wrap the pass rings to the form with a nylon thread, preferably matched to the brand color. Do not use cotton threads or silk acetate threads: the former are fragile and break when tensioned (besides, they darken under the varnish and produce lint that cannot be removed by varnishing), and the latter are dissolved by a topcoat fixative varnish that contains acetone.
Start winding the ring on the form, stepping back from the end of the foot by 3-5 mm. Having secured the end of the thread with two or three turns (4), rotate the form away from you with both hands, pulling the thread and laying turn to turn. To ensure even tension on the thread, run it between the pages of an old thick magazine, place it on a stool or chair and sit on top. Place the spool of thread in a clean glass jar on the floor - this way the thread will not get tangled and the spool will not “run away” when winding.
Not reaching the end of the winding 3-4 mm, place a piece of “braid” with a diameter of 0.15 mm and a length of 15-20 cm under the thread, folding it in half (5). Having finished the winding, cut the thread with a small margin, insert its end into the loop of the “braid” and, holding the winding with your fingers, pull the end of the thread outward (6), then carefully cut it (7). Cover the finished ring winding with a colorless fixative varnish (you can use nail polish (8)), smoothing the winding with your fingers, and after it dries (after 30-40 minutes) with epoxy glue (9). When the “epoxy” hardens, the new ring winding will be practically indistinguishable from the original one (10).
Windings are made in the same way on other parts of the form. For example, it is useful to place a winding in those areas where the varnish is damaged down to the carbon fiber, or to strengthen the outer surface of the joint of the elbows (joint tube).
Replacing telescopic rod rings
On telescopic fishing rods, not only the “tulip” suffers from accidental impacts, but also the guide ring (11) that follows it. If you cannot find exactly the same ring for replacement, you can replace it with a regular ring with a claw, you just need to choose the same one with the standard one in terms of the inner diameter of the insert and the height (distance from the center of the insert to the form).
The defective ring is removed in the same way as the “tulip” - using a lighter, its seat on the form is cleaned of glue residues with the blade of a sharp knife. The new access ring is installed exactly in the place of the old one; to fix it on the form, it is convenient to use Super-Moment glue. You only need to apply glue to one surface to be glued (12)! After winding and varnishing, the new ring will be fully functional (13), while the overall structure of the rod can be significantly improved by reducing the weight of the ring.
It is worth recalling that it is easier to prevent any breakdown than to waste time, effort, and sometimes money on eliminating its consequences.
Source
Source: https://catcher.fish/ekspertnyi-tsentr/lab/zamena-tyul-pana-i-propuskny-h-kolets-pri-remonte-udilishha/
Knee repair
It is possible to repair a spinning rod with a broken knee if the damaged area does not have long (over 3 cm) longitudinal damage to the surface.
- The edges of broken parts must be prepared for major repairs. If they are uneven, it is necessary to saw off all the irregularities using a diamond tool (this is what is recommended for processing carbon fiber).
- We process the smooth ends of both parts of the knee using a needle file, removing small roughnesses.
- We prepare a tube that will serve as a stiffener at the fastening point. This can be a piece of suitable size and diameter from any other old spinning rod or even a new cheap fishing rod. It should fit snugly inside both broken parts. The outside of the tube must be sanded with fine sandpaper and degreased.
- Lubricate the tube with epoxy resin/glue and put the elbow pieces on both sides. We align the parts as much as possible so that there are no kinks.
- The carbon fabric must be generously moistened with epoxy and wrapped around the joint. For thinner parts of a broken spinning rod, 3–4 turns will be enough, and for the thick part (closer to the handle) 6–8 turns. Before winding, the carbon fabric is carefully wrung out to remove excess glue.
- Scotch tape is tightly wound over the carbon fabric and a nylon thread is wound round to round. At this stage, compaction will force out excess epoxy, which can be immediately removed from the surface with a clean rag.
- The rod is left in a vertical position for a day for the glue to dry. It is better to place it in a warm place or near a radiator.
- After a day, the nylon thread and tape must be removed. The joint is sanded with sandpaper and coated with moisture-resistant varnish.
In order to achieve more aesthetics, before varnishing, you can paint the repaired area with moisture-resistant acrylic paint to match the rod.
Rod resuscitation: replacing rings on a spinning rod
Replacing rings on a spinning rod is a frequent necessity .
cause could be, for example, a broken tip of a spinning rod or cuts in the rings with a cord.
A broken leg or deformed frame are two more reasons to repair a fishing rod, which you can do yourself.
How to do this and what you need to have on hand, read this article.
Hide content
Parts and tools to get started
In order to change the ring on a spinning rod you will need:
- New rings . Fishing stores, including online, have a huge range of similar products. We advise you to choose Fuji (they have ceramic inserts, the brand is reliable).
- Threads (synthetic, lint-free), monofilament line.
- Parquet varnish with a polyurethane base or a special Flex Coat product for covering the winding (if you can find it).
- large cardboard box Triangular grooves are made in its parallel sidewalls.
- Candle or lighter.
- Hairdryer.
- Thin wire.
- Sharp knife.
- Magnifier.
- Epoxy adhesive.
- Popsicle stick
- Silicone tube.
- Electrical tape , you can also use masking tape.
Spinning reel repair
There are two main types of spinning rods:
- Telescopic. One that folds up like a spyglass or telescope. Its rod is evenly divided into knees, the structure is empty inside. Which allows it to fold (the thin part into a slightly thicker part).
- Plug (knee). The knees in the rod, between each other, are tightly secured with tubes. Such spinning rods are more convenient and reliable to use.
Types of spinning reels:
- Inertial coils of the “Nevskaya” type. This is the simplest type of reel. Often it does not even have a mechanism for braking the fishing line. The fisherman has to slow down the drum with the fishing line with his finger.
- Professional fishermen prefer to use a spinning reel. In such a reel, when casting bait, the spool (the place where the fishing line is wound) remains motionless. Only the fishing line unwinds. The main condition for using a spool is that it must be completely filled with fishing line.
- The newest development of specialists is inertial. It combines the operating mechanisms of an inertial and inertialess coil.
The first two can be repaired yourself. Multipliers are very complex, and their repair is best left to specialists. The only problem with this reel that you can fix yourself is tangling of the fishing line.
Types of spinning rod breakdowns
The spinning rod breaks for two reasons:
- Manufacturing defects. This reason for further damage can be detected upon purchase. The main thing is to choose carefully;
- Breakage occurs due to the fault of the fisherman. Due to inept handling of gear and improper transportation. More than 90% of breakdowns occur for this reason.
Let's look at what types of rod breakdowns can occur.
- The rod (knee) breaks in half.
- Breakage of the tulip, the very tip of the spinning rod. Often it breaks off at the base.
- Top breakage. Often breaks in the middle or beginning of the last section.
A gap has formed between the line laying roller and the lever. The line gets stuck there, and this causes a lot of inconvenience.
- Failure of the line guide return spring.
- The reel rotates slowly and jams.
- Bow transformation.
- Loss of gearbox cap.
Repairing fishing reels with your own hands is difficult, but it is possible, the main thing is to have everything you need at hand:
- lubricant;
- small screwdrivers (phillips and flathead);
- electrical tape;
- patch;
- needle file;
- sandpaper;
- small pliers;
- two-component glue;
- pin.
Main breakdowns and solutions:
- The line is caught between the line roller and the lever, where the gap forms. This unit is disassembled and the flaw on the roller head is filed using a file.
- If the spring of the line guide arch is broken, it is quite possible to replace it with a pin. It won't last long, but it will help out for the first time.
- When the coil rotates tightly and sticks, you need to add lubricant to the gearbox. To do this, slightly unscrew the bolts on the cover. The lid opens slightly and the lubricant is dropped into this gap.
- If the spinning rod is handled incorrectly (it falls), the bow may become deformed. If this happens, it is removed and leveled. This may have to be done more than once.
- If the gearbox cap is lost, the place where the cap was located is sealed with electrical tape or tape. If this is not done in time, sand getting into the coil will lead to serious damage that you cannot fix yourself.
For more complex breakdowns of spinning reels, it is better to contact specialists.
How to properly disassemble a coil
When disassembling a fishing reel, it is important that all parts are laid out in the correct sequence. This will be needed to assemble it correctly.
Disassembly sequence:
- The brake nut and spool are removed.
- The gear and washers located under the spool are removed.
- The handle unscrews.
- The clamping nut in the reel mechanism is unscrewed.
- The rotor is removed.
- The line laying arm is removed.
- The line laying mechanism is removed.
- The roller for passing the fishing line is disassembled.
- The reverse stop bolt is unscrewed.
- The switch is removed.
- The plug bolt is unscrewed.
- The plug is pulled out.
- The coil wall is removed.
The main mechanism follows. It consists of a runner and two gears. It should not be removed unless necessary. The coil is assembled in the same way, but in reverse order.