DIY fishing rod case
Almost every fishing enthusiast has a fishing rod case. This, although simple, is a convenient assistant for any fisherman. With its help, you can transport fishing rods to any distance without fear of damage. In addition, it is very convenient to place all the fishing rods in a separate case and transport or carry them this way, rather than dealing with each fishing rod separately. In addition to the fishing rod, you can also place other fishing accessories in the case, which is very practical.
How to sew a soft case: materials, pattern, tips
Sewing a soft cover for fishing rods begins with making a pattern. The figure shows the simplest option in the form of a rectangle.
For sewing you will need:
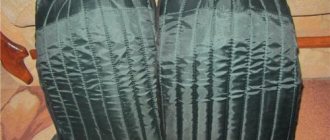
- 2 meters of waterproof fabric (Oxford, Taslan, Avisent, Tafetta). Its standard width is usually 140 cm, so to reduce material waste it is more profitable to sew two covers at once;
- 2 meters of dublerin (material with an adhesive layer). It comes in several types; for a cover it is better to choose one based on dense fabric, this will give the finished product additional strength and wear resistance;
- 3 meters of corsage or belt tape for one handle or 6 meters for two (it is better to take with a small margin);
- 3 “zippers”: two 40 cm each (they will go on pockets), one – 1.5 meters.
It is better to choose synthetic threads, marked “100% polyester”. They are characterized by high strength and elasticity.
There are two most common ways to make a fishing accessory.
Option 1
1. Lay out the fabric on the table or floor, use a marker or chalk to transfer the pattern onto the material, cut the fabric along the lines. You can do it easier by making marks directly on the fabric. To do this, fold the fabric in half, from the wrong side of the fold, measure 12 cm on one side, 23 cm on the other and connect the resulting segments. We will get a truncated cone 150 cm long with a wider lower part.
2. Place the dublerin on the main fabric with the adhesive side down, put on top an auxiliary material that is usually used for ironing (for example, gauze). Iron the surface evenly with a hot iron.
3. Sew ready-made pockets to the bottom (wide) part of the future cover. They are made from the remnants of the main fabric, with a zipper or Velcro fastener sewn along the edge.
4. Sew 2 handles from grosgrain ribbon across the entire length of the workpiece, along the bottom.
5.Attach straps to the bottom part to tie the rods together (you can buy ready-made ones or make them yourself by sewing Velcro to a strip of fabric).
6.In the direction from the narrow side of the cover to the wide side, sew a long zipper. Then sew the side edges of the cover.
Note! Sewing is done from the reverse side of the product. After completing the work, turn the cover right side out.
Option 2
The pattern is made in the form of a rectangle. To do this, 50 cm is cut from the base material reinforced with dublerin (the fabric will be used for pockets). After this you can start sewing the cover:
- cut the fabric lengthwise into 2 equal parts (you will get 2 pieces of 70*150 cm)
- sew pockets and handle;
- sew the zipper in the direction from bottom to top. Advice! You can take two zippers of 75 cm each and sew them towards each other.
Making a spinning rod tube from sewer pipes
First, you will need to carry out measuring work to ensure that the tube is suitable for storing a particular fishing rod. Initially, the spinning rod itself is measured. You need to carefully measure the longest leg of the rod and add four centimeters to this indicator. This must be done so that there is room for laying foam rubber in a tube, the thickness of which is at least 2 centimeters. After which a pipe is taken and the required length of the rod is marked on it. The rest of the part needs to be sawed off. But it should not be thrown away, since this part is necessary to create the lower base of the tube for spinning rods. This part is not suitable for the upper part of the cover, because the hacksaw cut is very difficult to make perfectly even.
Then a butt is placed in the pipe to check its movement along it. After this, it is bent until it becomes oval. This must be done so that the tube ends up with the required shape. After such manipulation, the butt will move around the future cover for spinning rods more freely.
After completing work on the base and main part of the tube, you need to start making the lid. The spinning tube at the bottom must be pierced with an awl. They will be needed to attach the foam rubber. Almost everyone has this material at home. It can be cut from old clothes, for example. You don't have to buy it separately in the store. Small pieces are cut out of the material, the dimensions matching the parameters of the future homemade case. Then insert the foam rubber into the workpiece and secure with threads.
Next, you need to give the product the desired look using covering. First, the material is sewn from the bottom, then a longitudinal seam is made. In the upper part of the height of the product you will need to leave a small margin of 10 centimeters
It is important to remember that the covering must be made in such a way that it fits snugly to the base and does not slide along it. It is recommended to use the strongest threads when stitching the material.
This way, a homemade tube will last much longer.
After the covering is made, it is necessary to stretch it onto the prepared base of the cover for spinning rods. When tensioning, you must ensure that the sheathing along the seam does not twist. As soon as the work is completed, it is necessary to trim off the excess material, leaving a small piece that could easily be folded inside the cover made by yourself. If desired, this material can not be fixed in any way.
To make a cover for a spinning fishing rod, you will need a piece of high-quality leather material. You will first need to cut out a small piece from it, the size of which would be slightly larger than the profile of the prepared product. You need a cut that will allow you to create a lid that does not fall into the tube.
Next, you will need to take more leather material and cut two more such blanks from it. All prepared elements need to be glued together. As a result, their total thickness should not be less than two centimeters. And for a better quality cover for the product, it is necessary to make even more layers of leather. After gluing all the parts on top, it is better to make a small loop to make it convenient to open the cover of the case. Then you need to trim the workpiece a little so that it fits tightly into the finished product for storing and carrying a spinning fishing rod. The main thing is to correctly calculate how much you need to cut. Otherwise, a lot of effort will be wasted. We will have to start working again on cutting out blanks to make a suitable lid.
Making a spinning tube is very simple
To do this, we purchase a plastic pipe of the required diameter, a coupling and a plug from a plumbing store. At home, we measure the required pipe size (1.5 meters will be enough) and cut off the excess with a hacksaw. We clean the edges with a file or emery. We fill one edge of the pipe with foam rubber (sometimes you can drop a few drops of glue on the foam rubber from different sides so that the foam rubber is fixed to the walls of the tube) and put a coupling on the pipe, after which you need to place a plug on it. If desired, you can do the same with the second end of the pipe, only excluding the foam rubber. That's practically all, and as they say, we can finish here.
But, for beauty, you can sew a cover for the tube from fabric, which on one side will be “blind” (where the plug and foam rubber are installed), and on the other it will be covered with Velcro. Then, you can make a Velcro cap that will be attached to the Velcro on the tube. If you go even further, you can sew a strap to the fabric, or you can attach it to a plastic pipe or coupling. There are many mounting options: from using clamps to using carabiners. A tube for fishing rods made from a sewer pipe is very easy to use and reliable; any of us can make it, since all the work carried out to assemble the tube does not require special knowledge or expensive tools.
Making a tube for winter fishing with your own hands
Winter tackle is small, unlike summer fishing rods. Therefore, the tube for them is made in the same ways as listed earlier, but in reduced sizes.
In addition, there is a simpler method for creating a tube for winter gear.
The work order is as follows:
- Take two bottles. Suitable for volumes of 1,2,3 liters. It all depends on the size of the fishing rods.
- We make marks with a marker in a circle at a suitable distance from the bottom of the bottle. Let's cut it off.
- Next, two cuts are made on one of the bottles from the edge along the bottle, 5 cm each. This is enough so that at the entrance one side opposite the other narrows, forming a tube for winter fishing rods.
The advantage of plastic material is its lightness, resistance to moisture, ease of use and transportation.
The low cost of raw materials allows you to create such fishing rod cases in unlimited quantities without any financial investments.
Assembling a tube at home is very easy and does not take much time or labor. Therefore, all a fisherman needs to know is the design of the future product, have the appropriate tools, materials and imagination.
Making a tube
The tube is a cylindrical product with a hard coating.
With its help, your fishing rod or spinning rod will not be damaged. Manufacturers make tubes from hard materials. The outer covering is made of plastic or other hard material, and the inner covering is made of foam. A fishing rod is placed inside the case, so the tube will protect the accessories in it as much as possible, and its service life is very long.
A do-it-yourself rod tube is made from any materials available at hand, for example, from sewer or water pipes. Every homeowner can find such plumbing accessories. Material is often left behind after a water line has been installed. To make a hard case you will need the following:
- epoxy adhesive;
- plastic cover - it is desirable that it matches the diameter of the pipe;
- a handle from any bag, for example, from an old briefcase;
- plastic pipe 170 cm long, but it all depends on the size of the spinning rod;
- metal hacksaw with fine teeth.
You will also need a container for stirring the glue, gloves and water.
First, the rod itself is measured. The resulting dimensions are recorded in a notepad. A plastic pipe is being prepared. The dimensions from the fishing rod are transferred to the workpiece. Now the master must begin the main work:
- The resin and hardener are mixed in a saucepan with a ratio of 10 to 1. If you add more hardener than required, the drying process of the glue will speed up, but the quality of the parts being glued will decrease.
- The end of the plastic pipe is sanded with sandpaper, and the plastic dust after cutting the material is washed off with water. The surface must be smooth and free of burrs. The plastic cover is cleaned from various contaminants.
- The end side of the pipe is coated with mixed glue. The lid is placed tightly on the cut and pressed with maximum force. The glue will reach its greatest strength only after drying for a day. The prepared mixture should be used as quickly as possible, otherwise it will become unusable after 90 minutes. The bottom of the homemade case is ready.
- The next step is to cut off the handle from the old briefcase and attach it to the case with glue. It is advisable to use a strap on which the length is adjustable. It wouldn’t hurt to make two handles and carry the tube behind your back, putting the straps on your shoulders.
- If you wish, you can spend a little money and purchase a special plumbing plug for pipes. It is glued in the same way as the lid. All that remains is to make a removable cover from the plug. To do this, a hole is made in the center of the part, a small bolt is inserted there and tightened with nuts. Now a thin elastic band with a thickness of 2 mm is made; its length should be enough to cover the entire inner circumference of the pipe. This material adheres firmly to rounded walls. The plug is purchased so that its diameter is slightly smaller than the internal cross-section of the pipe. All that remains is to check the work by inserting the plug into the pipe, but with force so that it does not fall out.
All that remains is to decorate the product in your own way or use stickers with images of fish.
Homemade tube from scrap materials
There are many descriptions and videos on the Internet on how to make a spinning rod tube yourself. Summarizing these materials, we can focus on two options. The simplest and most popular is to use a polyethylene pipe.
From PVC pipe
Finding a plastic pipe that is suitable in size will not be difficult or particularly expensive. This material is sold at very reasonable prices. At construction sites, a two-meter section can generally be purchased for next to nothing.
The purchased pipe is cut to the length of the disassembled spinning rod and to a diameter that allows free placement of the spinning rod in it, taking into account the foam rubber folded into the pipe (photo 1.1).
Next, a plug made from improvised material is attached to the bottom of the future tube using glue (photo 1.2). This could be a plate made of thick plastic or a lid for a jar.
To make it easier to carry, the tube should be covered with some material.
In this sample, the lining is made from old jeans (photo 1.3). Making a zipper is a little tricky. It can be replaced with a regular button or push-button. The finished tube with a handle strap looks like in photo 1.4.
Photo 1.
Made from plastic profile
You can also make a spinning tube with your own hands from profile plastic used for laying the cable. This type of material is convenient because it can be easily separated, and its inside is very easy to cover with soft insulation for better preservation of the spinning rod (photo 2.1). The tube size parameters, as in the first case, are determined by the size of the fishing rod. The bottom plug is made of hard foam, trimmed with foam rubber for shock absorption and tightly glued (photo 2.2).
After this, first the entire body of the tube is wrapped with wide tape to give rigidity, and then a cover made of dense material is sewn onto it.
The top cover, also reinforced with foam rubber, is sewn with one edge to the lining material of the tube, forming a closed entrance, and is supplemented with belt fasteners (photo 2.3)
At the final stage, fittings are attached to the side plane of the tube, to which the strap is attached (photo 2.4). And you can put the tackle in the finished tube (photo 2.5)
Photo 2.
From foam plastic
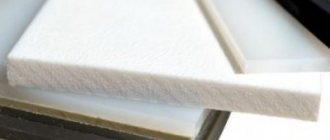
Another homemade tube for spinning can be made from polystyrene foam. To be more precise, it should be called a case. It is all the more interesting because it is not mentioned either on fishing forums or on websites.
The point is simple. Two equal-sized strips are sawn off from a foam board. The dimensions of the strips are determined visually - the spinning rod handle with the attached reel is placed on the plane of the foam plate, and its outline is drawn with a marker. A knee with an apex is placed next to it and also traced along the contour. They should be stacked compactly so as not to increase the size of the future case.
Having decided on the dimensions of the first strip, it is sawed off, applied to the remaining slab, and a second one is prepared, identical to the first. Next, the contours outlined on the first strip are removed through tracing paper and transferred to the second strip in a mirror image.
The next stage presents some difficulties, however, quite surmountable. You need to use a semicircular chisel to make a recess in both strips of the volumetric parts of the spinning rod. This operation can also be performed with a sharp knife. Foam plastic is easy to process. After this, all roughness of the material should be pounded out with an ordinary kitchen rolling pin and treated with emery cloth.
When the spinning rod sits comfortably in the bed prepared for it, the strips on top are reinforced with hard material.
To do this, you can use thin plywood or some kind of plastic. This will make the case somewhat heavier, but will make it reliable in terms of bending and breaking forces.
All that remains is to cover the case with dense material so that it can open horizontally, providing open access to the spinning rod with a reel ready for action. And don't forget about the fasteners. They can also be made from the straps of an old backpack.
These are the ingenious ways that cunning Russian fishermen acquire useful and very necessary things. Not all, of course. Some people buy it. They can be understood and forgiven. They don’t know that the best thing is the one made with their own hands.
We also offer you an alternative version of the tube in this video.
Materials and tools
In the process of making a case or tube for fishing rods, a number of materials and tools may be needed. To create soft packaging you should stock up on:
- 2 m of dublerin with an adhesive base;
- 2 m of waterproof fabric (Bologna);
- 1.5 meter zipper;
- 1-3 short zippers (20-40 cm);
- 2.0-2.5 m with corsage ribbon;
- strong thread;
- sharp knife and scissors;
- needle and sewing machine.
It’s easier to make a hard tube for men; just find the following materials and tools:
- 1.5 m of plumbing pipe with a diameter of 100 mm;
- sheet plastic or plastic 4-5 mm thick;
- foam rubber 10-15 mm thick;
- sharp knife;
- waterproof glue;
- belt with carabiners;
- industrial dryer;
- drill with drills.
Purpose of covers and tubes
Modern rod blanks are distinguished by the presence of an elastic tip, which, despite the fact that it bends, is subject to mechanical hardening that is not aimed at bending.
Also, if you transport fishing rods in bulk, they will certainly lose their attractive appearance. The presence of scratches and abrasions really reduces the durability of products, and interest in them is lost. In most cases, in such cases you constantly want to buy a new fishing rod. Unfortunately, desires do not always coincide with opportunities.
Blueprints
Thus, making a spinning rod tube with your own hands is very simple. The design is a piece of plastic pipe of the required length with two plugs at the ends. In this case, different options are possible:
- tube for one or more spinning rods;
- with or without handle;
- with a lid made of a plastic plug, a leather lid or a lid made of any other suitable material.
There is no point in making drawings of such designs - just look at a few photographs of similar homemade products and make your own variation on the theme. Without unnecessary haste, a simple and reliable tube can be made within an hour.
Sewage pipes and other suitable materials cannot be called very cheap, but such a homemade design will cost two to three times less than a purchased tube. In the tube, the rod will be reliably protected from damage during storage or during transportation. Modern high-quality gear is quite fragile, so such a reliable hard case for a spinning rod is a must-have item for an avid fisherman.
DIY spinning tube: a simple solution to a big problem
Professional fishermen have a whole arsenal of fishing equipment. We are talking not only about gear, but also about all kinds of accessories for storing and transporting precious devices. Firstly, they promote order and quick access to certain items, and secondly, they ensure the safety of equipment.
This is of no small importance given the high cost of fishing products. Anyone who has ever experienced unexpected damage to gear will make every effort to prevent this from happening in the future. That’s why some people buy a case for a fishing rod, while others make a spinning rod tube with their own hands.
The main thing is to achieve the goal and protect your favorite gear.
Preparing fishing rods for storage
To be prepared for the next fishing season, you need to properly complete the current one, namely, put in order and put away all the parts of the fishing equipment. These procedures will allow you to maintain the quality of the products, as well as be in full uniform for the long-awaited moment of the next fishing. Before placing the gear in a case for long-term storage, you should prepare it for this:
- All parts must be dried and cleaned. Depending on the degree of contamination, use warm water, detergent or a dry brush. Even slight dust or grains of sand can play a cruel joke on the rod and joints during the first fishing.
- The fishing line must not be stored under tension. It needs to be freed from hooks, weights, floats, removed from the reel, dried, and then loosely wound on a pre-prepared foam reel or reel.
- Make a thorough visual inspection of the spinning rods. If defects are detected, they must be corrected immediately.
Advice! Noticed cracks and chips on the fishing rod must be repaired before the gear is sent to wait for the next season. For this purpose, coatings with varnish and glue are used.
Only after carrying out these simple procedures do you need to remove the spinning rods to a certain place.
Where to store spinning rods
It’s great when it is possible to allocate a separate room for storing fishing equipment. Do not forget that the environment should be cool and dry. Therefore, not every garage or balcony will provide favorable conditions.
It is ideal to allocate a place for fishing rods in the house. A pantry or closet works well. Many people believe that fishing rods should be stored vertically on special racks. Others refute this opinion, claiming that this causes fishing rods to become deformed.
Attention! Deformation of fishing rods only affects inexpensive products. High-quality, especially professional, gear looks forward to the next season in a standing position.
An alternative option for placing gear is tubes and covers for spinning rods. They have additional benefits:
- Compactly accommodates all gear;
- closed shape prevents dust contamination;
- do not require a special place, they can be placed on a shelf, under the bed, in the pantry;
- provide protection during transportation;
- you don’t need to collect fishing rods, look in different places, they are packed together - take the case and go.
The modern market offers a large selection of such products. If you don’t want to incur additional costs, you can make a rod tube with your own hands.
Types of cases for spinning rods
Transporting gear without proper protection is undesirable; it is too vulnerable. Moreover, this applies to both movement by car and public transport. For the safe delivery of fishing equipment to the reservoir and back, a variety of covers are used. These products can be divided into 3 types:
- Soft. These include fabric covers made from waterproof material. They protect fishing rods from various contaminants and high humidity, but are ineffective against mechanical damage. This is the most inexpensive placement option for spinning rods.
- Semi-rigid. Made from high-strength fabrics such as leather and tarpaulin. There are rubberized models that provide enhanced waterproofing. They protect equipment well from any damage, but they are heavy and expensive.
- Tough. This segment provides better protection to fishing gear. This type of case is represented by tubes and trunks, which have a durable plastic body that is resistant to sharp impacts and prolonged pressure. The tubes are absolutely waterproof, often equipped with tubes inside that serve as additional protection.
Almost all models are equipped with a zipper, handles, shoulder straps, as well as pockets in which you can store removable parts and consumables. Many of them are designed for several fishing rods, which is very convenient. There are cases in which a spinning rod with a reel can be freely placed.
Tips for making your own tackle case
The first thing that is necessary is a clear definition of the desired type of cover. Here fishermen often start from:
- purpose of the case – storage, transportation, or all together;
- the way they get to the reservoir (on foot, by bicycle, by car, by public transport);
- type of gear placed.
Having answered these questions, it becomes clear what dimensions are optimal and acceptable - weight, size, shape. It is believed that it is worth making cases designed specifically for carp, spinning, plug and other equipment. However, most often they are universal. Thus, a tube for feeder gear is quite suitable for storing spinning gear.
General rules when developing a case model
You should not save when choosing a material; it should be:
- durable;
- moisture resistant;
- wear-resistant.
Making a case yourself makes it possible to make it to the required size, usually the length is at least a meter. And in the case of a long rod, a homemade spinning tube can reach more than 2 meters. Its diameter should be such that your equipment fits. This is especially necessary for owners of models with large access rings on high legs to take into account.
DIY fishing rod and reel case
Every fisherman should have a case for a fishing rod and reel, since the reel is most often exposed to various dangers. For example, dust or moisture may get into it, which will worsen the operation of this device, and what’s even worse - it may fall or hit something, and then it will definitely need to be replaced with another one.
And as you know, the cost of some reels can reach over $400, so experienced fishermen recommend using protective covers not only for fishing rods, but also for reels.
Necessary materials:
- zipper at least 20 cm long;
- strong threads;
- waterproof fabric material;
- a hard plastic shell with a lid (any strong box that can easily accommodate the reel is suitable for this);
- glue.
Manufacturing:
- First you need to fit the hard shell under the coil, because the device must be completely protected from external factors. If the height of the shell is too large and the coil sinks very deeply, then you can trim the edges of the box a little. In addition, the casing lid must close tightly.
- After this, you need to cover the entire surface of the protective box inside and out with thick fabric.
- Next you need to sew a zipper to the top side of the box and the lid so that you can easily open and close the case by opening the zipper.
- Using glue or thread, attach the pre-sheathed handle to one side of the spool case.
Tube design
You can attach a handle to the case to make it comfortable to carry; you can also cover it with fabric or decorate it with rivets. Get creative and design your case to suit your preferences and it will attract the attention of other anglers.
How to cover a tube with fabric?
For these purposes, it is better to choose fabrics that are not too dense in structure, so it will be much easier to work with. The stretchy and elastic fabric will fit perfectly on the hard cover, and if necessary, it can be removed and washed.
It is necessary to sew a cover from an elastic material that will be a couple of millimeters smaller than the tube. To do this, you should first prepare a pattern and mark it with chalk. The lower part of the cover is sewn with strong threads in a straight line, only then a side seam is made, which runs perpendicular to the bottom.
You can also equip the case with additional pockets in which you can store fishing lures. The pockets are sewn on top of the cover itself or Velcro is used, with which they will be attached to the tube itself.
How to make a handle?
If you want to equip your tube with a handle, then you need to attach it to the base of the pipe with bolts, this will be more reliable. The handle itself can be purchased at any bag store or tailor shop. If you equip the tube with a carrying handle, transportation of gear will be more convenient, especially since attaching the handle to the case is easy.
You need to drill several holes in the pipe for the bolts and use them to secure the handle itself, the length of which is selected individually.


