The success of fishing directly depends on the ability to tie line to line. If a fisherman does not have specific skills in this topic, then his favorite hobby can turn into a useless pastime of an annoying nature.
The difficulty of attaching the thread is that it is quite slippery. In the instructions below, you can theoretically familiarize yourself with the known methods of reliably connecting cords together.
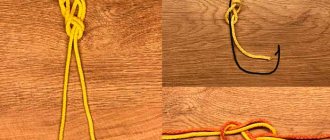
"Bloody" fishing knot
The “bloody” knot was first invented in the era of the navigator Columbus. It got its name from the method of punishing guilty sailors. A knob was tied with such a knot, which left bloody marks on the body during lashing. The bloody knot is also sometimes called the “snake knot.”
Characteristics
- Line: monofilament, braided. The diameters of the lines should not differ by more than two times.
- Specific knot strength at break (load capacity): 70-75% of the strength of the fishing line itself.
- Application: tying fishing line on a spinning rod (the knot passes well through the rings of the rod), tying leashes to the bottom fishing rod.
- Features of the knot: small size and neat elongated shape.
Learning to knit
By following our step-by-step instructions, you will easily master the technique of knitting this knot.
- Place two fishing lines parallel to each other.
- Wrap the end of the first line around the second line. The number of turns depends on the diameter of the fishing thread:
- fishing line up to 0.15 mm – 6 turns;
- up to 0.27 mm – 5;
- up to 0.3 mm or more – 4;
- for braided fishing line – 3.
- The end of the wrapping line must be folded back and threaded from below between two threads until the turns begin.
- With the second end, perform the operations described in points 1 and 2. The only difference is that the end must be threaded from above (towards the first).
- Make sure that the ends of the two lines point in different directions.
- Wet the lines with water and pull. You need to pull on the long ends of the fishing line.
- Trim off the excess length of the ends. The node is ready.
It is not allowed to tighten the “bloody” knot by the short ends of the fishing line!
Improved fishing knot
An improved fishing knot is an improved version of a regular fishing knot. This knot is tied in two stages and is a simple and convenient way to tie two fishing lines.
The improved fishing knot is not suitable for tying monofilament; it is used to tie two braids together.
Characteristics
- Line type: braided. The difference in line diameters should not be more than twice.
- Specific knot strength at break (load capacity): 65-70% of the strength of the fishing line itself.
- Application: tying two ends of a braided fishing line.
- Features of the knot: small size and neat round shape.
Learning to knit
A detailed description of the technique of tying a knot will help you quickly master this knot.
- Place two lines parallel to each other.
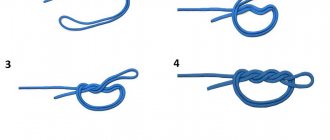
- Wrap one line around another, forming a loop.
- Take the resulting loop in one hand, take the end of the fishing line in the other and pass it through the loop, pulling it behind the other fishing line. Do this action twice.
- Tighten the resulting knot, after wetting the fishing line.
- Take the second fishing line and do all the manipulations described in paragraphs 1-4 with it.
- Take the main ends of the fishing lines in your hands and carefully pull the knots together. The node is ready.
The strongest knots for tying braided line with monofilament line
Durable to use, this knot, called “Shock Leader knot” , is small in size and very conveniently fits through all the rings on the fishing rod.
Method of tying such a knot:
- The free end of the monofilament is tied into a knot without tightening;
- We stretch 20 centimeters of braid through the loose knot;
- The knot on the monofilament tightens;
- Take the edge of the braid left 20 cm apart and wrap it around the monofilament, making about 10 turns;
- The braid remaining after curling the turns returns to the first knot, and we thread it between the knot and the turn;
- The end of the braided loess is passed into the loop, which was formed by wetting it in advance, and a knot is tied;
- You need to pull the edges of the braid and monofilament to tighten the knot;
- Cut off unnecessary ends.
“Blood” is one of the most practical knots in terms of strength. This knot can be used to tie loess of various diameters. Try it, maybe this method will be the most suitable option for you.
Method of tying such a knot:
- We fold the ends of two fishing lines towards each other; It turns out two tips lying opposite each other;
- We wrap one end around the other , 15 times;
- Then we return the tip of the fishing line to the beginning, pull it between the two fishing lines, thus making a loop;
- We do the same with the second tip of the fishing line, return it to the beginning, and pull it between the two loess;
- Pull up gradually, at each end separately;
- We cut off the ends of the fishing line.
Fishing knot "Centaurus"
The Centaurus fishing knot is used to tie two fishing lines of the same or different diameters and types.
The Centaurus knot is universal and allows you to tie two fishing lines together or tie a fishing line to a braided line.
Characteristics
- Line type: any (monofilament, braided, fluorcarbon, etc.). The diameter of the lines may vary several times.
- Specific knot strength at break (load capacity): 90-95% of the strength of the fishing line itself.
- Application: tying any fishing gear.
- Knot type: compact size and neat straight shape.
Learning to knit
To acquire practical knot tying skills, follow these steps:
- Place the lines to be tied in parallel.
- Wrap the end of one fishing line around the second 5-6 times.
- Take the remaining end of the fishing line to the beginning of the turns and insert it inside these turns.
- Tighten the wrapping line by pulling the short and long ends.
- Perform all the manipulations from points 2-4 with the second line.
- Pull the long ends of the two lines, pulling the knots towards each other.
- Trim the excess length of the ends of the fishing lines. The node is ready.
Types of forest knots
To connect lines with different diameters, different knots are used.
When connecting elements with a difference in diameter of no more than thirty percent, the following nodes are used:
Double sliding
It belongs to the category of sliding and self-tightening, as a result of which it cannot come undone, but only tear. Mainly used to connect elements of the same diameter.
Step-by-step instructions:
- Place the two ends of the tackle element that need to be connected parallel to each other.
- Make loops from the bottom element.
- Insert the end of the top line into the loop.
- Place the top and bottom pieces together.
- Lower the end of the bottom element down and bring it into the resulting loop.
- Lower the end of the top line and bring it into the resulting loop.
- Tighten the two knots and move the knots as close to each other as possible by tensioning the ends of the connected elements.
In the process of connecting two elements, it is allowed to make up to six winding revolutions inside the loop.
Serpentine
In some literature it is called “blood knots”. This design can be used to connect threads of different cross-sectional diameters. It retains up to ninety percent of the load-carrying capacity of the connected element compared to a solid product.
Step-by-step instructions:
- Place the two ends of the fishing line overlapping in parallel, so that its ends point in the direction of each other.
- When making a snake knot using the internal spiral method, you need to wrap one end of the thread several times (from three to six) around itself and the other end, then pass the free end between the resulting loops and pull it, forming a spiral. Repeat the entire process for the second end of the element to be connected, after which it is necessary to tighten the knot by pulling both ends.
- When connecting in this way using the external spiral method, it is necessary to wrap one end of the element around the other, then bend one of them and pass between them before the first turn of the spiral. A similar procedure must be carried out with the second end of the structural element, after which you need to pull the ends, thereby tightening the knot.
A correctly executed connection should be located clearly in the center. Even though the line twist on both sides is in the same direction relative to the center, they can appear in a mirror image style.
"Loop to Loop"
Ideal for joining threads of the same diameter. A slight discrepancy in this value is allowed. At the same time, the main fishing line is taken with miniature parameters compared to the leash, due to the fact that it is the main component that is folded in half.
Step-by-step instructions:
- In the main line, step back thirty centimeters from the edge and fold the segment in half.
- Tie an ordinary simple knot from a double fishing line, pass the doubled fishing line through the loop twice and pull it off.
- On the auxiliary line on the leash, you need to do a similar procedure.
- The loop on the leash must be placed over the loop on the main line and the end of the leash must be passed through the main loop.
- Pull the main line and leash in different directions.
If the knot is performed correctly, before forming a loop, the double line should be folded into a figure eight.
Triple fisherman's knot
It is used to connect lines of either the same diameter or with a difference in this value of up to 0.05 millimeters. Its use is not recommended in places where it is planned to pass through rod rings.
Step-by-step instructions:
- The two components that need to be connected are placed in parallel so that the ends coincide.
- Tie a simple knot twenty centimeters from the edge. In this case, the two components should be parallel and should not bend.
- Pass the fishing line through the knot ring twice on one side and the other.
- Tighten the knot so that the loop takes the form of a figure eight.
- Trim the protruding ends to a length of one millimeter.
Albright
It is a universal knot for connecting lines of any diameter. It is successfully used in various types of fishing, including carp fishing, spinning fishing, as well as feeder and float fishing. The most effective way is to combine a thin solid line with braided line.
Step-by-step instructions for executing a node:
- Folding a component element with a larger diameter in half so that the distance from the edge when folded corresponds to ten centimeters.
- Thread the braided element through the loop and wrap it around the doubled first element six times. The more turns, the stronger the knot is considered.
- Returning the thin line to the loop and making three turns inside it.
- Wetting and tightening the resulting structure.
- Trimming protruding ends to one millimeter in length.
Surgical knot
The "surgeon's knot" can be easily mastered by beginning anglers.
A surgical knot is used to tie two fishing lines of the same diameter.
Characteristics
- Line type: any. Line diameters may vary slightly.
- Specific knot strength at break (load capacity): 65-70% of the strength of the fishing line itself.
- Purpose: for tying two ends of a fishing line of the same type or different types of fishing line.
- Application: connecting fishing line on bottom fishing rods of different types.
- Knot type: large size and rough shape.
Learning to knit
- Place two fishing lines parallel.
- Make one loop out of them.
- Pull the long ends of the lines into a loop and make a double half-knot.
- Pass the short ends through the loop and make a half knot.
- Moisten the resulting knot and gently pull all four ends of the fishing line. The node is ready.
Method of tying various fishing elements to a fishing line
Attaching to a leash
The leash plays a protective role as a fishing line at the place where the bait is attached , from uneven bottoms in the form of stones and sharp fish teeth. Incorrect connection of elements can lead to fish disappearing at the most crucial moment.
Swivel connection
A swivel is a special device - a fastening necessary to avoid twisting of the components of the gear. This connection method helps to significantly increase the use of fishing gear, reducing the risk of premature wear and failure.
Connection with front sight
The fly plays the role of bait in fishing and it is important to secure it in such a way that the fastening is invisible and reliable. To tie a fly to a leash, a gripping knot is usually used.
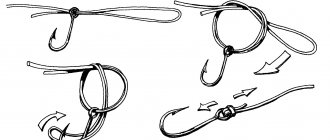
Technology for attaching the leash to the front sight with a gripping unit:
- Pass the line through the ring of the lure's carabiner.
- Make four turns with the carabiner ring.
- Place the end of the fishing line between the turns with the carabiner ring.
- Pull the connection elements in different directions.
Connection with a spinner
“Unconditional”
A spinner is an artificial metal bait for fish. A knotless connection is used to secure it.
The technology of attaching a spinner using a knotless connection consists of connecting a special element - a knotless connection. Here it is important to observe the proportions of the ratio of fastening elements and the knotless number.
We recently published a new collection of knots: sea knots for fishing.
Blitz tips
- There is no universal node. Each node is suitable for a specific purpose.
- When choosing a knot, consider the type and diameter of the fishing line.
- When tightening the knot, moisten the line to prevent it from breaking.
- Tighten the knots slowly and carefully to prevent them from unraveling.
All of the above knots are well suited for tying two lines or tying braid and line for tying hooks, feeders, swivels and other fishing gear. Having studied the purpose and mastered the technique of knitting these knots, if situations arise with a line break, you can easily continue fishing.
