Homemade Onigiri recipe
Before you begin, you need to know how to prepare onigiri rice. The whole result depends on it. Therefore, it is better for novice cooks to cook onigiri without filling for the first time in order to understand the principle of cooking. The recipe is for 6 rice balls.
Ingredients:
- rice – 1 mug;
- water – 2 mugs;
- Nori seaweed - 6 strips.
Preparation steps:
- Wash the rice grains. This process is lengthy, since the water must be changed until it becomes completely transparent. Drain the liquid and leave the rice grains to swell for half an hour.
- Pour into a saucepan and add water. Bring to a boil over high heat without covering the lid.
- Close the lid and switch to low heat.
- Cook for a quarter of an hour. Do not stir the product and do not open the lid, otherwise the result will be spoiled.
- Remove from the stove. Cover with a blanket and leave for a quarter of an hour.
- Transfer to a deep container and stir with a wooden spatula. Cool.
- Wet your hands in water. Form into triangles and wrap in Nori.
According to the rules, salt is never added to onigiri.
Classic recipe
According to the classic recipe, the dish is prepared from sushi rice, nori leaves and salmon.
Composition of ingredients
List of required components:
- 100 g rice;
- 100 g salmon;
- 1 tsp. vinegar;
- 4 sheets of nori;
- 1/4 tsp. salt.
Step-by-step cooking process
Onigiri, the recipe for preparing it at home is quite simple, is prepared according to the following scheme:
- First you need to take a deep container, pour rice into it and rinse it 10 times, draining the water.
- After that, you need to transfer it to a large saucepan with a thick bottom, pour in 1 tbsp. water and wait until the water boils.
- Then you need to set the heat to low, close the pan with a lid and cook the rice for 10-15 minutes. After the rice has absorbed all the liquid, turn off the heat, cover the pan with a towel, close the lid and let the rice sit for 10-15 minutes.
- Next, you need to cut the salmon into small cubes and divide the sheets into 4 parts. Then you need to pour table vinegar into the rice and mix well.
- Now you can form the rice into balls. To do this, you need to wet your hands with water, take a handful of rice, press it down a little and squeeze your palm so that a depression appears in the center of the rice cake. You need to put a small amount of salmon in it and wrap the flatbread into a ball. Prepare the rest of the rice balls in the same way.
- Then you need to take a sheet of nori, put the smooth side to the top and wrap it in a rice ball. The same needs to be done with the rest of the blanks.
What can I add?
Instead of salmon, you can use tuna, chicken, salmon or pollock caviar, pickled plums, pickled cucumbers, conger eel, sausages, sausages, seaweed and shrimp as fillings. Also added to onigiri are mayonnaise, sesame seeds, butter cream, ginger, tomatoes, broccoli, white radish, carrots, mushrooms, onions, sake, soy sauce, green onions, bell peppers and garlic. Nori leaves are replaced with lettuce leaves or pancake omelet.
How to serve a dish
The dish is served on the table in plates made of white porcelain or on wooden boards. To decorate the dish, crushed seaweed, sesame seeds, fruits and vegetables are used. It is consumed with green tea or sake.
Onigiri with tuna
The recipe for onigiri with tuna is especially tender and juicy inside.
Ingredients:
- rice – 250 g;
- broccoli – 40 g;
- canned tuna – 140 g;
- mayonnaise – 30 ml;
- seaweed.
How to cook:
- Wash and cook rice grains according to package instructions. Cool.
- Chop the tuna. Add mayonnaise and chopped broccoli. Mix.
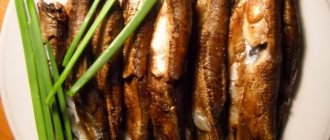
- Form the rice into a ball. Use your thumb to make an indentation in the center. Place the filling. Carefully cover the hole with rice.
- Wrap in a strip of seaweed.
Onigiri Seasonings – Japanese and International Flavors
Although simply dipping the onigiri in soy sauce makes the combination taste great, you can also stuff the small rice balls as you wish. Typical Japanese filling: fresh or dried fish. So, you can, for example, take strips of smoked salmon or tuna pate.
Fruits or vegetables, such as crispy fresh bell peppers, diced avocado, shredded broccoli, or striped cucumbers, are delicious additions. To stuff onigiri, just make a small depression in each portion of rice, place the filling there, and cover it with rice.
Chicken recipe
This option is ideal for those who do not like fish.
Ingredients:
- boiled rice – 400 g;
- tomato – 120 g;
- green salad;
- oil;
- chicken fillet – 180 g;
- pickled ginger – 20 g;
- daikon – 140 g.
How to cook:
- Cut the fillet into small cubes and fry in any oil until tender.
- Chop the daikon, ginger and tomato as finely as possible. Combine all prepared products.
- Roll the rice into tight balls. Make a depression in the center. Place the prepared mixture. Cover the filling with rice.
- Place on lettuce leaves. Serve with tomato wedges.
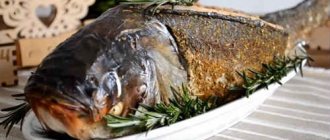
Salmon in maple syrup
This filling is also very easy to prepare. Yes, maple is not a cheap pleasure, but it’s worth it. Salmon marinated in soy sauce and maple syrup is something incredible. Delicate, sweet, rich taste that you will definitely love.
Place the steak in a bag, mix the soy sauce and syrup and pour the mixture over the salmon. Seal the bag and marinate for an hour.
Lightly oil the pan, place the steak skin side down and bake under the broiler for 6-8 minutes depending on the thickness of the steak. After this, turn off the oven and let the fish cook for 5 minutes.
It turned out so beautiful, and the taste is simply incredible. Now this golden-brown piece of salmon can be used as a filling, or you can sprinkle it with sea salt and eat it straight with rice or vegetables. Perfect lunch!
Let the steak cool slightly and shred it with a fork, removing any bones along the way.
If the salmon is very fatty, pat it dry with paper towels. Otherwise, when we make onigiri, the rice will become saturated with fat and fall apart.
Stuffing with mushrooms
Fans of mushroom dishes will appreciate the aromatic filling. For cooking, you can use champignons or any forest mushrooms, previously boiled. Pickled and canned are also suitable.
Ingredients:
- boiled rice – 450 g;
- mushrooms – 250 g;
- mayonnaise – 30 ml;
- onion – 40 g;
- seaweed.
How to cook:
- Fry mushrooms in oil until golden brown. Add chopped onion. Pour in mayonnaise. Mix. Simmer until soft.
- Form rice balls. Place the cooled filling in the center.
- Cut the seaweed into strips and wrap the workpiece. Serve with soy sauce.
How to cook delicious onigiri - tips for beginners
- To keep your onigiri out of the refrigerator for a while, don't use perishable fillings;
- Making rice balls at home can be easier and more convenient with the help of cling film, in which you need to put the finished flatbread with filling, and then press it, tightening the film;
- Japanese rice cakes with oriental seasonings and spices are very tasty;
- When packing food for a picnic or in a bento for breakfast, wrap it only in cling film; if you want to wrap it with nori, do it just before eating;
- Try spicing up the dish with toasted sesame seeds, gomashio (a mixture of sesame seeds and salt), furikake (ground dried fish with spices);
- If not you, then your children will definitely love this sweet dessert recipe for rice balls with dried fruits, nuts and other yummy things;
- Be sure to serve quality green tea with sweet rice cakes.
Serve onigiri on plain porcelain plates or on wooden boards - in the Japanese traditional minimalist style, wash it down with aromatic tea, and you will feel the sophisticated atmosphere of the land of the rising sun, in which people are able to feel the harmony and beauty of the world even amid the hustle and bustle, in the midst of everyday work.
Cooking in an omelet
An unconventional cooking option that's ideal when you've run out of seaweed.
Ingredients:
- cod caviar – 100 g;
- eggs – 3 pcs.;
- vegetable oil;
- water – 300 ml;
- flour – 20 g;
- pepper;
- salt;
- rice – 200 g.
How to cook:
- Pour flour into eggs. Beat. Sprinkle with salt and pepper. Mix.
- Heat the pan. Pour in the oil. Fry the omelette, pouring the batter in small portions. The pancakes should turn out thin. Cool and cut into strips.
- Boil washed rice grains in water. Mix with caviar. Form into balls.
- Wrap each piece in an omelette.
To prevent rice from sticking to your hands, your palms must be constantly moistened with water.
The right products are half the success
The main thing in making onigiri is to choose the right ingredients. Since the main component of this dish is rice, it is important not to miss in its choice. It should stick well, but not be too dry or too wet. It is best to use a round, unpolished one as the main component. The best option is special rice for Japanese dishes, which is sold in supermarkets.
After cooking, it can be slightly crushed to improve stickiness. Under no circumstances should you use a blender or meat grinder. This procedure can only be carried out with a knife. We also buy nori leaves at the supermarket there.
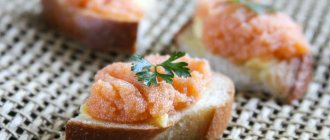
Onigiri with salmon
A delicious option that is especially popular among most onigiri fans.
Ingredients:
- water – 320 ml;
- dry seaweed;
- rice – 160 g;
- smoked salmon.
How to cook:
- Pour the washed rice grains with water. Cook over maximum heat until boiling.
- Close the lid and simmer on low for a quarter of an hour. Turn off the heat and leave without opening the lid for 20 minutes. Open and cool.
- Cut the fish into pieces. Wet your hands. Take a portion of rice. Form into a ball and flatten with your palm. Mark the fish pieces in the center. Cover with the same amount of rice.
- Form a tight bun. Wrap with a strip of Nori.
Preparing onigiri:
Step 1: prepare the rice.
Take 1/2 cup of sushi rice, pour it into a small bowl, fill it with regular running water and rinse thoroughly, repeat this process at least 10 times or until the water is crystal clear. Then we transfer it into a colander with a fine mesh and leave it in this container for 5 - 7 minutes to allow the remaining liquid to drain. Then transfer the rice grains to a non-stick pan with a thick bottom and proceed to the next step.
Step 2: cook and season the rice.
Fill the rice with 1 glass of clean water and place the pan on the stove, turned on at a high level. As soon as the liquid begins to boil, mix the rice with water with a wooden kitchen spoon, reduce the stove temperature to the lowest level and cook the rice grains for 15 minutes.
Then remove the pan from the stove. Cover it with a waffle towel, place a lid on top of it and leave the rice in this form for 10 minutes. Then remove the lid, towel and cool the finished rice to room temperature.
Step 3: prepare the filling and nori sheets.
We don’t waste time in vain; while the rice is cooling, take half a sheet of pressed nori seaweed and cut it into strips 2 - 2.5 centimeters thick and 5 to 7 centimeters long. A total of 4 strips or more are needed, the number depends on how you want to decorate your onigiri.
Then, one by one, remove the skin, rib and spinal bones from each piece of lightly salted salmon. Place the fish meat on a cutting board and cut into small pieces of arbitrary shape, their diameter can range from 2 - 5 millimeters to 1 centimeter. Transfer the slices to a deep plate and leave the seaweed on the cutting board.
Step 4: Form the onigiri.
Now pour 4 tablespoons of clean, boiled and cooled to room temperature water into a small bowl. Add a pinch of salt to it and mix it with the liquid until smooth and until the salt grains are completely dissolved. Then we take a clean medium-sized bowl and place a piece of plastic cling film on its bottom, for example, a square with a diameter of 15 by 15 centimeters.
Pour 1 tablespoon of salted water into the middle of the film.
Place 1/4 of the total mass of rice on it.
With a clean finger, make a small, non-through hole in the center of the rice mound and put 1/4 of the total mass of chopped salmon into it.
Carefully collect the rice from the sides and pile it on top of the filling.
We connect the ends of the plastic film.
We roll them into a ball and give the rice mass the desired shape: triangle, ball or oval.
Afterwards, remove the film from the almost finished onigiri.
And we wrap the “rice cake” in a sheet of nori, placing it on the rice surface with the rough side.
If desired, several strips of seaweed can be glued onto the “rice cakes”. Use the same method to form the remaining onigiri, place them on a plate and serve.
Step 5: Serve onigiri.
Onigiri is served at room temperature or cold. As an addition to this dish, you can offer wasabi, soy sauce, pickled ginger, as well as tempura - vegetables or seafood fried in batter.
These delicacies are eaten with chopsticks and washed down with sake, green tea or plum wine. Enjoy! Bon appetit!
Tips for the recipe:
– The filling in this recipe is not important! You can use any stewed, fried, salted seafood, fish, vegetables, and very often onigiri is stuffed with red or black caviar or umeboshi - pickled salty and sour plum.
– Sometimes finely chopped cucumber, avocado, stewed seaweed, green onions or sesame are added to boiled rice. Very often, formed onigiri are not wrapped in nori, but simply rolled in chopped nuts or sesame seeds.
– Rice can be cooked in a cauldron.
How to shape onigiri: rice balls, squares, triangles
Now let's move on to sculpting onigiri. This procedure must be performed with moistened hands - but do not use too much water: heavily moistened rice will quickly lose its stickiness. It is also important not to squeeze the products - otherwise the rice will begin to fall apart and it will turn out dry and tasteless.
Onigiri comes in three basic shapes: balls, triangles and squares.
✔ Rice balls are the easiest to form and stuff.
✔ Square onigiri, in turn, will help save space, fitting perfectly into a tight lunch box.
✔ Forming triangles requires the most skill, but they are the ones that most often make fun figures.
Sushi pro
Sushi Pro is a Japanese cuisine delivery service. Recently, ordering food to your home or office has become very popular among those who do not have the energy or time to go to any restaurant. This campaign is interesting because, in addition to traditional sushi and miso soup, it offers a huge selection of onigiri.
Onigiri with salmon and spicy sauce, sea bass, scallop and omelette, tempura onigiri with smoked chicken or flying fish caviar - there are so many options that everyone will find a rice bun to suit their taste.
Average price of 1 piece: 140 rub.
Text: Ekaterina Larina
Step-by-step preparation
Only short grain rice is suitable for onigiri due to its stickiness. Long grain is too crumbly, but Kuban is perfect. Rinse the rice under running water. This will remove excess starch from the rice.
Pour cold water into the pan and immediately add rice there. Cook until boiling. There is no need to add salt, as the rice for onigiri should be fresh.
After boiling, the rice cooks for only twenty minutes. You need to stir it with a wooden spatula. The foam that forms during cooking should also be removed with a wooden spatula.
Before you remove the rice from the heat, you should make sure it is cooked. It shouldn't crunch inside. Place the rice in a colander and allow excess water to drain.
Do not rinse, since to sculpt onigiri, the rice must be as sticky as possible and, most importantly, warm.
Prepare the filling. Mix canned tuna fillet with mayonnaise
The structure of the filling should be finely homogeneous, so it is more convenient to knead and mix the fish with a fork.
Add shavings of nori seaweed to the filling. It is difficult to tell by the required amount of algae, because they are weightless. Therefore, it is worth adding according to taste. I used pastry scissors and cut the nori into thin strips. Mix the filling thoroughly.
Wet your hands with water and take about seventy grams of rice. Distribute it evenly in your palm and place a heaping teaspoon of the filling in the center of the rice cake. Bring the edges of the tortilla towards the center and form into a ball, trying to seal the filling inside.
Shape the rice ball into a flat triangular shape. The main thing here is to get used to it. Each subsequent onigiri will look better than the previous one. And, of course, do not forget that your hands should be wet.
Step 9: Using scissors, cut strips of nori six centimeters long and two centimeters wide and wrap them around each onigiri. Decorate with nori if desired, sprinkle with sesame seeds. Due to the fact that only the filling has a bright taste in onigiri, they are served with soy sauce, cold.
The Japanese often make spherical onigiri without paying attention to the triangle formation. So this can save a decent amount of time on preparing the dish. Onigiri is decorated mainly with nori, cutting out funny and cute faces from it - kawaii. One of my onigiri, for example, was angry that they took a bite out of it :) Bon appetit!
Onigiri Triangle Nutrition Information
One serving of onigiri with lightly salted salmon contains approximately:
- 220 calories
- 3 grams fat
- 37 carbs
- 10 grams of protein
Onigiri is a snack, so nutritionists don't consider it the healthiest snack, especially if you're trying to lose weight.
However, salmon onigiri is a low-fat, high-protein option and is one of the healthiest stuffed onigiri.
Rice is full of carbohydrates and not very nutritious, but adding salmon and nutrient-rich nori seaweed makes the rice triangles a little healthier.
Marukame, Sushchevskaya 27, building 2
Marukame, an establishment of the Japanese chain Marugame Seimen, known in many Asian countries, is one of the most popular and cheapest noodle shops in the city.
This small restaurant with a simple design and Japanese music operates on the buffet principle: you choose dishes, excluding noodles, and drinks, then pay for them at the checkout. The noodles here are cooked in a large cauldron in front of spectators. The philosophy of the restaurant is romantic: for Marukame, the open kitchen is a symbol of the honesty and hospitality of their establishment.
Recently, you can order onigiri in the restaurant, which is presented here in three types: with tuna, salmon, and chicken. Here, rice balls are served in packaging, which, according to the establishment’s staff, can be opened by pulling just 3 corners.
Price for 1 piece: 120 rub.
Filling options for onigiri
Due to its popularity in Japan, onigiri fillings can be purchased at a variety of stores. There are even specialized points where the range of fillings is amazing.
At the time when onigiri was invented, refrigerators did not yet exist. So the Japanese came up with a method to keep rice fresh longer by adding salty or sour ingredients as natural preservatives. This is why salt is rubbed into your hands when you make onigiri, so that the rice stays fresh for a longer time.
The most common fillings for onigiri in Japan are:
- sha-ke (salted salmon);
- umeboshi (Japanese pickled plum);
- okaka (bonito flakes dipped in soy sauce);
- kombu (boiled kombu seaweed);
- tuna mayo (canned tuna with Japanese mayonnaise);
- tarako (salted cod).
These days, onigiri fillings are more creative. You can use any leftovers from a previous meal, such as chicken or shrimp. You can also try making onigiri with mixed rice instead of plain white rice.
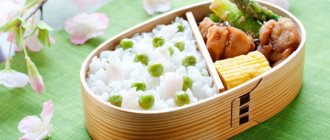
Thanks to their convenient compact shape, these small rice balls are easy to transport and eat with your hands. You can enjoy onigiri as a quick snack, or a school/work lunch, or a picnic. Very often they are an integral part of bento boxes.
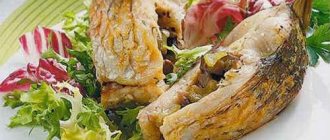
Shrimps in batter
Battered shrimp is another popular filling for onigiri. To do this you will need large tiger shrimps, which first need to be properly processed. If you fry them as is, they will curl and wrapping them in onigiri will not be so easy. Therefore, we will use the Japanese technique of processing shrimp for tempura.
Clean the tails of the shrimp with the back of the knife.
Let's make an incision along the carcass and remove the esophagus.
Now turn the shrimp over and make a few cuts on the bottom. About two-thirds of the thickness.
Turn the shrimp over again and gently press it along its entire length.
You will get this smooth and long shrimp.
We carry out this procedure with all the remaining shrimp.
For the batter we need flour (100 g), starch (2 tbsp), baking powder (1/2 tsp), beaten egg (1 pc.) and ice water (100 ml)
This is important because the batter must be very cold.
Cooking features
The technology for preparing onigiri is extremely simple; even a novice cook can easily master it. You just need to know some points, otherwise the result will be very different from what you expected, and not for the better.
- Onigiri requires sticky rice. Any variety of this grain intended for making sushi is suitable. You can also use regular short-grain rice, after soaking it for half an hour in cool water.
- When cooking rice for onigiri, do not add salt to the water: this dish requires a fresh product. However, the filling should be salty or savory enough to balance the flavor of the finished dish.
- When cooking rice for onigiri, the grain is washed 7 times and placed in already boiling water. First, cook for 5 minutes over medium heat, then cook for 10 minutes over low heat, then let stand under the lid and reach the desired state for 15–20 minutes. By this time, the temperature of the product will be just such that it allows you to work with it with your hands without the risk of getting burned.
- The traditional technology for preparing onigiri involves forming a small ball (for 2-3 bites), in which a hole is made with a finger, the filling is placed in it, then it is pressed with rice.
- Seafood is most often used as a filling for onigiri: tuna flakes, salmon, shrimp, caviar. One of the most favorite fillings for 40% of Japanese people is salted plums. It is acceptable to use fresh and pickled vegetables, meat, chicken, and seaweed.
- You don’t have to place the filling inside the rice ball, but just mix it with the rice, and then form the resulting mass into figures of the desired shape.
- You can form onigiri by hand or using cling film. It will be even easier to do this by using special molds.
- If you are making onigiri without filling, you can add a little soy sauce and sesame oil to the rice.
- Before serving, onigiri is wrapped in strips of seaweed or made into a base. Seaweed can be replaced with lettuce leaves or pancake omelet. The main purpose of the mat is to prevent the sticky rice from getting on your fingers. Additionally, it helps maintain the shape of the onigiri.
- Onigiri is wrapped in seaweed before serving. If you do this in advance, the nori will become soggy.
- Japanese women often decorate onigiri with pieces of seaweed, fruits, vegetables, and sesame seeds, giving the rice products a resemblance to funny faces.
Onigiri is served on white porcelain plates or wooden boards. You can serve green tea or sake with the dish.