Detection of puncture site
If the boat runs into a snag or, say, a piece of reinforcement that has turned up, then the place of the rupture is not difficult to detect.
It is much more difficult to find a puncture point that is invisible during a quick inspection of the boat, especially if it is located above the water level. For this, a soap solution is used. We dilute ordinary laundry soap in water, then use a brush to treat the areas of suspected damage, and, if necessary, the entire surface of the inflatable parts of the boat.
The soap solution will bubble at the puncture site. You can do it even simpler: deflate most of the air from the boat and immerse it in water. The puncture will reveal itself as bubbles.
Treatment of the patch application site and preparation of materials
The area where the patch is applied must first be dried. After drying, degrease with acetone, white spirit or another solvent of similar effect.
Treatment with a solvent must be carried out carefully, since intensive rubbing with the application of great force causes the PVC coating to become thinner. Place a piece of board (brick, boat flooring element, etc.) under the puncture/tear points or simply spread it out on a flat piece of ground. We place a piece of repair fabric over the damage (included with the boat or purchased in a specialized store) and with a marker we outline the outline of the patch so that it covers the hole by at least three centimeters. Then we cut out the patch and treat its working surface with solvent
A hole of a complex shape with branches must first be sewn together with special threads before applying glue.
To glue a rubber boat, you should use glue intended specifically for repairing PVC boats, which comes in the repair kit, or purchase it in a store. It is better to refrain from using general-purpose glue (“Moment”, “Superglue” and the like) or use it only as a last resort.
Cold repair
To repair a PVC boat in the field, the following method is used: the surface of the boat around the damaged area is coated with glue (which is included in the repair kit) using a brush, then the same procedure is done with the working surface of the patch.
Two to three minutes after applying the glue, the patch is applied to the damage and pressed tightly for ten to fifteen seconds. This repair method is good because it can be used in adverse conditions. It is something of an “ambulance”, so this patch must be changed at the first opportunity.
The other method is more labor-intensive, but also more reliable. We treat the area around the hole and the patch with glue, then let them dry for about fifteen minutes, after which we treat it with glue again. After five to seven minutes, use your finger to check the degree of drying of the second layer.
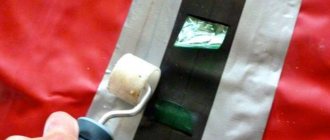
The surface of the glue should “grab” but stick slightly to your finger. We apply the patch to the damaged area and roll it with a roller made of hard material, expelling air bubbles from under it.
Hot repair
Hot boat repair is the highest quality, but also the most labor-intensive. During its production, it is also necessary to apply glue twice to the surfaces to be glued. A special feature is the use of a hair dryer when repairing. This can be either a special construction hair dryer or a regular household hair dryer, but it must be turned on at maximum power to achieve the desired processing temperature.
After applying the second layer of glue to the area around the hole and to the patch, let it dry until it loses its stickiness. Then two options are possible.
- In the first case, the patch is applied to the damage and treated with a stream of hot air (up to +80 Celsius) from a hairdryer. The glue will soften, after which the patch is rolled with a roller.
- In the second, after the second layer of glue has dried, the patch and the damaged area are heated with a hairdryer to the desired temperature, then the patch is glued and also rolled with a roller.
After repairing a PVC boat with your own hands, it is not recommended to immediately launch it into the water. Upon completion of the repair work, the boat must be inflated without creating excess pressure and left in this condition. In order for the glue to gain maximum strength, you need to wait at least a day. After this period, the boat is ready for operation.
Features of choosing glue
In addition, durable and high-quality boat repairs do not require the use of cyanoacrylate-based .
All types of superglues, which are so easy to use at home and harden extremely quickly, are completely unsuitable for a rubber boat.
They are designed exclusively for instant gluing of hard surfaces that will not be subject to powerful mechanical stress in the future.
As for a rubber boat, here the material not only constantly experiences air pressure from the inside, mechanical and hydrodynamic influences from the outside, but also expands and deflates on its own depending on how full it is with air.
The quality of the selected glue can be assessed quite well by applying a thin layer of it to any surface. The better the adhesive composition , the less it will stick to your fingers after complete drying.
Tackier adhesives do not have good final strength because their structure is too fluid to create strong, long-lasting bonds.
This applies to a greater extent to polyurethane-based adhesives . As for polychloroprene adhesive, separate additional resins are responsible for the stickiness.
In addition, when choosing a durable and reliable adhesive for gluing, it is a good idea to pay attention to its heat resistance .
The higher the limit range of a given composition, the better for the result. It is worth immediately preventing boat owners from using universal adhesives.
Any universal compounds will always be worse in their final result than specialized options designed for connecting rubber components.
Until the adhesive film has completely dried and formed stable bonds, any humidity , and especially open water, is completely contraindicated for the repair site.
In such a situation, polyurethane glue simply loses its properties, and chloroprene glue greatly reduces its effectiveness. If you are striving to create a truly high-quality and reliable seam and have already chosen a good glue for this, there will be nothing wrong with additionally heating the surfaces to be joined.
In particular, it is for this purpose that glue with high thermal stability is selected. Joining hot rubber, even with glue, is much more effective and reliable than trying to glue cold pieces together.
Always remember what material your boat is made of. Today, along with classic rubber products, there are also PVC boats.
Tips for fisherman: Fishing rod for sea fishing from a boat - All the nuances
It is necessary to glue them with completely different types of glue. A high-quality and durable patch on a PVC boat will stick if polyurethane glue is used.
If your boat is made of rubber, neoprene and hypalon, then it is better to use polychloroprene glue , which bonds much better to similar material structures.
There are certain differences when preparing for repairs. Rubber boats coated with Hypalon should be cleaned at the point of damage, ideally to the point where all Hypalon has been removed.
At the same time, the rubber itself is cleaned, which significantly increases adhesion . When repairing PVC boats, such cleaning is not carried out.
After thorough degreasing with acetone and alcohol, the glue is applied to both surfaces to be glued, after which it is necessary to wait up to 20 minutes for the formation of a connecting layer.
After this, the patch is connected to the damaged area and compressed tightly. It would be a good idea to warm them up to 50 degrees Celsius for the best effect.
Before the gluing process, it is necessary to completely tear the bottom off the boat, then heat it with a hairdryer and clean it well with sandpaper. Then you need to glue the sealing tape. Only after this should you start gluing the bottom.
How to pump up
The boat owner should know how to properly inflate the product. To prepare the flotation device, you will need a pump. There are several types of this device:
- Mechanical - air is pumped by pressing the foot. As a rule, the pump is already included in the kit.
- Manual mechanical - in this case the boat is inflated by hand.
- Electric is a universal device that helps complete the procedure in the shortest possible time without much effort.
Before you start inflating the boat, it should be unfolded and left for 15 minutes. This way the material can adapt to the air temperature. Otherwise, cracks may form on the cylinder.
To inflate the boat, you need to fix the pump in a special hole. Next you need to pump it up. Boat preparation time will depend on the type of pump used.
How much to download
The boat owner should know how long to inflate the boat with PVC to create optimal pressure in the cylinders. This rule will ensure a long period of operation of the product.
To check the pressure level in the swimming device, you must use a pressure gauge. This tool will be able to reflect average values - 250-300 mBar.
When preparing the watercraft, it should be taken into account that many electric pumps will not be able to independently determine the pressure. Therefore, this process should be controlled to avoid rupture of the cylinders.
However, you can purchase a special pump with a built-in pressure gauge. In this case, the device will be able to control the inflation level without outside help.
It is necessary to take into account that seams or patches are a vulnerable point. Large injections or high temperatures can damage their integrity. For example, a dark-colored boat quickly heats up under the sun's rays, and therefore the pressure in the cylinder increases. Therefore, if over-inflated, such connecting elements can creep apart.
The optimal pressure level for a PVC boat is indicated in the operating instructions. These readings may vary for each model. You should follow the instructions from the manufacturer.
What to do if the valve on a PVC boat cylinder leaks?
At first, the new boat is pleasing to the eye and does not cause any trouble. I pumped it up at the beginning of the season and until the coldest weather, be sure to keep it in working condition. To avoid problems in the summer, after fishing, slightly lower the pressure in the cylinders, and before fishing, take it and quickly finish it up to the desired pressure. And no problems... The pressure holds properly if there are no punctures.
But this cannot last forever. And for various reasons beyond your control, the pressure gradually begins to disappear somewhere. Having washed the boat, you may be displeased to find not only micro-punctures, but also a leak through the valve, which previously worked properly and coped with its duties one hundred percent...
An annoying valve leak can occur for two reasons. Either it began to etch under the valve (between its body and the PVC fabric itself), or through the valve itself due to wear of the valve sealing rubber.
Unscrewing the valve using a special valve wrench, you can see such an unsightly picture
I think the cause of the leak is clear - the ubiquitous sand that got into the space between the PVC fabric and the valve body.
Well, sand and leakage between the cylinder and the valve body are easy to deal with. We clean out the accumulated sand carefully and thoroughly. We wipe the seat of the valve with a swab with acetone, apply a little silicone to the valve itself and its counterpart (the one inside the cylinder) (although you don’t have to apply it if the boat is not old and the PVC fabric itself is still relatively elastic)
and twist it tightly (but without much fanaticism).
But there is also such a category of leakage through the valve as pressure etching under the sealing rubber of the valve seat
And since we’ve already gotten to its insides, it’s never a sin to pay attention to the condition of the sealing gum itself. Over time, a groove like this, not very noticeable at first glance, appears on its working surface.
This is most often the cause of pressure leakage through the valve itself.
A completely reasonable question arises - where can I get a new rubber seal for the valve or what can I use to replace it if it is impossible to get it?
But don't despair, there is a much easier way out! All you need to do is simply turn the valve sealing rubber over to the other side - the one on which there is no such groove.
If for some reason you still need to replace the entire valve with a new one, then you may encounter another difficulty. The hole for the valve is narrow enough to easily pull out (or insert) the so-called mating part of the valve through it.
On some forums, you can read the following advice... Lightly cut the hole for the valve crosswise without going beyond the boundaries of the pressure plate on the top of the valve.
The mating part of the valve can be broken off piece by piece - you will still have to insert a new valve.
After inserting the lower mating part of the valve inside the cylinder, tie it with a thread so that it does not get lost inside the cylinder. In place of the cut hole, cut out “washers” from PVC fabric that overlap the cut hole by a couple of centimeters in diameter. And glue them either on both sides of the hole (inside and outside), or only on the outside.
Well, then, assemble the valve as I described above. Now you can rest assured that you will not be disappointed by the cylinders of your boat getting wrinkled at the wrong time.
I hope that my simple advice from personal experience will help someone. Good luck on the water!
Features of repair for various types of damage
There are situations when the damage is significant and it is quite difficult to accurately connect the edges of the tear (cut) of the material before gluing. Therefore it is recommended:
- the damaged area is washed and dried;
- laid out on a flat surface and degreased;
- Before gluing the damaged edges, it is better to sew them together, and only then proceed to the main gluing stage.
When repairing large cuts and tears in this way, it is advisable to install two patches at once. This is a more complex repair, but one can do it alone. One of the patches is glued on the inside, and the other on the outside of the damage. To make it easier to glue the patch inside the boat, you can use a special hook.
Having completely unscrewed the valve, glue the first patch through the hole using a hook. It is always glued inside the boat, and then only the outer patch is glued. After completing the repair, you need to make sure that the inside of the cylinder walls do not stick together due to glue getting on them. If such a nuisance does occur, then you must immediately carefully pull the cylinder by opposite sides.
To prevent the boat from gnawing on top of the outer patch, it is better to additionally glue a larger patch. It turns out that two patches will be glued to the outside of the damage site. But there is no need to rush to glue the second one. Only after the glue on the previous patches has dried well can you glue the third one.
Features of bottom repair. Damage to the bottom is quite specific. The main culprits are snags, large tree branches, and rebar rods found in reservoirs. Such cuts are torn and have a complex configuration. When repairing them, you should also install internal and external patches. And to accurately connect damaged edges, you can use thread for stitching. The procedure for carrying out the work is the same as for repairing regular punctures.
Features of seam repair. After drying and degreasing the seam of the boat and the area around it on both sides, a patch is cut out with a size slightly larger than the length of the damaged seam. A thin layer of glue is applied to the patch. Then it is glued and immediately rolled with a roller. Excess glue that has come out can be removed with a cloth moistened with solvent. After the glue dries on the first patch, another one is cut out. Its dimensions are larger than the first one, taking into account that it can be folded to the reverse side. After gluing it, you also need to roll the damaged area.
When the seam repair is completed, the boat must be inflated to check the quality of the work. Using a soap solution, treat the repair area with it and check the air outlet. If everything is fine and the soap solution does not poison, then after 24 hours the boat can be used for fishing.
I. Types of holes.
1. Minor scratches. In this case, the damage concerns only the PVC coating; a small section of it is removed, exposing the fabric. As a rule, such damage does not threaten anything in the initial stages, but the sooner they are eliminated, the better.
2. Small cuts or holes, up to 5 centimeters. Can be easily eliminated at home or even on the go. All you need is a repair kit and a little time.
3. More significant holes, from 5 to 15 cm. They can also be repaired independently, but this is more difficult to do. Especially if you don't have the skills.
4. Holes larger than 15 cm. Theoretically, it is possible to repair houses, but it would be better if a specialist does this.
Repair tips from experienced fishermen
How to find the puncture site? Sometimes this task is not easy. Experienced fishermen advise two simple and always working methods
Submerge the boat in the water and pay attention to the bubbles. The escaping air will create a hole
The second option is to rub the sides and bottom with thick soapy foam. The formation of bubbles will also indicate a puncture.
In everyday life, you often have to deal with the problem of poor adhesive properties of glue. Most of the cheap copies under the loud name “Super” are not able to properly glue even paper. And when we are talking about a watercraft that is constantly either in water or in air and is operated at different temperatures, then the fish are advised to use Desmokol adhesives, specially designed for gluing PVC materials, and also add stabilizing additives to it, for example, “Polyisocyanate (PIC) grade B” or “Desmodur” in a proportion of 95% glue 5% additive.
Fishermen pay great attention to preparing the place for gluing the patch
It is important to thoroughly clean the puncture site and the area around it within a radius of 5-7 cm and dry it. Fishing masters warn that if the surface of the puncture on the bottom or side and the patch are not properly degreased, then all the work will be in vain.
Fishing masters warn that if the surface of the puncture on the bottom or side and the patch are not properly degreased, then all the work will be in vain.
Repairing a PVC boat is not a complicated process, but it requires a lot of attention and responsibility. If the restoration technology is violated, the amateur fisherman’s vessel will not only fail to float, but may also cause a tragedy. Therefore, if there is any doubt that you cannot cope with boat repairs on your own, then it is better to entrust this delicate matter to professionals.
Step-by-step instruction
An example of sealing a simple puncture:
• find the puncture site - the surface can be doused with a soap solution, a bubble will form at the puncture site; • wipe the puncture site and treat with a degreaser. White spirit, solvent, acetone, alcohol will do; • cut out a patch; its diameter should be 4-6 cm larger than the area of the damaged area; • heat the patch with a hairdryer; • spread a layer of glue on the damaged area and the entire patch, wait 4-7 minutes; • spread another layer of glue on the surface of the boat and the patch, press the sides tightly together; • roll with a roller so that there is no air between them; • press down with a weight and leave for a day.
Work must be carried out with a deflated boat.
A seam gap is repaired as follows:
• clean the damaged area, dry it, treat it with a degreaser; • prepare two patches of the same size; their diameter should be 4-6 cm larger than the damaged area. Before gluing the patch, you need to warm it up with a hairdryer; • the breach along the seam is sealed on both sides: external and internal, so you need to carefully remove the valve to inflate the boat - this provides access to the inside of the boat; • glue the patch on the inside: apply a layer of glue to the damaged area and the patch, wait 4-6 minutes. Apply glue again and press the sides tightly together, press with a weight for an hour. Do the same with damage on the outside; • Press down the damaged area with something heavy, but do not damage the boat itself. You can place a soft cloth under the item. Leave it like this for 24 hours until it sticks well.
It is convenient to seal a break from the middle with a “liquid patch”. This substance is similar to glue, but when completely dry it forms a stable crust, like a regular PVC patch. It is better to repair a puncture larger than 2 cm in diameter with several patches according to the principle of an inverted pyramid - first the smallest patch, then larger and even larger ones. it's done like this:
• the puncture site is located; • cleaned of dirt and dried with a hairdryer; • treated with a degreaser; • patches of three different sizes are prepared: the first is 3-4 cm larger than the diameter of the damage. The second is 4-5 cm larger in diameter than the first, the third is 3-4 cm larger than the second. Before gluing, the patch must be heated with an industrial hair dryer; • Apply a layer of glue for working with PVC material to the puncture site and to the patch. Leave for 5-7 minutes; • apply glue again, press the patch tightly to the puncture site. Roll with a roller to remove excess air. Press down with a weight and leave for 20-30 minutes; • repeat everything with the second gasket, leave for 20 minutes; • do the same with the third gasket, press down with a weight and leave for a day.
If the damage is large and has ragged edges, take it to a boat repair shop. There is special equipment for repairing such damage, but it cannot be done efficiently at home.
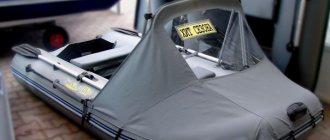
Transom
Connoisseurs of high-speed travel on water purchase an inflatable boat with the option of installing an electric or gasoline engine. For the latter option, models with a stationary transom are widespread.
Common reasons for a broken boat transom:
- Water ingress;
- Detachment of PVC material;
- Weakness of adhesive bonding;
- Strict conditions of use;
- Violation of operational recommendations.
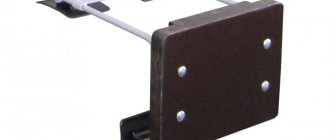
To replace or repair a stationary transom you will need:
- A sheet of bakelite plywood for the transom insert and a new transom with a thickness specified in the manufacturer's characteristics of the boat;
- A piece of PVC fabric with a density of at least 650 grams per square meter;
- Water-repellent impregnation;
- Polyurethane one-component adhesive;
- Fasteners for transom insert;
- Construction hair dryer;
- Jigsaw;
- A simple pencil.
Transom repairs are carried out in the following sequence:
- Heat the PVC material near the transom using a heat gun at 210 degrees Celsius.
- Carefully lift the transom down, pressing towards the bottom.
- Turn the boat upside down and heat the rubber seams between the transom and the cylinder with a heat gun, without touching the similar adjacent boat seam of the cylinder.
- Use the old transom as a template to make a new one.
- Outline the outline of the transom and inserts on a piece of plywood and cut it out with a jigsaw.
- Impregnate with water-repellent emulsion.
- Fit the transom to the boat.
- Cut out a transom template from PVC fabric and glue it on both sides.
- Glue the ends of the transom with polyvinyl chloride or polycarbonate material.
- Secure the insert to the transom with fasteners.
- Place the finished transom into the boat with the transom insert facing up.
- Prepare pieces of PVC fabric and glue the transom at the junction with the bottom and cylinders using polyurethane glue.
The new transom with your own hands is ready for active rafting under the motor!
Video instruction
This video contains step-by-step instructions for repairing a boat transom.
One of the problems that appears when an inflatable boat is used for a long time is divergent seams.
Important! When inflating the boat, monitor the pressure in the cylinders to avoid seams coming apart
For repair you will need:
- Degreasing emulsion;
- Polyurethane glue;
- Construction hair dryer;
- Muscular strength.
Repairing PVC boat seams consists of the following steps:
- Open the seam and clean out any penetrated silt, sand and other natural debris.
- Remove remaining adhesive with solvent or a mild acetone solution.
- Apply glue to the inside of the seam on both sides and leave for 7 to 10 minutes.
- Press down firmly and, if necessary, heat the joint with a hair dryer at medium temperature.
PVC boat repair, how to install a patch on a boat with your own hands
PVC boat repair
Recently we encountered a problem: a friend’s PVC boat began to poison. The question arose: what to do: repair the PVC boat yourself or give it to specialists? We decided that we would still have time to spend the money, especially since in small towns all the “specialists” do the same thing as you, on their knees, only they take money for it. In fact, the process is not that intensive. And there is very little labor involved.
To repair a PVC boat you will need:
- PVC glue is good. They bring it from our factory and bottle it in glass vials. It will also work with a repair kit (ask at a fishing store)
- PVC patch, included in the repair kit or sold separately
- Solvent 646 or similar (acetone, alcohol, not gasoline or white spirit - they are greasy)
- a flat area, which is also a place where you can leave the boat for a day
- small brush or similar object for applying glue
- soap, water, shaving brush, rags (cotton rag)
- some kind of spatula-type object for smoothing out the patch
- scissors and (or) for cutting PVC
- a construction hair dryer or, as a last resort, a household hair dryer
I'll describe it point by point. PVC boat repair:
- We determine the place where the air escapes (with a brush with a soapy solution, like gas workers, visually or by dipping it in water) all this on an inflated boat
- We lower the boat, wash it, dry it
- If the leak is in an old patch (as it turned out for us), we carefully tear it off with pliers (we didn’t succeed neatly, it came off along with the top layer of PVC)
- If possible, remove all scraps of fabric near the future patch.
- We cut out a patch 3-5 cm wider than the hole (ours is wider than the patch torn off along with the top layer of PVC)
- We degrease the patch and the boat (in no case do we clean it mechanically!)
- The patch is applied with the smoothest(!) side to the boat
- Use a felt-tip pen (pen, pencil) to trace the contours of the patch
- Apply a thin layer of glue to the boat and to the patch (carefully, checking that there are no empty spaces, especially around the edges)
- Let the glue dry for 5-10 minutes, depending on the glue and air temperature (naturally, when it’s below zero, you don’t need to glue :-P), check carefully with your finger so that it doesn’t stick (just don’t press and leave grease on your hands!)
- Next, we heat the boat and the patch with a hairdryer (preferably to 60-70 degrees, the hand cannot tolerate 60). Do not overdo it so as not to burn the boat and glue. (if you overheat, the PVC will lose its shape and structure)
- We firmly press (with our hands) the patch and with a special spatula (available in the repair kit, conveniently with rings of scissors) smooth it out from the middle to the edges, squeezing out air bubbles
- You can warm up the gluing area a couple more times to improve polymerization (remember to press down on the softened patch)
- Let it dry for 3(!) days, although you can use it after an hour (if necessary)
In field conditions, repairing PVC boats requires all the same operations, with the exception of a hair dryer and solvent. But the patch on the boat may have to be re-glued later. It is also possible to glue boats with super glue, but this is a last resort. If the hole is large, it is glued on both sides, or two patches are applied, the second one covering the first one by 3-5 cm. For very large damage, threads are used, and it is probably better to send it to a service center.
Fish carefully, watch your step! And watch a video about applying a patch to a PVC boat. And remember that repairing PVC boats is not such a difficult task.
How to attach fittings to a PVC boat cylinder
DIY PVC boat repair, cut
Installing a patch on a PVC boat
Latest searches:
- pvc patch
- PVC boat patch how to glue
- the patch is glued with the ribbed or smooth side
- PVC boat patch
- pvc boat patch
- patches for pvc boats
- patches for pvc
- how to glue pvc patches
- technology of applying two patches to a PVC boat
- How to put a salary on a pvc boat
What glue to use
The most important thing in repairing punctures is to know exactly how to seal a rubber boat and how to connect the patch to the boat material. The reliability of the repair depends on the quality of the adhesive mixture. What kind of glue can you use if the repair kit contains low quality or has run out? The popular composition “Secunda” is not capable of sealing a hole in a PVC product efficiently. The patch will stick, but will soon fall off. The composition of this glue is cyanoacrylate, which widens the hole.
Experienced fishermen know well what glue to use to glue a PVC boat at home. It is better to use a polyurethane-based adhesive; such a tube is included in the repair kit. This may be “Professional” glue, but it is selected specifically for PVC products. The quality of the glue is determined by the following criterion: a good composition does not stick to your hands when it dries. Once dry, excess cannot be removed from surfaces. Heat resistance is also of great importance; the boat gets very hot in the sun.
Fishing Tips: How to Use a Fish Finder for Boat Fishing - Detailed Review
When choosing the right composition, you should consider the following:
- special glue is better than universal glue;
- cheap composition is of low quality;
- superglue is not suitable for working with PVC;
- polyurethane composition requires heating to 70 °C.
If the listed factors are taken into account, the gluing will be of high quality.
Gluing methods
The trick to the job is heating the repair area. If it is done at home, it is better to use a hairdryer. In nature, a mug of heated water is used. After heating, the repair area cools and dries. You can use the boat after 2-3 hours, but even better - after 2-3 days. By this time the glue is gaining strength.
In this way, it is easy to repair cuts or punctures up to 5 cm. Sometimes an underwater snag pulls out a large piece from the bottom, then it is easier to turn to specialists for help. Such repairs are carried out in workshops that carry out tire fitting. You can also seal a puncture in a swimming mattress there.
It is necessary to ensure that the adhesive is distributed evenly over the entire area. Next, the surfaces are pressed tightly against each other and fixed with fingers or a press for several minutes. To fully achieve the effect, the boat, with taped seams, is left in an inflated state for the time specified in the instructions.
How to check the pressure in a boat
The pressure in the cylinders depends on the type of structure. For example, for elements with a toroidal contour, the optimal pressure is 250 mBar. The value in cylinders without a toroidal contour should exceed the previous indicator. For this type of swimming equipment, the pressure should be maintained at 400 mbar.
For long service life, the boat must be pressurized to the required operating levels. It is recommended to avoid significantly exceeding or decreasing them. If such nuances are not taken into account, the model will be subject to increased loads, which will lead to rapid wear.
You can check the pressure using a conventional pressure gauge, which displays an operating value of 250 to 300 mBar. Every PVC boat owner should have this device on hand.
Check pressure without a pressure gauge
There are situations when a pressure gauge is not at hand. In this case, the pressure can be determined by the characteristic sound. To do this, you need to lightly hit the cylinder with your palm. At operating pressure you can hear a slight ringing sound. If there is no sound, then you need to continue the pumping procedure. The absence of sound warns that the product cannot be used for its intended purpose.
You can check the pressure in another way. You need to press the balloon. At the optimal rate, a deflection of no more than 15 mm will be visible.
If the material is not pressed at all or, on the contrary, is pressed too much, then the situation should be corrected.
Brodyaga-02 › Blog › Self-repair and tuning of PVC boats (glue)
Any owner of a PVC boat sooner or later has a problem with repairs or tuning. And the main question is how and with what glue to do this or that work. I bring to your attention a selection of video instructions for almost all occasions.
Technician No. 2 Installing an anchor eye on a PVC boat
Technician No. 3. Tuning Set of reinforcements for the bottom of a PVC boat
Technician No. 4. Repair of the partition between cylinders in a PVC boat
Technician No. 5. Replacement, repair of drain valve on a PVC boat
Technician No. 6. How to properly peel off molded fittings from a PVC boat
Technician No. 10. How to repair a cut PVC boat
Video from Alex_Ural: Quick repair of PVC boat
Installing internal patches
Dismantling and restoration of the seam of a PVC boat
Useful video channel www.youtube.com/channel/UC9XoOPirXk0hFYRUZ7OCIzw An extremely useful topic on Russphishing. Of course, there is a lot of different information on the Internet, but in my opinion these are the best, most professional video tutorials.
Comments 12
Hello. Can you tell me: does dismacol need to be activated after 15-20 minutes? Is it possible to warm it up, say, in a day or two? Will he keep?
I don’t know. It’s unlikely that anyone performed such experiments. What for?
Safety valve
The safety valve helps relieve excess pressure that exceeds permissible limits when inflating inflatable boats. This prevents deformation and damage to the boat.
The principle of operation of the safety valve is to press the membrane with a spring, which is compressed under excess pressure. Thus, moving the membrane away, forming a hole to bleed off excess air, after normalizing the pressure, the spring returns the membrane to its original position.
Safety valves are of two types such as:
- Combined with boat inflation valve. It is used extremely rarely due to its impracticality and complex design.
- Not combined, which allows them to be installed separately, and in the event of a breakdown, they can be easily dismantled and replaced with a new valve or repaired.
Safety valves come built into the boat by the manufacturer or are installed independently. It is recommended to install a safety valve on all types of inflatable boats; purchase it, and installation will cost less than repairing or buying a new boat.
Repair
In order for the valve to serve for a long time and reliably, it should be constantly closed with a plug.
As a rule, repair of the air valve is necessary when it begins to bleed air on its own.
Three reasons can cause such a breakdown:
- Dirt, sand and other various debris got into the valve, after which the membrane stopped closing tightly. In this case, you should unscrew the valve, wash it with water and blow it with compressed air.
- The valve received mechanical damage due to improper storage of the boat or was stepped on. After which a crack could appear on the valve, which would lead to its depressurization. In such cases, repair is impossible and the damaged valve must be replaced with a new one.
- The valve has loosened, allowing air to leak between the boat's material and its hull. Tightening with a key will eliminate this problem.
Let's start the renovation
Once all the tools are in front of you, the repair location has been determined, you can begin to act.
Let's describe the actions step by step:
- We clean the place where the glue will be. This must be done carefully, but without significant effort. The process is performed with acetone or solvent. The fact is that with prolonged exposure, the PVC itself is destroyed. As a last resort, wipe the designated area with alcohol, although this is not as effective. Without performing this action, nothing will work! Never touch the surface with sandpaper or similar materials.
- We measure the hole and count around the edge about four centimeters. We cut out such a patch, apply it to the break and outline it with a pencil.
- For stronger bonding, apply a layer of glue to the patch and outlined area and wait for it to dry, repeating the procedure. After this, apply another layer and carefully apply it to the selected surface. If you need it quickly, it won't turn out as good. Simply lubricate the fabric of the boat and the patches and fasten them together. It is better to redo such repairs at the first opportunity.
- We heat the surfaces to be glued. You need an average of 70 degrees. If you have an industrial hair dryer, be careful not to overdo it, as too much heat will destroy the material.
- Carefully level the surface using a roller. We expel all bubbles and irregularities. The smoother it lies, the more it will hold. If you are not confident in your abilities, glue a small piece to another part of the boat, practice a little and you will succeed.
In principle, the renovation is complete. Leave the patch alone. It is better not to shift and under no circumstances bend the gluing area.
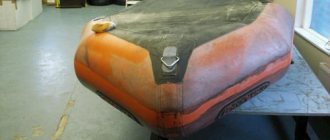
Glue the bottom of the boat
The bottom is the element of the boat that requires the greatest strength and, in turn, is most susceptible to injury. If you have a small hole or a huge cut, it is better to contact a repair shop.
You can try to repair the bottom yourself, however, to do this you need to use only the most durable gluing method and the best glue. Also, this only requires PVC fabric.
Glue along the seam
Here the process is no different from that described, only the number of patches changes. We apply one from the inside, according to the technology described, and glue the second from the outside. We do this carefully so that there are no gaps left on the folds. Roll thoroughly with a roller, and if necessary, glue another patch on the sides.
Checking the strength is quite easy. Prepare a thick soap solution and lubricate the areas where air may leak, first wait until it is completely dry and inflate the boat.
Each glue takes its own amount of time to dry, but it is better to let the repair sit for an extra hour to be more sure. If there is poisoning somewhere, soap bubbles will appear.
Repairing a PVC boat with liquid patching
A simple but effective way to repair a boat involves using a liquid patch. It is a suspension with a liquid solvent and allows you to carry out repairs as quickly and efficiently as possible (Figure 5).
The principle of operation of such a patch is very simple. It contains a special solvent that corrodes the PVC structure, and the active reagent restores the ductility of the material. After drying, the connection is very strong and durable.
The main advantage of liquid patching is its ease of use. In addition, this substance allows for high-quality repairs of an inflatable boat. The connection that is formed at the puncture site is monolithic, and only a new puncture or burning can destroy it.
Repairing a PVC boat with liquid patching is practically no different from repairing it using a special kit. The area with the puncture is degreased, a generous layer of adhesive is applied to it, and a weight is simply placed on top. After a day, a strong monolithic connection is formed in place of the hole.
When degreasing, contact with the plane should not exceed two seconds, otherwise this product can affect the structure of the rubber.
Before starting work, you need to determine how many damaged places on the rubber product require repair. This can be checked by lowering the inflated boat into the water and marking the places where bubbles appear. You can also check this by applying a soap solution to the surface.
It's even better to conduct a thorough inspection of the entire surface. If there are worn areas or peeling, it is better to fix it immediately to avoid any unpleasant moments in the future.
After determining the place of repair, you need to start repairing the boat yourself.
Cutting patches
For the patch, a material is selected that is identical to the repair plane. If there is a repair kit, which should usually be in the package with the boat, then it is better to use it.
Tips for a fisherman: How to choose an echo sounder for fishing from a boat - What is the difference, pros and cons
The patch is cut 5 cm longer on each side than the size of the damage. The shape should be rectangular, but with rounded ends to prevent the repair area from snagging in the future.
Surface treatment
The area to be sealed must be cleaned of dirt and treated with fine sandpaper. Since roughness provides better adhesion. After sanding, the surface is cleared of dust.
The patch itself is prepared for work in the same way.
Sew up the incisions
When stitching a cut, you must use nylon threads. The seam must be dense and strong so that it can withstand high loads.
Degreasing
After sanding and stitching, the joints are degreased. Acetone and gasoline are suitable for this procedure.
When degreasing, contact with the plane should not exceed two seconds, otherwise this product can affect the structure of the rubber.
This procedure is mandatory, as it promotes better adhesion of the two surfaces to be bonded.
Applying glue
How to use the glue is written in the instructions. Typically, glue is not applied to the patch material, only to the boat itself. It is better to apply evenly with a brush. Covered with two layers. After the first one, wait the required time for complete drying and only then apply the second one.
Attaching patches
After applying the second layer, a patch is applied. Afterwards, the patch material is smoothed out, expelling the formed air; wrinkling is not allowed.
Alignment of the patch is carried out immediately, since after time, corrections are no longer made.
If the gluing is bad, it is better to immediately remove the patch and prepare a new one.
There are still quite a lot of old rubber inflatable boats in use. They also have to be repaired; the order of work will not change in this case. Only for a rubber boat you will need to select a patch made of a material other than PVC, and also use suitable glue.
Rules for inflating a boat without a transom
Small-sized PVC boat models usually have oval inflatable cylinders. In this case, the watercraft should be inflated in two stages. On the first, it is enough to shape the cylinders, and on the second, to complete the process using additional devices that will ensure proper air distribution. To do this, use special flooring slats or complete liners. The cans are placed in the appropriate places. But how to inflate a PVC boat so that the air is properly distributed among the compartments (cups)? Control must be carried out through the adjustment of the membranes separating the compartments. While one cup is inflating, the adjacent one should remain in a calm position. If, during pumping, it is discovered that a depression forms at the location of the membrane, it means that the air has been unevenly distributed or the boat’s cylinders have been overinflated.
The need for bleed valves
If there is a shock or normal overheating, the air is immediately released automatically from a special valve to the required value. Today, most watercraft are assembled using special bleed valves, which will be a very important element here. Such a valve is required to release excess air, so it will no longer be possible to pump, and this is an important point.
A special working valve for bleeding is very practical and important when there is a critical rapid increase in pressure by large values, and this can happen when there is strong heating on the salt lick and during a wave shock there will be no rupture of the cylinder.
Due to the high temperature and significant pressure, the cylinders in the boat will work at maximum speed, and to avoid further damage, a bleeding valve must be installed.
Low pressure in the boat: harm
Be sure to use good modern pressure gauges and ensure that the cylinders are properly inflated, which can be checked for sound by hitting them with the palm of your hand and there should be a slight ringing sound.
Every day the product deflates and after 2 days it will drop quite significantly, and this can become dangerous, since under-inflating leads to problems. It must be taken into account that in cold weather, when launching, it will drop, and if the boat is under-inflated, it will fall even more, and this is life-threatening.
If the cylinders are not fully inflated, there is a fear of overheating, and the stability of the entire vessel is greatly reduced and the tensile loads of the fabric will increase and it will be easily damaged. A soft boat is very vulnerable; even stepping on board with under-inflated cylinders can even damage the boat.
We invite you to read: Reports on paid fishing in the Tula region
If the boat is overinflated, the pressure in its cylinders will quickly increase due to the hot sun and the boat can literally explode and sink. The geometry of the structure changes very much and air cylinders can easily and quickly be punctured even by a small ordinary twig, so pumping is very dangerous for human life.
The seams on the boat must be smooth and well taped so that they do not come apart if accidentally pumped.
Modern PVC boats are durable and resistant to ultraviolet radiation, as well as to the effects of oils and gasoline, since, in addition to the air layer, there is a special mesh. Because of the sun, the fabric, especially if it is dark, easily heats up and the pressure in the cylinder will increase even more, and if it is inflated too much, then there will definitely be damage and the seams will unravel because of this.
If patches have been made, then only heat-resistant glue should be used, and the glue layer itself should be protected from sunlight; such repairs should only be carried out by experienced workers. The pressure in the cylinders can increase even due to the shock action of the wave, and if the pressure is more than required, then it is already life-threatening.
Good quality seams and balloons are required; you should rationally select sizes and check the quality of the bottom, which can be hard or balloon.
A balloon bottom, that is, an inflatable one, reduces the weight of the boat and its cost, although the stability will be weak, which is only suitable for a quiet body of water and this should be taken into account.
Danger at work:
- Hitting the boat with a branch or stone.
- Severe overheating.
- Storm.
- Big wave and strong wind at sea.
- If the pressure in the cylinder is less or more than required.
The shape is also a significant indicator of operational safety; a wide side has great wind resistance, while a narrow side allows water to enter the boat.
Piercing fabric
Such a wonderful and durable material like PVC is very functional and quite durable, especially if it was reinforced with polymer threads, which are very rigid and stable. Thanks to the reinforcement, this material becomes resistant to tearing and cutting, although due to too much pressure in the cylinder it can easily be pierced and destroyed under the influence of UV and shock wave forces.
Another weak point is the seams, and if they are made with poor glue or the welding is done incorrectly, then a puncture is possible in this place, and this also applies to patches.
If previously they used slats made of plywood or metal, now they have begun to use removable high-pressure products that are more durable and easier to assemble, and they also serve as thermal insulation. Modern watercraft can have greater load-carrying capacity, so their sweat resistance has become less.
How to seal a boat with your own hands
Any type of repair begins with preparation:
- the damaged boat is deflated;
- the damaged area should be washed and dried well;
- Next, lay out the damaged area on a flat place (you can put a board under it for easier repairs), degrease it using solvent or acetone.
And if these products are not at hand, they can be replaced with gasoline, kerosene and ordinary alcohol.
When the damaged surface is well prepared, you can proceed to the main stage of repairing the damage.
- A patch of the desired shape is cut out from a piece of PVC material, which is included in the repair kit. Its size should exceed the site of damage by 4-5 cm. If there is no patch from the repair kit, a piece of thin rubber or thick oilcloth can easily replace it.
- The prepared patch should also be degreased.
- Glue is applied to the repaired area and the patch; after 3-4 minutes, press them tightly together.
- Apply the patch to the damaged area and roll it with something heavy. This procedure is necessary to remove all the air from under the patch.
- Next, you should inflate the boat, but only until it acquires its shape and leave it in this state for 2-3 hours. If it is not possible to inflate the boat, then, without bending the material at the site of damage, it should be carefully folded and left to dry.
When repairing a boat, you can use several gluing methods.
- Apply glue to the damaged area and the prepared patch with a brush. After 3-4 minutes, the bonded surfaces are pressed against each other. The described method is bad in that it is only suitable for carrying out repairs in field conditions and is short-lived. If possible, it is recommended to replace the supplied patch with a new one.
- A layer of glue is applied to the surfaces to be glued. After the first application of glue, after about 8-10 minutes, apply its second layer. Apply the patch to the damaged area and roll it with a heavy object, squeezing out the air.
- Dry the second adhesive layer well until it completely loses its stickiness, then apply a patch to the damaged area. To start the action of the glue, it should be heated to a temperature of 60-80C (a household hair dryer is used for heating). Then the patch is rolled. This gluing method can also be used in a different sequence. The patch and the damaged area are heated with a hairdryer, and then applied to each other and rolled. This gluing method is the most optimal and high-quality, but it takes more time. Therefore, it is used when repairing a boat only at home.