Boat glue
Rubber boats are more popular. But it’s no secret that rubber is a very specific material and can be damaged quite easily. In order for your rubber boat to please you every time you use it, timely care and necessary repair work are necessary. After all, punctures and cracks in an inflatable boat are a very common problem. Unfortunately, this is not always the boat owner’s fault; there are also factory defects, but most often damage occurs from improper storage or during operation.
It’s good that minor damage to rubber can be repaired yourself. To do this, in most cases you only need special glue and patches. Currently, the consumer market can offer a large selection of adhesives for rubber and caoutchouc. But before purchasing, it would be better to figure out which glue for a rubber boat is suitable in your case, because the characteristics, purpose and composition greatly influence the quality of the repair performed.
How to choose glue for a rubber boat?
When purchasing a valuable and useful item, any owner undoubtedly wants it to serve him as long as possible.
In particular, lovers of fishing and hunting on open water, happy owners of rubber boats, treat their watercraft with trepidation and monitor their condition. It's no secret that rubber is a special material that can often be damaged. To prevent the money spent on buying a boat from going down the drain, proper care and repair of your personal watercraft is necessary.
Popular brands of glue for rubber boats
The most reliable means for repairing rubber boats is undoubtedly glue. Its correct choice, in terms of composition, characteristics and purpose, guarantees the quality of repairs and the service life of the boat.
Let's consider the most popular brands of glue that have proven themselves among boat owners:
Glue 4508 (rubber, based on Nairit DP rubber)
This brand is considered the most effective for repairing all rubber products and, in particular, boats. Has high strength. A distinctive feature from other adhesives is that it does not require heating the product during work. If you use it in combination with hardeners (“Leukonate” or “Dismodur”), the wear resistance of the composition increases significantly.
Polyurethane glue for PVC boats
Polyurethane, as a substance, has special adhesive properties. In addition, it is plastic and does not lend itself to mechanical stress.
Radical
The adhesive can withstand low temperatures, pressure and loads and is adapted to sea water.
Gum
This glue contains natural rubber. A distinctive quality is the increased water resistance of the repaired product.
Rubber glue NK
It is a solution of rubber and nefras. Gluing is carried out using the “cold” method.
Adhesives 88 SA, 88-NP, 88-N
These grades are suitable for bonding rubber surfaces, but are used for a specific problem.
Which glue to choose
The modern market for repair kits, accessories and substances spoils inflatable boat owners with a rich abundance. Almost every tube is equipped with detailed instructions for self-repairing a PVC boat. However, not all manufacturers write about the advantages and disadvantages of glue. Let's look at the most popular and popular brands and tell you which glue to choose.
Moment
This well-known brand has long established itself as a handy tool for reliable gluing of various materials.
- Affordable, easy to find in the mass market;
- Waterproof, suitable for water motor category;
- Convenient and easy to use.
- Damaged by prolonged exposure to the sun;
- Susceptible to decomposition upon contact with gasoline, oils and other solvents;
- Highly toxic.
How to use glue correctly Moment:
- Apply glue to the surface to be glued in a thin layer along the seam and in a lattice shape along the patch.
- Wait 7 to 12 minutes.
- Press firmly onto the surface for 1-2 minutes.
- Allow the joint to dry for up to 12 hours.
Kleyberg
Domestic professional glue for repairing PVC boats. The polyurethane composition, coupled with organic solvents and stabilizing additives, gives Kleyberg adhesive not only beneficial advantages, but also disadvantages.
Advantages of Kleyberg glue (Kleyberg):
- Water resistance;
- Thick consistency;
- High adhesion.
Disadvantages of Kleyberg glue (Kleyberg):
- Loses adhesive properties at low temperatures;
- Must be stored at a temperature not lower than +15 degrees Celsius.
How to use Kleyberg glue correctly:
- Squeeze a thin layer of glue onto both surfaces to be glued.
- Allow to stand and dry with a hairdryer at a temperature of 20 to 30 degrees Celsius.
- Apply a second layer of adhesive and leave for up to 2 minutes.
- Close the glued sides tightly and press down with a weight.
- Leave under pressure for 12 hours to dry.
Texacol (Texacol)
This brand is widely used not only for repairs, but also for the production of PVC boats. The adhesive composition is designed for high tenacity of polyurethane materials and reinforced polyvinyl chloride.
Advantages of Texacol glue (Texacol):
- Available in one-component and two-component types;
- Does not require heating with a hairdryer;
- High adhesion.
Gluing a rubber boat, step-by-step instructions
In order to start repairing a boat with your own hands, you need to correctly identify the problem and its location.
The most common problems
- holes;
- tears on surfaces and at seams;
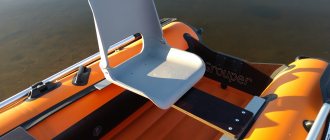
- damage to oarlocks;
- bottom defects;
- damage and deformation of tapes.
If it is not possible to visually determine minor damage to the body or bottom, you should gradually inflate its compartments and treat the surface with a foaming soap solution. Bubbles will form at the rupture site, indicating the location of the defect dislocation.
Necessary tools and tools
- glue and instructions for it;
- “Galosha” gasoline (car gasoline will not work, as it contains oil);
- patch material;
- self-adhesive tape;
- sandpaper (fine-grained);
- marker;
- brush;
- scissors.
How to properly seal a boat
Before starting work, you need to determine how many damaged places on the rubber product require repair. This can be checked by lowering the inflated boat into the water and marking the places where bubbles appear. You can also check this by applying a soap solution to the surface.
It's even better to conduct a thorough inspection of the entire surface. If there are worn areas or peeling, it is better to fix it immediately to avoid any unpleasant moments in the future.
After determining the place of repair, you need to start repairing the boat yourself.
Cutting patches
For the patch, a material is selected that is identical to the repair plane. If there is a repair kit, which should usually be in the package with the boat, then it is better to use it.
The patch is cut 5 cm longer on each side than the size of the damage. The shape should be rectangular, but with rounded ends to prevent the repair area from snagging in the future.
Surface treatment
The area to be sealed must be cleaned of dirt and treated with fine sandpaper. Since roughness provides better adhesion. After sanding, the surface is cleared of dust.
The patch itself is prepared for work in the same way.
Sew up the incisions
When stitching a cut, you must use nylon threads. The seam must be dense and strong so that it can withstand high loads.
Degreasing
After sanding and stitching, the joints are degreased. Acetone and gasoline are suitable for this procedure.
When degreasing, contact with the plane should not exceed two seconds, otherwise this product can affect the structure of the rubber.
This procedure is mandatory, as it promotes better adhesion of the two surfaces to be bonded.
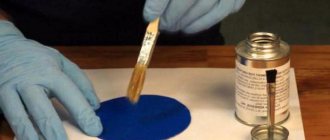
Applying glue
How to use the glue is written in the instructions. Typically, glue is not applied to the patch material, only to the boat itself. It is better to apply evenly with a brush. Covered with two layers. After the first one, wait the required time for complete drying and only then apply the second one.
Attaching patches
After applying the second layer, a patch is applied. Afterwards, the patch material is smoothed out, expelling the formed air; wrinkling is not allowed.
Alignment of the patch is carried out immediately, since after time, corrections are no longer made.
If the gluing is bad, it is better to immediately remove the patch and prepare a new one.
Basic “steps” of repair
Determining the location of the rupture
Significant damage such as holes, cuts and tears can be identified by visual inspection. If the boat allows air to pass through, but the defect location is not found, as mentioned above, you will need a detergent that covers all the chambers one by one. Inflated.
Treating the edges of the damaged area
Having identified the defect, its size and location, the edges of the damaged surfaces are processed before gluing.
The area of intended gluing is cleaned with fine-grained sandpaper. This is necessary in order to increase the quality of adhesion of materials and glue to each other. The fragment cleaned using “sandpaper” is treated with “Galosha” gasoline for a degreasing effect.
Gluing
If additional components are used for gluing surfaces, such as hardeners or similar substances, the adhesive mass must be prepared in advance.
In some cases, after applying the glue, it is necessary to maintain a certain temporary exposure for better contact between the adhesive fragments.
Repair instructions for individual components
Gluing a rubber boat along the seam
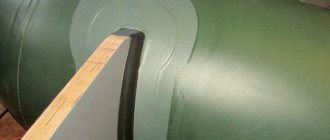
Fishermen and hunters who use rubber boats are well aware that elements such as seams are the first to fail. What does it look like? The special tape that protects the seam begins to peel off over time, allows water to pass through and can contribute to rotting of the suture material.
Boat seam repairs should be carried out in a dry, ventilated and warm room. At the beginning, the boat should be inflated, but not too much. Then, determine the location of the detachment or damage. Lightly sand it, degrease it and apply the glue itself directly.
It is necessary to ensure that the adhesive is distributed evenly over the entire area. Next, the surfaces are pressed tightly against each other and fixed with fingers or a press for several minutes. To fully achieve the effect, the boat, with taped seams, is left in an inflated state for the time specified in the instructions.
Storage:
Store tightly closed at temperatures between –20°C and +30°C.
If frozen, the glue completely restores its original consistency and properties at room temperature.
After the expiration date, dispose of the packaging with residual adhesive with household waste.
Shelf life 24 months from the date of production.
Application
1.
Make sure surfaces are clean, dry and ready for bonding. You can use warm water and soap to clean the surface, and paper towels or rags to dry. In some cases, you can also use a special cleaner. For more reliable gluing, you can also sand the surfaces with sandpaper, making them rough.
2.
Apply glue to both surfaces and be sure to leave it to dry for 10-15 minutes. Don't use too much glue - apply a thin layer. Use a putty knife or similar tool to spread the adhesive evenly over the surface.
3.
Make sure the glue is dry to the touch and does not stick to your finger and connect the surfaces. When gluing porous materials that absorb liquids well, it may be necessary to apply an additional layer of glue.
4.
Press them firmly together. It is not the duration of pressure that is important, but the strength! A few seconds will be enough.
5.
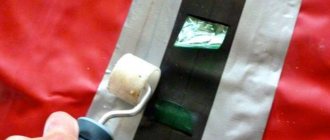
In order to distribute the glue evenly over the surfaces to be glued, professionals sometimes use a special roller. The connected surfaces are placed horizontally and rolled over them with a roller. Using a rolling pin or bottle you will also achieve the desired result. Press from the center outwards to avoid air pockets. Glue the edges carefully.
6.
The initial bonding strength is sufficient to immediately subject the surfaces to further processing. Maximum strength is achieved after 24 hours, depending on the material and the pressure applied when gluing.
FAQ
Is it possible to use Moment glue in the repair of rubber boats?
Based on practice, experts and experienced fishermen do not recommend using Moment glue for repairing watercraft. This glue reacts to high temperatures and dries when exposed to sunlight.
How to remove old glue from a rubber boat
It is worth taking into account that when the glue comes into contact with a rubber surface, a vulcanization effect occurs, in which the glue itself seems to be embedded inside the rubber. Therefore, it is not worth tearing off by hand or removing with solvents and other aggressive substances, as this can cause damage to the fabric.
In conclusion, I would like to remind you that sealing a damaged boat at home is one thing. But if it breaks down in nature, it’s not an easy task. Therefore, when going fishing or hunting, keep a boat repair kit with you.
How to choose quality glue for a rubber boat
Rubber boats are more popular. But it’s no secret that rubber is a very specific material and can be damaged quite easily. In order for your rubber boat to please you every time you use it, timely care and necessary repair work are necessary. After all, punctures and cracks in an inflatable boat are a very common problem. Unfortunately, this is not always the boat owner’s fault; there are also factory defects, but most often damage occurs from improper storage or during operation.
It’s good that minor damage to rubber can be repaired yourself. To do this, in most cases you only need special glue and patches. Currently, the consumer market can offer a large selection of adhesives for rubber and caoutchouc. But before purchasing, it would be better to figure out which glue for a rubber boat is suitable in your case, because the characteristics, purpose and composition greatly influence the quality of the repair performed.
What glue to use to glue a rubber boat
Under no circumstances should you use such seemingly traditional “Super Glue” or “Moment” to seal a boat. This glue is unreliable and difficult to clean off the surface. When choosing an adhesive, first of all, look at the instructions for it to see if there are any recommendations for use with rubber material.
The most popular and in demand glue among its analogues is glue 4508. This glue is rubber, based on DP rubber (chloroprene rubber). The base gives the adhesive good fire resistance, high bonding ability, excellent resistance to weathering, as well as natural oxidation, wear resistance and low temperature. After hardening, the glue becomes strong and elastic, withstanding pressure and loads, not to mention waterproof. With such popularity and effectiveness, it is difficult to doubt its reliability. The main difference when working with this glue is that it does not need to be heated during operation.
People experienced in this matter advise using it in combination with hardeners, so the abrasion resistance will increase significantly.
Most often, 4508 glue is used to repair surface damage to a boat hull. Before you begin to carry out repair work yourself, you need to determine the location and type of damage.
Rogneda and Super-NN glue also received good reviews among users, but it is better to combine it with the addition of Izur-021. In camping conditions, Loctite Super Fast glue will help to patch up the boat; it sets within 5 minutes, but this is its drawback, since its distribution over the surface is almost always uneven.
Also, due to the cold cooking principle, Tangit PVC-U or GRIFFON UNI-100 enjoy frequent attention among consumers. Radical glue is able to withstand low temperatures and is also adapted to sea water. Adhesives 88 SA, 88-NP, 88-N are usually used in certain problems.
DIY rubber boat repair
Holes, surface and seam tears, warped bands, leaky bottoms, damaged rowlocks are all common problems that require immediate repair.
If there is a problem with the location of a small puncture, the easiest way is to use soapy water. First, the boat's compartments are inflated step by step, and then the damaged compartment is lathered. This way you will find a defect where soap bubbles accumulate.
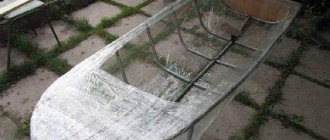
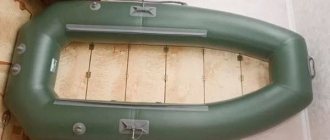
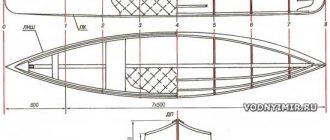
To describe the entire process of repairing a boat with your own hands, let’s take the Ufimka rubber boat as an example. In the old days, this rubber boat was in great demand. A light, compact two-seater rowing boat that can be rowed forward or backward. It consists of two inflatable cylinders, fastened together by a bottom and overhead gussets. But this boat has a significant drawback: the cylinders on the left and right sides do not have their own partitions and therefore, when punctured, the entire side is deflated. And since fishermen eagerly take advantage of the Ufimka’s ability to walk not only on water, but also through aquatic thickets, damage to the cylinders is inevitable. In this connection, the Ufa boat needs to be glued very carefully.
What do you need?
To repair the boat we will need:
- glue,
- suitable patch,
- scotch,
- sandpaper,
- scissors,
- gasoline or thinner,
- small brush,
- spray.
Many people advise using solvent 646 or Galosh gasoline. You cannot use a regular car one, because... its composition includes oils. If you decide to add hardeners or other components and additives to the glue, then it is better to prepare the finished mixture in advance. The patch should have rounded corners, so it will last longer. It is better to choose the material for the patch similar to the material of the boat, for example, rubber is needed for Ufimka. Sandpaper should be fine-grained.
Having found a defect on the surface (you can mark this place with a marker so as not to lose it again), having learned its size, you can begin processing the edges of the damaged area.
To increase the adhesion ability of the glue to the material, the gluing area must be cleaned with sandpaper. It would also be a good idea to sand the patch on the gluing side. Next, the cleaned areas are treated with solvent or Galosh gasoline for degreasing.
A thin layer of glue 4508 is applied to the patch and the damaged area of the boat. It is necessary to ensure that the patch is completely coated with glue at the edges. By the way, when the glue dries, it may curl up. Next, wait for the first layer of applied glue to dry, it lasts about 15 minutes, and then apply the second layer. After 10 minutes, the patch is applied to the damaged area on the boat and immediately rolled with a roller or other similar object. For proper adhesion, you can place the gluing area under a press for several hours.
Do not forget that it is better to begin repairs immediately after discovering a minor puncture than to leave such minor damage until next time. A larger hole will require much more effort to repair the rubber boat.
III. Damage repair
In fact, all types of damage to PVC boats are eliminated using the same method, with only a slight difference.
Step 1. Stripping
We clean the gluing area from dirt. Some people recommend using fine sandpaper for sanding, but this can only damage the surface. Sandpaper erases the coating of a boat just like everything else, and this is not exactly something that will improve the quality and durability of the boat. So, unless absolutely necessary, you should not resort to such a drastic method, unless the pollution is very firmly rooted and there is no other way to get rid of it.
Step 2. Degreasing
For ideal and durable adhesion, the surface must be degreased. The ideal solution for this is a solvent; you can also use acetone. If there is neither one nor the other, then alcohol will do, but this is only as a last resort. When degreasing the boat, you need to be careful and not overdo it - solvents, although hard, corrode the surface of the boat. Therefore, everything should be in moderation.
Step 3. Preparation
· Cut out the patch. It should be a couple of centimeters larger than the hole.
· Apply it to the damage and trace the contours with a pencil.
· Lubricate the patch itself and the gluing area on the boat with glue.
· Let the glue dry for 10 minutes.
· Then again apply a layer of glue to the patch and the surface of the boat.
· Wait a few minutes. The glue should dry a little, but set.
Step 4: Gluing
· Using a hair dryer, heat both surfaces coated with glue. You need to do this quickly so that the surface warms up, but the glue does not dry out.
· We apply the patch to the surface, making sure that it lies strictly along its contours drawn and smeared with glue, and also that there is no air between the surfaces to be glued.
· We thoroughly roll the gluing area with a hard roller or some similar object so that the surfaces adhere well.
· We send the boat to dry for 2-3 days.
Minor scratches
which only exposed the material, simply fill it with glue. But you can, just to be sure, put a patch on it.
For damage greater than 5 cm
two patches are installed. One is outside, the other is inside. First you need to glue the one that will be inside, then the outside one.
Damage exceeding 15 cm
should be eliminated by specialists; it is difficult to do it yourself. And the repair kit is not designed for such serious holes - there is not enough material.
Methods and means for repairing inflatable rubber boats
Small punctures and cracks in inflatable boats are common.
The reasons for their formation are different: from improper operation and storage to banal factory defects.
Minor damage can be repaired using special glue and patches. But if your favorite “Ufimka” or “Kolibri” comes apart at the seam, then you cannot do without serious repairs.
Read about how you can repair a rubber boat yourself? Also check out our new article about the secrets of choosing glue for PVC boats.
The answer immediately suggests itself - seal the rubber boat
This is exactly what many people do, but it doesn’t work out for them. In this article I will try to briefly give some recommendations on how to apply your knowledge as correctly and systematically as possible in order to correctly seal a rubber boat and continue fishing in the future.
- Surely, when you bought the boat, a repair kit was included with it. Rule 1:
this kit should always be nearby, because... the manufacturer selects the most effective means for repairing its ships, and all you have to do is follow the instructions.
- Glue. In principle, you can use any waterproof glue for gluing PVC, rubber, etc. But, in order to be completely sure of the quality, it is advisable to purchase glue in specialized stores (often, glue and patches for boats are sold in fishing and hunting stores.
These are the two main points that you need to pay attention to.
And then, the actual repair of the boat. It is customary to distinguish between ordinary small punctures, large punctures and torn coating violations, and material divergence along the seam. The simplest, and as practice shows, reliable and durable, is to seal small and medium punctures.
Variety of adhesive mixtures
The consumer market today is filled with an abundance of different products. The table below will help you decide on the glue that is most suitable for repair.
| Brand | Application area | Time until complete hardening, hours. | Packing volume, ml | price, rub. | Notes |
| "Uranus" | For polyurethane and PVC products | 4-24 depending on method (hot/cold) | 45 | 150 | A good effect is achieved only with heat treatment |
| Stamp 4508 “Eurobank” “Wave” “Three Whales” “Monument” | for rubber and rubberized fabrics | 10-12 | 200 50 45 30 | 70 50 50 35 | Does not require vulcanization |
| Poligrip M328 | PVC | 24 | 100 | 100 | Designed for urgent repairs |
| "Three whales" | For products made from PVC fabrics | 24 | 50 | 38 | |
| Rubber glue "Mark A" | universal | 24 | 45 | 100 |
There are also ready-made repair kits available for sale, which include a tube of glue and material for patches.
Adhesive “Moment”, for boats and PVC products
Characteristics
- Type : Glue
- Works : External, Internal
- Scope of application : Universal, For wood, For furniture, For windows, For floors
- Country of origin : Russia
- Packing : Box
Description
Adhesive for boats and other PVC products is suitable for both professional and DIY repairs. The adhesive seam is transparent. The connection is resistant to water, oil and gasoline. Suitable for gluing various combinations of soft and hard PVC, rubber, leather, metal, fabric.
Polychloroprene adhesive
– a one-component composition that is created for gluing inflatable boats, wetsuits and rubberized materials. Not particularly suitable for PVC, but in the absence of fish, as they say...
- Water resistant
- · Elastic
- · High strength
- · Sets quickly
- Ensures seam durability
- Durable
- Heat resistant
Restoration of serious damage
If “Ufimka”, “Volga” or another product comes apart at the seam, then the technology for eliminating such damage becomes somewhat more complicated. In these cases, the cylinder must be sealed on both sides.
The patch for the inside must exceed the gap itself by at least 5 cm. It must be cleaned and degreased in the usual way, and glued in two stages.
Immediately apply one half of the tear from the inside and one half of the patch similarly to the method described above (in two layers with a break of 15 minutes).
Next, this part is carefully inserted into the gap, pressed and rolled. After drying, a similar procedure is carried out with the other half.
When using any narrow metal objects, it is important to prevent the sides from touching prematurely. The outer patch should be glued in the usual way.
Large damages and cracks in a rubber boat can be repaired in another way. The cut is stitched with nylon thread, the seams should be as close to each other as possible. The damage on top must be sealed with a large patch. In this case, using a patch from the inside is not required.
How to seal a rubber boat with a cut or torn hole
To repair large cuts you will need nylon threads and a thick needle. It is necessary to sew up the resulting hole in the boat so that the seam forms a rigid and durable junction of the edges, but the threads are not too tight. After all, during use, the vessel will constantly receive waves and high loads, so the seam must be made so that it does not come apart 100%.
If the boat has a hole with torn edges, which are problematic to sew, you should use the gluing method. This operation is carried out similarly to removing a puncture, only with an additional procedure - gluing a patch from the inside. Let's consider how to carry out this action.
So, to repair a torn hole, you will need to cut two patches, and one will be 5 cm larger than the size of the break, and the second will be another 3-5 cm larger than the first. Apply a layer of glue to the inner surface of the hole and to a smaller patch, while only treating half of the fabric with glue! This is necessary for convenience and strength of bonding. After the layer has dried, carefully place the patch into the hole and glue the edge, pressing it tightly to the inside of the case. For high-quality adhesion, we roll the gluing area a couple of times with a roller.
You may be interested in: Selecting a propeller for a boat motor - types, calculation, decoding of markings
After letting the first part dry a little and “set”, apply glue to the second edge of the patch with a brush and repeat the gluing procedure. Next, again leave 10-15 minutes to dry, and glue the top patch using the method described above.
An example of stitching a torn hole in a rubber boat with nylon thread
Recommendations for use
In order for the service life of the inflatable boat to be as long as possible, you need to adhere to simple operating rules.
- Do not over-pump the cylinders.
- It is advisable to store the watercraft in an inflated state.
- Try to drag the boat as carefully as possible along the coasts of water bodies, especially in places where there is a risk of mechanical damage.
- Limit the contact of the cylinder with sharp objects (when fishing, it is best to use a folding knife, the ends of the anchor should be blunt, etc.)
- If any defects are found, they should be glued immediately.
- It is advisable to cover the seams and bottom with a special self-adhesive tape.
- Protect from constant exposure to sunlight and frost.
If you follow these recommendations, your favorite “Ufimka” or “Volzhanka” will last a long time, and fishing and relaxing on them will bring nothing but pleasure!
You may also be interested in material about choosing a pump for a PVC boat yourself. We recommend reading our material on creating an awning for your boat.