Fishing tackle repair
Give broken gear a second life, don’t rush to throw it away!
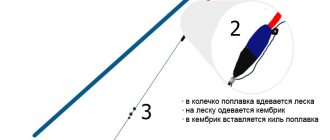
We present to your attention an additional service of the store - repair of fishing gear of any complexity.
Prevention of reels and rods for different types of fishing! Our TackleMaster, in the shortest possible time, will carry out professional and high-quality repairs of broken gear, at the lowest prices. For questions about gear repair, please contact the store managers, on weekdays from 9:00 to 20:00 and on weekends from 10:00 to 19:00.
Below are the types of work and the cost of their implementation.
Telescopic rod repair
- VK
Like spinning rods, telescopic and plug fishing rods have several characteristic types of breakdowns, according to which a certain type of repair is selected. Let's look at them in order.
Rod whip repair
A frequent occurrence is the breakage of the whip of a conventional fly rod, which is hollow along the entire length. Most often, the whip is lost in the upper third of its length. The fix is to select and install a new connector. Somewhat less often, a breakdown occurs at the point where the whip exits the second elbow. In this case, winding a fiberglass bandage with subsequent adjustment to the diameter and cone of engagement helps. Of course, in both cases the rod will become a little shorter, but a few centimeters are unlikely to affect the fishing result.
The so-called “sports” whips with a monolithic carbon fiber insert practically do not break. Thanks to a more uniform distribution of forces along the length of the whip, it absorbs the load much better and does not overload the subsequent knee. Rarely does the thin upper part of the carbon fiber insert break due to careless use, but it is not difficult to straighten it with a diamond file and glue a new connector.
An extremely rare failure is the separation of the insert and the hollow lower part of the whip, but this is most likely a manufacturer’s defect. It is treated by gluing the whip back on; For reliability, it is worth wrapping the joint with a thin nylon thread impregnated with epoxy resin or making a microbandage from fiberglass. You can try to look for a suitable whip in the store, but you need to choose exactly the same one (preferably from the same model), approximately equal in rigidity and weight to the broken one.
One option is to replace the hollow whip with a “sports” one, but in no case vice versa, otherwise a stiffer hollow whip will break the second knee even with a small load. Such breakdowns occur quite often.
The situation is much simpler with a plug rod for fishing with shortened equipment. Here, a whip breakage is quite a rare occurrence, since almost all the load is taken by the rubber shock absorber, but even if it does occur, you just need to rearrange or select a new Teflon bushing. A small loss of length can be neglected. When selecting a new whip, it is better to choose the most rigid one and the appropriate diameter. There are often uncut long lengths on sale that can be used as spare parts for plug rods of various models. They are adjusted by cutting them with a diamond file to the required diameter and length.
Repair of upper and middle knees
Repair of these knees depends on the location of the breakdown. If the knee breaks in the upper part, then a simple and effective way is to increase the lead-in part of the thinner knee so that the joint moves to the entire section of the knee. The site of the breakage itself is trimmed and a bandage made of glass or carbon fiber, which will prevent transverse cracking of the upper edge of the knee, must be applied to a length equal to two to three diameters of the broken knee. This repair is very simple, but requires care when adjusting the gear cone.
It's even easier if the breakdown occurred in the lower part of the knee. According to the standard scheme, a bandage with a length equal to six to eight diameters of the knee is applied at the site of the breakdown. The pattern is made from fiberglass (it is not necessary to use carbon fiber for this) and is made in a rectangular shape. When winding, it is advisable to step back 1-2 cm from the place of breakage for ease of work, and then use sandpaper, first coarse, and then with medium grit, to rub in the engagement cone. Repair is more difficult if it breaks approximately in the middle of the knee. Of course, you can use one of the methods described above, but then the length of the rod will decrease by almost half the knee.
The following options are possible: If the knees are sufficiently tapered, insert the upper fragment telescopically into the lower part, having previously leveled the breakage site. The optimal engagement length should be equal to five to seven diameters of the elbow at the point of failure, the minimum – at least three diameters. If the engagement length is shorter, the connection will not be able to withstand the load. The joint must be cleaned with sandpaper on the outside of the elbow to remove varnish, and on the inside to remove special grease that does not provide sufficient adhesion during gluing. Epoxy glue is usually used. When gluing, it is necessary to ensure that no sagging or drops of resin form on the inner surface of the knee; they are removed with a swab moistened with a solvent.
After the resin has polymerized, it is highly advisable to make a narrow (one or two knee diameters long) reinforcing bandage outside, directly at the joint, which will prevent longitudinal cracking of the form. For this, two or three layers of thin fiberglass are enough.
Using the same scheme, the upper and middle legs (from the second to the fifth, and sometimes the sixth) of plug rods for fishing with shortened equipment are repaired. They almost always have sufficient taper to allow such repairs to be made with minimal loss of length.
Repair of lower knees
The most difficult parts to repair are the lower legs of telescopic and plug rods. In fairly expensive and high-quality products, these elbows are almost cylindrical; it is impossible to repair them using the method described above, and you have to do a full repair with gluing in a bushing and applying a bandage. Unlike a spinning rod, more serious requirements are placed on the sleeve: it must be made of carbon fiber, and even better, from a rod of approximately the same class as the one being repaired. Indeed, in addition to centering the broken knees, she has to take a decent load, since it is difficult to get by with just an external bandage (or it will have to be made too thick). The length of the sleeve should be equal to five to seven diameters of the knee at the point of fracture. In this case, the thinner elbow should fit freely into the sleeve located in the thicker one.
Quite often, especially in so-called “mini-telescopes”, this condition cannot be met, and a new lead-in part has to be formed. By the way, the angler is forced to transport the repaired butt knees of plug rods separately precisely because of the bandage and internal sleeve, which prevent the knees from folding into one another. However, this does not interfere with the assembly of the rod to bring it into working condition.
Of course, the bandage for carbon fiber rods, and even more so for plugs, must be made of carbon fabric; it should have a thickness equal to approximately 1.2-1.4 times the thickness of the rod wall at the point of breakage. Only in the most desperate situation can a bandage be made from fiberglass, and in order to maintain sufficient load-bearing capacity it must be 1.5-2 times thicker than the knee wall. A breakage of a plug rod at a joint is extremely unpleasant.
Such repairs are usually so complex that even in a workshop it is often easier to replace the entire docking assembly than to repair a fragmented one. The presence of a repaired area on the plug does not affect its performance at all. Maybe it just worsens the appearance a little.
Common repair cases
Regardless of the type of fishing rod, wear on the joints is inevitable. Of course, an angler can slow it down significantly by keeping the knots clean and cleaning them if necessary. But there are types of fishing (for example, summer jigs) when the rod is laid out dozens of times during fishing, and often the abrasive gets on the rod. I have seen rods that literally fell apart into their component parts in just one season. Meanwhile, strengthening the docking unit is very simple; just apply a bandage made of a couple of layers of thin fiberglass, and then adjust the entry. This kind of work can be done when the unit is already pretty worn out.
A temporary, but quite effective measure to strengthen the docking unit is to wrap the previously degreased entry with two or three layers of wide tape. The tape should be glued as evenly as possible, without bubbles or folds. Such protection is often enough for several fishing trips, and if necessary, it is easy to replace.
Rods with rings
All of the above applied to rods without guides. The latter, unfortunately, make repair work very difficult, since in order to get to the broken knee, they have to be dismantled and then reinstalled. Sometimes it is possible to get by with half measures: remove the ring only from the upper knee, for example, when forming the lead-in part. But working in this case is very inconvenient, and the likelihood of a new breakdown increases greatly, because the rod can simply slip out of your hands. Especially many problems arise when working with modern Bolognese fishing rods, into which manufacturers glue internal plugs made of microporous rubber so that the edges of the knees do not break on the guide rings. It is possible to remove them, but such an operation is often more labor intensive than the repair itself.
Therefore, the best option is to handle the rod as carefully as possible, trying to avoid breakages. Competent and high-quality repair of a fly rod does not greatly affect its structure, weight and strength and often removes a potential weak point. Numerous repairs to a “combat” fishing rod do not affect its structure and strength.
Related articles:
Wobbler modernization
Homemade spinners for perch
Repair of the line handle bracket
Homemade balancer
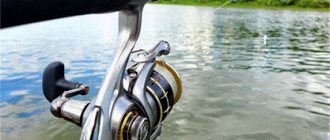
Fishing reel repair
Fishing reel prevention –
- a procedure that must be carried out at the end of each fishing season, as well as if the reel has been used in extreme conditions for its mechanism.
For example, after a fishing holiday in the Volga-Akhtuba floodplain, where any blow of the steppe wind is in some way a sandstorm, all gear requires immediate prevention. And if a spinning rod or fishing rod can be cleaned of sand yourself, at home, by rinsing it with water and wiping it with a towel, then the reel requires more careful care.
In order not to have to do a full repair of the spinning reel, it is worth doing preventive maintenance in a timely manner. Prevention of a fishing reel includes cleaning the main working elements from sand and sandy dust, followed by replacing the lubricant in them. The liquid lubricates the instantaneous reverse stopper and the “fast” bearings.
Semi-fluid - “slow” bearings, an endless screw, its drive gear, bushings and gears that do not carry large loads, and also, if necessary, friction discs are lubricated with it.
Thick, placed in the drive pair and other rotating elements that are subject to heavy loads.
The cost of coil prevention is 500-600 rubles
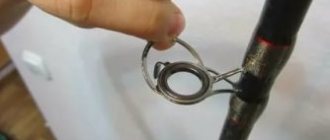
Repair of the line laying mechanism - perhaps the most common “disease” of a spinning reel is the breakdown of this mechanism. As a rule, it is treated by replacing the spring, although sometimes “isolated” cases occur.
The cost of repairing the line laying mechanism is from 900 rubles
Replacement or repair of bearings - if your reel “crunches”, or extraneous, characteristic noises appear when the rotor rotates or jams, most likely one or more bearings are “decided to live a long time”. Don’t continue fishing, but bring it to us as soon as possible: most likely, the problem can be solved with minimal material costs if you contact us in a timely manner.
The cost of replacing or repairing bearings is from 500 rubles and more.
Replacing gears - if sand gets into the reel mechanism, not only the bearings can fail, but also the gears, and most often those that are subject to heavy loads. A part such as a gear cannot be restored and the coil can only be saved by replacing this element.
The cost of replacing gears is 900-1100 rubles
Replacement or repair of the shaft - as a rule, this element of the coil requires replacement or repair in the event of mechanical stress. If the coil fails to fall onto a rock or asphalt, the shaft may be bent or even broken.
The cost of replacing or repairing the shaft is from 900 rubles
Replacing the handle - the handle of a fishing reel, as statistics show, also breaks due to the fault of the user. But no one is immune from such troubles, and sometimes they happen.
The cost of replacing the handle (coil made in China) is from 300 to 500 rubles
The cost of replacing a handle (Shimano, Daiwa reels) is from 900 rubles and above.
Other breakdowns and malfunctions of fishing reels are considered individually, over the phone.
ROD REPAIR AT “HOME” CONDITIONS
A broken favorite rod is always a big disappointment. After all, after a breakdown, the fisherman loses his “working tool.”
In many, but not all cases, it is possible to carry out decent quality repairs directly at home, on your own.
Before starting repairs, you need to evaluate both the technical feasibility of the repair itself and its feasibility. First you need to evaluate the feasibility. It may happen that the material and labor costs for repairs exceed the cost of the rod itself. If you live in a large city where several fishing stores operate, then purchasing an inexpensive fishing rod instead of a broken one will not be difficult, and it will not cause a significant financial blow. It’s a different matter if you break a long fly rod or plug rod purchased at an exhibition, from a catalog or on occasion and for decent money. Then the first question becomes replacing the broken knee.
Theoretically, this is possible, but only if you are very lucky. Firstly, you will be lucky if you purchased your rod directly from the manufacturer, who took care of the spare parts. Secondly, you might be lucky if you suddenly manage to pick up a knee from another rod. Even if you take elbows from one rod and replace them with the elbows of another rod made in the same factory, you still have to be lucky for them to fit together. Although such cases do happen.
Before you begin repairs, you need to accurately assess its feasibility. To help you do this, let's look at some of the most common types of float rod failures and repair methods.
In the first place, of course, are breakdowns that occurred due to careless handling of the fishing rod.
Most often the rod is stepped on. They usually step on the middle of the knees. If one knee is broken, then it’s easier, but if you stepped on and pushed through several knees, then it’s cheaper to throw away the rod and buy a new one. Very often the rod is crushed under a car door. Such cases are typical when fishing smoothly flows into a relaxed holiday, and getting ready to go home is already done in the dark. I have personally seen a rod knee broken in seven places. The knee did not want to “get into” the car and they gradually pushed it through, each time trying to close the door. And so - seven times.
In second place are breakdowns that occurred during overload of the rod. Overloading of the rod occurs when very heavy rigs are used, when they try to cast a rig against a strong wind with a long and insufficiently powerful rod, as well as during an attempt to cast a rig with a hook caught in the bushes and during attempts to break off the rig after a “dead” hook with the help of a rod .
During overload, a knee fracture usually occurs in its lower third. Such breakdowns can be fairly easily repaired. To do this, use a diamond tool (any other tool does not cut carbon fiber, but breaks it) to trim the cut. A shortened lower part of the knee is obtained. The upper part of the broken knee is inserted into the lower part and the approach is adjusted. The entry is adjusted by shortening the lower part of the upper trim until the mating length is three diameters at the joint. This way you can rejoin a broken knee even while fishing.
In the event that the knee is broken almost in the middle, there is one subtlety in repair. In order to reduce the weight of the knee as much as possible after repair, you need to end the thin fragment and after that cut the end of the thick fragment until the entry of the fragments reaches the required length.
After adjusting the scraps, it is better to glue them together with a drop of waterproof glue, but you don’t have to glue them.
A rod repaired in this way has a slightly different structure, but you can fish with it indefinitely, that is, until the second unforeseen event.
The situation is worse if the knee is split in the upper part, at the end of the knee, or if the butt knee is broken. In this case, a bandage is used. Banding a broken knee is also used to repair the knees of plug spinning rods and match rods.
You can carry out independent repairs at home using the following technology. The broken knee needs to be placed on some kind of mandrel. In reality, this may be a thinner rod leg.
In order to later remove the repaired elbow from the mandrel, it should be covered with a separating layer.
You can use plastic film as such a layer, but it is better to use lubricant.
The best results are obtained when wax is used. But it is relatively difficult to get natural wax; it is much easier to stock up on wax floor polish. Lubricant is applied to the mandrel along its entire length. The elbow is placed on the mandrel with lubricant, and the repair can begin. Thin, no thicker than 0.12 mm, fiberglass is taken. You can take a piece of fiberglass, which is used as electrical insulation or thermal insulation. Fiberglass must be annealed on an electric stove. During annealing, paraffin lubricants are removed from the surface of the fiberglass. You can also anneal it over an open fire, you just need to not overheat the fiberglass so that the fiberglass does not start to melt. If you accidentally burn through the fabric, it needs to be replaced, otherwise the strength of the bandage will be low. After preparing the fabric, you can begin making the binder. As such, it is better to use epoxy resin, and a resin that is designed to polymerize for at least 10–12 hours. The slower the polymerization goes, the stronger the connection will be. The resin is mixed with the hardener in the proportion recommended in the instructions for it. It is very convenient to mix in polyethylene lids, which are used to close the jars. The resin is thoroughly mixed. It is better to do this by placing the lid on a warm radiator. The heated resin will have a lower viscosity and better saturate the fiberglass.
The fiberglass is cut to size. The cutting dimensions are made such that the bandage covers the length of the knee crack by 3–4 centimeters on each side. The width of the fiberglass should be sufficient to wrap the knee at the fracture site approximately four times. The cut fabric is impregnated with the prepared resin and the fracture is carefully wrapped. At the next stage, the fiberglass needs to be secured and sealed. For this, lavsan film is used. It is convenient to use an old tape, and a narrow one at that. The tape must be placed on the fiberglass with the side on which there is no magnetic layer, otherwise it will be very difficult to remove it later. The tape is laid turn to turn, with an overlap and under constant tension. In this case, excess resin will be squeezed onto the surface. After winding, which is called crimping, excess resin is removed with a rag. The next day, before removing the tape, it makes sense to warm up the repaired area. To do this, you can use a hairdryer or other source of hot air. After heating, the strength of the connection will increase. You can do it differently. Remove the tape by simply winding it up and warming up the repair area. In this case, the knee can be heated to a temperature of 100–120 degrees for half an hour. At higher temperatures, household resins may change their strength characteristics, and it is better not to take risks.
It should be noted that repairing the knee at home will not completely restore the strength of the material. Cold-curing resins are susceptible to moisture, so you will have to dry your knee after each fishing trip. But in general, this method of repair provides the necessary strength and reliability.
Separate problems arise when a fracture occurs in the uppermost knee. If the tip is not hollow, then it should either be replaced or shortened to the point of break. Attempts to repair using a bandage bring satisfactory results only in cases where it is possible to join the fragments using a piece of a very thin-walled and light tube. But, as a rule, nothing good comes from such repairs.
Repair of spinning rods and other fishing rods
Replacement tulip - this is the name given to the last ring on the tip of the rod. Most often, when using rods, it is the tip that breaks, and if the length of the broken tip is less than 5-7cm, it makes sense to simply re-glue the tulip. Also, after a certain period of time, the insert may crack or fly out. This tulip is unusable and must be replaced.
Repairing a fishing rod includes replacing the tulip, adjusting the seat and applying the bottom winding.
The cost of replacing a tulip is 500 rubles
Replacing guide rings - they can be broken due to improper transportation of the rod. It is enough to lightly press the rings with heavy objects and the ceramic insert of the ring will crack. The procedure for replacing guides is not expensive, so don’t rush to put your rod on the shelf.
The cost of replacing the access ring on 1 leg is 500 rubles
The cost of replacing a pass ring on 2 legs is 550 rubles
Replacing unloading rings - sliding rings on the upper leg of a Bolognese or spinning telescopic rod are called unloading rings. To replace them, you need to remove and re-glue the tulip.
The cost of replacing the unloading ring is 550 rubles
Adding an element for attaching bait - many manufacturers of spinning rods do not install such a basic and convenient part, which is always missing when you move from one place to another. If you are planning to order repairs of spinning rods from us, then you can also take care of such useful little things.
The cost of adding an element for attaching bait is 300 rubles
Replacing the upper whip on a Bolognese (float) rod - sometimes, the breakdown of the upper leg of the rod is so serious that restoring it by applying a bandage does not make any sense - the structure and sensitivity of the rod will be impaired. In such cases, the most correct solution would be to replace the broken whip. We will select and replace the appropriate whip for your fishing rod!
The cost of replacing the upper whip on a fishing rod is 500 rubles (excluding replacement of rings)
Knee fusion on a Bolognese float rod (except for the upper knee), fusion of the lower knee on a spinning rod - a broken knee is fused by applying a bandage.
The cost of knee repair is from 1500 rubles
Splicing the upper whip on a Bolognese float rod, splicing the upper knee of a spinning rod - a broken knee is spliced by applying a bandage.
The cost of knee repair is from 1500 rubles
Restoring the connection of a plug-in spinning rod - such a breakdown occurs during power casting when the spinning rod’s knee is poorly secured.
The cost of repairing the spinning rod docking is 1500 rubles
Other types of repairs for spinning rods and other fishing rods are priced individually, by phone.
| Coil prevention | 500-600r |
| Repair of the line laying mechanism | from 900r |
| Replacement or repair of bearings | from 500r |
| Replacing gears | 900-1100rub |
| Shaft replacement or repair | from 900r |
| Replacing the handle (reels made in China) | 300 – 500rub |
| Replacing the handle (Shimano, Daiwa reels) | from 900r |
| Replacing the tulip | 500r |
| Replacing the pass ring on 1 leg | 500r |
| Replacing the pass ring on 2 legs | 550rub |
| Replacing the relief ring | 550rub |
| Adding an element for attaching bait | 300rub |
| Replacing the top whip on a rod | from 500 rubles (excluding ring replacement) |
| Lower knee repair | from 1500r |
| Upper knee repair | from 1500r |
| Restoring the docking of a plug-in spinning rod | from 1500r |
Repairing the upper part of the rod
Some damage to fishing rods can be repaired directly while fishing. It is clear that the fishing rod will not function as well. However, they will be able to fish. The house will have to undergo better repairs.
For repairs we will need the following materials:
- Good glue that dries quickly (not super glue)
- Elastic waterproof varnish
- Degreaser (vodka or alcohol will do)
- A skein of thin nylon threads
- Fine sandpaper
Most often the rod tip breaks when fishing. If you fish with a feeder, then you should have spare quivertips. It is better to replace the broken tip and repair it at home in a calm environment. If there is no spare one, or the breakdown occurred on the folding fishing rod, then it will have to be repaired in the field.
Often, cracks of varying degrees of depth form on the tip, or, in other words, on the upper knee of the rod, and breakages occur. If a crack has formed on the top, it can be repaired in several ways. If it is shallow, more like a large scratch, then it should be thoroughly cleaned of dirt and degreased with alcohol. Next, the damaged area should be varnished. At home, you need to apply two layers. After the first coat, wait until the varnish dries, then apply the second coat. The varnish dries quickly enough in the sun. During this time you can fish with other gear.
If a large crack has formed, and it is clear that there are prerequisites for its increase, then more serious repairs will have to be made. First of all, it is necessary to clean the place where the crack has formed from dirt and degrease it. Next, coat this area with varnish and leave to dry. After the varnish has dried, we wrap the thread in this area using nylon thread. If there is no thin nylon thread, then a braided cord with a cross-section of 0.12-0.16 mm is suitable. The turns should fit tightly together, as in the photo below:
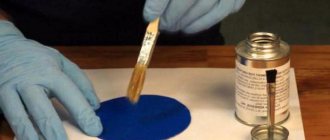
After this, apply a layer of glue to this area. We do this very carefully using a special brush. All the glue should get on the coils, but not on the form, and especially not on the rings.
It is not always possible to make this operation aesthetic. Much depends on the thickness and quality of the thread. But even if the view is not very good, as in the photo below, the fishing rod will still last quite a long time.
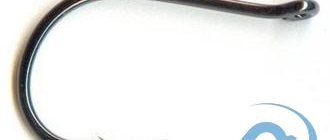
It happens that the tip breaks near the tulip. In this case, it is necessary to cut off the edge of the broken tip with a file and clean it from irregularities and chips.
You should cut about 0.5 cm. In this case, it will be easier to insert the tulip. Before further processing, you should plant the tulip to make sure the sizes are compatible.
The next stage is varnishing the tip. If the tip is hollow, then you need to place a cotton wool inside so that glue does not get into the middle. After applying the glue, wait about 5 minutes, remove the fleece and put on the tulip. It should fit tightly enough to stick well.
Usually this operation does not cause any problems. This way you can also repair the tips of feeder rods if you choose a tulip. You can also use an old tulip. You just have to pick out the rest of the top from the inside.
Gear repair.
The workshop operates in a store on
Ladozhskaya (Zanevsky Prospekt, 38, NEO shopping center).
Fishing gear is repaired by a professional fisherman, a master with more than 10 years of experience, Vladimir “Morgan”. VLADIMIR - repairs fishing rods of any type (spinning rods, float rods, feeder rods, etc.), can make excellent spinning rods and special wire rods to order. Repairing fishing gear is his main occupation. This is what allows us to offer you high-quality services and bring almost any broken gear back to life. We can repair the most complex breakdowns, if of course it is even possible to repair. At your request, we can modify the rod, reinstall the rings, increase the length or shorten the handle, replace the cork handle or glued whip. We are confident in the quality of our work and provide a 6-month warranty on repairs. Our master also assembles designer rods for spinning fishing and wiring, according to your requirements.
Examples of our master’s work:
Repairing a broken spinning rod
Replacing the ring
Repair of the tip without loss of characteristics
Carp life hack. Equipment repair and maintenance
In all areas of human life, there are small tricks that are brilliantly simple, but make life much easier. Today we will tell you about some secrets that will be useful to all carp anglers without exception. Carp life hack!
Carp life hack No. 1. Repairing a tent or shelter
Anything can happen when fishing and sometimes the fabric of our shelters is subject to various mechanical damages. We won’t describe now how this can happen, just let’s take a situation - you have a hole in the roof of your tent, or shelter.
Today, in the clothing industry, the same leather products are successfully used, so-called patches. They can be in the form of a figurine, or just a piece of fabric. Sold in a variety of colors and sizes. They are called “clothing repair patches.” The leading manufacturer in 21st century patch manufacturing is McNett. Which offers you two types of patches - from CORDURA® and Tenacious Tape™. Despite the fact that we remember Cordura from the eternal bags of the FOX FX series, Tenacious Tape material is best suited for tents. It belongs to the Gear Aid line and is intended specifically for repairing punctures, cuts, tears, etc. They can be used to repair inflatable products, backpacks, bags, and the repairs can be performed on the go, which is very important!
Sample patch from McNett
Just cut off the piece we need to size
Glue to the slot
All is ready!
It’s hard to believe, but everything is really as simple as in the photo and does not require any complex operations or the use of various glues and presses.
Carp life hack No. 2. Improving lightning performance
To prevent the zippers of your shelter, tent, or sleeping bag (which is especially important), use the old proven method that our grandparents used. Take a piece of candle wax and rub it on your zippers. Even if you just bought the item and it is very, very new, it will be impossible not to notice that the zippers open and fasten a little faster than before they were waxed.
Carp life hack No. 3. Prevention of rod joints
Don't move the candle too far! Now is the time to pay attention to the knee joints of your rods. We hope that you follow the rules for caring for your rods, but we still recommend that you also wax the joints of your rods. This will add smoothness, increase glide, and extend the life of your blanks. Please note that this does not in any way affect the fact that when casting the joint will begin to slip out of the lower knee. Only on the condition that you do not check the joints before casting, and this must be done even under normal conditions when you do not use wax.
Carp life hack No. 4. Cleaning the coils
WD-40 aerosol was invented in 1953 in California. The creator's name is Norman Larsen. Initially, this liquid was intended as a water-repellent agent that would resist corrosion. And only a couple of years later it turned out that it also has many options for household use. Half of the composition is white spirit solvent, a quarter carbon dioxide, 15% mineral oil and 10% inert ingredients. By the way, sea fishermen love to use it, lubricating their fishing gear with it. There is even a legend that WD-40 contains fish oil, since it was noticed that larger fish were biting on gear treated with this spray.
We do not suggest you use WD-40 as a dip, but cleaning the coils and lubricating their mechanisms is more than enough! Please note that you need to use WD-40 with the addition of SILICONE!
Carp life hack No. 5. Prevention of telescopic stands
In the same way, you can carry out preventative maintenance on your telescopic stands, which will extend like clockwork!
Full or partial copying without the consent of the portal editors is prohibited
Price for services:
| Name of services provided | Price, rub) |
| Installing an insert into a ring or tulip | 300 |
| Installation of a ring (with one foot), tulip | 350 |
| Installation of the ring (with two claws) | 400 |
| Installing the bait holder | 300 |
| Spinning rods: | |
| Whip repair | 1000-2000 |
| Butt repair | 500-3000 |
| Repair of spigot (connection point) | 1000-1500 |
| Restoration of cork handle | 300-800 |
| Repairing the butt under the handle | 1000-1500 |
| Replacing the reel seat | 1000 |
| Replacing the cork or neoprene on the handle | 1000 |
| Float rods: | |
| Knee repair | 600-800 |
| Replacing the reel seat | 500 |
* the cost of work is indicated without the cost of materials used
Repair time is from 7 days.
Urgent repairs possible + 20% of the base cost
Other breakdowns and malfunctions of spinning rods and fishing rods can be discussed by phone with a specialist.
Master working hours:
from Monday to Friday from 11 to 18 You can also hand over your spinning rod for repair to the sellers of our store during opening hours Zanevsky Prospect, building 38 - TK “Neo” (2nd floor), Mon-Fri 10.00 to 20.00, Sat-Sun from 10.00 to 20.00 19:00
Telephone consultation:
RODBUILDING (AUTHOR'S ASSEMBLY OF RODS TO ORDER)
ASSEMBLY OF TELESCOPIC WIRING RODS
.
from 2500 rubles + cost of spare parts
Our master has extensive experience in catching a wide variety of fish, from bream to salmon. We create unique telescopic fishing rods, giving them the required technical characteristics. Just call us or come to our office, you won’t find such “telescopes” anywhere else.
AUTHOR'S ASSEMBLY OF CUSTOM RODS
from 2500 rubles + cost of spare parts
It is not always possible to buy a fishing rod that perfectly matches the desired technical parameters, and when you need something individual, one of a kind, such a fishing rod can only be assembled to order. We discuss the desired characteristics, design, select any components and assemble a unique spinning rod especially for you.
Repair and tuning of modern fishing rods
Few anglers have ever had a fishing rod break in their life. Modern carbon fiber rods are quite fragile tools, sensitive to shock and overload, and serious fishing is no walk in the park. Unusual situations happen all the time when fishing, and as a result, sometimes the fishing rod breaks or fails. After a breakdown, you should, if possible, leave “everything as is” and contact a serious workshop with qualified personnel who will perform high-quality repairs (or, perhaps, advise against repairing the rod if the game is clearly not worth the candle). Let's look at some typical situations that we encounter in service. But first, a few words about the general principles of restoration.
Almost like a dentist
Repairing fishing rods using special crowns and inserts can be compared to restoring broken teeth in dentistry. You can put a large filling on a dilapidated tooth, but this is only a temporary measure, which will subsequently result in complete loss of the tooth (here is a good example of unjustified savings!). If you make a high-quality inlay and crown, then, in a favorable situation, this tooth may be enough for the rest of your life.
The same applies to fishing rods. This method of repair allows you not only to maintain the strength of the fishing rod, but also to increase it. But here a lot depends on whether the master can correctly calculate the dimensions of the crown, the thickness of the walls, select the material (titanium, stainless steel or other metal), and then make the crown in exact accordance with the calculations (up to hundredths of a millimeter). The crown should fit very tightly, without any gaps. In fact, calculating the required parameters in accordance with the law of strength is an engineering task that not everyone can handle (you need to know the strength of materials and be able to use your brain). Having solved such a problem, you can, in principle, order the production of a crown on the outside, but we do everything ourselves, having the necessary equipment, skills and materials. It's more reliable and faster.
Using another technology, with the addition of carbon fiber, does not allow obtaining the same results. A strong thickening will form on the rod, and the appearance, in any case, will not be the same.
Repair of an inexpensive fishing rod
I was once asked to repair an inexpensive fishing rod in an “economical way.” This rod was used to catch salmon on the Kola Peninsula, and they caught it in a simple way, dragging three to five kilograms of fish into the kayak. It is not surprising that during one of these “drags” the rod could not stand it and broke.
I completed the repair, as requested, in an “economical option”, without any finishing or decoration. It was necessary to restore a working tool, the appearance of which no one cared about.
The next year, after another trip to Kola, they brought me the same rod, broken in a different place. Apparently, the fishing technique has not changed at all since last time! I repaired it again.
Repairing a spinning rod is easy
There is probably not a single spinning angler whose spinning rod has not broken at least once. And it doesn’t matter how this happens - while catching fish or simply due to unsuccessful transportation or storage - the result is most often the same, the rod is sent to the pantry or, even worse, to the trash.
But I advise you not to rush to write off a broken fishing rod, because it is quite easy to repair it at home. In this case, no special tools or skills are required. Of course, it is not always possible after repair to maintain the technical characteristics originally laid down by the manufacturer, such as testing and operation, but in most cases, as a result of repairs, the technical characteristics change within a minimal range. The blanks of modern spinning rods have a cone-shaped shape, which becomes thinner from the handle to the tip. Almost the entire structure is hollow and only at the end there can be a solid glued insert. Therefore, we will consider two different cases of spinning blank failure.
The first case is a spinning rod fracture in the thick part of the blank. In case of a breakdown of this kind, repair is carried out using the double bandage method. Let's look at this method step by step. First, you need to remove all accessories, that is, rings, from the form. This is quite simple to do; you just need to use a hair dryer to heat the place where the ring is attached. When heated, the glue and varnish melt and the ring is easily removed from its seat. On some models, the ring may still be fixed with a wound thread, in which case it will simply have to be cut off with a knife. After removing the ring, the seat should be sanded with sandpaper until smooth. We take a file and grind the ends at the fracture sites. We prepare bandage inserts, for which fragments of old spinning rods are well suited, or for this purpose you can specially purchase some folding Chinese rod, costing $2-3. The bandage is carried out from the inside and outside, so we will need two bandage inserts. The thickness of the bandage inserts is selected by eye, taking into account their taper. In order to gain access to the internal cavity of the thick part of the form, remove the plug in the handle. We insert the inner bandage insert into this cavity. We pull it out at the fracture site to the maximum possible length, but do not be zealous, since the form being repaired may crack. On the inner bandage insert, mark the future joining line with a marker, and remove the insert. From this line we measure approximately 4 cm in both directions and saw off the excess. The length of the internal insert, depending on the location of the banding, should be no more than 8 diameters of the form in the place where the banding occurs, that is, if the diameter of the form at the point of failure is 10 mm, then the length of the internal banding insert should be 80 mm. We try on the second broken part by putting it on the bandage insert. If everything is put on without effort, and the break line matches perfectly, then we disassemble everything in the reverse order. Lightly sand the bandage insert with sandpaper, spread glue on it and assemble the entire structure as described earlier. To glue parts, you can use any glue for plastic, the main thing is that it is tested. Leave the glued part to dry for a day. After the glue has dried, we proceed to external bandaging. To do this, we put on a cone-shaped tubular bandage on the thin side of the rod. For the external mounting tube, the following rule exists: its length should be 1 cm greater than the length of the internal bandage insert. To correctly select the diameter and length of the outer bandage tube, you must put the longest tube on the form. After making sure that it completely covers the fracture site, we leave a mark on the rod blank with a marker. We remove the bandage and measure the distance from the mark to the fracture site. If the distance is more than 5 cm, then the resulting difference must be cut off. Now measure 10 cm from the cut point and cut off the excess part. As a result, we get the necessary tube for the bandage. We sand the places where the bandage is attached to the forms, spread it with glue and put a bandage tube on it. After which we leave the structure to dry. After drying, use a file to roll up the edges of the bandage tube and level the difference by applying glue. In principle, the renovation is complete. Then this place can be sanded, painted in the color of the form and varnished. Case two - a fracture of the spinning rod in part of the blank with a solid structure. In modern spinning rods, the top has a solid, non-hollow structure. If the rod breaks in this place, there is only one way out - replacing the glued part with a new one. To do this, we find the place where the solid structure is connected to the hollow part, and disconnect the rod at this place. A new tip can usually be purchased at a store. If you can’t find one exactly like it was, you can try to glue in a similar one, the main thing is that the diameter matches. The gluing area can be additionally bandaged with a very thin mesh, which should be coated with a thin layer of epoxy glue. After this, the place is painted and varnished. The spinning rod repair methods described above have helped me save more than one fishing rod. Moreover, in some cases I did not even feel any changes in characteristics after the repair. I hope my experience can help you too. In general, quite a few films have been made about the repair of spinning rods, or about the repair of various fishing equipment. These films can be downloaded without any restrictions on the Internet, fortunately there are really a lot of them and they bring a lot of useful and necessary information to every fisherman.
TOP 15 best workshops for repairing PVC boats in Moscow and the Moscow region
Today every second fisherman uses boats based on polyvinyl chloride. Thanks to their low cost, but at the same time high practicality and mobility, they have become indispensable assistants for successful fishing, hunting or just a walk on the water.
The PVC flotation device is very easy to use. You can handle it alone: assemble, disassemble and move. When folded, it does not take up much space, but after inflating it turns into a spacious vessel.
If a PVC boat needs repairs
All the advantages of the watercraft are negated in one movement by the weakness to cuts and punctures. Underwater obstacles, even sometimes in the form of flat stones, often become fatal for the bot. However, according to statistics, most often spoilage does not even occur in water. On land, the owner himself causes injury to his floating assistant during transportation or storage in a cluttered place.
However, a puncture, cut, burn or laceration is not the end. A leaky bot doesn't always need to be thrown into the trash. In most cases it can be repaired. Similar services are provided by specialized companies.
Moreover, the range of work is quite wide:
- elimination of cuts, punctures and seam divergences;
- restoration of integrity;
- reinforcement of the bottom and sides;
- applying protective layers to prevent damage.
Repair in the workshop
How to catch more fish?
Damage occurs of various types. Many people logically ask whether the workshop can handle complex and rare cuts or punctures? If the problem takes up more than half the ship, there is always a solution.
Below is a list of work that is usually performed by almost every repair company:
- repair of cuts;
- transom repair and replacement;
- manufacturing a new transom from “marine” plywood (bakelite);
- seam repair;
- repair of inflatable bottom (low and high pressure);
- keelson repair;
- installation of a new valve.
Among the new qualities that a ship acquires after tuning are the following:
- reinforcement of the bottom with special PVC tape;
- armoring the bottom by covering it with a PVC cord layer;
- equipped with mounts for echo sounder and fishing rods;
- installation of an anchor eye;
- installation of transom wheels for moving on land;
- number marking;
- installation of additional accessories (handles, towing rings, guard washers);
Replacement work includes the following:
- dismantling all accessories on the transom;
- dismantling (disposal in case of breakdown) of the transom board;
- preparing the seat for installing a new transom (cleaning, degreasing);
- making a new transom;
- installation of a new transom board;
- installation of reinforcing elements;
- sealing joints;
- installation of fittings and nameplate.
DIY PVC boat repair
You can eliminate cuts, burns and punctures on your own. True, if this is not serious damage, the repair of which requires sophisticated equipment. These are mostly minor violations.
To fix the bot yourself you will need:
- repair kit (comes with the boat upon purchase);
- metal roller or plate;
- scissors;
- a hair dryer (a household hair dryer is also suitable if it is powerful enough);
- brush and pencil;
- solvent.
The gluing procedure is quite simple:
- prepare a patch of the required size;
- straighten the damaged area;
- clean the gluing area from dirt and build-up;
- degrease with solvent;
- apply a patch;
- apply glue with a brush along the edges of the patch;
- repeat the procedure again after 15 minutes;
- for good adhesion, the patch is heated;
- applying a patch to the puncture site;
- leave to dry for at least 24 hours.
How to repair a fishing rod and carbon film for a car
Home | Tips for fishermen | How to repair a fishing rod and carbon film for a car
Today, hollow fishing rods have become widespread among fishermen. They are very convenient as they fold up and take up little space. They are also light and elastic. These rods can easily be broken by stepping on them or running over them. This nuisance began to occur frequently and cause disappointment to fishermen. How to repair a fishing rod? I will give you 3 options:
1. Take it to the workshop and pay 400-500 rubles, or even more. your fishing rod repaired in a short time and with high quality .
2. Replace a broken knee, they are sold at any poultry market. If you are lucky, you will pick up a knee of the same color, and if not, then your rod will be full of a variety of colors. This option will be a little more expensive than the first, but will allow for high-quality repairs of the fishing rod .
3. The cheapest and most difficult option is to repair the fishing rod yourself. This will require your craftsmanship skills. You will need to plan a conical frame of wood to fit the diameter of the crushed area. Make a thin metal plate on it. This pad is necessary to prevent the epoxy glue from seizing the wooden frame. Then you need to remove all the chips and burrs and clean the crushed part of the rod with fine sandpaper. So next, we dilute eboxy glue, insert a wooden frame with a metal cover inside the rod in place of the cracks, soak it with eboxy glue, wrap it tightly with threads on the outside and soak it with glue again.
When the bauxite thickens, you need to remove the wooden frame and leave the rod to dry for 24 hours. At the end of the repair of the fishing rods , you will need to remove the threads, that is, process them with sandpaper. That's all - the rod is repaired.
Now let’s consider the option when your rod is monolithic. It is impossible to crush it, you can only break it. This rod repair will be a little easier than the previous one. To do this, you need to cut off the break on both halves at an angle, make a small transverse cut to prevent displacement, place a piece of wire in this cut, spread it with epoxy glue and join both parts of the rod. Wrap the outside with threads and soak them with glue. After 24 hours, carefully sand with sandpaper. If you do it carefully and with patience, you will succeed.
Remember, no matter how high-quality the repair of a fishing rod is, its characteristics still change.
For example, such as rod action or test. You need to pay special attention to this and try to experimentally select the weight of baits that can be used, and so on. Home | tackle | fish | kitchen | humor | forum | fisherman's calendar | tips | medical assistance | photo reports about fishing | bait | laws | photo gallery | interesting | contacts
Repair tips from experienced fishermen
How to find the puncture site? Sometimes this task is not easy. Experienced fishermen advise two simple and always working methods. Submerge the boat in the water and pay attention to the bubbles. The escaping air will create a hole. The second option is to rub the sides and bottom with thick soapy foam. The formation of bubbles will also indicate a puncture.
In everyday life, you often have to deal with the problem of poor adhesive properties of glue. Most of the cheap copies under the loud name “Super” are not able to properly glue even paper. And when we are talking about a watercraft that is constantly either in water or in air and is operated at different temperatures, then the fish are advised to use Desmokol adhesives, specially designed for gluing PVC materials, and also add stabilizing additives to it, for example, “Polyisocyanate (PIC) grade B” or “Desmodur” in a proportion of 95% glue 5% additive.
Repairing a PVC boat is not a complicated process, but it requires a lot of attention and responsibility. If the restoration technology is violated, the amateur fisherman’s vessel will not only fail to float, but may also cause a tragedy. Therefore, if there is any doubt that you cannot cope with boat repairs on your own, then it is better to entrust this delicate matter to professionals.